Table of Contents
Advertisement
Advertisement
Table of Contents

Subscribe to Our Youtube Channel
Related Manuals for Foldawheel PW-4 4Q Series


Summary of Contents for Foldawheel PW-4 4Q Series
- Page 1 V3.0 PW-4x4Q User Manual...
-
Page 2: Table Of Contents
TABLE OF CONTENTS Title Page Introduction Operation 03 - 04 Parts Introduction Controller Introduction 05 - 08 Gyro System Controller Introduction Adjustment 10 - 12 Charging The Battery Care and Maintenance 14 - 18 Warranty Specification Back Cover... -
Page 3: Introduction
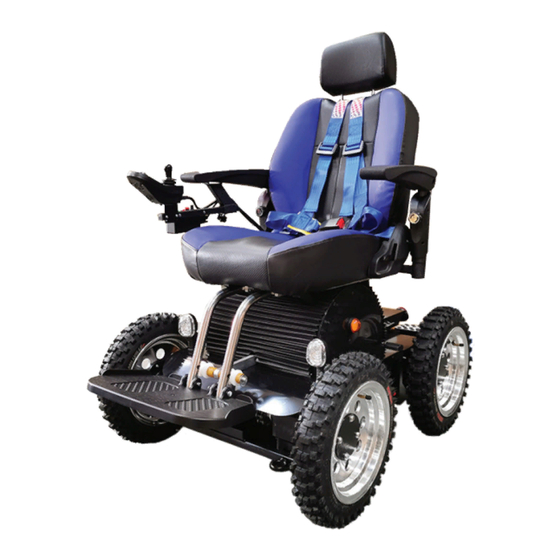
The electric wheelchair you have purchased combines the high technology of optics electrics and machine. Our patended gyro system will adjust your body centre of gravity to the same level as the terrain. Our electric wheelchair also can climb up to 30 degree. It’s safe, comfort, and styling. We are confident that our electric wheelchair will offer you the most convenience indoor, public location, open space ect. -
Page 4: Operation
The basic requirement of user: 1. The user must have ability of both physical and metal to use the power chair safely. User who have vision or mental retardation, please consult the doctor before using the wheelchair 2. Users should maintain their balance and be able to withstand bumpy caves and raised driveways. -
Page 5: Parts Introduction
9. Do not try to open, repair or replace the motor, otherwise it will damage the motor and invalidate the maintenance. It is absolutely forbidden to enter the water. When the electric wheelchair crosses 100 mm, the motor can be soaked; it will cause permanent damage to the motor. -
Page 6: Controller Introduction
Controller Introduction Main Controller 1. Battery Gauge 2. Speed Indicator 3. Power Button 4. Fifth Wheel Selection Button 5. Mode Indicator LED 6. Light / Right Signal Light Button 7. Horn Button 8. Joystick 9. Driving Mode Selection Button 10. Hazard Light/ Left Signal Light Button Speed Adjustment Increase speed : Turn the Power Button to the right to... - Page 7 Hazard Lights To switch on the hazard lights, press Hazard Light Button once, both Hazard Lights Button & Light Button will start flashing, indicate that the hazard light is on. To switch off the hazard lights, press Hazard Lights Button or Light Button once.(P1) Lights Press and hold the Light Button, green light will appear on the the button indicate that the front &...
- Page 8 The Status Indicator The status indicator is located underneath the power button. When the system is not powered up, the status indicator is not lit. When the system is powered up, and there are no faults with the system, the status indicator will be lit green. If, when powered up, there is s fault with the system, then the status indicator will flash red.
- Page 9 Using The Lock Function The Lock Function is used, primarily to restrict who can use the system, but also can help prevent unintentional use of the controls for when the system is not required for any length of time. When a system is locked ( see below). The system is powered down, and the user contrals are not responsive.
-
Page 10: Gyro System Controller Introduction
Gyro System Controller Introduction The gyro system is offline, do not turn ON the gyro system when driving on a horizontal level. (P7) Press the “ON” button, green light will appear. Gyro system will automatically adjust to horizontal level when climbing up stairs or slopes.(P8) During ascending or descending from the slopes or stairs, when the seat has reach the maximum angle, it will stop... -
Page 11: Adjustment
Adjustment Headrest Height Adjustment To adjust the height of the headrest, push the button located on the bottom left of the headrest and adjust the desire height. Then release the bottom to secure the headrest.(P12,13) Armrest Height & Width Adjustment Turn the knob anti-clockwise and pull to loosen the armrest and adjust the height. - Page 12 Headrest Height Adjustment 1. Pull out the pins out from the iron stick.(P18) 2. Take out the iron stick, and the footrest can be taken out.(P19) 3. There are 3 level to adjust, choose the desire height and put back the iron stick.(P20) 4.
- Page 13 Seat Belt Adjustment 1. Fastern the seat belt. (P22) 2. Loosen the straps on the shoulder, then pull to tighten the strap. (P23.24) 3. Same with the waist straps, loosen it and then pull to tighten it.(P.25,26) WARNING! Do not over tighten the straps, make sure that after tightening the belt, user still ablt to breath smoothly...
-
Page 14: Charging The Battery
Charging The Battery 1. There is an arrow on the connector, make sure it it always facing upwards when you are connecting to the controller (P27,28) 2. After connected, switch on the power socket and the wheelchair will start . charging LED Indication LED 1... -
Page 15: Care And Maintenance
Care and Maintenance The electric wheelchair is a sophisticated mobility vehicle. Like any motorized vehicle, it requires routine maintenance checks. You can perform some of these checks, but others require assistance from an authorized provider. Preventive maintenance is very important. If you follow the maintenance checks in this section as scheduled, you can help ensure that your wheelchair gives you years of trouble-free operation. - Page 16 General Guidelines Avoid knocking or bumping the controller, especially the joystick. Avoid prolonged exposure of your chair to extreme conditions, such as heat, cold, or moisture. Keep the controller clean Check all connectors to ensure that they are all tight and secured properly. WARN- ING! Even though the electric wheelchair has passed the necessary testing require- ments for ingress of liquids, you should keep electrical connections away from sources of dampness, including direct exposure to water or bodily fluids and inconti-...
- Page 17 Monthly Checks Check for drive tire wear. See an authorized provider to repair. Keep your electric wheelchair clean and free of foreign material, such as mud, dirt, hair, food, drink etc. Yearly Checks Take your electric wheelchair to an authorized provider for yearly maintenance, especially if you use your chair on a regular basis.
- Page 18 Wheelchair Replacement If your Wheelchair is equipped with a solid tire insert, then you must replace the whole wheel assembly; If your wheelchair is equipped with a beach tire, which maximum charge pressure or pressure range is 2Kpa. When you replace the beach tire to solid tire, you must exchange the whole wheel assembly.
-
Page 19: Warranty
Warranty PW-4x4Q warranty start from the date of purchase, this products will be free from defects in material workmanship. We will repair or replace this product or any component of the product found to be defective during the warranty period. Replacement will be made with a new remanufactured product or component. -
Page 20: Specification
Specification 143 kg (314.5 lb) Net Weight Folded Size 107 cm x 75 cm x 91cm (42" x 29.5" x 35.8") (Backrest & Footrest) (L X W X H) Opened Size (L X W X H) 120 cm x 75 cm x 106.5cm (47.2" x 29.5" x 42") Seat Width Front and Back 50.8 cm , 46 cm (20", 18") Seat Depth...
Need help?
Do you have a question about the PW-4 4Q Series and is the answer not in the manual?
Questions and answers
Faulted and won't reset
If the Foldawheel PW-4 4Q Series is faulted and won't reset, do not attempt to repair or adjust any electrical or mechanical function. Contact an authorized provider for assistance, as unauthorized repair or disassembly will void the warranty.
This answer is automatically generated