Advertisement
Quick Links
Advertisement

Related Manuals for Foldawheel LLOYD LEO II


Summary of Contents for Foldawheel LLOYD LEO II
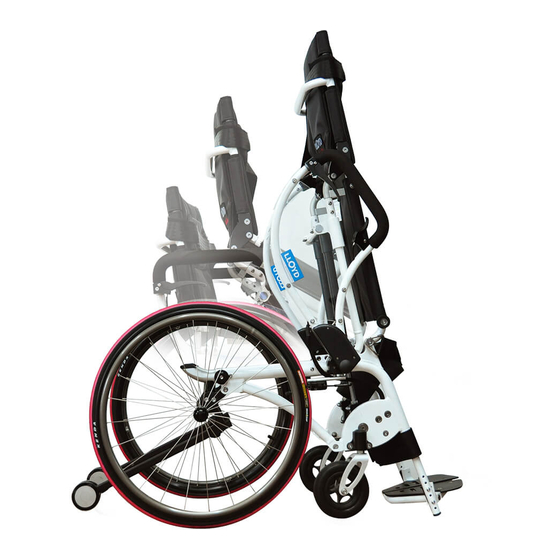
- Page 1 V2.0 w h e e l c h a i r . c o m F o l d a w h e e l LLOYD LEO II User Manual...
-
Page 2: Table Of Contents
TABLE OF CONTENTS Title Page Parts Introduction Safety Tips 02 - 03 Set Up Upon Arrivals 04 - 05 Adjustment 06 - 07 Operation Storage Maintenance Contact Us PARTS INTRODUCTION 01. Backrest 02. Gas Spring-release Lever 03. Rear Wheel 04. Handrim 05. -
Page 3: Safety Tips
SAFETY TIPS 1-1. Standing Attention : - Before using the stand up wheelchair you should supposed to be familiar with the operation and the function. - Use only standard household and hard even ground. Not use in the ground of dripping wet. -
Page 4: Set Up Upon Arrivals
SET UP UPON ARRIVALS 2-1. The Original Package Contains The Following Components. - Standing wheelchair Heel strap & safety belt - Knee Support - User manual , tool and oil pot - Option as ordered 2-2. Unfolding The Standing Wheelchair, Please Proceed As Attention : - Remove any transport straps or transport guards. -
Page 5: Adjustment
ADJUSTMENT Should you require adjustments and alterations to the mechanism of the wheelchair, or any maintenance work, please contact qualified technicians. 3-1. Adjusting The Seat Depth - Push the gas spring release lever let the wheelchair frame rise over the rear wheel. (P5) - ... - Page 6 ADJUSTMENT 3-3. Adjusting The Footrest Angle - After release the screws the footplate angle can be adjusted using the different hole at 3 range incline angle.(P14 & 15) - Retighten the screws.(P16) 3-4. Adjusting The Backrest Height - Remove the backrest padded and end cap. (P17 &18) - ...
- Page 7 ADJUSTMENT 3-6. The Knee Support And Safety Belt The most important safety features of the stand-up wheelchairs are the knee support & safety belt and chest belt. It is absolutely essential that these be correctly in place before you attempt to stand up. 3-6-1.
- Page 8 ADJUSTMENT To remove and set back the castors together with the front forks, depress the quick-release axle from underneath then pull off the forks or push the forks. (P27) (P28) 3-8. The Heel Strap The purpose of the heel strap is to prevent the legs or feet slipping backwards. It is fitted behind the heels or higher. By making use of the velcro fastening it is possible to alter the length of the strap and thus to ensure the ideal position for the feet on the footrest. Ideal positioning of the feet is vital in ensuring a good standing position. 3-9. Gas Spring The gas spring are specially design to help hold your body weight in the balance. With minimal arm work, i.e. pushing lightly on the armrests, you can stand yourself up. Similarly, by pulling lightly you can sit yourself back down in your seat, equally effortlessly. There is a range of spring strengths to suit the body weight of different wheelchair users. Note: Contents under pressure. Do not take apart puncture apply heat or fire. The gas springs may be adjusted by qualified technician! Please contact your dealer ! Caution: Do not bead or stretch the cables leading from the armrests to the gas springs as this may unintentionally trigger the stand- up mechanism (risk of accident)!
-
Page 9: Operation
OPERATION Standing up stresses your body in ways you may not be used to. For this reason, please consult your doctor or physical therapist before using the standing aid to make sure you do not suffer from any conditions (e.g. strong contractures or osteoporosis) which make standing potentially harmful. - Page 10 OPERATION 4-1-1. To release the gas springs, you should first push forward the little latch to be found on the gas spring-release levers, then pull the release levers themselves. (P32) 4-1-2. Having raised yourself up as for as your arms will allow, let go of the gas spring-release levers to lock the gas springs once more in place.
- Page 11 STORAGE 4-2. Sitting Down Your LLOYD LeoII is equipped with a folding backrest which allows you to cut down significantly on the space required store the wheelchair away. Pull the chord and at the same time pressing the backrest lightly forward , You can folding the backrest (P36~38) 5-2 The Quick-release Axles The quick-release axles enable you speedily to remove and re-mount the rear...
- Page 12 MAINTENANCE When cleaning your LLOYD LeoII ( HSH2 ) series use a dry or slightly moistened cloth to wipe the wheelchair down. For stubborn or oily stains, apply a mild detergent to the cloth. Do not hose down your LeoII ( HSH2 ) series with water. According to frequency of use, check tyre pressure between once a week and once a month.
Need help?
Do you have a question about the LLOYD LEO II and is the answer not in the manual?
Questions and answers
how do you secure the release cable to the release mechanism? the set screw does not hold it. It pushes past the cable through the hole on the opposite side
The question is related to a Leo II
Adjust release
To adjust the release on a Foldawheel LLOYD LEO II:
1. Unlocking Gas Springs: Push backward the latch on the gas spring-release levers, then pull the release levers. Hold them down while using the armrests to adjust your position.
2. Locking Gas Springs: Let go of the gas spring-release levers to lock the gas springs in place.
3. Armrest Adjustment: Use the armrest-release levers to lower or raise the armrests to the desired height. Pull the levers, adjust the armrests, and let go once the armrests click into place.
4. Repeat as Needed: Continue steps to achieve the desired position.
This answer is automatically generated