GE DBL333 Owner's Manual
Dryers owner's manual
Hide thumbs
Also See for DBL333:
- Technical service manual (38 pages) ,
- Owner's manual (24 pages) ,
- Owner's manual and installation instructions (24 pages)
Table of Contents
Advertisement
Advertisement
Table of Contents

Subscribe to Our Youtube Channel
Related Manuals for GE DBL333


Summary of Contents for GE DBL333
-
Page 3: Important Safety Information
IMPORTANT SAFETY INFORMATION. READ ALL INSTRUCTIONS BEFORE USING. WARNING! For your safety, the information in this manual must be followed to minimize the risk of fire or explosion, electric shock, or to prevent property damage, personal injury, or death. Do not store or use gasoline or other flammable vapors and liquids in the vicinity of this or any other appliance. - Page 4 IMPORTANT SAFETY INFORMATION. READ ALL INSTRUCTIONS BEFORE USING. WARNING! YOUR LAUNDRY AREA Keep the area underneath and around your appliances free of combustible materials, such as lint, paper, rags, chemicals, gasoline and other flammable vapors and liquids. Keep the floor around your appliances clean and dry to reduce the possibility of slipping.
- Page 5 Never attempt to operate this appliance if it is damaged, malfunctioning, partially disassembled, or has missing or broken parts, including a damaged cord or plug. The interior of the machine and the exhaust duct connection inside the dryer should be cleaned at least once a year by a qualified technician.
-
Page 6: About The Dryer Control Panel
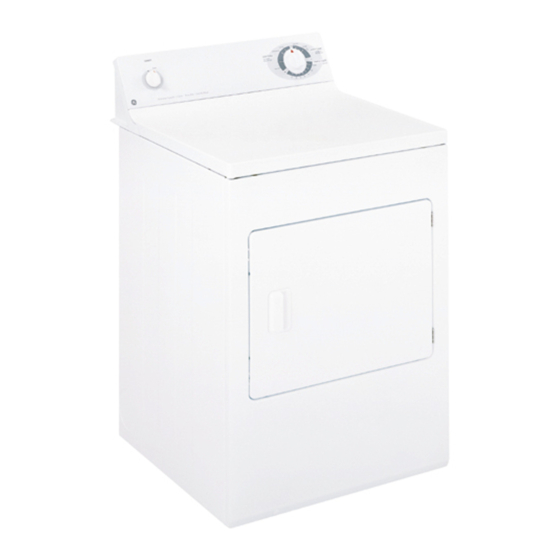
About the dryer control panel. You can locate your model number on the label on the front of the left side of the door opening. Model DCL333 START START Model DVL223 START START Model NLL113 START START AUTOMATIC MORE DRY COTTONS LESS DRY LESS DRY... - Page 7 Model NVL333 START START Model DBL333 START TEMPERATURE START MEDIUM REGULAR About the control settings. IMPORTANT: Clean the lint filter each time you use the dryer. Automatic cycles automatically determine fabric dryness. Select MORE DRY for heavier fabrics, LESS DRY for lighter fabrics.
-
Page 8: Loading And Using The Dryer
As a general rule, if clothes are sorted properly for the washer, they are sorted properly for the dryer. Do not add fabric softener sheets once the load has become warm. They may cause fabric softener stains. Bounce Conditioner Dryer Sheets have been approved for use in all GE Dryers when used in accordance with the manufacturer’s instructions. -
Page 9: Fabric Care Labels
Fabric Care Labels WASH LABELS Machine wash cycle Normal Permanent Press/ wrinkle resistant Water temperature (50 C/120 F) BLEACH LABELS Bleach symbols Any bleach Only non-chlorine bleach (when needed) (when needed) DRY LABELS Tumble Normal Heat setting High Medium Special instructions Line dry/ hang to dry... -
Page 10: Preparing To Install Your Dryer
Preparing to install your dryer. Read these instructions completely and carefully. WARNING This dryer must be exhausted to the outdoors using only rigid metal or flexible metal 4 diameter ductwork for inside the dryer cabinet or exhausting. Never use plastic or other combustible ductwork. See Exhausting section. -
Page 11: Electrical Requirements
Electrical requirements. Read these instructions completely and carefully. Electrical Connection Information for Gas Dryers... -
Page 12: Exhausting The Dryer
In special installations when it is impossible to make a connection with the above recommendations, then UL-listed clothes dryer transition duct may be used as transition venting between the dryer and wall connection only. The use of this ducting will affect drying time. -
Page 13: Installing The Dryer
Installing the dryer. Exhaust Ducting Length The exhaust system should be inspected and cleaned at least once a year with normal usage. The more the dryer is used, the more often you should check the exhaust system and vent hood for proper operation. If roof vents or louvered plenums are used, they must be equivalent to a 4 dampered wall cap in regard to resistance to airflow, prevention of back drafts and... -
Page 14: Location Of Your Dryer
Installing the dryer. Location of Your Dryer Do Not Install the Dryer: Do not install the dryer in an area exposed to dripping water or outside weather conditions. Do not install the dryer in an area where it will come in contact with curtains, drapes, or anything that will obstruct the flow of combustion and ventilation air. -
Page 15: Rough-In Dimensions
Dryer MUST be exhausted outside (outdoors, not beneath the mobile home) using metal ducting that will not support combustion. Metal ducting must be 4 (10.16 cm) in diameter with no obstructions. Rigid metal duct is preferred. If dryer is exhausted through the floor and area beneath the mobile home is enclosed, the exhaust system MUST terminate outside the enclosure with the termination securely fastened... -
Page 16: Electrical Installation For Electric Dryers
Installing the dryer. Electrical Installation for Electric Dryers WARNING: The following are specific requirements for proper and safe electrical installation of your dryer. Failure to follow these instructions can create electrical shock and/or a fire hazard. WARNING: This appliance MUST be properly grounded. - Page 17 Remove the screws securing the terminal block access cover and the strain relief mounting bracket located on the back of the dryer upper corner. Install a UL-approved strain relief into the power cord entry hole of the mounting bracket. Use a strain relief which attaches to the mounting bracket with a nut.
- Page 18 Installing the dryer. Replacement Parts...
- Page 19 Reversing the Dryer Door Swing Open the dryer door. Remove the 4 hinge hole plugs or screws from the left side of door opening. Place nearby for future installation. NOTE: You may need a plastic knife to help pull out the plugs.
- Page 20 Problem Possible Causes Dryer doesn’t start Dryer is unplugged Fuse is blown/circuit breaker is tripped Thermal limiter tripped Dryer doesn’t heat Fuse is blown/circuit breaker is tripped,the dryer may tumble but not heat Gas service is off What To Do •...
- Page 21 What To Do • Try a fabric softener. • Bounce® Fabric Conditioner Dryer Sheets have been approved for use in all GE Dryers when used in accordance with the manufacturer’s instructions. • Try a fabric softener. • Adjust controls for less drying.
- Page 22 Notes...
- Page 23 Any part of the dryer which fails due to a defect in materials or workmanship. During this full One Year one-year warranty, GE will also provide, free of charge, all labor and in-home service to replace From the date of the the defective part.
-
Page 24: Service Telephone Numbers
Expert GE repair service is only a phone call away. Special Needs Service 800-TDD-GEAC (800-833-4322) GE offers, free of charge, a brochure to assist in planning a barrier-free kitchen for persons with limited mobility. Service Contracts Purchase a GE service contract while your warranty is still in effect and you’ll receive a substantial discount.
Need help?
Do you have a question about the DBL333 and is the answer not in the manual?
Questions and answers