GE DCL333 Owner's Manual And Installation Instructions
Hide thumbs
Also See for DCL333:
- Technical service manual (38 pages) ,
- Owner's manual (25 pages) ,
- Owner's manual and installation instructions (24 pages)
Table of Contents
Advertisement
Quick Links
GEAppliances.com
Safety Instructions
. . . . . . . . . 2-5
Operating Instructions
Control Panels . . . . . . . . . . . . . . . .6
Control Settings . . . . . . . . . . . . . . .7
Loading and Using the Dryer . . .8, 9
Electrical Requirements . . . . . . . 11
Exhausting the Dryer . . . . . . . . . 12
Installing the Dryer . . . . . . . . 13-19
. . . . . 20, 21
Consumer Support
Consumer Support . . . . Back Cover
Warranty . . . . . . . . . . . . . . . . . . . 23
Write the model and serial
numbers here:
Model # __________________
Serial # __________________
You can find them on the label
on the front of the left side of
the door opening.
134202100B 175D1807P436 49-90172-1 08-03 JR
Owner's Manual and
Installation Instructions
DBL333
DCL333
DVL223
Advertisement
Table of Contents

Related Manuals for GE DCL333


Summary of Contents for GE DCL333
-
Page 1: Table Of Contents
Control Panels ....6 DBL333 Control Settings ....7 DCL333 Loading and Using the Dryer . . .8, 9 DVL223 Installation Instructions Electrical Requirements . - Page 2 IMPORTANT SAFETY INFORMATION. READ ALL INSTRUCTIONS BEFORE USING. WARNING! For your safety, the information in this manual must be followed to minimize the risk of fire or explosion, electric shock, or to prevent property damage, personal injury, or death. Do not store or use gasoline or other Installation and service must be performed flammable vapors and liquids in the by a qualified installer, service agency or...
- Page 3 GEAppliances.com WARNING! PROPER INSTALLATION This dryer must be properly installed and located in accordance with the Installation Instructions before it is used. I Properly ground dryer to conform with all Exhaust/Ducting: governing codes and ordinances. Follow This dryer MUST be exhausted to the outside. details in the Installation Instructions section.
- Page 4 IMPORTANT SAFETY INFORMATION. READ ALL INSTRUCTIONS BEFORE USING. WARNING! WHEN USING YOUR DRYER I Never reach into the dryer while the drum is I To minimize the possibility of electric shock, moving. Before loading, unloading or adding unplug this appliance from the power supply clothes, wait until the drum has completely or disconnect the dryer at the household stopped.
- Page 5 GEAppliances.com WHEN NOT USING YOUR DRYER I Grasp the plug firmly when disconnecting this I Before discarding a dryer, or removing it appliance to avoid damage to the cord while from service, remove the dryer door to pulling. Place the cord away from traffic areas prevent children from hiding inside.
-
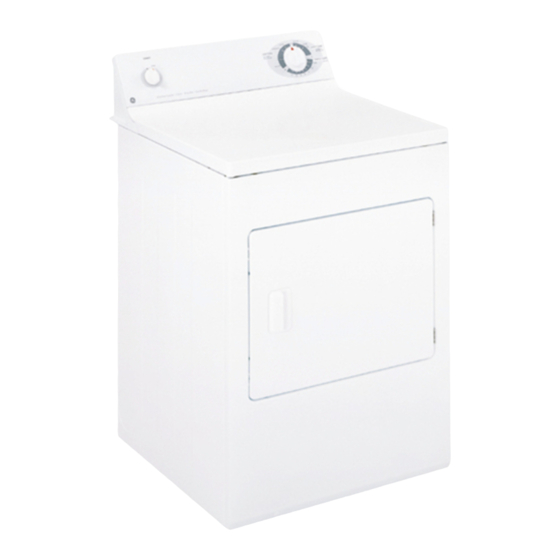
Page 6: Control Panels
About the control panel. You can locate your model number on the label on the front of the left side of the door opening. Model DBL333 Model DCL333 Model DVL223... -
Page 7: Control Settings
About the control settings. NOTE: Not all features are available on all dryer models. GEAppliances.com IMPORTANT: Clean the lint filter each time you use the dryer. Temperature REGULAR For regular to heavy cottons. MEDIUM For synthetics, blends, delicates and items labeled permanent press. FLUFF For fluffing items without heat. -
Page 8: Loading And Using The Dryer
Bounce ® Fabric Conditioner Dryer Sheets have been approved for use in all GE Dryers when used in accordance with the manufacturer’s instructions. Care and Cleaning of the Dryer The Exterior: Wipe or dust any spills or washing The Exhaust Duct: Inspect and clean the exhaust compounds with a damp cloth. - Page 9 GEAppliances.com Fabric Care Labels WASH LABELS Machine wash cycle Normal Permanent Press/ Gentle/ Do not wash Do not wring Hand wash wrinkle resistant delicate Water temperature Warm Cold/cool (50°C/120°F) (40°C/105°F) (30°C/85°F) BLEACH LABELS Bleach symbols Any bleach Only non-chlorine bleach Do not bleach (when needed) (when needed)
-
Page 10: Installation Instructions
Preparing to install your dryer. Read these instructions completely and carefully. WARNING I This dryer must be exhausted to the outdoors. I The National Fuel Gas code restricts installations of gas appliances in garages. They must be 18″ Use only rigid metal or flexible metal 4″ diameter ductwork for exhausting to the (45.7 cm) off the ground and protected from outside. -
Page 11: Electrical Requirements
Electrical requirements. Read these instructions completely and carefully. Electrical Connection Information for Electric Dryers WARNING Electrical Requirements — To reduce the risk • This dryer must be connected to a 208V or of fire, electric shock or personal injury: 240V individual branch circuit, protected by •... -
Page 12: Exhausting The Dryer
Exhausting the dryer. Read these instructions completely and carefully. Exhaust System Requirements Use only 4″ (10.2 cm) diameter (minimum) rigid metal The dryer exhaust system MUST BE EXHAUSTED duct for best performance, or flexible metal duct. Use TO THE OUTSIDE of the dwelling. approved vent hood which has swing-out dampers DO NOT allow combustible materials (for example: that open when the dryer is in operation. -
Page 13: Installing The Dryer
To change exhaust direction you (34 cm) will need Exhaust Kit, Pub. No. 14-A018 and a rigid metal 4″ 90 degree elbow. The kit is available through your GE retailer. Follow the instructions supplied with the kit. 3-3/4″ (9.5 cm) 3-3/4″ (9.5 cm) - Page 14 Installing the dryer. Read these instructions completely and carefully. Location of Your Dryer Do Not Install the Dryer: Do not install the dryer on carpet. Do not install the dryer in an area exposed to dripping water or outside weather conditions. Floor MUST be solid with a maximum slope of 1″...
- Page 15 Mobile Home Installation Dryer MUST be exhausted outside (outdoors, not Installation MUST conform to current beneath the mobile home) using metal ducting Manufactured Home Construction & Safety that will not support combustion. Metal ducting Standard (which is a Federal Regulation Title must be 4″...
- Page 16 Installing the dryer. Read these instructions completely and carefully. Grounding Requirements DANGER: Improper connection of the For a permanently-connected electric dryer: equipment-grounding conductor can result in I The dryer MUST be connected to a grounded a risk of electric shock. Check with a licensed metal, permanent wiring system;...
- Page 17 3-Wire System for Electric Dryers—DO NOT use for Mobile Home Installations Remove the screws securing the terminal block Attach the power cord neutral (center wire) access cover and the strain relief mounting conductor to the silver-colored center terminal bracket located on the back of the dryer on the terminal block.
- Page 18 Installing the dryer. Read these instructions completely and carefully. Gas Connection for Gas Dryers Remove the shipping cap from gas pipe at the WARNING: NEVER TEST FOR rear of the dryer. GAS LEAKS WITH AN OPEN FLAME. NOTE: DO NOT connect the dryer to LP gas service NOTE: On gas dryers, before the burner will light, without converting the gas valve.
- Page 19 If replacement parts are needed for your dryer, visit WARNING: The instructions in the GEAppliances.com, or call GE Parts and Accessories manual and all other literature included with at 800.626.2002 or contact an authorized parts this dryer are not meant to cover every possible supplier.
-
Page 20: Troubleshooting Tips
No fabric softener was used • Bounce ® Fabric Conditioner Dryer Sheets have been approved for use in all GE Dryers when used in accordance with the manufacturer’s instructions. Overdrying • Try a fabric softener. • Adjust controls to LESS DRY. - Page 21 GEAppliances.com Problem Possible Causes What To Do Inconsistent • Automatic drying times will vary according to the type Type of heat drying times of heat used (electric, natural or LP gas), size of load, types of fabrics, wetness of clothes and condition of exhaust ducts.
- Page 22 Notes.
- Page 23 Any part of the dryer which fails due to a defect in materials or workmanship. During this From the date of the full one-year warranty, GE will also provide, free of charge, all labor and related service costs original purchase to replace the defective part.
-
Page 24: Consumer Support
Contact Us GEAppliances.com If you are not satisfied with the service you receive from GE, contact us on our Website with all the details including your phone number, or write to: General Manager, Customer Relations GE Appliances, Appliance Park...
Need help?
Do you have a question about the DCL333 and is the answer not in the manual?
Questions and answers