Weber GENESIS SMART EX-335 Owner's Manual
Hide thumbs
Also See for GENESIS SMART EX-335:
- Manual (84 pages) ,
- Assembly manual (48 pages) ,
- Owner's manual (28 pages)
Advertisement
Quick Links
SMART
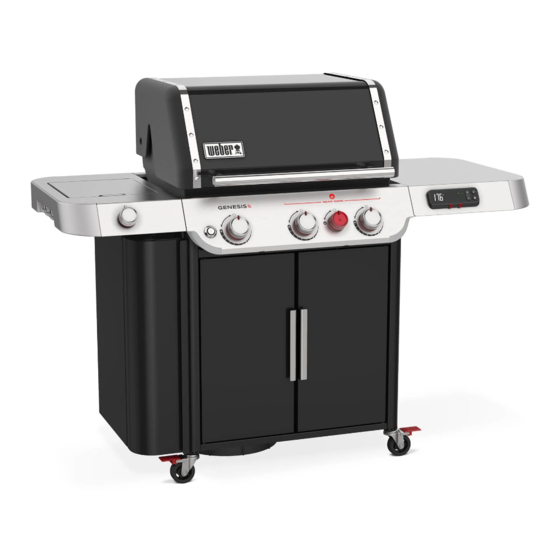
EX-335 • SX-335 • SE-SX-335
EPX-335 • SE-EPX-335 • SPX-435 • SE-SPX-435
LP Owner's Manual
REGISTER TODAY
Register your gas grill and receive special content
to make you the ultimate backyard hero.
Scan the QR Code or register online at weber.registria.com
Need help? Visit photoregister.com/help or text help to 71403
Keep this Owner's Manual for future reference, thoroughly read through it, and
if you have any questions please contact us today.
52965
101021
enUS
Advertisement

Related Manuals for Weber GENESIS SMART EX-335


Summary of Contents for Weber GENESIS SMART EX-335
- Page 1 LP Owner’s Manual REGISTER TODAY Register your gas grill and receive special content to make you the ultimate backyard hero. Scan the QR Code or register online at weber.registria.com Need help? Visit photoregister.com/help or text help to 71403 52965 101021 Keep this Owner’s Manual for future reference, thoroughly read through it, and...
- Page 2 Log onto bottom, back and sides of the grill. www.weber.com. of this (grill) or any other m DANGER: Keep the cooking area clear of flammable m WARNING: Do not let the cord hang over the edge of vapors and liquids such as gasoline, alcohol, etc.,...
- Page 3 The Weber Promise grill, so please take just a couple of minutes to register your grill. When you sign up for a WEBER-ID as part of your registration, we will deliver special grill- Product Features related content just for you to enjoy.
- Page 4 The WEBER Promise At WEBER, we pride ourselves on two things: making grills that last and providing a lifetime of excellent customer service. Thank you for purchasing a WEBER product. Weber-Stephen The use and/or installation of parts on your WEBER product Products LLC, 1415 S.
- Page 5 PERFORMANCE GRILLING The high performance grilling system sets the standard in the world of gas grilling, and lands Weber in a class of its own. This powerful grilling system is based on over 65 years of grilling experience, culinary expertise, and most importantly, the wants and needs of the people who matter most –...
- Page 6 • Replacement regulator and hose assemblies must be as specified by Weber-Stephen Products LLC (UL-listed Type 1 (CGA 791) tank connection device as described in the latest edition of ANSI Z21.81).
- Page 7 LP Tank Installation Installation Location The tank is hung onto the tank scale which is located inside the cabinet. The shape of the collar assembly (the metal protective ring around the tank valve) determines one of two directions in which the tank will correctly hang on the tank scale (A).
- Page 8 The fuel system in your grill features factory- made connections that have been thoroughly checked for gas leaks and the burners have been flame-tested. WEBER recommends performing a thorough leak check after assembly, as well as annually. The following fittings should be tested: •...
- Page 9 Follow the instructions for "Checking for Gas Leaks". Notification on the WEBER CONNECT Module The WEBER CONNECT module will display a fuel level notification when an LP tank is installed to your fuel scale. Refer to "Using the WEBER CONNECT Module" section in this manual.
- Page 10 Replace brush if any loose bristles are After preheating, any bits of food or debris left over from found on cooking grates or brush. WEBER previous use will be easier to remove. Cleaned grates recommends purchasing a new stainless steel will also prevent your next meal from sticking.
- Page 11 Igniting the Grill Using the Electronic Ignition System to Ignite the Grill Each control knob operates an individual burner, and each burner ignites independently. Ignite the burners starting from left to right. All burners should be lit for preheating, however, all burners do not have to be lit while grilling.
- Page 12 Using the sear zone Searing is a direct grilling technique used on meats, such as steak, poultry parts, fish and chops. Searing browns the surface of the food at a high temperature. By searing both sides of the meat, you caramelize the food surface, creating a more desirable flavor.
- Page 13 Igniting the Side Burner Using the Electronic Ignition to Ignite the Side Burner If one or more of the main burners on your grill are already lit and you would like to ignite the side burner, skip to step 3. If none of the main burners are lit and you are only using the side burner, start with step 1.
- Page 14 NOTE: In order to successfully connect your smart device to your grill via a local Wi-Fi Your new WEBER CONNECT module can handle up to two separate food temperature probes (one probe network, first make sure your grill is paired via included) to gain superior control of your grill for perfect results every time.
- Page 15 5) Once the grill reaches the target temperature, the BELL button will blink, the controller will ding, and if using the WEBER CONNECT app, you will receive a push notification on your smart device. 6) All of these WEBER CONNECT module functions can also be set wirelessly via Wi-fi or Bluetooth®...
- Page 16 The Flame - Direct or Indirect HIGH MEDIUM DIRECT HEAT INDIRECT HEAT SETUP SETUP Use the direct method for small, tender pieces of food that take less than Use the indirect method for larger cuts of meat that require 20 minutes or 20 minutes to cook, such as: hamburgers, steaks, chops, kabobs, boneless more of grilling time, or for foods so delicate that direct exposure to the heat chicken pieces, fish fillets, shellfish, and sliced vegetables.
- Page 17 Frame. Remove the right-hand cooking grate. Place the Frame on the right-hand side of the cookbox for the widest range of heat control (A). The Spacer included with your grill is used only when cooking with the WEBER CRAFTED Outdoor Kitchen Collection (B).
- Page 18 FLAVORIZER BARS, near the front of the grill, making sure only the narrow end with the WEBER logo will be directly over a lit burner (C). This is the end where the wood chips ignite first. The main body of the smoker box aligns...
- Page 19 The side storage area (A) is ideal for storing outside of the grill. Additional hooks on the inside of accessories and grillware. the cabinet store the WEBER CRAFTED spacer grate, Adjustable condiment basket keeps smaller items which can be used with WEBER CRAFTED Outdoor close at hand.
- Page 20 Cleaning and Maintenance Cleaning the Inside of the Grill Over time, the performance of your grill can diminish if it has not been maintained properly. Low temperatures, uneven heat, and food sticking to cooking grates are all signs that cleaning and maintenance are overdue.
- Page 21 MEAL-TO- MEAL MAINTENANCE. Cleaning the Outside of the Grill The outside of your grill may include stainless steel, porcelain-enameled, and plastic surfaces. WEBER recommends the following methods based on the surface type. Cleaning Stainless Steel Surfaces...
- Page 22 Follow the instructions for “Checking the Components of the Electronic Ignition System”. 9) Replace the matchstick holder by hanging underneath left side table (B). REPLACEMENT PARTS To obtain replacement parts, contact the local retailer in your area or log onto weber.com.
- Page 23 Weber-Stephen Products LLC, Customer Service Department. WARNING: Failure to use genuine Weber- Stephen parts for any repair or replacement will void all warranty protection. CAUTION: The burner tube openings must be...
- Page 24 If you are still experiencing any problems, contact the Customer Service Representative in your area using the contact information on weber.com. 435 Igniter Module Wire Chart Checking the Ground Wire Models 425s and 435 have a ground wire connected to the manifold bracket. This is visible from beneath the...
- Page 25 LOSS OF POWER SYMPTOM • WEBER CONNECT module and control knobs lights do not turn on. CAUSE SOLUTION Wires are disconnected. Check that all of the wires are connected securely to the terminals on the back of the WEBER CONNECT module and to the control board under the side table.
- Page 26 Use a flathead screwdriver to gently pry open the fuse holder and remove the fuse (B). NOTE: WEBER recommends replacing the fuse if there is suspicion of failure. 3. Install a new fuse into the fuse holder and reinstall the fuse holder into the power module (C).
- Page 27 Connecting an External Power Bank USB-C As an alternative to using an AC wall outlet to power the WEBER CONNECT Module during your cook, you can instead connect an external rechargeable power bank, sold seperately. The power bank should have a minimum capacity of 10,000 mA hours with a 5 volt USB-A connector.
- Page 28 Grilling Guide Type Thickness/Weight Approximate Total Grill Time RED MEAT ¾ inch (19 mm) thick 4 to 6 minutes direct high heat Steak: New York strip, porterhouse, 1 inch (25 mm) thick 6 to 8 minutes direct high heat rib-eye, T-bone, and filet mignon (tenderloin) 14 to 18 minutes sear 6 to 8 minutes direct high heat, 2 inches (5 cm) thick...
- Page 29 GENESIS EX-335 • SX-335 GENESIS SE-SX-335...
- Page 30 GENESIS EPX-335 GENESIS SE-EPX-335...
- Page 31 GENESIS SPX-435 GENESIS SE-SPX-435...
- Page 32 Weber-Stephen Products LLC is under license. Other trademarks and trade names are those of their respective owners. © 2021 Designed and engineered by Weber-Stephen Products LLC, 1415 S. Roselle Road, Palatine, Illinois 60067 USA.
Need help?
Do you have a question about the GENESIS SMART EX-335 and is the answer not in the manual?
Questions and answers