
Subscribe to Our Youtube Channel
Related Manuals for Minuteman RoboScrub 20


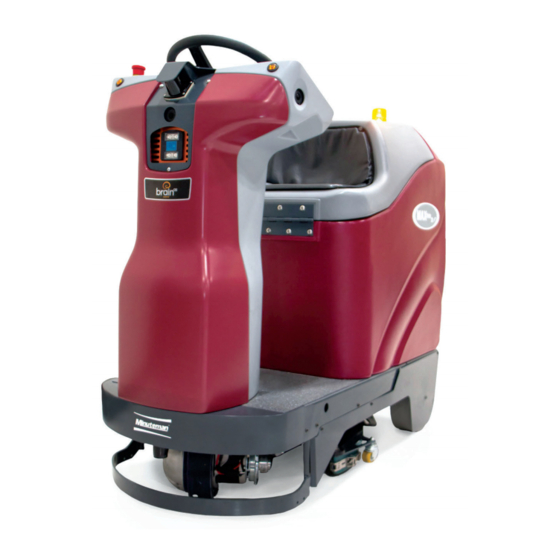
Summary of Contents for Minuteman RoboScrub 20
- Page 2 Table of contents Specifications………………………………………………………...................4 Warranty……………………………………………………………………………………………………………………………………………………..5 Testing/Troubleshoot DriveSystem……………………………………………………………………………………………………………..8 Replace Drive Plate…………………………………………………………………………………………………………………………………….15 Brake Release……………………………………………………………………………………………………………………………………………..23 Removing Front Cowling…………………………………………………………………………………………………………………………….24 2D Camera Troubleshooting……………………………………………………………………………………………………………………..31 3D Sensor Troubleshooting………………………………………………………………………………………………………………………...36 Modem troubleshooting…………………………………………………………………………………………………………………………….40 Steering Troubleshooting……………………………………………………………………………………………………………………………42...
- Page 3 Table of Contents cont’d Replacing BCM…………………………………………………………………………………………………………………………………………63 Lower Lindar Removal..........................72 Kinetek Controller……………………………………………………………………………………………………………………………………84 Brain Error Code 3.0………………………………………………………………………………………………………………………………..88 Brain Error Code3.1………………………………………………………………………………………………………………………………..117 Wiring…………………………………………………………………………………………………………………………………………………….122...
- Page 8 Testing and Troubleshooting Drive System Disconnect Batteries...
- Page 9 Remove back panel...
- Page 10 Secure panel for ease of access...
- Page 11 Locate and disconnect P3 connector from controller...
- Page 12 Place probes on pins 20 (BLK/PNK) and 10 (BLK/WHT). Set meter to OHMs. Depress Accelerator Pedal. Reading should be 0.3 (Static) to 1.7 (Full Throttle)
- Page 13 Plug P3 back into Controller. Place probes on Controller leads as shown.
- Page 14 1. Reconnect batteries. 2. Turn machine on. 3. Sit on seat to activate seat switch. 4. With meter in lap, select Forward on Right Touch Pad and depress Accelerator Pedal. At static (Stopped) voltage should be 0.0 VDC. As pedal is depressed the voltage should increase all the way up to 24 VDC. (Full Throttle) 5.
- Page 15 THESE INSTRUCTIONS ARE A GUIDELINE FOR REPLACEMENT OF DRIVE WIRING PLATES FOR THE MR20 AUTONOMOUS MACHINE...
- Page 16 REMOVE SCREW & WASHER FROM LARGE LOOSEN CHAIN TENSIONER SPROCKET TO GAIN CHAIN SLACK REMOVE MASTER LINK THEN REMOVE CHAN FROM SPROCKETS...
- Page 17 LOOSEN BOTH SET SCREWS AND REMOVE SPROCKET REMOVE STEERING PIVOT FROM STEERING SPINDLE STOP AND KEY (NOT SHOWN) FROM STEERING SPINDLE...
- Page 18 REMOVE STEERING SPINDLE/DRIVE MOTOR AND PLACE ON WORKBENCH...
- Page 19 REMOVE OLD DRIVE WIRING PLATE AND REPLACE WITH NEW DRIVE WIRING PLATE...
- Page 20 TIE WRAPS REINSTALL DRIVE MOTOR ORIENTED LIKE SHOWN. WRAP THE CABLE CONDUIT LOOSELY AROUND THE DRIVE MOTOR AND HOLD IN POSITION WITH TIE WRAPS INSTALL SUPPLEMENTAL DRIVE PLATE (SEE FOLLOWING PARTS DIAGRAM)
- Page 22 ROTATE DRIVE MOTOR TO VERIFY CABLES ARTICULATE PROPERLY REASSEMBLE MACHINE IN REVERSE ORDER OF ASSEMBLY...
- Page 23 BRAKE RELEASE PROCEDURE The RoboScrub is stopped via an electromagnetic brake, located on the front drive wheel assembly. When the accelerator pedal is pressed the electromagnetic brake releases, which allows the RoboScrub to move forward or backward. When pressure is removed from the accelerator pedal, the electromagnetic brake presses against the front drive wheel stop the RoboScrub.
- Page 24 Switch, UI Screen and Control Console To remove the MinuteMan Cowling, remove the 5/32” hex screw on each side of the upper portion of the cowling, as well as the five 1/8” hex screws that secure the Slanted LIDAR shield.
- Page 25 Removing the MinuteMan Cowling, Wheel, E- MinuteMan RoboScrub 20 Stop, Key Switch, UI Screen and Control Console The cowling can be lifted up and off the two hooks at the top of the unit.
- Page 26 Removing the MinuteMan Cowling, Wheel, E- MinuteMan RoboScrub 20 Stop, Key Switch, UI Screen and Control Console Removing the Wheel, E-Stop, Key Switch, UI Screen and Control Console The wheel has a cover with five false screws and one real one. Loosen the real screw and...
- Page 27 Removing the MinuteMan Cowling, Wheel, E- MinuteMan RoboScrub 20 Stop, Key Switch, UI Screen and Control Console Use a ¾” socket to remove the locking nut and washer. Pull the wheel straight up to remove. There is a semi-circle key that is present. Be sure it does not fall out or get lost.
- Page 28 Removing the MinuteMan Cowling, Wheel, E- MinuteMan RoboScrub 20 Stop, Key Switch, UI Screen and Control Console Use a 3/32” hex key to remove the two screws that secure the E-Stop. Slide over the metal lock to free the connector.
- Page 29 Removing the MinuteMan Cowling, Wheel, E- MinuteMan RoboScrub 20 Stop, Key Switch, UI Screen and Control Console Use a 3/32” hex key to remove the two screws that secure the Key Switch. Decouple the white connector to free the hardware.
- Page 30 Removing the MinuteMan Cowling, Wheel, E- MinuteMan RoboScrub 20 Stop, Key Switch, UI Screen and Control Console Use a 3/32” hex key to remove the four screws that secure the Control Console. Carefully unplug the two cables from the rear of the Control Console.
- Page 31 2D CAMERA If machine software does not boot up/freeze during start-up, the most likely cause is the right 2D camera is not working. This is the only camera that HAS TO BE WORKING for the software to boot up.
- Page 32 Disconnect the 2D camera affected and check for 5VDC on pins 2 and 4.
- Page 33 If this is the right camera or front camera and voltage is present, please swap it with the left camera and test to ensure that the issue follows the camera. If the issue follows the camera, may need to be replaced.
- Page 34 If voltage is not present, test the following for continuity for the suspect camera.
- Page 35 If no continuity present, replace UP TRUNK.
- Page 36 3D CAMERA If you receive a side IFM error, check to see if the camera has power. If the LED is blinking or lit, the camera has power. In this case, try reseating the communication cable going to the camera on the UP TRUNK as well as the UP TRUNK connection on the BCM...
- Page 37 If the LED is not blinking or lit, check voltage on the power cable to confirm there is 24VDC. If there is power the camera may need to be replaced.
- Page 38 If you receive a front IFM error, check to see if the camera has power. If the four LED’s on the front of the camera are blinking or lit, the camera has power. In this case, try reseating the communication cable going to the camera from the UP TRUNK as well as the UP TRUNK connection to the BCM.
- Page 39 If the four LED’s are not blinking or lit, check voltage on the power cable to confirm there is 24VDC. If there is power the camera may need to be replaced.
- Page 40 MODEM Fro the Modem, there are four connections which interface with the Modem: USB Power connector, micro USB Data connector and 2 antenna connectors: MIM01 and MIM02.
- Page 41 Using a digital Multimeter, measure the voltage at the pins on the M12 female connector as shown below. (note the location of the M12 notch)(voltage should be 5 VDC) If there is voltage measured across ALL three pins, contact tech support for further assistance.
- Page 42 Steering Place steering wheel in zero position as shown below...
- Page 43 Verify that drive wheel is also in the zero position as shown below...
- Page 44 If Steering wheel and Drive wheel do not line up, remove front cowling and check for loose/missing Encoder set screws or slack/jumped gear in steering gear assembly.
- Page 45 Turn machine on when prompted enter Operator PIN (1337)
-
Page 46: Enter Settings
Enter Settings... - Page 47 Enter Service...
- Page 48 Enter Service PIN(If you do not have, contact Minuteman Tech Support)
- Page 49 Enter Service Tools...
- Page 50 Enter Steering...
- Page 51 Enter Steering Assembly...
- Page 52 Enter Sensor View...
- Page 53 With Encoder set screws loosened turn encoder collar until line points to 0 degrees on screen. Now without letting collar moving line up steering wheel and drive wheel to zero position. Tighten set screws.
- Page 54 Move steering from left to right the return to zero position and recheck screen/encoder position.
- Page 55 Move steering right until it stops. (Screen/Encoder should line up with 90 degree mark) Do same for left. If offset return to zero and re-adjust.
- Page 56 Back out to Steering Assembly screen. Enter Steering Longevity.
- Page 57 Follow on-screen instructions...
- Page 58 Follow on-screen instruction, press start. (Steering wheel will start moving left and right) After a minimum 5 times of both directions, select cancel.
- Page 59 Back out to Steering assembly screen and select Run...
- Page 60 Follow on-screen instructions.
- Page 61 Continued...
- Page 62 After Diagnostic run screen will show SUCCESS with a green check mark steps are complete.
- Page 63 First, begin by disconnecting the battery connector at the rear of the machine. To remove the MinuteMan Cowling, remove the 5/32” hex screw on each side of the upper portion of the cowling, as well as the five 1/8” hex screws that secure the Slanted LIDAR shield.
- Page 64 Replacing the MinuteMan BCM MinuteMan RoboScrub 20 The cowling can be lifted, up and off the two hooks at the top of the unit.
- Page 65 Replacing the MinuteMan BCM MinuteMan RoboScrub 20 Unscrew the four bundled black connectors that couple to the BCM. Decouple the fan connector. Cut the indicated zip ties and place the BCM to the side. Remove the six 3mm hex screws that secure the BCM.
- Page 66 Replacing the MinuteMan BCM MinuteMan RoboScrub 20 * Be sure to reconnect the green grounding cable (if present) when replacing the Brain Module. Follow the instructions in the reverse order to re-assemble. Power on the machine and make sure the robot can establish ROC connection.
- Page 67 Replacing the MinuteMan BCM MinuteMan RoboScrub 20 Site connectivity may be limited depending on building architecture or cellular signal infrastructure. Moving the scrubber to a different part of the property (or even outside the building) may improve connectivity. Train a short test route Print the home marker found on the following page.
- Page 68 Replacing the MinuteMan BCM MinuteMan RoboScrub 20...
- Page 69 Replacing the MinuteMan BCM MinuteMan RoboScrub 20 Enter the PIN code and select Teach Route. Teach a short route that starts and ends at the same home marker location.
- Page 70 Replacing the MinuteMan BCM MinuteMan RoboScrub 20...
- Page 71 Replacing the MinuteMan BCM MinuteMan RoboScrub 20 When replaying the short route, ensure that the robot follows the path without difficulty. At some point during the replay, step in the robots path and continue to block it until an assist is triggered.
- Page 72 Lower Lidar Removal...
-
Page 73: Front Panel Removal
Front Panel Removal... - Page 74 1. Remove these three screws.
- Page 75 2. Remove these two screws. Remove Upper Lidar cover plate.
- Page 76 3. Remove two nuts positioned inside frame underneath. There are two access holes to alow for removal.
- Page 78 4. Remove screw on each side as shown in pictures below.
- Page 80 Removal of lower jaw and Lidar.
-
Page 81: Disconnect Cables
1. Disconnect cables. - Page 82 2. Remove these four screws. Then remove bracket.
- Page 83 3. Remove these two screws. Now Lidar is ready to remove.
- Page 84 How to read Kinetek Error Codes Step one. Locate the rear panel and remove the 7 screws and remove the panel. Step Two. Locate the Nidec/ Kinetek controller.
- Page 85 Step Three. Find the red light in the bottom right of the controller. Step Four. If the light is flashing the board has an error it will blink in a series of fast flashes and then slow flashes. Count the flashes and see the table below to get your hex code. See document Kinetec error codes.pdf to find what is wrong with your machine.
- Page 88 KCCA0237 ERROR CODE TABLE Error Code Description 0x12 EEPROM ERROR 0x1A BATTERY LOW(ALL FUNCTION OFF) 0x21 BATTERY LOW(TRACTION ONLY) 0x23 MCU OVER TEMPERATURE 0x26 PRECHARGE FAILURE(TRACTION) 0x29 TRACTION LEFT NULL ERROR 0x2D BRUSH NULL ERROR 0x2E VACUUM NULL ERROR 0x2F SQUEE NULL ERROR 0x31 BRUSH ADJUSTMENT TIMEOUT...
-
Page 89: List Of Error Codes
Title List of Error Codes The following table provides detailed information for the available Assist, Alert, Startup and Error codes displayed on the current UI. Error Error Back-end Error Title Critical Code Title Instructions Type (not shown in UI) Level 1. - Page 90 Error Error Back-end Error Title Critical Code Title Instructions Type (not shown in UI) Level 1. Turn off the machine. 2. Wait 15 seconds. 3. Turn on the machine. Large front column angle Assist prediction error Steering Error Contact supervisor if issue continues. 1.
- Page 91 Doc Title Error Error Back-end Error Title Critical Code Title Instructions Type (not shown in UI) Level Water Tank Alert WATER_TANK_EMPTY Empty Inspect and fill the water tank. 1. Fill water tank. Water Tank 2. Drive the machine back to the route. Assist WATER_TANK_EMPTY Empty...
- Page 92 Error Error Back-end Error Title Critical Code Title Instructions Type (not shown in UI) Level 1. Inspect the brushes and pads for damage or debris. 2. Adjust or replace as needed. Alert BRUSH_ERROR Brush Error 3. If the issue continues, contact customer service. 1.
- Page 93 Error Error Back-end Error Title Critical Code Title Instructions Type (not shown in UI) Level 1. Inspect the squeegee for damage or debris. 2. Adjust or replace as needed. 3. If no issues are found, press the Start/Pause button to Squeegee resume.
- Page 94 Doc Title Error Error Back-end Error Title Critical Code Title Instructions Type (not shown in UI) Level Seat Sensor 1. Make sure the seat is empty. Assist SEAT_SENSOR_TRIGGERED Triggered 2. To resume, press the Start/Pause button. 1. Restart the machine. Alert SCRUBBER_ERROR_STATE Processor Error...
- Page 95 Error Error Back-end Error Title Critical Code Title Instructions Type (not shown in UI) Level SENSOR_CHECK_IN_PROGRES Sensor Check 1. Drive the machine 10-15 feet along the route. Alert in Progress 2. To resume, press the Start/Pause button. 1. Make sure the path is clear. FIRMWARE_PAUSE/FW_FOOTP 2.
- Page 96 Error Error Back-end Error Title Critical Code Title Instructions Type (not shown in UI) Level 1. Clean all the sensors with a clean microfiber cloth. 2. Inspect for damage or obstructions. FIRMWARE_SLANTED_LIDAR_TI 3. If no issues are found, press the Start/Pause button to Assist MEOUT Sensor Error...
- Page 97 Doc Title Error Error Back-end Error Title Critical Code Title Instructions Type (not shown in UI) Level Left Side 1. Inspect the machine and the surrounding area. FIRMWARE_LEFT_IFM_OBSTAC Obstacle 2. Drive past any obstacles. Assist LE_TOO_CLOSE Detected 3. If clear, press the Start/Pause button to resume. Right Side 1.
- Page 98 Doc Titl Error Error Back-end Error Title Critical Code Title Instructions Type (not shown in UI) Level 1. Turn off and inspect machine. 2. If no issues are found, press the Start/Pause button to FIRMWARE_SLANTED_MARKER resume. Assist _NOT_FOUND Machine Error 3.
- Page 99 Error Error Back-end Error Title Critical Code Title Instructions Type (not shown in UI) Level 1. Make sure the path is clear. 2. Drive past any obstacles. Assist Start Pose Colliding Path is Blocked 3. To resume, press the Start/Pause button. 1.
- Page 100 Doc T Error Error Back-end Error Title Critical Code Title Instructions Type (not shown in UI) Level 1. Make sure the path is clear. 2. Drive past any obstacles. Assist Path is Behind Path is Blocked 3. To resume, press the Start/Pause button. 1.
- Page 101 Doc Title Error Error Back-end Error Title Critical Code Title Instructions Type (not shown in UI) Level Error IMU_TIMEOUT Gyro Error Gyro error. Please restart the machine. Steering 1. Drive the machine back to the charging station. Calibration 2. Turn off the machine. MCU_STATUS_STEERING_OUT Adjustment Notify your supervisor of this issue and include the error...
- Page 102 Doc Title Error Error Back-end Error Title Critical Code Title Instructions Type (not shown in UI) Level Path Following Restart the machine. Assist PERCEPTS_INVALID Error If the issue continues, contact your supervisor. Path Following Restart the machine. Assist PERCEPTION_POSE_INVALID Error If the issue continues, contact your supervisor.
- Page 103 Doc Titl Error Error Back-end Error Title Critical Code Title Instructions Type (not shown in UI) Level Right Sensor 1. Clean the right sensors with a clean microfiber cloth. 2. Inspect for damage. 5005 Startup RIGHT_IFM_NOT_RESPONDING Responding 3. Restart the machine. Upper Sensor 1.
- Page 104 Error Error Back-end Error Title Critical Code Title Instructions Type (not shown in UI) Level 1. Clean the left sensors with a clean microfiber cloth. Left Sensor Not 2. Inspect for damage. 5014 Startup LEFT_IFM_NOT_RESPONDING Responding 3. Restart the machine. Right Sensor 1.
- Page 105 Doc Title Error Error Back-end Error Title Critical Code Title Instructions Type (not shown in UI) Level Upper Sensor 1. Clean the upper sensors with a clean microfiber cloth. 2. Inspect for damage. 5023 Startup FRONT_IFM_ERROR Responding 3. Restart the machine. 1.
- Page 106 Error Error Back-end Error Title Critical Code Title Instructions Type (not shown in UI) Level Right Sensor 1. Clean the right sensors with a clean microfiber cloth. 2. Inspect for damage. 5029 Startup RIGHT_IFM_NOT_RESPONDING Responding 3. Restart the machine. Upper Sensor 1.
- Page 107 Doc Title Error Error Back-end Error Title Critical Code Title Instructions Type (not shown in UI) Level Lower Sensor 1. Clean the lower sensors with a clean microfiber cloth. PLANAR_LIDAR_NOT_RESPON 2. Inspect for damage. 5035 Startup DING Responding 3. Restart the machine. IFM_FIRMWARE_UPDATE_ERR Sensor Update 5036...
- Page 108 Doc Title Error Error Back-end Error Title Critical Code Title Instructions Type (not shown in UI) Level 1. Clean all the sensors with a clean microfiber cloth. 2. Inspect for damage or obstructions. 3. If no issues are found, press the Start/Pause button to 8200 Assist SENSOR_ERROR...
- Page 109 Doc Title Error Error Back-end Error Title Critical Code Title Instructions Type (not shown in UI) Level 1. Make sure the path is clear. 2. Drive past any obstacles. 8800 Assist MACHINE_ERROR Path is Blocked 3. To resume, press the Start/Pause button. 1.
- Page 110 Doc Title Error Error Back-end Error Title Critical Code Title Instructions Type (not shown in UI) Level 20002 Error ROUTE_TOO_SHORT Route Error Retrain the route to be at least two minutes long. 1. Turn off the machine. 2. Disconnect the battery cable for 15 seconds. 3.
- Page 111 Doc Titl Error Error Back-end Error Title Critical Code Title Instructions Type (not shown in UI) Level Retrain the route, starting and ending at the same Home 20006 Error ROUTE_CANNOT_CONNECT Route Error Marker. 20007 Error ROUTE_FAILED Route Error Route failed to save. Retrain the route. Retrain the route, starting and ending at the same Home 20008 Error...
- Page 112 Doc Title Error Error Back-end Error Title Critical Code Title Instructions Type (not shown in UI) Level 1. Turn off the machine. 2. Wait 15 seconds. 3. Turn on the machine. 29999 Error MAPPING_SAVE_ERROR Unknown Error Contact supervisor if problem continues. 1.
- Page 113 Doc Title Error Error Back-end Error Title Critical Code Title Instructions Type (not shown in UI) Level PROBLEM WITH USB Connection 1. Restart the machine. 40003 Assist CONNECTION Error 2. If the issue continues, contact your supervisor. 1. Turn off and inspect the machine. 2.
- Page 114 Error Error Back-end Error Title Critical Code Title Instructions Type (not shown in UI) Level 1. Drive the machine back to the charging station. Steering 2. Turn off the machine. Calibration 3. Notify your supervisor of this issue and include the Adjustment error code number.
- Page 115 Doc Tit Error Error Back-end Error Title Critical Code Title Instructions Type (not shown in UI) Level 1. Drive the machine back to the charging station. 2. Turn off the machine. 3. Notify your supervisor of this issue and include the ESTOP_CODE_GYRO_STEERIN Calibration error code number.
- Page 116 Doc Title Error Error Back-end Error Title Critical Code Title Instructions Type (not shown in UI) Level Safety Mechanical Relay Test 1. Turn off and inspect machine. VCU Failed to Stop 2. If no issues are found, restart the machine. 60442 Assist Communicating...
- Page 117 3.1 Diagnostic App Errors Error Code Error Name Error Description NO_ERROR UNKNOWN An unknown error occurred. SYSTEM_ERROR An unexpected error occurred. MACHINE_ERROR TIMEOUT The test failed to complete within the allotted time. VCU_CONNECTION_ERROR TRACTION_ENCODER_ERROR Unable to get necessary information from the traction encoder. STEERING_ENCODER_ERROR Unable to get necessary information from the steering encoder.
- Page 118 3.1 Diagnostic App Errors LEFT_3D_CONFIG_UPDATE_FAILED Unable to write configuration to left 3D camera. FRONT_3D_CAMERA_ERROR FRONT_3D_CONNECTION_ERROR Failed to connect to front 3D camera. FRONT_3D_CAMERA_BAD_READING Invalid readings collected from 3D camera. FRONT_3D_CALIBRATION_FAILED An unknown exception occurred while calibrating. FRONT_3D_OUT_OF_TOLERANCE The physical placement of the front 3D camera is out of the maximum allowed tolerance. FRONT_3D_CONFIG_UPDATE_FAILED Unable to write configuration to front 3D camera.
- Page 119 3.1 Diagnostic App Errors THROTTLE_SPEED_MISMATCH Sign of the throttle does not match the sign of the change of encoder steps. ENCODER_STD_DEV_TOO_HIGH The standard deviation of the change of encoder steps is above a threshold. UNEXPECTED_HEADING_CHANGE Expected machine to move straight, but machine turned. RIGHT_WHEEL_LIMIT_LEFT_OF_CENTER Expected traction encoder to register right limit to the right of center.
- Page 120 3.1 Diagnostic App Errors MISSING_DEPTH_DUMPS The 3D camera data dumps are missing. MISSING_IFM_CALIBRATIONS The 3D camera calibrations must be run. MISSING_LIDAR_CALIBRATIONS The LIDAR calibrations must be run. INVALID_CALIBRATION_FILES Calibration files were found but are invalid. STEERING_LONGEVITY_INVALID_LIMITS Invalid limits set for the Steering Longevity tool. UNKNOWN_ROC_CONNECTION_ERROR Unable to communicate with the ROC.
- Page 121 Failure to install Ferrite can cause lines on the display screen. Installation in Ferrite P/N 275-00156-01 Ferrite Core, Hinged, 348ohm, 10mm ID Install 1 ferrite approximately 1.5" from the connector on the LCD Install 1 ferrite approximately 1.0" from the first ferrite Place zip ties next to the ferrites as shown.
- Page 123 REVISIONS NOTES: 1.4 ALL LABELS ARE ARIAL FONT, 3MM HEIGHT PER LINE, CONTRASTING TEXT AND BACKGROUND COLORS, LABEL TEXT READS AWAY FROM CONNECTOR 1.1 INSTALL CRIMPS INTO HOUSING PER MANUFACTURER'S INSTRUCTIONS 1.5 ALL MATERIALS MUST BE RoHS COMPLIANT See Sheet 3 1.1.1 CRIMP PER MANUFACTURER'S RECOMMENDATIONS 1.6 EQUIVALENT PARTS MAY BE USED WITH BRAIN CORPORATION APPROVAL.
- Page 124 Pinout and Labeling Connector D38999 Pin Signal Name Label Wire Color Label ID Connector ID Description USB4P GREEN USB_5V_1 USB4N LTE_MODEM WHITE M12, 4-Pin, A, F BLACK SHELL SHIELD DRAIN SHELL GE1_0 W/ORANGE GE1_2 W/GREEN GE1_1 DEPTH_RIGHT_ETH ORANGE M12, 4-Pin, D, M GE1_3 GREEN SHELL...
- Page 125 REVISIONS REV. DESCRIPTION DATE APPROVED INITIAL RELEASE 2017-10-18 Changed connector exit orientation from 45° to 20°. 2017-11-09 Moved the drain of sub-assembly cables to connect to the D38999 shell, and added conductive braid near the D38999 2017-12-14 connector. Hard-coded pinouts and labels. 2018-02-27 Changed the drawing format for ease of readability.
- Page 126 REVISIONS See Sheet 2 NOTES: 1.4 ALL LABELS ARE ARIAL FONT, 3MM HEIGHT PER LINE, CONTRASTING TEXT AND BACKGROUND COLORS, LABEL TEXT READS AWAY FROM CONNECTOR 1.1 INSTALL CRIMPS INTO HOUSING PER MANUFACTURER'S INSTRUCTIONS 1.5 ALL MATERIALS MUST BE RoHS COMPLIANT SOURCE 1.1.1 CRIMP PER MANUFACTURER'S RECOMMENDATIONS 1.6 EQUIVALENT PARTS MAY BE USED WITH BRAIN CORPORATION APPROVAL...
- Page 127 REVISIONS REV. DESCRIPTION DATE APPROVED INITIAL RELEASE 2017-06-28 Decreased VBATT_IN by 380mm, to 620mm. 2017-08-28 Changed ring terminal size to #8 studs. 2017-10-17 Added potting to the boot, added a pinout table to the drawing, and brought sub-trunk 2017-10-19 drawings into the main document. Changed exit/keying angle from 45°...
Need help?
Do you have a question about the RoboScrub 20 and is the answer not in the manual?
Questions and answers