
Related Manuals for Epson ELPMB22


Summary of Contents for Epson ELPMB22
- Page 1 ELPMB22 ELPMB23 天吊り金具 ELPMB22/ELPMB23 取扱説明書 Ceiling Mount ELPMB22/ELPMB23 Instruction Manual Fixation au plafond ELPMB22/ELPMB23 Guide de l’utilisateur Deckenhalterung ELPMB22/ELPMB23 Bedienungsanleitung...
-
Page 2: Safety Precautions
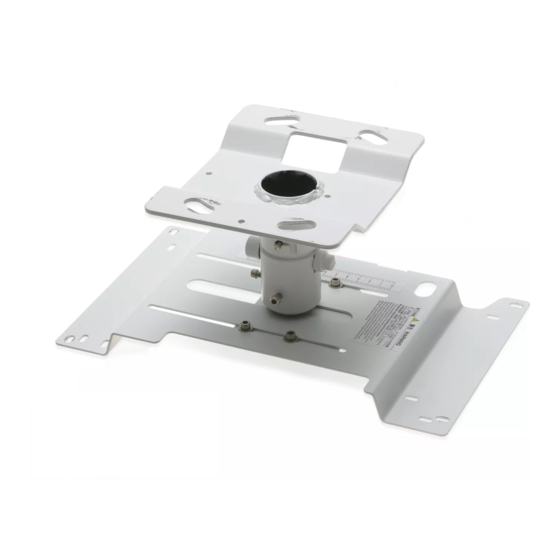
This product is for mounting an Epson Multi-Media Projector on the ceiling. ELPMB22 is for medium-size projectors and ELPMB23 is for small projectors. See our website or product catalog to find out which model can be used to mount your projector. -
Page 3: Specifications
Specifications Weight ELPMB22: 3.5 kg ELPMB23: 3.4 kg Dimensions × × ELPMB22: W 342 D 210 H 150 mm × × ELPMB23: W 270 D 139 H 150 mm 1 Before Assembly and Installation 1-1 Safety Precautions Warning This product is sold on the assumption that the installation work will be performed by a specialist with the required technical know-how and ability. -
Page 4: Checking The Package Contents
1-2 Checking the Package Contents Open the box and check that nothing is missing. ELPMB22 ceiling mount ELPMB23 ceiling mount Offset wrench Projector mounting screws: 4 pcs. (M4 × 12)/ lock washers: 4 pcs./ Instruction manual plain washers: 4 pcs. -
Page 5: Installing The Projector
1-4 Installing the Projector • Install the projector away from fluorescent lighting, air conditioners and other electrical items. Failure to do so can cause the remote control to malfunction. • To limit the effect of external noise, we recommend that you position the projector so that the cable connecting it to a computer or other device is no longer than 20 meters. - Page 6 Oblong holes Projector lens Ceiling plate side • The illustration shows ELPMB22. ELPMB23 has the same dimensions. • When installing the ceiling mount on a concrete ceiling, use anchors and bolts. → For details, see "3 Installing on a Concrete Ceiling" on page 10.
- Page 7 2-3 Fitting the Projector Plate to the Projector (1) Turn over the projector so that the operating panel faces downwards. (2) Use the four projector mounting screws provided to attach the projector plate to the projector. There are several oblong holes in the projector plate. Place the screws through the holes that align with your projector and tighten them.
- Page 8 2-4 Fitting the Projector Plate to the Ceiling Plate (1) Insert the ball joint of the projector plate into the ceiling plate. Put the two protrusions on the ball joint into the grooves of the ceiling plate. Fit the plates together so that the ball joint is in the direction illustrated (Front view).
-
Page 9: Adjusting The Angle
Moving the projector plate horizontally enables you to align the center of the ceiling mount (the ball joint) and the center of the projector lens. Horizontal adjustment range: 130 mm (ELPMB22)/100 mm (ELPMB23) Warning Hold the projector carefully from below during adjustment. - Page 10 Use nuts and bolts that are M12 or higher. Failure to do so could cause the projector to fall. Epson accepts no responsibility for the projector falling due to inadequate installation.
-
Page 11: For Safe Use
4 Extension Pipe To adjust the height of where the projector is installed, you need to purchase a separate extension pipe. There are two extension pipe model numbers, ELPFP13 and ELPFP14. The illustration below shows the range of distances between ceiling plate and projector to which each model can be adjusted.
Need help?
Do you have a question about the ELPMB22 and is the answer not in the manual?
Questions and answers