
Related Manuals for Alienware AW720M


Summary of Contents for Alienware AW720M
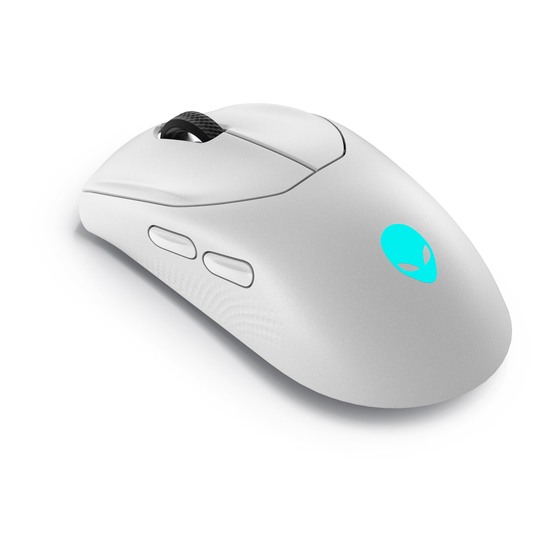
- Page 1 Alienware Tri-Mode Wireless Gaming Mouse AW720M User Guide Mouse Model: AW720M Regulatory Model: AW720M/UD2201p...
- Page 2 Notes, cautions, and warnings NOTE: A NOTE indicates important information that helps you make better use of your mouse. CAUTION: A CAUTION indicates potential damage to hardware or loss of data if instructions are not followed. WARNING: A WARNING indicates a potential for property damage, personal injury, or death.
-
Page 3: Table Of Contents
Battery indicator colors ......17 Alienware Command Center (AWCC) ... .18 Installing AWCC through Windows Update . - Page 4 Specifications ....... . . 22 General ......22 Electrical .
-
Page 5: What's In The Box
What’s in the box 1. Mouse 2. USB charging cable 3. Clip 4. USB wireless dongle 5. Dongle extender 6. USB-C magnetic dongle for charging 7. Documents What’s in the box... -
Page 6: Features
Features Bottom Left Side Right Side 1. Left button 2. Scroll wheel 3. Right button 4. Mode button 5. DPI adjustment button 6. DPI indicator 7. Power button 8. USB-C port 9. Forward button 10. Backward button Features... -
Page 7: Magnetic Snap Charging Function
• 1200: Green ( ) (default) • 1600: Yellow ( ) • 2400: Purple ( ) • 3200: Red ( ) You can change the default DPI settings and customize the DPI stages with the Alienware Command Center (AWCC) application. Features... -
Page 8: Setting Up Your Gaming Mouse
Setting up your gaming mouse Connecting the mouse NOTE: - The mouse supports both wired mode and wireless mode. - Your mouse has a rechargeable battery. For best results, ensure that the battery is fully charged before using it for the first time. - To improve battery life, turn off the power switch when the mouse is not used. -
Page 9: Wireless Mode (2.4Ghz)
3. Slide the power button down to switch on the mouse. Wireless mode (2.4GHz) Laptop 1. Slide the mode button to “2.4G”. Setting up your gaming mouse... - Page 10 2. Connect the USB wireless dongle to a USB port on your laptop. Desktop 1. Slide the mode button to “2.4G”. 2. Connect the USB-C end of the USB charging cable to the bottom port of the dongle extender. Insert the USB wireless dongle to the top port of the dongle extender.
-
Page 11: Wireless Mode (Bluetooth)
Wireless mode (Bluetooth) 1. Slide the mode button down to “ ” then continue to slide the button down and hold it for three seconds. The DPI LED will blink indicating your wireless mouse is in pairing mode. 2. Pair your wireless mouse with your Bluetooth-enabled computer. Swift Pair: a. - Page 12 Click Add Bluetooth or other device > Bluetooth. e. From the list of available devices, click Alienware AW720M. NOTE: If Mouse AW720M is not listed, ensure that the pairing mode is enabled on the wireless mouse. 3. Confirm that both the wireless mouse and the device are paired.
-
Page 13: Wired Mode
Wired mode NOTE: The battery starts charging automatically in wired mode. 1. Connect the USB-C end of the USB charging cable to the USB-C port on the mouse. 2. Connect the other end of the USB charging cable to an available USB port on your desktop or laptop. -
Page 14: Turning On The Mouse
Turning on the mouse Slide the power button down to switch on the mouse. Charging the battery Wired mode 1. Connect the USB-C end of the USB charging cable to the USB-C port on the mouse. Setting up your gaming mouse... - Page 15 2. Connect the other end of the USB charging cable to an available USB port on your desktop or laptop. Laptop Desktop 3. When the battery is fully charged, the battery indicator blinks in green for 2 seconds and then stays static green for 10 seconds. After 12 seconds, it reverts to the user default lighting.
-
Page 16: Wireless Mode
Wireless mode 1. Connect the USB-C end of the USB charging cable to the bottom port of the dongle extender. Insert the USB wireless dongle to the top port of the dongle extender. 2. Connect the other end of the USB charging cable to an available USB port on your desktop or laptop. -
Page 17: Battery Indicator Colors
4. Snap the magnetic end of the USB-C magnetic dongle to the magnetic port of the dongle extender. 5. When the battery is fully charged, the battery indicator blinks in green for 2 seconds and then stays static green for 10 seconds. After 12 seconds, it reverts to the user default lighting. -
Page 18: Alienware Command Center (Awcc)
Alienware Command Center (AWCC) Alienware Command Center (AWCC) application provides a single interface to customize and enhance the gaming experience. This application enables you to perform the following functions: NOTE: You will experience limited functionality in AWCC when your device is connected by Bluetooth Low Energy (BLE). -
Page 19: Installing Awcc Through Windows Update
Installing AWCC through Windows Update 1. Connect your Alienware peripheral to your computer through the USB port. The AWCC application is downloaded and installed automatically. AWCC installation takes up to 10 minutes to complete. 2. Navigate to the program folder to ensure that the AWCC installation is complete. -
Page 20: Updating The Firmware
1. Connect your mouse to your computer through the USB cable. 2. Launch AWCC software and click the FX tab. 3. Under SETTINGS, select Alienware AW720M Tri-Mode Wireless Gaming Mouse from the EDIT DEVICE SETTINGS drop-down list. 4. Click the Settings tab. -
Page 21: Updating The Mouse Firmware Manually
Updating the mouse firmware manually 1. Go to www.dell.com/support and search for AW720M. 2. From the Drivers & Downloads tab, download AW720M Mouse FW update tool. 3. Connect your mouse to your computer through the USB cable. 4. Open the downloaded AW720M Mouse FW update tool file. -
Page 22: Specifications
Model number AW720M Connection type Tri-mode Wireless (2.4GHz, Bluetooth 5.1 and wired) System requirement • Windows 7, 32/64 bit (without Alienware support feature) • Windows 8, 32/64 bit (without Alienware support feature) • Windows 8.1, 32/64 bit (without Alienware support feature) •... -
Page 23: Environmental
Environmental Temperature: Operating 0°C to 40°C (32°F to 104°F) Storage -40°C to 65°C (-40°F to 149°F) Storage humidity 95% maximum relative humidity; non-condensing Wireless RF transmission Supports 2.4GHz and BT5.1 LE Operation distance Up to 10-meter Specifications... -
Page 24: Troubleshooting
Troubleshooting Problems Possible solutions Mouse is not functioning Turn ON the power switch on the bottom of the mouse and try again. 1. In wireless mode, ensure that the Mouse is not functioning battery has sufficient battery power. 2. Slide the power button to turn off the mouse and then turn on again. - Page 25 5. Restart the computer. Mouse is not running based on 1. Ensure that the Alienware the configuration selected in Command Center (AWCC) the Alienware Command Center application is installed on your (AWCC) application.
- Page 26 Problems Possible solutions Resolving cursor issues 1. In wired mode, connect the USB charging cable to another USB port. Wait until a notification appears indicating that the driver installation is complete before you use the mouse. 2. In 2.4GHz wireless mode, connect the USB wireless dongle to another USB port or connect the USB wireless dongle and USB charging...
- Page 27 Problems Possible solutions Resolving mouse button issues 1. Ensure that there is nothing preventing the mouse buttons from moving. Most mouse buttons make a clicking noise when pressed down. 2. In wired mode, connect the USB charging cable to another USB port.
- Page 28 Problems Possible solutions Troubleshooting a slow moving cursor 1. Ensure that the sensor is not obstructed or dirty. 2. Glass or very smooth glossy surfaces are not suitable for the mouse sensor to capture movement. Using a dark colored fabric mouse pad can improve the tracking.
-
Page 29: Statutory Information
Statutory Information Warranty Limited warranty and return policies Dell-branded products carry a two-year limited hardware warranty. If purchased together with Dell system, it will follow the system warranty. For U.S. customers: This purchase and your use of this product are subject to Dell’s end user agreement, which you can find at https:/ /www.dell.com/terms.
Need help?
Do you have a question about the AW720M and is the answer not in the manual?
Questions and answers