Table of Contents
Advertisement
Available languages
Available languages
USER MANUAL
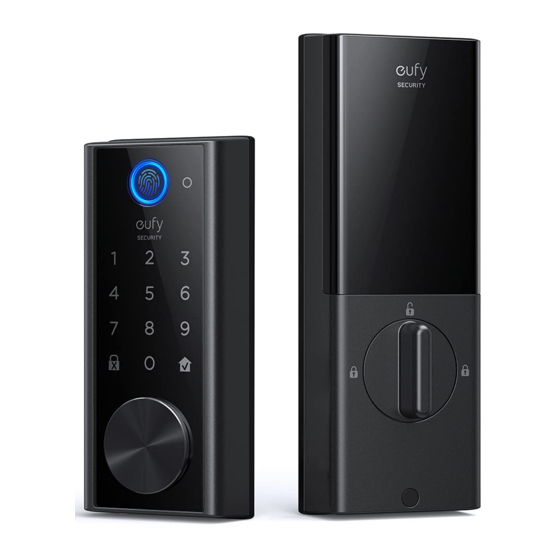
Smart Lock Touch & Wi-Fi
1
Anker Innovations Limited. All rights reserved. eufy Security and eufy Security Logo
are trademarks of Anker Innovations Limited, registered in the United States and other
countries. All other trademarks are the property of their respective owners.
Model: T8520S
51005002645 V02
Advertisement
Table of Contents

Subscribe to Our Youtube Channel
Related Manuals for EUFY T8520S


Summary of Contents for EUFY T8520S
- Page 1 USER MANUAL Smart Lock Touch & Wi-Fi Anker Innovations Limited. All rights reserved. eufy Security and eufy Security Logo are trademarks of Anker Innovations Limited, registered in the United States and other countries. All other trademarks are the property of their respective owners.
- Page 2 TABLE OF English CONTENTS Español 02 18 What's Included Basic Operations Français 03 20 Product Overview 04 21 Getting Started Troubleshooting 07 22 Installing the Smart Lock Touch Important Safety Instructions & Wi-Fi 14 22 Setting up the Smart Lock Touch Notice &...
-
Page 3: What's Included
WHAT'S INCLUDED PRODUCT OVERVIEW For Smart Lock Touch & Wi-Fi Installation Front View Fingerprint LED Fingerprint Button Touchscreen Deadbolt Exterior Assembly Spacer Interior Assembly Cylinder Cylinder Cover Reboot Button Micro USB Port Mounting Plate Rear View Mounting Plate Strike Plate Strike Reinforcer Screws Battery Cover... -
Page 4: Getting Started
With Google Home or Amazon Alexa devices at home, you can lock the door using voice commands. Sign up for a eufy Security account and add the Smart Lock Touch & Wi-Fi to the device list. Remove the battery cover and scan the QR code on the back of the device to view the Smart Lock Touch &... -
Page 5: Prepare Door For Installation
Prepare Door for Installation 3. If you have an existing lock, remove it, including the bolt. 1. Make sure that the following criteria are met so that the Smart Lock Touch & Wi-Fi can be installed properly: ① Check the door status. Make sure the doorframe is aligned with the door. ②... -
Page 6: Step 2: Install The Strike Plate
What is required: Deadbolt, Deadbolt Screws, Screwdriver (not provided) What is required: Strike Plate, Strike Screws, Strike Reinforcer (optional), Reinforcement Screws (optional), Screwdriver (not provided) Strike Reinforcer Screwdriver Deadbolt Screws Deadbolt Strike Screws Strike Plate (optional) Reinforcement Screwdriver Screws Step 2: Install the Strike Plate If you have an existing strike plate installed, skip this step. -
Page 7: Step 4: Install The Mounting Plate
Step 3: Install the Exterior Assembly Step 4: Install the Mounting Plate To install the exterior assembly into the doorframe: 1. Route the cable through the mounting plate. 1. Measure your cross bore dimension and determine the installation steps accordingly. 2. -
Page 8: Step 6: Install The Battery
Step 5: Install the Interior Assembly To install the Interior Assembly: 1. Remove the battery cover. 2. Match the wire connector from the circuit board with the one from the interior assembly as illustrated. The wire connector can only be plugged into the socket in one way. - Page 9 1. Scan the QR code on the back of the Smart Lock Touch & Wi-Fi to get Bluetooth information of the Smart Lock Touch & Wi-Fi. Follow the on-screen instructions to After the lock is calibrated, the eufy Security app will prompt you to name your Smart complete the setup.
-
Page 10: Other Settings
Register Your Fingerprint Other Settings After setting an access code, the eufy Security app will prompt you to register your eufy Security app. The features are listed as follows: • Add up to 100 users • Set language: English •... -
Page 11: Basic Operations
Option 4: Use automatic lock follow the in-app instructions or use the provided key to unlock the door. 1. On the eufy Security app, set the “Automatic lock” option to On, and set the time duration for the door to be locked. -
Page 12: Specifications
4. The Smart Lock Touch & Wi-Fi ringtone is too loud. Open the eufy Security app and pair your phone with your Smart Lock Touch & Wi-Fi. Press the Reboot button on the bottom to restart the Smart Lock Touch & Wi-Fi. The You can set the ringtone volume on the eufy Security app. -
Page 13: Important Safety Instructions
IMPORTANT SAFETY INSTRUCTIONS FCC Radio Frequency Exposure Statement The device has been evaluated to meet general RF exposure requirements. The device • DO NOT attempt to install or repair the product without authorization. Notice: Shielded cables • Do not use excessive force or sharp objects to press lock buttons, as this can All connections to other computing devices must be made using shielded cables to damage the product. - Page 14 CONTENIDO TABLA DE CONTENIDOS Para la instalación de Smart Lock Touch & Wi-Fi 25 41 Contenido Funcionamiento Básico 26 44 Descripción Del Producto Pieza de separación Cerrojo Panel exterior Panel interior 27 44 Primeros Pasos Solución De Problemas 30 45 Instalación De Smart Lock Instrucciones De Seguridad Touch &...
-
Page 15: Descripción Del Producto
Descarga de la aplicación eufy Security Vista frontal Descargue la aplicación eufy Security de la App Store (para dispositivos iOS que ejecuten la versión 10.2 y posteriores) o Google Play (para dispositivos Android que ejecuten la LED de huella digital versión 5.0 y posteriores). - Page 16 Preparación de la puerta para la instalación la aplicación eufy Security para conectar y emparejar el teléfono con el dispositivo Smart Lock Touch & Wi-Fi. Una vez que el emparejamiento se haya realizado correctamente, 1. Para instalar el dispositivo Smart Lock Touch & Wi-Fi correctamente, es necesario podrá...
- Page 17 3. Si hay una cerradura instalada, extráigala, incluyendo el tornillo. Elementos necesarios: cerrojo, tornillos del cerrojo y destornillador (no incluido) Tornillos del Destornillador Cerrojo cerrojo INSTALACIÓN DE SMART LOCK TOUCH & WI-FI Paso 1 : Instalación del cerrojo Para instalar el cerrojo: 1.
- Page 18 Paso 3: Instalación del panel exterior Elementos necesarios: placa de impacto, tornillos de la placa de impacto, reforzador de la placa de impacto (opcional), tornillos de refuerzo (opcional) y destornillador (no incluido) Para instalar el panel exterior en la puerta: •...
-
Page 19: Paso 4: Instalación De La Placa De Montaje
Paso 4: Instalación de la placa de montaje Paso 5: Instalación del panel interior 1. Coloque el cable a través de la placa de montaje. Para instalar el panel interior: 2. Fije la placa de montaje en el lado interior de la puerta mediante el uso de los 1. -
Page 20: Paso 6: Instalación De La Batería
Una vez que haya emparejado correctamente el teléfono con el dispositivo Smart Lock código QR para acceder a la información sobre Smart Lock Touch & Wi-Fi, Touch & Wi-Fi, la aplicación eufy Security le solicitará que realice la calibración de la cerradura. - Page 21 Error en la calibración: el LED del botón y el LED de estado se iluminan en color Una vez configurado el código de acceso, la aplicación eufy Security le solicitará que voz “Cerrojo atascado. Vuelva a la instalación e inténtelo de nuevo”.
-
Page 22: Funcionamiento Básico
El dispositivo Smart Lock Touch & Wi-Fi ofrece una amplia gama de funciones que puede Puede abrir la puerta con un código de acceso válido, una huella digital, la aplicación eufy Security o la llave suministrada. • Adición de hasta 100 usuarios Métodos de apertura de la puerta:... - Page 23 2. Siga las instrucciones en pantalla de la aplicación eufy Security para bloquear la puerta. Opción 4: Uso del bloqueo automático Opción 3: Uso de la aplicación eufy Security 1.
-
Page 24: Especificaciones
4. El tono del dispositivo Smart Lock Touch & Wi-Fi es demasiado alto. Abra la aplicación eufy Security y empareje el teléfono con el dispositivo Smart Lock Touch 44 Español... - Page 25 CONTENU TABLE DES MATIÈRES Pour l’installation du Smart Lock Touch & Wi-Fi 47 63 Contenu Fonctionnement De Base 48 66 Présentation Du Produit Pêne dormant Montage extérieur Espaceur Montage intérieur 49 66 Premiers Pas Dépannage 52 67 Installation Du Smart Lock Consignes De Sécurité...
-
Page 26: Présentation Du Produit
Barillet Couvercle de barillet Créez un compte eufy Security et ajoutez le Smart Lock Touch & Wi-Fi à la liste des périphériques. Retirez le capot de pile et scannez le code QR à l’arrière de l’appareil pour consulter la vidéo d’installation du Smart Lock Touch & Wi-Fi. - Page 27 Préparation de la porte pour l’installation Suivez les instructions à l’écran dans la section Paramètres Wi-Fi de l’application eufy Security pour vous connecter et coupler votre téléphone avec le Smart Lock Touch & Wi-Fi. Une fois le couplage réussi, vous pouvez faire fonctionner le Smart Lock Touch &...
- Page 28 3. Si vous avez déjà une serrure, retirez-la, verrou compris. Matériel nécessaire : pêne dormant, vis du pêne dormant, tournevis (non fourni) Vis de pêne Tournevis Pêne dormant dormant INSTALLATION DU SMART LOCK TOUCH & WI-FI Étape 1 : installer le pêne dormant Pour installer le pêne dormant : 1.
- Page 29 Étape 3 : installer le montage extérieur Matériel nécessaire : Gâche, vis, renfort de gâche (facultatif ), vis de renfort (facultatif), tournevis (non fourni) Pour installer le montage extérieur dans le cadre de porte : 1. Mesurez la dimension du logement du corps et déterminez les étapes d’installation en conséquence.
- Page 30 Étape 4 : installer la plaque de montage Étape 5 : installer le montage intérieur 1. Faites passer le câble à travers la plaque de montage. installer le montage intérieur : 2. Fixez la plaque de montage sur le cadre de porte intérieur à l’aide des vis de la 1.
- Page 31 QR pour accéder aux Une fois que le Smart Lock Touch & Wi-Fi est couplé avec votre téléphone, l’application informations concernant le Smart Lock Touch & Wi-Fi, ainsi qu’au eufy Security vous invite à calibrer le verrou. 58 Français Français 59...
- Page 32 8 fois, les numéros de 1 à 8 s’allument. Une fois la serrure calibrée, l’application eufy Security vous invite à nommer votre Smart Lock Touch & Wi-Fi et définir un code d’accès. Suivez les instructions à l’écran pour établir la connexion.
-
Page 33: Fonctionnement De Base
Déverrouiller la porte Le Smart Lock Touch & Wi-Fi prend en charge de nombreuses fonctionnalités que vous pouvez configurer par le biais de l’application eufy Security. Les fonctionnalités sont Vous pouvez déverrouiller la porte en utilisant un code d’accès valide, vos empreintes présentées ci-dessous :... - Page 34 2. Suivez les instructions à l’écran sur l’application eufy Security pour verrouiller la porte. porte. Option 3 : utiliser l’application eufy Security Option 4 : utiliser le verrou automatique 1.
-
Page 35: Spécifications
4. La sonnerie du Smart Lock Touch & Wi-Fi est trop forte. Ouvrez l’application eufy Security et couplez votre téléphone avec votre Smart Lock Touch & Wi-Fi. Vous pouvez configurer le volume de sonnerie dans l’applications eufy Jeu de puces : Realtek SOC BLE faible consommation ; BT 5.0 ;... -
Page 36: Customer Service
CUSTOMER SERVICE Servicio de atención al cliente | Service Clientèle Warranty Garantía | Garantie Smart Lock Touch & Wi-Fi: 36-Month Limited Warranty Mechanical part: 36-Month Warranty Electrical Part: 18-Month Warranty +1 (800) 988 7973 Mon-Fri 9AM-5PM (PT) +44 (0) 1604 936 200 Mon-Fri 6AM-11AM (GMT) +49 (0) 69 9579 7960 Mon-Fri 6:00-11:00 Customer Support: support@eufylife.com Anker Innovations Limited...
Need help?
Do you have a question about the T8520S and is the answer not in the manual?
Questions and answers