Table of Contents
Advertisement
Quick Links
- 1 General Warnings and Safety Specifications
- 2 Installation
- 3 Machine Operation and Coffee Preparation
- 4 Dispensing Steam and Hot Water
- 5 Maintenance and Periodic Cleaning Operations
- 6 Mandatory Maintenance and Check-Up Operations
- 7 Software Programming Guide
- 8 Software Programming Guide "Barista" Programming
- Download this manual
manual
gb5
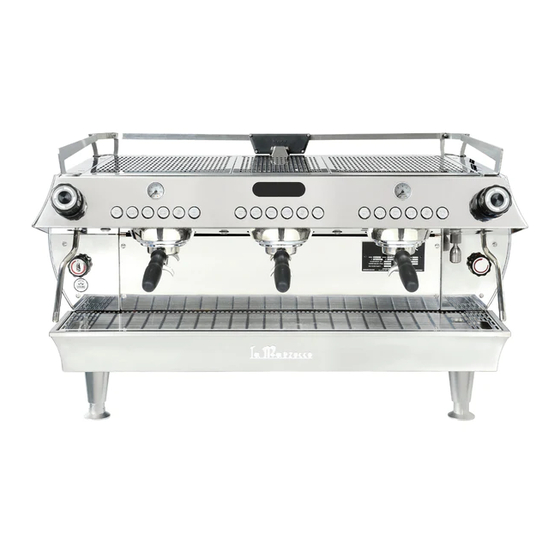
The new GB5 is designed with traditional European style and is
for those locations with an eye on classic aesthetics but that still
demand the highest performance. This new machine combines
the most advanced La Marzocco proprietary electronics with the
industry-leading temperature stability and hydraulic systems that
always ensure maximum consistency.
Advertisement
Chapters
Table of Contents

Related Manuals for La Marzocco GB5 X Series


Summary of Contents for La Marzocco GB5 X Series
- Page 1 This new machine combines the most advanced La Marzocco proprietary electronics with the industry-leading temperature stability and hydraulic systems that always ensure maximum consistency.
-
Page 2: Table Of Contents
Operating Manual V1.1 - 07/2021 MAN.25.1 Chapters La Marzocco S.r.l. page 3 1. General Warnings and Safety Specifications Via La Torre 14/H Località La Torre page 8 2. Definition of Available Models 50038 Scarperia e San Piero (Firenze) - ITALIA page 11 3. -
Page 3: General Warnings And Safety Specifications
1. General Warnings and Safety Specifications years of age) with reduced WARNING CAUTION physical, sensory or mental This machine is for professional As already mentioned in capabilities, or lack of use only and should be installed the preceding notes, the experience and knowledge, in locations where its use and manufacturer shall not be held... - Page 4 will send out specialized personnel Users are asked to read qualified authorized the enclosed warnings and authorized to perform service on personnel. cautions carefully, as they the espresso machine. 8) Incorrect installation may provide valuable information 5) Packaging (boxes, plastic cause for injury/damages to concerning safety...
- Page 5 10) Furthermore, you must inappropriate and dangerous. atmospheric agents (rain, ensure that the capacity of The manufacturer shall not be held sun, etc.); the available electrical system responsible for any damages caused • do not allow children or is suitable for the maximum by improper and/or irrational use.
- Page 6 operating in a faulty manner overheating problems, it is format on a website or breaks down, disconnect recommended that the power http://techcenter.lamarzocco. it from the electrical network supply cable be fully unfurled. com. (as described in the preceding 18) Do not obstruct air intake 21) The machine should be point) and close the water and exhaust grilles and, in...
- Page 7 10+; tubing for drainage; current not exceeding 30mA • wireless network 2.4 GHz; • 1 hose clamp. is installed. • La Marzocco app available machine 26) This machine is designed at the official stores Play been temporarily housed only for preparing coffee and Store and App Store.
-
Page 8: Definition Of Available Models
2. Definition of Available Models This operating manual refers exclusively to the following models, of our own manufacture: GB5, model AV & EE, ABR 2, 3 and 4 groups Legend Main Switch Pressure Gauge (steam boiler) Pressure Gauge (coffee boiler) Brew Groups Control Panel Group #1 Keypad... - Page 9 1) General Description minutes. Operating pressure is maintained operating pressure of 9 bar. The following The machine is built in 2, 3 and 4 coffee by temperature probe and PID controller. is a list of effective volume and power group versions and is essentially composed The steam boiler has various fittings used ratings according to the number of groups of the following parts:...
- Page 10 • Safety device, based on an expansion • Machine CE plate: type mechanical valve, with ounteracting spring adjusted to 13 bar. • Testing: Hydraulic test at 18 bar performed on ready-to-use small boilers, GN000000 GB-5 X 3AV HC 02/19 at our factory. 220-240 7783 33,8...
-
Page 11: Installation
SOLO PER 2 GRUPPI: NEMA 6-30P SOLO PER 3 E 4 GRUPPI: NEMA 6-50P 3. Installation WARNING The machine is intended to be permanently connected to fixed wiring, and it is mandatory that RATED COFFEE STEAM RATED POWER CORD TOTAL a residual current device (RCD) MODEL/SERIES GROUP... - Page 12 WARNING At each installation, the machine should be equipped with a new set of tubes for plumbing and related gaskets. RATED COFFEE STEAM RATED POWER CORD TOTAL MODEL/SERIES GROUP V/Hz POWER INPUT BOILER BOILER SIZE (mm²) WATTAGE WATTAGE WATTAGE WARNING AC220-240V/60Hz 23,7 AC208-240/60Hz...
- Page 13 WARNING WARNING WARNING Hazardous voltage disconnect In order to prevent cracks This appliance is not intended from power supply before or leakage: do not store or for use by persons (including servicing. install the Coffee machine children) with reduced physical, in places where in boiler or sensory or mental capabilities, WARNING...
- Page 14 1) Installation on the counter 2) Accessories The image below shows the recommended method to drill the hole on the counter. In order to proceed with installation, it is necessary that the following are available: • Pipes carrying drinking water with a 3/8”G (BSP) end connection;...
- Page 15 the indications given in the chapter about properly. Connect water supply Installation and in compliance with any connection of the espresso machine to local/national safety standards of the the water pump outlet using one of the location in which the machine is being supplied stainless steel braided hoses.
- Page 16 versions, secured to espresso machine via - Cable connection; 6) Waste water drain connection a strain relief connector. The espresso machine drain is to be connected by means of the included b) Water pump motor power cord reinforced plastic tubing. Connect one end This is the power supply for the water of the reinforced plastic tubing to the drain pump motor.
-
Page 17: Machine Operation And Coffee Preparation
4. Machine Operation and Coffee Preparation it. Once removed the top of the groups will CAUTION IMPORTANT be exposed. Never remove the filter holder To improve the flavor of the espresso, the Loosen the bleed screws one at a time (see temperature of the water in the coffee boiler when water is being delivered. - Page 18 Note: It may happen that the air inside the When the espresso machine is ready to the portafilter. You should allow hot water steam boiler builds up pressure (which may operate all lights on the keypads will light. to pass through the empty portafilter(s) for a be detected through the pressure gauge few seconds each time, in order to pre-heat - item 2, fig.
- Page 19 also in case the valve remains open in the 7) Controlling the brew process using volumetric (quick light brown flow). A general rule drain position (i.e. the pressure cannot programming (AV model only) is that a double dose should dispense increase to 8 bar approx.).
-
Page 20: Dispensing Steam And Hot Water
5. Dispensing Steam and Hot Water 1) Steaming milk or other liquids itself with an appropriate cloth. HOT WATER AV In order to allow for any condensed water In order to prepare milk for making in the wand to be released ALWAYS allow cappuccino with the right amount of foam, some steam to be discharged by turning on go through the following steps:... -
Page 21: Maintenance And Periodic Cleaning Operations
6. Maintenance and Periodic Cleaning Operations WARNING WARNING WARNING If the above-mentioned The machine must be installed so This machine is for professional instructions are not adhered that qualified technical presonnel use only and should be installed to the manufacturer cannot be in locations where its use and can easily access it for eventual held responsible for damage to... - Page 22 2) Cleaning filters Rinse thoroughly with clean water. Install 6) Cleaning the hot water and steam nozzles - Put 2 or 3 teaspoons of detergent powder and run hot water through each group Steam nozzles must cleaned for coffee machines in about 1/2 a litre several times with the screen installed.
-
Page 23: Commissioning And Demolition
each steam wand for at least one minute. follow these safety indications: Turn on the hot water valve for the time Disconnect the machine from the water necessary to allow the following quantities mains or interrupt the water connection of water to be brewed: via a mains tap. -
Page 24: Mandatory Maintenance And Check-Up Operations
8. Mandatory Maintenance and Check-up Operations These operations are in addition to the Maintenance and Periodic Cleaning Operations as specified in Chapter 6. The following maintenance and check-up operations sould be carried out by a qualified technician. The time required for the periodic maintenance is determinated by the quantity of daily work and/or coffee consumption. N.B. -
Page 25: Precision Scale
9. Precision Scale WARNING Legend Handle with care maximum load Drain grille 1Kg do not lift. Scale individual grid Removable drain tray WARNING The individual grid of the scale is a fragile component, handle and store with care. WARNING The height of the bottom tray is fixed. - Page 26 - To avoid contact with dirt before placing the filter holder, clean and dry the grid; - Use only original La Marzocco filters and - Please be careful during the cleaning filter holders, identified by the following...
-
Page 28: Software Programming Guide
10. Software Programming Guide “Barista” Programming La Marzocco 09:30 92.0°C page Press and hold the T3 button for 5 seconds. Menu Press B3 to Exit Group Dose Backflush Water Dose Coffee Boiler Settings INDIVIDUAL Settings Settings page 42 page 57... - Page 29 “Barista” Programming Preinfusion Barista Lights H20 Sensor - TDS Total Hardness Configure Settings Settings 000.0 ppm 000.0 ppm Gateway page 65 page 69 page 71 page 72 page 73 Not Brewing Brewing Eco Mode Barista Lights 40,0 % 100,0 % Exit page 69 page 70...
-
Page 30: Press B3 To Exit
“Technical” Programming La Marzocco 09:30 xxxxxxxxxxxx page Press and hold the T3 button for 10 seconds. Enter Password ****** page 38 Technician Menu Press B3 to Exit Language Temp Units Name Group Dose ENGLISH CELSIUS LaMarzocco Settings page 76 page 78... - Page 31 “Technical” Programming Backflush Chrono Chrono Info Type Water Dose INDIVIDUAL ENABLED DOSE Settings page 97 page 100 page 102 page 103 Steam Boiler Coffee Boiler Solenoid Test Scale Settings Settings Settings Configuration page 116 page 113 page 110 page 106 Electronics Barista Lights H20 Sensor - TDS...
- Page 32 Programming Introduction Description • This espresso machine has a CPU and many configurable settings. • Additionally, there are many feedback controls employed in this espresso machine to troubleshoot problems should they occur. • The following is a brief introduction to the controls and display and how they interact with the operator. Digital Display Digital display 2nd group coffee boiler temperature...
- Page 33 Programming AV Keypad Group 1 Back button Enter button Group 1 Accessing “T1” “T3” programming mode Forward button “T2” The keypad has two functions. The first is for control of the espresso. The second is for programming individual software parameters. The programming of the individual parameters is possible only using the buttons in the group 1 (group starting from the left).
- Page 34 Programming EE Keypad Back button Enter button “T1” “T3” Group 1 Forward button Accessing “T2” programming mode The keypad has two functions. The first is for control of the espresso. The second is for programming individual software parameters. Description Button This button is used to control the brewing of the group 1 espresso.
- Page 35 First Use Procedure Description Turning the Espresso Machine On The following is the procedure to be • Proceed checking for water connection followed for the first use of the espresso to the espresso machine. machine. • Proceed making sure you have filled the •...
- Page 36 Shut Down Procedures Description Turning the Espresso Machine Off The following is the procedure for turning • This machine has two off settings. One off power to the espresso machine. setting turns off all of the components • Please follow the procedures carefully in the espresso machine and the other to avoid any damage to the espresso turns off power to the complete espresso...
- Page 37 Accessing Programming Mode Description Programming Mode • To change the values of any parameter • Barista Programming - The parameters the operator must first enter into the contained within this level are ones programming mode. the operator can change to affect the •...
- Page 38 Accessing Programming Mode Description Programming Mode • Technical Programming - The parameters contained within this level are ones the operator can change to affect the performance of the espresso machine. 94.4 00:00 These parameters are set in the factory 95.5 95.1 their adjustment...
- Page 39 Cleaning Cycles Description Cleaning Cycles • This parameter allows the operator • The rinsing procedure is provided to give to carry out the washing of the coffee the operator more flexibility and freedom groups, in an automatic way, by running with regard to this operation.
- Page 40 Brewratio Programming (only on ABR espresso machine models) Description Brewratio The procedure for weighing the filter • To brew in brew ratio mode, set this holder either empty or filled with coffee mode by entering the software settings. powder is shown below. •...
- Page 41 Description Program Dose • This parameter allows the operator to • Once programmed, Selection program the amount of coffee (brewing Indicator remains lighted. amount) for each Selection Indicator. 00:00 • The brewing amount can be set in terms of time (sec.), pulses, mass or brewratio. Display Operating Procedure When the espresso machine is turned on, press and hold the button...
-
Page 42: Group Dose Settings
“Barista” Programming Description Program Dose • This parameter allows the operator to • It is possible to set the dose for both program the amount of coffee (brewing a short and a long shot on the same amount) for each Selection Indicator. Selection Indicator. - Page 43 “Barista” Programming Description Program Dose • This parameter allows the operator to • It is possible to set the dose for both a program the amount of coffee (brewing short and a long shot on the same key. amount) each button •...
-
Page 44: Group 1 Mode Pulses
“Barista” Programming Description Program Dose • This parameter allows the operator to • It is possible to set the dose for both program the amount of coffee (brewing a short and a long shot on the same amount) for each Selection Indicator. Selection Indicator. - Page 45 “Barista” Programming Description Program Dose • This parameter allows the operator to • It is possible to set the dose for both a program the amount of coffee (brewing short and a long shot on the same key. amount) each button •...
- Page 46 “Barista” Programming Description Program Dose • This parameter allows the operator to • It is possible to set the dose for both a program the amount of coffee (brewing short and a long shot on the same key. amount) each button •...
- Page 47 “Barista” Programming (only on ABR espresso machine models) Description Program Dose Scales • This parameter allows the operator to • For greater accuracy and consistency of view and manually change each dose for the doses, it is recommended that you each key.
- Page 48 “Barista” Programming (only on ABR espresso machine models) Description Program Dose Scales • This parameter allows the operator to • For greater accuracy and consistency of view and manually change each dose for the doses, it is recommended that you each key.
- Page 49 “Barista” Programming (only on ABR espresso machine models) Description Program Dose Scales • This parameter allows the operator to • For greater accuracy and consistency of view and manually change each dose for the doses, it is recommended that you each key.
-
Page 50: Copy Doses By Button
“Barista” Programming Description Program Dose • This parameter allows the operator to copy the doses present of each key to the others. Group Dose Settings Copy Doses By Button Display Operating Procedure When the espresso machine is turned on, press and hold the the button to access the “Barista”... - Page 51 “Barista” Programming Description Program Dose • This parameter allows the operator to copy the doses present of each key to the others. Group Dose Settings Copy Doses By Button Display Operating Procedure Press the key where you want to paste the previously copied setting. Successful programming is indicated by Push to Paste the fixed lighting of the key.
- Page 52 “Barista” Programming Description Program Dose • This parameter allows the operator to copy the doses present of each group to the others. Group Dose Settings Copy Doses By Group Display Operating Procedure When the espresso machine is turned on, press and hold the the button to access the “Barista”...
- Page 53 “Barista” Programming Description Program Dose • This parameter allows the operator to copy the doses present of each group to the others. Group Dose Settings Copy Doses By Group Display Operating Procedure Press the key where you want to paste the previously copied setting. Successful programming is indicated by Push to Paste the fixed lighting of the key.
- Page 54 “Barista” Programming Description Program Dose • This parameter allows the operator to cancel all the doses set. Group Dose Settings Reset Doses Display Operating Procedure When the espresso machine is turned on, press and hold the the button to access the “Barista” programming. 94.4 00:00 95.5...
- Page 55 “Barista” Programming Description Program Dose • This parameter allows the operator to cancel all the doses set. Group Dose Settings Reset Doses Display Operating Procedure Press T1 or T2 to continue with the programming of the other parameters. Press T2 and T3 at the same time to exit the programming mode and return to the normal use of the espresso 94.4 00:00 machine.
- Page 56 “Barista” Programming Description Program Dose • This parameter enables the operator to check of the flowmeter. Group Dose Settings Flowmeter Test Display Operating Procedure When the espresso machine is turned on, press and hold the the button to access the “Barista” programming. 94.4 00:00 95.5...
-
Page 57: Backflush Individual
“Barista” Programming Description Backflush • This parameter allows the operator • Do not perform the cleaning procedure to carry out the washing of the coffee when other groups are dispensing groups, in an automatic way, by running coffee. Group Dose multiple cleaning cycles. - Page 58 “Barista” Programming Description Backflush • This parameter allows the operator • Do not perform the cleaning procedure to carry out the washing of the coffee when other groups are dispensing groups, in an automatic way, by running coffee. Group Dose multiple cleaning cycles.
- Page 59 “Barista” Programming Description Backflush • This parameter allows the operator • Do not perform the cleaning procedure to carry out the washing of the coffee when other groups are dispensing groups, in an automatic way, by running coffee. Group Dose multiple cleaning cycles.
-
Page 60: Water Dose Enabled
“Barista” Programming Description Water Dose • This parameter allows the operator to • This feature can be enabled or disabled. program the amount of water (brewing amount) for the hot water button. Group Dose Settings Water Dose Settings Display Operating Procedure When the espresso machine is turned on, press and hold the the button to access the “Barista”... - Page 61 “Barista” Programming Description Water Dose • This parameter allows the operator to • This feature can be enabled or disabled. program the amount of water (brewing amount) for the hot water button. Group Dose Settings Water Dose Settings Display Operating Procedure Desired dose can be programmed using hot water button.
- Page 62 “Barista” Programming Description Water Dose • This parameter allows the operator to • This feature can be enabled or disabled. program the amount of water (brewing amount) for the hot water button. Group Dose Settings Water Dose Settings Display Operating Procedure Water Dose Press T1 or T2 until the display shows the exit menu, press the T3 button to return to the “Barista”...
-
Page 63: Enabled
“Barista” Programming Description Coffee Boiler • This parameter allows the operator to • This parameter allows the operator to enable/disable the coffee boiler. program the coffee boiler temperature. Each group can have a different Group Dose programming. Settings Coffee Boiler Settings Display Operating Procedure... -
Page 64: Cb1 Temperature
“Barista” Programming Description Coffee Boiler • This parameter allows the operator to • This parameter allows the operator to enable/disable the coffee boiler. program the coffee boiler temperature. Each group can have a different Group Dose programming. Settings Coffee Boiler Settings Display Operating Procedure... - Page 65 “Barista” Programming Description Pre-Infusion or Pre-Brewing • This parameter allows the operator to pre-brewing cycle; during this time the program the time of pre-brewing of pump is active. Once the pre-brewing water with the coffee. Each group can cycle is over, the normal brewing cycle Group Dose have a different programming.
-
Page 66: Exit
“Barista” Programming Description Pre-Infusion or Pre-Brewing • This parameter allows the operator to pre-brewing cycle; during this time the program the time of pre-brewing of pump is active. Once the pre-brewing water with the coffee. Each group can cycle is over, the normal brewing cycle Group Dose have a different programming. - Page 67 “Barista” Programming Description Cup Warmer • This parameter allows the operator to • This function is displayed only on the enable or disable the cups heating models of espresso machine equipped function. with this accessory. Group Dose Settings Cup Warmer ENABLED Display Operating Procedure...
- Page 68 “Barista” Programming Description Cup Warmer • This parameter allows the operator to • This function is displayed only on the enable or disable the cups heating models of espresso machine equipped function. with this accessory. Group Dose Settings Cup Warmer ENABLED Display Operating Procedure...
- Page 69 “Barista” Programming Description Barista Lights • This parameter allows the operator to • This parameter allows the operator to set adjust the brightness of the barista up the brightness to be maintained in lights. case of a temporary non utilization of Group Dose the espresso machine.
- Page 70 “Barista” Programming Description Barista Lights • This parameter allows the operator to • This parameter allows the operator to set adjust the brightness of the barista up the brightness to be maintained in lights. case of a temporary non utilization of Group Dose the espresso machine.
- Page 71 “Barista” Programming Description Water Quality • This parameter allows the operator to view the TDS and water hardness values that are measured by the water probe at Group Dose the inlet of the coffee machine. Settings H20 Sensor - TDS 000.0 ppm Display Operating Procedure...
- Page 72 “Barista” Programming Description Water Quality • This parameter allows the operator to view the TDS and water hardness values that are measured by the water probe at Group Dose the inlet of the coffee machine. Settings Total Hardness 000.0 ppm Display Operating Procedure When the espresso machine is turned on, press and hold the the button...
- Page 73 “Barista” Programming Description Gateway • This parameter allows the operator to connect the coffee machine to the WiFi connection. Group Dose Settings Configure Gateway Display Operating Procedure When the espresso machine is turned on, press and hold the the button to access the “Barista”...
- Page 74 “Barista” Programming Description Gateway • This parameter allows the operator to connect the coffee machine to the WiFi connection. Group Dose Settings Configure Gateway Display Operating Procedure Press T1 or T2 to continue with the programming of the other parameters. Press T2 and T3 at the same time to exit the programming mode and return to the normal use of the espresso 94.4 00:00...
- Page 75 “Barista” Programming Description Exit Menu • This parameter allows the operator to exit the “Barista” programming and return to the normal use of the espresso Group Dose machine. Settings Menu Press B3 to Exit Display Operating Procedure Press the T3 button to exit the “Barista” programming and return to the normal use of the espresso Menu machine.
-
Page 76: Language English
“Technical” Programming Description Language • This parameter allows the technician to change the language of the display. Enter Password ****** Language ENGLISH Display Operating Procedure When the espresso machine is turned on, press and hold the button . After about 10 seconds the following 94.4 00:00 95.5... - Page 77 “Technical” Programming Description Language • This parameter allows the technician to change the language of the display. Enter Password ****** Language ENGLISH Display Operating Procedure To exit the menu move between the parameters using the buttons T1 and T2 until the exit menu is displayed. Menu Press the T3 button to exit the menu and return to the normal use of the espresso machine.
- Page 78 “Technical” Programming Description Temperature Measurement Units • This parameter allows the technician to change the temperature display from degrees Celsius to degrees Fahrenheit Enter Password and vice versa. ****** Temp Units CELSIUS Display Operating Procedure After accessing the “Technical” programming menu and entering the password, use the buttons T1 and T2 Enter Password until the following screen is displayed.
- Page 79 “Technical” Programming Description Temperature Measurement Units • This parameter allows the technician to change the temperature display from degrees Celsius to degrees Fahrenheit Enter Password and vice versa. ****** Temp Units CELSIUS Display Operating Procedure Alternatively, you can exit the “Technical” programming and return to the normal use of the espresso machine 94.4 00:00 by pressing T2 and T3 at the same time.
-
Page 80: Name Lamarzocco
“Technical” Programming Description Name • This parameter allows the technician to • The user name is displayed continuously program a 16 character user name. on the display on the second line. Enter Password ****** Name LaMarzocco Display Operating Procedure After accessing the “Technical” programming menu and entering the password, use the buttons T1 and T2 Enter Password until the following screen is displayed. - Page 81 “Technical” Programming Description Name • This parameter allows the technician to • The user name is displayed continuously program a 16 character user name. on the display on the second line. Enter Password ****** Name LaMarzocco Display Operating Procedure Alternatively, you can exit the “Technical” programming and return to the normal use of the espresso machine 94.4 00:00 by pressing T2 and T3 at the same time.
- Page 82 “Technical” Programming Description Program Dose • This parameter allows the operator to • It is possible to set the dose for both program the amount of coffee (brewing a short and a long shot on the same amount) for each Selection Indicator. Selection Indicator.
- Page 83 “Technical” Programming Description Program Dose • This parameter allows the operator to • It is possible to set the dose for both a program the amount of coffee (brewing short and a long shot on the same key. amount) each button •...
- Page 84 “Technical” Programming Description Program Dose • This parameter allows the technician to • It is possible to set the dose for both program the amount of coffee (brewing a short and a long shot on the same amount) for each Selection Indicator. Selection Indicator.
- Page 85 “Technical” Programming Description Program Dose • This parameter allows the technician to • It is possible to set the dose for both a program the amount of coffee (brewing short and a long shot on the same key. amount) each button •...
- Page 86 “Technical” Programming Description Program Dose • This parameter allows the technician to • It is possible to set the dose for both a program the amount of coffee (brewing short and a long shot on the same key. amount) each button •...
- Page 87 “Technical” Programming (only on ABR espresso machine models) Description Program Dose Scales • This parameter allows the technician to • For greater accuracy and consistency of view and manually change each dose for the doses, it is recommended that you each key.
- Page 88 “Technical” Programming (only on ABR espresso machine models) Description Program Dose Scales • This parameter allows the technician to • For greater accuracy and consistency of view and manually change each dose for the doses, it is recommended that you each key.
- Page 89 “Technical” Programming (only on ABR espresso machine models) Description Program Dose Scales • This parameter allows the technician to • For greater accuracy and consistency of view and manually change each dose for the doses, it is recommended that you each key.
- Page 90 “Technical” Programming (only on ABR espresso machine models) Description Program Dose • This parameter allows the technician to copy the doses present of each key to the others. Group Dose Settings Copy Doses By Button Display Operating Procedure After accessing the “Technical” programming menu and entering the password, use the buttons T1 and T2 Enter Password until the following screen is displayed.
- Page 91 “Technical” Programming (only on ABR espresso machine models) Description Program Dose • This parameter allows the technician to copy the doses present of each key to the others. Group Dose Settings Copy Doses By Button Display Operating Procedure Press the key where you want to paste the previously copied setting. Successful programming is indicated by Push to Paste the fixed lighting of the key.
- Page 92 “Technical” Programming Description Program Dose • This parameter allows the technician to copy the doses present of each group to the others. Group Dose Settings Copy Doses By Group Display Operating Procedure After accessing the “Technical” programming menu and entering the password, use the buttons T1 and T2 Enter Password until the following screen is displayed.
- Page 93 “Technical” Programming Description Program Dose • This parameter allows the technician to copy the doses present of each group to the others. Group Dose Settings Copy Doses By Group Display Operating Procedure Press the key where you want to paste the previously copied setting. Successful programming is indicated by Push to Paste the fixed lighting of the key.
- Page 94 “Technical” Programming Description Program Dose • This parameter allows the technician to cancel all the doses set. Group Dose Settings Reset Doses Display Operating Procedure After accessing the “Technical” programming menu and entering the password, use the buttons T1 and T2 Enter Password until the following screen is displayed.
- Page 95 “Technical” Programming Description Program Dose • This parameter allows the technician to cancel all the doses set. Group Dose Settings Reset Doses Display Operating Procedure Press T1 or T2 to continue with the programming of the other parameters. Press T2 and T3 at the same time to exit the programming mode and return to the normal use of the espresso 94.4 00:00 machine.
- Page 96 “Technical” Programming Description Program Dose • This parameter enables the technician to check of the flowmeter. Group Dose Settings Flowmeter Test Display Operating Procedure When the espresso machine is turned on, press and hold the the button to access the “Barista” programming. 94.4 00:00 95.5...
- Page 97 “Technical” Programming Description Backflush • This parameter allows the operator • Do not perform the cleaning procedure to carry out the washing of the coffee when other groups are dispensing groups, in an automatic way, by running coffee. Enter Password multiple cleaning cycles.
- Page 98 “Technical” Programming Description Backflush • This parameter allows the operator • Do not perform the cleaning procedure to carry out the washing of the coffee when other groups are dispensing groups, in an automatic way, by running coffee. Enter Password multiple cleaning cycles.
- Page 99 “Technical” Programming Description Backflush • This parameter allows the operator • Do not perform the cleaning procedure to carry out the washing of the coffee when other groups are dispensing groups, in an automatic way, by running coffee. Enter Password multiple cleaning cycles.
- Page 100 “Technical” Programming Description Crono Function • When enabled, this parameter displays a • If enabled, the Chrono function is timer that times each shot. permanently displayed during brewing, • The timer is reset each time a button on while during wait state it alternates with Enter Password the keypad is pressed.
- Page 101 “Technical” Programming Description Crono Function • When enabled, this parameter displays a • If enabled, the Chrono function is timer that times each shot. permanently displayed during brewing, • The timer is reset each time a button on while during wait state it alternates with Enter Password the keypad is pressed.
- Page 102 “Technical” Programming Description Crono Function • When enabled, this parameter displays a • If enabled, the Chrono function is timer that times each shot. permanently displayed during brewing, • The timer is reset each time a button on while during wait state it alternates with Enter Password the keypad is pressed.
- Page 103 “Technical” Programming Description Water Dose • This parameter allows the operator to • This feature can be enabled or disabled. program the amount of water (brewing amount) for the hot water button. Enter Password ****** Water Dose Settings Display Operating Procedure After accessing the “Technical”...
- Page 104 “Technical” Programming Description Water Dose • This parameter allows the operator to • This feature can be enabled or disabled. program the amount of water (brewing amount) for the hot water button. Enter Password ****** Water Dose Settings Display Operating Procedure Desired dose can be programmed using hot water button.
- Page 105 “Technical” Programming Description Water Dose • This parameter allows the operator to • This feature can be enabled or disabled. program the amount of water (brewing amount) for the hot water button. Enter Password ****** Water Dose Settings Display Operating Procedure Water Dose Press the T3 button to return to the “Technical”...
- Page 106 “Technical” Programming (only on ABR espresso machine models) Description Program Scales • This parameter enables the technician to set some scale parameters like: Enabling/disabling offset Enter Password parameter; ****** - Setting the weight reading time; - Calibrating the scales; Scale - Updating the scale software.
- Page 107 “Technical” Programming (only on ABR espresso machine models) Description Program Scales • This parameter enables the technician to set some scale parameters like: Enabling/disabling offset Enter Password parameter; ****** - Setting the weight reading time; - Calibrating the scales; Scale - Updating the scale software.
- Page 108 “Technical” Programming (only on ABR espresso machine models) Description Program Scales • This parameter enables the technician to set some scale parameters like: Enabling/disabling offset Enter Password parameter; ****** - Setting the weight reading time; - Calibrating the scales; Scale - Updating the scale software.
- Page 109 “Technical” Programming (only on ABR espresso machine models) Description Program Scales • This parameter enables the technician to set some scale parameters like: Enabling/disabling offset Enter Password parameter; ****** - Setting the weight reading time; - Calibrating the scales; Scale - Updating the scale software.
- Page 110 “Technical” Programming Description Solenoid Test • This parameter allows the technician to verify the proper work of all solenoid valves. Enter Password ****** Solenoid Test Settings Display Operating Procedure After accessing the “Technical” programming menu and entering the password, use the buttons T1 and T2 Enter Password until the following screen is displayed.
- Page 111 “Technical” Programming Description Solenoid Test • This parameter allows the technician to verify the proper work of all solenoid valves. Enter Password ****** Solenoid Test Settings Display Operating Procedure Test Hot Water Solenoid Press the T3 button to start verifying the proper work of hot water solenoid valve. Testing Solenoid ...
- Page 112 “Technical” Programming Description Solenoid Test • This parameter allows the technician to verify the proper work of all solenoid valves. Enter Password ****** Solenoid Test Settings Display Operating Procedure Press T1 or T2 until the display shows the exit menu, press the T3 button to return to the “Technical” Solenoid Test programming.
- Page 113 “Technical” Programming Description though the temperature of the boiler Coffee Boiler may vary slightly, the temperature of the • This parameter enables the technician water exiting the group is constant. to set various parameters of the coffee • To properly calibrate the temperature boiler.
- Page 114 “Technical” Programming Description Coffee Boiler • The OFFSET parameter is used to can cause unexpected results. calibrate the coffee boiler temperature • It is important to write down this value system to ensure the display temperature before making changes to be sure you Enter Password accurately represents the temperature can return to the factory programming if...
- Page 115 “Technical” Programming Description Coffee Boiler • The OFFSET parameter is used to can cause unexpected results. calibrate the coffee boiler temperature • It is important to write down this value system to ensure the display temperature before making changes to be sure you Enter Password accurately represents the temperature can return to the factory programming if...
- Page 116 “Technical” Programming Description Steam Boiler • This parameter enables the technician Temperature Pressure to set various parameters of the steam 247°F/119°C 1.0 bar boiler. Enter Password • The temperature of saturated water is 260°F/127°C 1.5 bar ****** proportional to the pressure inside the Steam Boiler.
- Page 117 “Technical” Programming Description Steam Boiler • The parameter filling WITH PUMP allows process can reduce the overall dispens- the technician to select the activation ing pressure in the brew boiler. of the water pump during the automatic • During the auto-fill cycle, if a brew Enter Password filling cycle of the service boiler.
- Page 118 “Technical” Programming Description Steam Boiler valve has triggered disable the function. boiler, discharging about one half of the • Should the safety valve fail to trigger water contained in the boiler. within approximately one minute of the • This procedure is recommended in case Enter Password temperature reaching 140°C, disable the machine should remain inactive for...
- Page 119 “Technical” Programming Description Steam Boiler Enter Password ****** Steam Boiler Settings Display Operating Procedure Press Water Button Press the hot water button to start draining the water contained in the steam boiler. Press the T3 button when Enter when Empty the boiler is empty, wait for refilling completion.
- Page 120 “Technical” Programming Description Steam Boiler Enter Password ****** Steam Boiler Settings Display Operating Procedure To exit the menu move between the parameters using the buttons T1 and T2 until the exit menu is displayed. Menu Press the T3 button to exit the menu and return to the normal use of the espresso machine. Press B3 to Exit Alternatively, you can exit the “Technical”...
- Page 121 “Technical” Programming Description Steam Boiler • The parameter “Level Sensit.” allows the • The black connection cable corresponds technician to select the probe sensitivity to the working level probe. for steam boiler filling according to water • The red connection cable corresponds to Enter Password hardness.
- Page 122 “Technical” Programming Description Steam Boiler • The parameter “Level Sensit.” allows the • The black connection cable corresponds technician to select the probe sensitivity to the working level probe. for steam boiler filling according to water • The red connection cable corresponds to Enter Password hardness.
- Page 123 “Technical” Programming Description Pre-Infusion or Pre-Brewing • This parameter allows the operator to pre-brewing cycle; during this time the program the time of pre-brewing of pump is active. Once the pre-brewing water with the coffee. Each group can cycle is over, the normal brewing cycle Enter Password have a different programming.
- Page 124 “Technical” Programming Description Pre-Infusion or Pre-Brewing • This parameter allows the operator to pre-brewing cycle; during this time the program the time of pre-brewing of pump is active. Once the pre-brewing water with the coffee. Each group can cycle is over, the normal brewing cycle Enter Password have a different programming.
-
Page 125: Cup Warmer Settings
“Technical” Programming Description Cup Warmer • This parameter allows the technician • This parameter allows the technician to to enable or disable the cups heating select the operating of the cup warmer function. by time or by button on the control Enter Password •... - Page 126 “Technical” Programming Description Cup Warmer • This parameter allows the technician • This parameter allows the technician to to enable or disable the cups heating select the operating of the cup warmer function. by time or by button on the control Enter Password •...
-
Page 127: Auto On/Off Settings
“Technical” Programming Description Auto ON/OFF • This parameter allows the technician to • This feature also allows the espresso program the espresso machine to turn on machine to remain in the off condition at a preset time and turn off at a preset for one repeating closed day. - Page 128 “Technical” Programming Description Auto ON/OFF • This parameter allows the technician to • This feature also allows the espresso program the espresso machine to turn on machine to remain in the off condition at a preset time and turn off at a preset for one repeating closed day.
- Page 129 “Technical” Programming Description Auto ON/OFF • This parameter allows the technician to • This feature also allows the espresso program the espresso machine to turn on machine to remain in the off condition at a preset time and turn off at a preset for one repeating closed day.
-
Page 130: Current Date 19 July 2021
“Technical” Programming Description Calendar • This parameter allows the user to set the day, month and year. Enter Password ****** Current Date 19 JULY 2021 Display Operating Procedure After accessing the “Technical” programming menu and entering the password, use the buttons T1 and T2 Enter Password until the following screen is displayed. - Page 131 “Technical” Programming Description Clock Adjust • This parameter allows the user to set the • There are 4 changeable values within time of day and the day of the week. this parameter: • This parameter is used to display time •...
- Page 132 “Technical” Programming Description Clock Adjust • This parameter allows the user to set the • There are 4 changeable values within time of day and the day of the week. this parameter: • This parameter is used to display time •...
-
Page 133: Eco Mode Settings
“Technical” Programming Description ECO Mode • This parameter allows the technician to • It is possible to set this parameter also set up a temperature to be maintained during the normal operation of the in case of a temporary non utilization of machine by pressing T1 and T2 at the Enter Password the espresso machine. - Page 134 “Technical” Programming Description ECO Mode • This parameter allows the technician to • It is possible to set this parameter also set up a temperature to be maintained during the normal operation of the in case of a temporary non utilization of machine by pressing T1 and T2 at the Enter Password the espresso machine.
- Page 135 “Technical” Programming Description Filter Alarm • This parameter enables the technician • A value of 0 (zero) disables the filter to program an alarm that will alert the alarm parameter. user about the need for maintenance or • This feature can be enabled or disabled. Enter Password replacement of the water filter.
- Page 136 “Technical” Programming Description Filter Alarm • This parameter enables the technician • A value of 0 (zero) disables the filter to program an alarm that will alert the alarm parameter. user about the need for maintenance or • This feature can be enabled or disabled. Enter Password replacement of the water filter.
- Page 137 “Technical” Programming Description Filter Alarm • This parameter enables the technician • A value of 0 (zero) disables the filter to program an alarm that will alert the alarm parameter. user about the need for maintenance or • This feature can be enabled or disabled. Enter Password replacement of the water filter.
- Page 138 “Technical” Programming Description Dose Counter • This parameter allows the technician • This parameter displays different values: to review the total doses dispensed for • Total steaming doses; each button. • Total purges doses; Enter Password • Total small doses; ****** •...
-
Page 139: Coffee Dose Counter
“Technical” Programming Description Coffee Dose Counter • This parameter allows the technician • This parameter displays different values: to review the total doses dispensed for • Total coffee doses; each button. • Coffee doses for each button; Enter Password • Hot water doses. - Page 140 “Technical” Programming Description Coffee Dose Counter • This parameter allows the technician • This parameter displays different values: to review the total doses dispensed for • Total coffee doses; each button. • Coffee doses for each button; Enter Password • Hot water doses.
- Page 141 “Technical” Programming Description Electronics • This parameter allows the technician to display the hardware and firmware version for all the electronic boards Enter Password installed on the espresso machine. ****** Electronics Settings Display Operating Procedure After accessing the “Technical” programming menu and entering the password, use the buttons T1 and T2 Enter Password until the following screen is displayed.
- Page 142 “Technical” Programming Description Electronics • This parameter allows the technician to display the hardware and firmware version for all the electronic boards Enter Password installed on the espresso machine. ****** Electronics Settings Display Operating Procedure 24V Universal Using the buttons T1 and T2 to display the hardware and firmware version for the Universal Board. HW0 FW0.6.0 G1 Scale Using the buttons T1 and T2 to display the hardware and firmware version for the Scale.
- Page 143 “Technical” Programming Description Electronics • This parameter allows the technician to display the hardware and firmware version for all the electronic boards Enter Password installed on the espresso machine. ****** Electronics Settings Display Operating Procedure Press T1 or T2 to continue with the programming of the other parameters. To exit the menu move between the parameters using the buttons T1 and T2 until the exit menu is displayed.
- Page 144 “Technical” Programming Description Barista Lights • This parameter allows the technician • This parameter allows the operator to set to adjust the brightness of the barista up the brightness to be maintained in lights. case of a temporary non utilization of Enter Password the espresso machine.
- Page 145 “Technical” Programming Description Barista Lights • This parameter allows the technician • This parameter allows the operator to set to adjust the brightness of the barista up the brightness to be maintained in lights. case of a temporary non utilization of Enter Password the espresso machine.
- Page 146 “Technical” Programming Description Water Quality • This parameter allows the operator to view the TDS and water hardness values that are measured by the water probe at Enter Password the inlet of the coffee machine. ****** H20 Sensor - TDS 000.0 ppm Display Operating Procedure...
- Page 147 “Technical” Programming Description Water Quality • This parameter allows the operator to view the TDS and water hardness values that are measured by the water probe at Enter Password the inlet of the coffee machine. ****** Total Hardness 000.0 ppm Display Operating Procedure After accessing the “Technical”...
- Page 148 “Technical” Programming Description Gateway • This parameter allows the operator to connect the coffee machine to the WiFi connection. Enter Password ****** Configure Gateway Display Operating Procedure After accessing the “Technical” programming menu and entering the password, use the buttons T1 and T2 Enter Password until the following screen is displayed.
- Page 149 “Technical” Programming Description Save and Load USB • This parameter allows the technician to load some guide profiles from the USB pendrive. Enter Password ****** Save and Load USB Settings Display Operating Procedure After accessing the “Technical” programming menu and entering the password, use the buttons T1 and T2 Enter Password until the following screen is displayed.
- Page 150 “Technical” Programming Description Save and Load USB • This parameter allows the technician to load some guide profiles from the USB pendrive. Enter Password ****** Save and Load USB Settings Display Operating Procedure Settings Confirmation message: all settings have been successfully loaded. Successfully Loaded Save Barista Press the T3 button to enter the menu.
- Page 151 “Technical” Programming Description Save and Load USB • This parameter allows the technician to load some guide profiles from the USB pendrive. Enter Password ****** Save and Load USB Settings Display Operating Procedure Save Technician Press the T3 button to enter the menu. Settings to USB Insert USB Key Enter to Exit...
- Page 152 “Technical” Programming Description Save and Load USB • This parameter allows the technician to load some guide profiles from the USB pendrive. Enter Password ****** Save and Load USB Settings Display Operating Procedure Press T1 or T2 to continue with the programming of the other parameters. To exit the menu move between the parameters using the buttons T1 and T2 until the exit menu is displayed.
- Page 153 “Technical” Programming Description Reset • This parameter allows the technician to • It is possible to reset the settings you reset all the values returning to initial made in the “Barista” programming or factory settings. the settings you made in the “Technical” Enter Password programming.
- Page 154 “Technical” Programming Description Reset • This parameter allows the technician to • It is possible to reset the settings you reset all the values returning to initial made in the “Barista” programming or factory settings. the settings you made in the “Technical” Enter Password programming.
-
Page 155: First Startup Enabled
“Technical” Programming Description First Startup • This parameter allows the technician to enable/disable first startup procedure. Enter Password ****** First Startup ENABLED Display Operating Procedure After accessing the “Technical” programming menu and entering the password, use the buttons T1 and T2 Enter Password until the following screen is displayed. -
Page 156: Update Firmware (Iot)
“Technical” Programming Description Update Firmware • This parameter allows the technician to update the control unit of the espresso machine via a USB Pendrive. Enter Password ****** Update Firmware Display Operating Procedure After accessing the “Technical” programming menu and entering the password, use the buttons T1 and T2 Enter Password until the following screen is displayed. - Page 157 “Technical” Programming Description Exit Menu • This parameter allows the technician to exit the “Technical” programming and return to the normal use of the espresso Enter Password machine. ****** Menu Press B3 to Exit Display Operating Procedure Menu Press the T3 button to exit the “Technical” programming and return to the normal use of the espresso machine. Press B3 to Exit...
Need help?
Do you have a question about the GB5 X Series and is the answer not in the manual?
Questions and answers