
Subscribe to Our Youtube Channel
Related Manuals for Toshiba SD-2550A


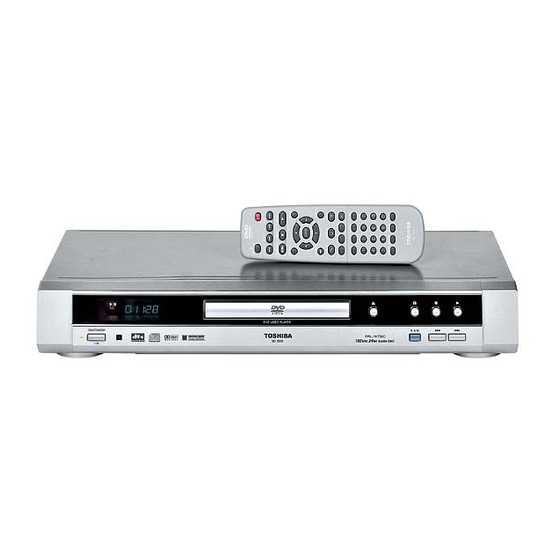
Summary of Contents for Toshiba SD-2550A
- Page 1 FILE NO. 810-200207 SERVICE MANUAL DVD VIDEO PLAYER SD-2550A SD-2550H SD-2550T Jun., 2002...
- Page 2 LASER BEAM CAUTION LABEL When the power supply is being turned on, you may not remove this laser cautions label. If it removes, radiation of a laser may be recceived. PREPARATION OF SERVICING Pickup Head consists of a laser diode that is very susceptible to external static electricity. Although it operates properly after replacement, if it was subject to electrostatic discharge during replacement, its life might be shortened.
-
Page 3: Table Of Contents
CONTENTS SECTION 1 GENERAL DESCRIPTIONS 3. TROUBLESHOOTING ............1-37 1. OPERATING INSTRUCTIONS ..........1-1 3-1. Main Circuit ............... 1-37 2. LOCATION OF MAIN PARTS AND 3-1-1. Servo System ..............1-37 MECHANISM PARTS ............. 1-30 3-1-2. Location Diagram of Servo Test Point ......1-44 2-1. - Page 4 This page is not printed.
-
Page 5: Operating Instructions
SECTION 1 GENERAL DESCRIPTIONS 1. OPERATING INSTRUCTIONS (SD-2550A/H) - Page 14 1-10...
- Page 15 1-11...
- Page 16 1-12...
- Page 17 1-13...
- Page 18 1-14...
- Page 19 1-15...
- Page 20 1-16...
- Page 21 1-17...
- Page 22 1-18...
- Page 23 1-19...
- Page 24 1-20...
- Page 25 1-21...
- Page 26 1-22...
- Page 27 1-23...
- Page 28 1-24...
- Page 29 1-25...
- Page 30 1-26...
- Page 31 1-27...
- Page 32 1-28...
- Page 33 1-29...
-
Page 34: Location Of Main Parts And Mechanism Parts
2. LOCATION OF MAIN PARTS AND MECHANISM PARTS 2-1. Location of Main Parts Disc motor PC board Feed motor PC board EU02 Power supply PC board EU03 Front display PC board Loading motor PC board EU01 Main PC board Fig. 1-2-1 1-30... -
Page 35: Location Of Mechanism Parts
2-2. Location of Mechanism Parts 2-2-1. Type A Tray Clamper stay Fig. 1-2-2 Mechanism chassis assembly (Top side) Loading motor PC board Mechanism chassis Fig. 1-2-3 Mechanism chassis assembly (Bottom side) 1-31... - Page 36 Loading belt Gear Gear Gear Loading motor Clamper Cam Slider Fig. 1-2-4 Mechanism chassis assembly (Internal side) 1-32...
- Page 37 Disc motor Rack gear assembly Pickup assembly Gear A Gear B assembly Sub chassis Fig. 1-2-5 Pickup mechanism chassis assembly (Top side) Front damper Front damper Feed motor Feed motor PC board Rear damper Rear damper Fig. 1-2-6 Pickup mechanism chassis assembly (Bottom side) 1-33...
-
Page 38: Type B
2-2-2. Type B Tray Clamper stay Fig. 1-2-7 Mechanism chassis assembly (Top side) Loading motor PC board Mechanism chassis Fig. 1-2-8 Mechanism chassis assembly (Bottom side) 1-34... - Page 39 Loading belt Gear Kick lever Gear Gear Loading motor Disc motor Cam Slider Fig. 1-2-9 Mechanism chassis assembly (Internal side) 1-35...
- Page 40 Front damper Front damper Rack gear assembly Pickup assembly Gear A Gear B assembly Sub chassis Rear damper Rear damper Fig. 1-2-10 Pickup mechanism chassis assembly (Top side) Feed motor Feed motor PC board Fig. 1-2-11 Pickup mechanism chassis assembly (Bottom side) 1-36...
- Page 41 3. TROUBLESHOOTING 3-1. Main Circuit 3-1-1. Servo System (1) Initial Operation after Power ON Power ON Send each LSI hard RST command and initial command. Pickup head is positioned at transmission initial position. Is tray closed? Pin 5 of CN502, TCLS=L Tray close operation Pin 126 of IC605: LDMP = H/L...
- Page 42 The pickup transmission initial operation is carried out to determine the initial position by transmitting the pickup to the innermost position once (start-limit switch (pin 4 of CN503) Pickup (P.U.) transmission initial develops "L".) and to the external direction at low speed operation does not occur.
- Page 43 Disc kind misjudgement (Initial setting is NG.) Are FE and RFSB signals for each disc normal? Check IC502. Lens cleaning. Check peripheral Replace pickup head. circuit of IC605. Fig. 1-3-4 Laser operating current DVD Iop 20mA 35mA 60mA 20mA 45mA 80mA CD Iop Check laser operating current.
- Page 44 (2) Picture appears (PLAY) PLAY Disc motor (D.M.) forced accelleration (500 ms) Focus search Repeat three times. Is forcus servo CLV servo ON. Tracking balance adjustment Tracking servo ON. Focus gain adjustment Automatic adjustment is carried out when a disc is replaced after power ON.
- Page 45 Disc motor (D.M.) does not rotate. Does pin 117 of IC401 (TP409) PLCK oscillate around 10 MHz ? Check peripheral Check peripheral circuits circuit of IC402. of IC402. Check disc motor and wiring. Fig. 1-3-10 Focus servo is NG. Focus servo ON signal waveform Are FE, RFSB, FE signal...
- Page 46 Tracking servo is NG. Is TE signal normal? Check peripheral Check IC502. circuit of IC605. Fig. 1-3-13 Signal waveform at Signal waveform at tracking servo ON (CD) tracking servo ON (DVD) TE signal Pin 151 (TP406) of IC401 1.65V RFRP signal Pin 153 (TP408) of IC401 Search ON (SRCH) Pin 38 (TP411) of IC401...
- Page 47 Does pulse of Disc playback is NG (DVD). L = 1.65V and H = 3.3V develop at pin 131 and L = 0V and H = 1.65V develop at pin 132 of IC401? Is PLL locked? Check peripheral circuits (Refer to waveforms.) of IC401 and IC605.
- Page 48 3-1-2. Location Diagram of Servo Test Point CN501 CN503 CN701 IC503 IC401 IC502 CN502 IC606 IC301 IC605 CN603 IC304 CN601 Fig. 1-3-21 1-44...
-
Page 49: Replacement Of Mechanical Parts (Type A)
SECTION 2 PART REPLACEMENT AND ADJUSTMENT PROCEDURES CAUTIONS BEFORE STARTING SERVICING Electronic parts are susceptible to static electricity and may easily damaged, so do not forget to take a proper grounding treatment as required. Many screws are used inside the unit. To prevent missing, dropping, etc. of the screws, always use a magnetized screw- driver in servicing. -
Page 50: Front Panel
1-1-4. Tray <Tray Panel Removal> 1. Pull out the tray (1) towards you until it stops. 1. Eject the tray (1). (Refer to item 1-1-2.) 2. Lift up claw A with a minus screwdriver, and pull out 2. Twist the tray panel (2) a little in the arrow A direction the tray (1) towards you, then remove the tray (1). -
Page 51: Pc Board Replacement
1-2-2. Power PC board 1-2. PC Board Replacement 1. Peel off two tapes (1) and remove the connector (2). 1-2-1. Main PC Board 2. Remove six screws (3) and remove the power supply Note: PC board (4). • Before removing the main PC board (4), be sure to short-circuit the laser diode output land. -
Page 52: Front Pc Board
1-2-3. Front PC Board 1-3. Mechanism Parts 1. Remove the front panel. (Refer to item 1-1-3.) 1-3-1. Mechanism Chassis Assembly 2. Remove nine screws (1) and remove the front display Note: PC board (2). • When removing the mechanism chassis assembly (3), be sure to short-circuit the laser diode output land Front display PC board (2) - Page 53 2. REPLACEMENT OF MECHANICAL PARTS (TYPE B) 2-1. Cabinet Replacement <Mounting > 1. The spring for tray side pressure is inserted into the 2-1-1. Top Cover portion “A”. (Refer to Fig. 2-1-12.) 1. Remove seven screws (1) and remove the top cover (2). 2.
- Page 54 2-1-3. Tray Panel <Tray Ejection> Tray (1) 1. Slide the slider (2) of the mechanism chassis assembly (1) with a screwdriver, etc. in the arrow direction, so that the tray (3) is ejected. Note: Tray panel (2) • Take care not to damage the pickup and other parts. Tray (1) Claw Tray...
- Page 55 • Confirm that the mark of the gear matches with the 2-2. PC Board Replacement triangle mark on the reverse side of the tray in the tray 2-2-1. Main PC Board close status. (The gear is rotated with the slider locks.) Note: (Refer to Fig.
- Page 56 2-2-2. Power PC board 2-3. Mechanism Parts 1. Peel off two tapes (1) and remove the connector (2). 2-3-1. Mechanism Chassis Assembly 2. Remove six screws (3) and remove the power supply Note: PC board (4). • When removing the mechanism chassis assembly (3), Screws (3) be sure to short-circuit the laser diode output land before removing the connector and the flexible cables.
- Page 57 SECTION 4 PARTS LIST SAFETY PRECAUTION The parts identified by ! ( ) mark are critical for safety. Replace only with part number specified. The mounting position of replacement is to be identical with originals. The substitute replacement parts which do not have the same safety characteristics as specified in the parts list may create shock, fire or other hazards.
- Page 58 4. EXPLODED VIEWS 4-1. Packing Assembly ZF23 (SD-2550A) ZF23 ZF30 (SD-2550T) ZF10 ZF20 ZF01 ZK04 ZF23 (SD-2550H) ZK02 ZK01 ZK02 Note: The shape of the packing material is sometimes different. Fig. 4-4-1...
- Page 59 4-2. Chassis Assembly (Type A) ZG60 ZG60 BID 3.0x6.0 BID 3.0x6.0 ZG27 ZG63 ZG20 ZG67 ZG64 ZG60 BID 3.0x6.0 EU02 ZG67 W503 ZG64 W502 ZG71 EU01 W501 ZG60 BID 3.0x6.0 ZG71 EU03 ZG01 ZG22 ZG69 ZG03 W603 Fig. 4-4-2...
- Page 60 4-3. Mechanism Assembly (Type A) W5.2P0.2D10 MC14 MC33 MC12 MC11 MC63 MC65 BID 2.6x4.0 MC01 MC10 BID 2.6x8 MP02 ZG63 PAN 2.0x5 MP60 MP16 PAN 1.7x4.0 MP92 MC03 MP37 MP91 MP65 PAN 1.7x3 MP37 MP36 RM01 MP01 MP36 FM01 EU05 MD01 Fig.
- Page 61 4-4. Chassis Assembly (Type B) ZG60 ZG60 BID 3.0x6.0 BID 3.0x6.0 ZG27 ZG63 ZG20 ZG67 ZG64 ZG60 BID 3.0x6.0 EU02 ZG67 W503 ZG64 W502 ZG71 EU01 W501 ZG60 BID 3.0x6.0 ZG71 EU03 ZG01 ZG22 ZG69 ZG03 W603 Fig. 4-4-4...
- Page 62 4-5. Mechanism Assembly (Type B) MC61 BID 2.6x8.0 MP01 MP60 PAN 2.0x5 MP91 MP16 PAN 1.7x4.0 MC04 MP61 MP92 PAN 2.6x15 MP37 MC03 MP65 PAN 1.7x3 MP37 MP36 MC63 MC12 BID 2.6x3.5 MC11 MC14 MC33 MP36 FM01 EU05 MC10 MC65 BID 2.6x8 ZG63 MC01...
- Page 63 FFC,6P,L110 W503 79080193 Cable,Flexible FFC,8P,L85 W603 79080190 Cable,Flexible FFC,13P,L150 ! ZF01 79078069 Remote Control Unit,SE-R0049 ! ZF10 79077206 Owners Manual,English/Chinese,SD-2550A/H ! ZF10 79077207 Owners Manual,Chinese,SD-2550T ! ZF23 79088010 Power Cord SD-2550A ! ZF23 79088014 Power Cord SD-2550T ! ZF23 79088034...
- Page 64 LOCATION PART LOCATION PART NUMBER NUMBER DESCRIPTION NUMBER NUMBER DESCRIPTION - DIODES - - ELECTRICAL PARTS - ! D803 79060087 Diode S1WB(A)60 D805 79060069 Diode HER108G D806 79060070 Diode HT15G EU01 79083125 PC Board Assy Main D807 79060080 Diode AK06 - INTEGRATED CIRCUITS - D808 79060029...
- Page 65 SPECIFICATIONS DVD Video Player/Outputs/Supplied Accessories [DVD Video Player] Power supply 100-240V AC, 50/60 Hz Power consumption 16 VA Mass 2.3 kg External dimensions 430 x 69 x 224 mm (W/H/D) Signal system PAL/3.58 NTSC Laser Semiconductor laser, wavelength 650/780 nm Frequency range DVD linear sound : 48 kHz sampling 4 Hz to 22 kHz 96 kHz sampling 4 Hz to 44 kHz...
- Page 67 FILE NO. 810-200207 SERVICE MANUAL DVD VIDEO PLAYER SD-2550A SD-2550H SD-2550T Jun., 2002...
-
Page 68: Standing Pc Boards For Servicing
SECTION 3 SERVICING DIAGRAMS 1. STANDING PC BOARDS FOR SERVICING EU02 Power supply PC board EU01 Main PC board EU03 Front display PC board Fig. 3-1-1... -
Page 69: Circuit Symbols And Supplementary Explanation
2. CIRCUIT SYMBOLS AND SUPPLEMENTARY EXPLANATION 2-1. Precautions for Part Replacement • In the schematic diagram, parts marked (ex. • Using the parts other than those specified shall violate the regulations, and may cause troubles such as F801) are critical part to meet the safety regulations, operation failures, fire etc. -
Page 70: Inductor Indication
2-4. Inductor Indication Eg. 4 ... Η Unit None µ ... µH ... mH Tolerance None ... ±5% ... ±0.1% ... ±0.25% ... ±0.5% ... ±1% Type name ... ±2% ... ±10% ... ±20% Fig. 3-2-4 2-5. Waveform and Voltage Measurement Eg. -
Page 71: Printed Wiring Board And Schematic Diagram
3. PRINTED WIRING BOARD AND SCHEMATIC DIAGRAM 16P(10P+6P) Press-fit VCC+9.0V VCC+9.0V VCC-9.0V VCC-9.0V PO SIG PWON E+5.0V E+5.0V E+6.0V E+6.0V CN801 VDD+5.0V VDD+5.0V Board-in VDD+3V VDD+3V CN701 M+8V M+8V MGND MGND VKK-31V VKK-31V F-(0.0) F+(3.7V) Mechanism W501 FFC 1mm 23P MON2 VOR2 VREF... -
Page 72: Block Diagrams
4. BLOCK DIAGRAMS 4-1. Overall Block Diagram Data/Control Bus DVD AV Data MAIN PROCESSOR UNIT IC402 M11B11664A-30T 1M-DRAM IEC958 Audio Out Tray Motor RF Amp. Optical Feed Interated Data Audio Out Motor IC901 IC912 processor AD1958 NJM4580E IC502 27MHz TA1323F Audio LPF Analog Audio-DAC... -
Page 73: Power Supply Block Diagram
4-2. Power Supply Block Diagram 4-3. Front Display, Power Switch Block Diagram 4-3-1. Front Display col2 col1 Fig. 3-4-3 (7G-2G) 4-3-2. Front Display Pattern Fig. 3-4-2 col2 col1 Fig. 3-4-4... - Page 74 4-3-3. Front Display, Power Switch Block Diagram A101 HUV-08SS38T 8-BT-230GNK EU03 MAIN EU01 FRONT DISPLAY F(-) F(+) G1 G2 G3 G4 G5 G6 G7 S18 S17 S16 S15 S14 S13 S12 S11S10 S9 CN101 CN603 EVER+5V EVER+5V Vkk (-31V) To POWER F(-) F(+) 52 53 54 55 56 57 58 59 60...
-
Page 75: Main Block Diagrams
4-4. Main Block Diagrams 4-4-1. Servo System Block Diagram 3# 27,-6 1+$ # Fig.3-4-6 3-11 3-12... - Page 76 4-4-2. Logical System Block Diagram MAIN UNIT IC401 IC301 IC304 J301 TC94A03F ZR36732 MM1567AJBE DATA PRO-1 AV MAIN PROCESSOR VIDEO DRIVER DVDDA0 From VOUT 27 IC502 RFDVD DVDDA1 PIN30 DISC STREAM DVDDA2 COUT 25 DATA 8bit DVDDA3 DVDDA4 YIN1 YOUT1 23 DVDDA5 DVDDA6 YOUT2 20...
- Page 77 5. CIRCUIT DIAGRAMS 5-1. Power Supply Circuit Diagram Fig. 3-5-1 3-15 3-16...
-
Page 78: Power Supply Circuit Diagram
Power Supply Circuit Diagram Drain-Sourse Q802 ON MODE (AC230V 50Hz in) V:100 V/div s/div Gate-Sourse Q802 ON MODE (AC230V 50Hz in) V:5 V/div s/div Fig. 3-5-2 3-17... -
Page 79: Front Display, Power Switch Circuit Diagram
5-2. Front Display, Power Switch Circuit Diagram IC101, Pin IC101, Pin X-OUT V: 2 V/div V: 2 V/div H: 100 ns/div H: 100 s/div IC101, Pin IC101, Pin V: 2 V/div V: 10 V/div H: 5 ms/div H: 500 s/div IC101, Pin IC101, Pin V: 10 V/div... - Page 80 Front Display, Power Switch Circuit Diagram FRONT EU03 Fig. 3-5-4 3-19 3-20...
- Page 81 5-3. Main Circuit Diagrams Main ICs Function Table 3-5-1 5-3-1. New Main ICs Information Ref. No. IC Name Function Detail ZR36732 AD1958 IC601 S-24C04BFJ-TB EE-PROM Setup default, memorization of specification setting. IC301 ZR36732 AV Decorder Decryption, MPEG-2 Decode, Audio Decode, Sub Picture Decode, OSD.
- Page 82 Table 3-5-4 TMP94C251AF(Z) (1/5) Table 3-5-4 TMP94C251AF(Z) (2/5) Name Function Name Function P00~P07 Port 0: I/O port Port 81: Output (initialized to “1” output) D0~D7 Data 0~7: data bus 0~7 Chip select 1: Develops “L” level when the Initialized to this function in the external address is within the assigned address ROM type, TMP94C251A.
- Page 83 Table 3-5-4 TMP94C251AF(Z) (3/5) Table 3-5-4 TMP94C251AF(Z) (4/5) Name Function Name Function Port B2: Output port (initialized to “1” Port F4: I/O port output) TXD1 Serial transmission data 1 (open drain output is possible) Port B3: Output port (initialized to “1” output) Port F5: I/O port RXD1...
- Page 84 Table 3-5-4 TMP94C251AF(Z) (5/5) Table 3-5-5 ZR36732 (1/5) Name Function Name Function ADVCC 10 bit AD converter power supply terminal Host interface, CD-DSP interface, sub code interface (32 pins) ADVSS 10 bit AD converter GND terminal (0V) RESET# Reset input (active: low). Initializing process of the device will start when DAVCC 8 bit DA converter power supply terminal...
- Page 85 Table 3-5-5 ZR36732 (3/5) Table 3-5-5 ZR36732 (2/5) Name Function Name Function VREF Apply reference voltage for DAC gain HRDY Host ready output (active: high). When adjustment. transmitting a stream through host bus with this signal, use the signal. And an external COSYNC Composite sync output.
- Page 86 Table 3-5-5 ZR36732 (4/5) Table 3-5-5 ZR36732 (5/5) Name Function Name Function SDRAM interface (35 pins) VDDIP 3.3V digital power supply. RAMDAT SDRAM bidirectional data bus. [15:0] GNDAAM GND for PLL power supply of 3.3V AMCLK generation. VDDAAM PLL power supply for 3.3V AMCLK generation.
-
Page 87: Main Circuit Diagram
Main Circuit Diagram J301 L ch output J301 Composite / R ch output video output (1 kHz, FS) CVBS output L ch output terminated 100% color bar R ch output V: 2 V/div V: 500 mV/div H: 200 s/div H: 20 s/div J301 J301 COAXIAL... - Page 88 5-3-2. Main Circuit Diagram Fig. 3-5-6 3-29 3-30 3-31 3-32...
- Page 89 5-3-2. Main Circuit Diagram...
- Page 90 agram...
- Page 94 3-29...
- Page 95 3-29 3-30...
- Page 96 3-30...
- Page 97 3-31...
- Page 98 Fig. 3-5-6 3-32...
-
Page 99: Motor System Circuit Diagrams
5-4. Motor System Circuit Diagram Fig. 3-5-7 3-33 3-34... -
Page 100: Pc Boards
6. PC BOARDS 6-2. Power Switch PC Board 6-1. Power Supply PC Board Part Loca- Part Loca- tion tion C801 Q801 C802 Q802 C803 Q803 C804 Q804 C805 Q821 C806 Q823 P802 C807 Q824 T801 F801 C808 Q825 C809 Q826 C811 Q827 Fig. - Page 101 6-3. Front Display PC Board Fig. 3-6-4 EU03 Front Display PC Board (Top Side) Fig. 3-6-5 EU03 Front Display PC Board (Bottom Side) The parts location list shows ex. A1/B1= top side/bottom side. Part Loca- Part Loca- Part Loca- tion tion tion A101...
- Page 102 6-4. Main PC Board IC914 J301 JX01 F-MARK1 RX04 IC902 R911 RX06 RX05 Q910 R326 IC901 R912 C333 C334 C912 R329 R902 R334 C323 R332 C324 C326 C328 C331 C909 C932 C335 Q909 R942 C925 Q913 C311 C325 C327 C330 C921 C922 R321...
- Page 103 Main PC Board (Top Side) Part Loca- Part Loca- Part Loca- Part Loca- tion tion tion tion C301 C611 Q401 R554 C302 C613 Q501 R555 C303 C614 Q502 R556 C305 C617 Q503 R557 C306 C618 Q504 R606 C307 C619 Q505 R607 C309 C621...
- Page 104 Main PC Board (Bottom Side) Part Loca- Part Loca- Part Loca- tion tion tion C304 C716 R436 C308 C717 R438 C329 C914 R442 C332 C915 R443 C401 C917 R450 C402 C933 R451 C403 C934 R454 C406 C935 R502 C409 C936 R503 C411 C937...
- Page 105 F-MARK3 C713 C714 C706 R701 D304 D303 D302 D301 C712 C701 C716 QY01 C715 C934 C933 C935 C936 R302 C917 C329 R314 R313 R920 R921 R315 R312 R945 C710 IC907 R309 C709 C915 C708 R303 R306 C304 C422 C442 R407 R418 C418 C439...
- Page 106 IC914 J301 JX01 F-MARK1 RX04 IC902 R911 RX06 RX05 Q910 R326 IC901 R912 C333 C334 C912 R329 R902 R334 C323 R332 C324 C326 C328 C331 C909 C932 C335 Q909 R942 C925 Q913 C311 C325 C327 C330 C921 C922 R321 C920 C707 C902 C906...
- Page 107 F-MARK3 C713 C714 C706 R701 D304 D303 D302 D301 C712 C701 C716 QY01 C715 C934 C933 C935 C936 R302 C917 C329 R314 R313 R920 R921 R315 R312 R945 C710 IC907 R309 C709 C915 C708 R303 R306 C304 C422 C442 R407 R418 C418 C439...
- Page 108 This page is not printed. This page is not printed. 3-49 3-50...
Need help?
Do you have a question about the SD-2550A and is the answer not in the manual?
Questions and answers