Samsung Jet Bot VR30T85 Series User Manual
Hide thumbs
Also See for Jet Bot VR30T85 Series:
- User manual (312 pages) ,
- User manual (80 pages) ,
- User manual (57 pages)

Subscribe to Our Youtube Channel
Related Manuals for Samsung Jet Bot VR30T85 Series


Summary of Contents for Samsung Jet Bot VR30T85 Series
- Page 1 Jet Bot User manual VR30T85**** series • Before operating this unit, please read the instructions carefully. • For indoor use only...
-
Page 2: Table Of Contents
APPENDIX Safety information SmartThings App Setting up the wireless router INSTALLATION Downloading the SmartThings App Setting up a SAMSUNG account Installing a Clean Station Registering a device to the SmartThings App 29 OPERATION Software Update Functions of the SmartThings App... -
Page 3: Preparation
User Manual ❇ ❇ If you want to purchase an additional Dust Bag, check the model name (VCA-RDB95) and SAMSUNG logo ( ) first, then contact your nearest SAMSUNG Electronics retailer or SAMSUNG service center. Safety information • Before operating the appliance, please read this manual thoroughly and retain it for your reference. - Page 4 Failure to meet these requirements could cause damage to the internal parts of the vacuum and void your warranty. General • Do not allow to be used as a toy. Close attention is necessary when used by or near children. •...
- Page 5 Clean Station • Do not modify the polarized plug to fit a non-polarized outlet or extension cord. • Do not use outdoors or on wet surfaces. • Unplug the Clean Station from the outlet when not in use and before servicing.
- Page 6 Jet Bot • Do not pick up hard or sharp objects such as glass, nails, screws, coins, and etc. • Do not use without a filter in place. When servicing the unit, never put fingers or other objects into the fan chamber in case the unit accidentally turns on.
- Page 7 Power related WARNING • Please prevent any risk of electric shock or fire. – Do not damage the power cord. – Do not pull the power cord too hard or touch the power plug with wet hands. – Do not use a power source other than rated volatge of the charger and also do not use a multi-outlet to supply power to a number of devices at the same time.
- Page 8 • Be sure the Jet Bot does not suck in or touch any kind of liquids (water, beverage, filth, etc.). – The Jet Bot can be severely damaged and it may contaminate other areas if the wheels pass through liquid. •...
- Page 9 • For the very low areas where the Jet Bot may get stuck, set the No- go Zones with the SmartThings App or attach the Boundary Markers to prevent the Jet Bot from getting in. • Do not install the Clean Station in an area with a dark floor. –...
- Page 10 In use WARNING • If any abnormal sounds, smells or smoke come from the Jet Bot, immediately shut off the power switch of the Jet Bot and contact a service center. CAUTION • Using the Jet Bot on a thick carpet may damage both the Jet Bot and the carpet.
- Page 11 • When the power cord is damaged, contact a service center to get it replaced by a certified repairman. – There is a risk of fire or electric shock. • Please check with a SAMSUNG Electronics service center when replacing batteries. – Using batteries from other products can cause malfunction.
- Page 12 • Before cleaning, remove objects which are less than 9 cm height and are lightly on the floor as the Jet Bot can push along them, or the objects can be caught in the Jet Bot’s Spin Brush or Driving Wheels. (Fixed objects can be detected by the Jet Bot when its bumper is pressed and will avoid them.) •...
-
Page 13: Installation
INSTALLATION Installing a Clean Station Status Indicator Approximately 0.5 m Approximately 0.5 m Approximately 1 Connect the provided power cord to the 2 Position the power cord into the fixing bottom of the Clean Station. groove at the rear of the Clean Station. 3 Place the Clean Station on an even floor and near an electrical outlet and plug it in. -
Page 14: Operation
OPERATION Charging the Jet Bot Before using the Jet Bot for the first time, charge it completely. (For the charging time and cleaning time, refer to the ‘Product specification’.) 1 Open the upper cover of the Jet Bot and remove the white gasket. 2 Remove the yellow gasket attached to the power switch at the side of the Jet Bot and press the power switch to turn the Jet Bot... - Page 15 Auto charging The Jet Bot automatically returns to the Clean station when it completes cleaning, when the Dustbin is full, or when the battery is low to recharge. Docking (Recharging) You can return the Jet Bot to the Clean Station while cleaning to recharge. •...
- Page 16 Checking if the docking (recharging) does not work Check the Clean Station’s installation status Charge the Jet Bot manually for the following conditions. • Check whether the Clean Station has been installed in a place where the Clean Station • When the Clean Station is installed in a cannot guide the Jet Bot to return.
-
Page 17: Using The Jet Bot
Using the Jet Bot Before using the Jet Bot, press the power switch at the side of the Jet Bot to turn the Jet Bot ❇ ❇ For the normal use of the Jet Bot’s functions, the SmartThings connection is required. –... -
Page 18: Operation Status On The Led Status Indicator
Operation status on the LED Status Indicator Classification Color Meaning Blinking without An error occurs. moving While Blinking while Auto returning to the Clean Station operating moving due to low battery Operating stops due to low battery Jet Bot Red, orange, or yellow While charging (depending on charging progress) While... -
Page 19: Cleaning Functions
Cleaning Functions Cleaning Functions Operation • Auto Clean: Cleans automatically until the Jet Bot completes cleaning all rooms one time. Cleaning Methods • Room Clean: You can select a room you want to clean. • Spot Clean: You can set a specific area you want to clean. •... -
Page 20: Additional Functions
Additional functions Additional functions Operation • When charging is complete, the Jet Bot automatically enters the Sleep Mode. While the Jet Bot is docked on the Clean Station, press and hold the [ ] for 7 seconds to set it to the Sleep Mode. To cancel the Sleep Mode, start cleaning or press the [ ] for Energy-Saving... -
Page 21: Attaching Boundary Markers
Attaching Boundary Markers If Boundary Markers are attached before using the Jet Bot, the Jet Bot can operate safely. You can purchase additional Boundary Markers at a service center. To prevent the Jet Bot from entering the following areas, attach the Boundary Markers to the floor in a shape with 15 cm space distance. -
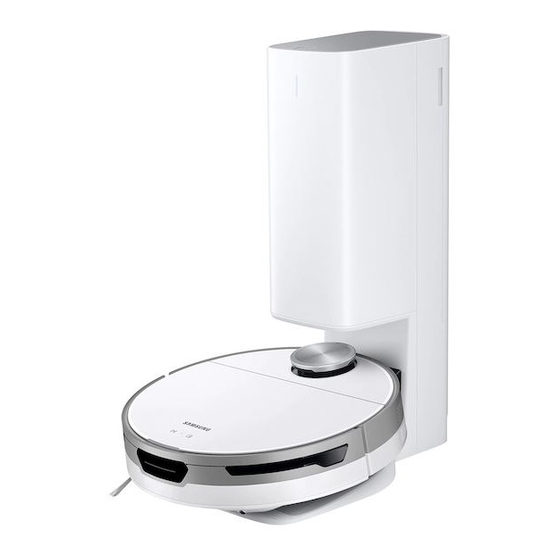
Page 22: Parts Diagram
Parts diagram Jet Bot 01 Obstacle Sensor 02 Power switch 03 LiDAR Sensor 04 Dustbin 05 Start/stop button 06 Docking (Recharging) button 07 Status Indicator 08 Docking Sensor Window 09 Upper Cover Bottom 01 Charging Pin 02 Brush 03 Brush Cover 04 Cliff Sensor 05 Roller 06 Battery Cover... -
Page 23: Maintenance
MAINTENANCE Cleaning the Jet Bot Before maintenance work, you should turn off the power switch at the side of the Jet Bot. Emptying and cleaning the Dustbin 1 Grasp the Jet Bot’s cover at the groove and 2 Hold the Dustbin handle and lift the lift it up. -
Page 24: Cleaning The Brush
Cleaning the brush 1 Push the Brush Cover Lock to the right to 2 Detach the brush cover. unlock. 3 Lift up the left side of the brush first and 4 Clean the brush. then pull the brush from the groove on the right. -
Page 25: Cleaning The Sensor Window
Cleaning the Sensor Window Wipe the Sensor Window with a soft cloth. Docking Sensor Obstacle Cliff Sensor Window Sensor LiDAR Sensor Dust Sensor Rear Sensor Cleaning the Driving Wheel 1 Place a soft cloth down first, turn the Jet 2 Remove foreign matter with a blunt rod or Bot over, and place it gently on the cloth. -
Page 26: Cleaning The Spin Brush
Cleaning the Spin Brush Cover the Spin Brush with a hot steamed cloth When the Spin Brush is very tangled with for 10 seconds, then wipe the Spin Brush. hair, threads, etc., detach the Spin Brush with a screwdriver while gripping the Spin Brush, and remove the foreign matter. -
Page 27: Cleaning The Clean Station
Cleaning the Clean Station Before cleaning the Clean Station, unplug the power cord from the electrical outlet. Replacing the Dust Bag 1 Press the [PUSH] 2 Pull the top of the button on the top Dust Bag holder of the Clean Station gently. -
Page 28: Appendix
• SAMSUNG Jet Bot supports IEEE 802.11b/g/n and Soft-AP. – IEEE 802.11n is recommended. • SAMSUNG Jet Bot supports only DHCP (Dynamic Host Configuration Protocol). Please make sure that the DHCP server option is activated on your wireless router. • The Jet Bot supports the WEP-OPEN, WPA-PSK/TKIP, and WPA2-PSK/AES for the authentication and encryption protocols. -
Page 29: Downloading The Smartthings App
• To set up a SAMSUNG account, you can follow the directions provided by the SmartThings App. • Or, if you have a SAMSUNG smartphone, you can add your SAMSUNG account in the setting app of your smartphone. Then, it will automatically sign in to your SAMSUNG account and you can use the SmartThings App. -
Page 30: Software Update
3 If a pop-up saying that a new device has been found appears, tap ADD NOW. – If the pop-up does not appear, add a device by selecting the ‘Home appliances’ category → ‘Robot cleaner’ and the Jet Bot to connect. –... -
Page 31: Functions Of The Smartthings App
Functions of the SmartThings App Classification Functions Explanation • You can check the result of the last cleaning. Monitoring Cleaning Report • You can check the histories of last 50 cleanings. • You can stop cleaning and have the Jet Bot Dock return to the Clean Station. - Page 32 Classification Functions Explanation • When cleaning is complete, you can receive Cleaning completed cleaning completion notice. Notice • If the Jet Bot needs to be checked, you can Check Notice receive a notice. • You can set a zone where you do not want the Jet Bot to clean.
-
Page 33: Notes And Cautions
Notes and cautions Installation NOTE • Install the Clean Station in a place where the floor and wall are level. • If the cleaning area is wooden floors, it is best to install the Clean Station along the grain of wooden floors. •... -
Page 34: Using
• If the Jet Bot is left detached from the Clean Station, the battery will drain naturally. – Try to keep the Jet Bot being charged on the Clean Station. (However, turn off the power switch and leave the Clean Station unplugged when planning to leave the house for long periods of time by going on a business trip or vacation, etc.) Using... -
Page 35: Cleaning And Maintenance
• If it is difficult to remove foreign matter from the brush, contact an authorized SAMSUNG service center. • Since the brush sweeps dirt up from the floor during cleaning, foreign matter such as a thin and long thread, long hair, etc. may get caught in it. -
Page 36: Battery Usage
• This battery is exclusively for the SAMSUNG Electronics Jet Bot. Do not use it for any other products or purposes. • Do not disassemble or modify the battery. -
Page 37: Corrective Measures Before Reporting A Problem
Corrective measures before reporting a problem 1 The Status Indicator 2 Turn off the power 3 When turning turns red and blinks switch and check the the Jet Bot on by with a voice guide. instructions below pressing the power and take appropriate switch, the Status actions. -
Page 38: Troubleshooting
Troubleshooting Symptom Checklist • Check if the power switch is on. • Check if the Status Indicator is on. • Check if the Jet Bot's battery is depleted. – When the Jet Bot’s Status Indicator turns red and stays red, place the Jet Bot manually on the Clean The Jet Bot is not working at all. - Page 39 Symptom Checklist The Jet Bot does not detect the • Make sure the Boundary Markers are attached as ( Boundary Marker and crosses shape at 15 cm before the locations where the Jet Bot the boundary. should not cross. • Check if the Clean Station is installed along the grain of wooden floors or tiles.
- Page 40 • Connect the Jet Bot to a wireless router by referring to App, but the Jet Bot fails to be the ‘SmartThings App’ of the user manual. connected. I fail to log into the SAMSUNG • Check your ID and password on the screen of the account. SAMSUNG account.
- Page 41 SmartThings App". • When the product registration fails repeatedly, restart the SmartThings App and try the product registration. • All users should use the SAMSUNG account issued by the country which launches the product. (Applicable to iOS only) During product registration, the AP •...
- Page 42 Symptom Checklist The 'Offline' message of the Jet • Close the SmartThings App and then run it again. Bot appears on the SmartThings • Check whether there is an internet connection problem App though the Jet Bot's of the wireless router. Especially, a firewall may registration has completed interrupt standard operation.
-
Page 43: Open Source Announcement
The software included in this product contains open source software. To obtain the source code covered under licenses which have the obligation of publishing source code (e.g. GPL, LGPL… etc), please visit http://opensource.samsung.com/ and search by model name. It is also possible to obtain the complete corresponding source code in a physical medium such as a CD-ROM;... -
Page 44: Product Specification
Product Specification Classification Items VR30T85**** series 3.4 kg Weight Size W 350 mm x D 350 mm x H 99.8 mm Mechanical Cleaning method LiDAR location recognition specifications Button method of the Touch type Jet Bot Power consumption of 60 W (Spot Clean) Electrical the Jet Bot specifications... - Page 45 Name Clean Station Rated voltage 220-240 V ~ 50-60 Hz Rated output current 25.85 V, 1.0 A Charging 40 W Power consumption Operation 1300 W (When using suction power) Weight 5.0 kg Size W 280 mm x D 400 mm x H 525 mm Operating time About 18 seconds Height...
Need help?
Do you have a question about the Jet Bot VR30T85 Series and is the answer not in the manual?
Questions and answers