Table of Contents
Advertisement
Available languages
Available languages
E Schaudt GmbH, Elektrotechnik und Apparatebau, Planckstraße 8, 88677 Markdorf, Německo, Tel. +49 7544 9577-0, Fax +49 7544 9577-29, www.schaudt- gmbh.de
Návod k obsluze a montáži
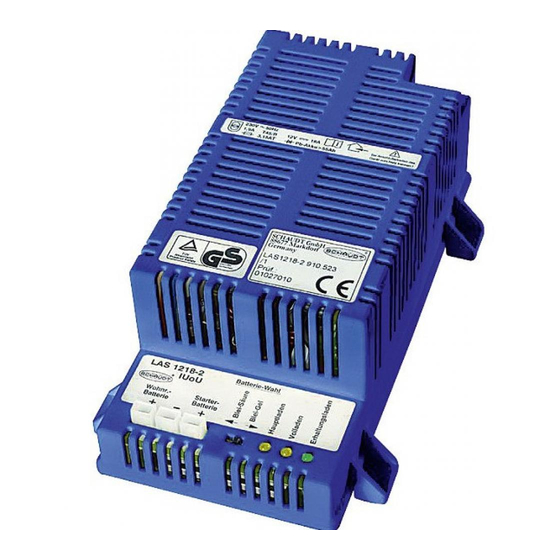
Nabíječka baterií LAS 1218-2
Obsah
1
Návod k obsluze.............................................................................2
1.1
Bezpečnostní upozornění...............................................................2
1.2
Úvod...............................................................................................3
1.3
Obsluha...........................................................................................4
1.4
Údržba............................................................................................7
2
Návod k montáži.............................................................................8
2.1
Úvod...............................................................................................8
2.2
2.3
2.4
První uvedení do provozu.............................................................16
2.5
Technické údaje............................................................................17
2.6
Skladování - balení - přeprava......................................................18
Příloha........................................................................................... 19
........................................................................8
........................................................................... 9
Advertisement
Chapters
Table of Contents

Related Manuals for Schaudt LAS 1218-2


Summary of Contents for Schaudt LAS 1218-2
-
Page 1: Table Of Contents
Mechanická instalace ................8 Elektrické zapojení ................9 První uvedení do provozu.............16 Technické údaje................17 Skladování - balení - přeprava............18 Příloha................... 19 E Schaudt GmbH, Elektrotechnik und Apparatebau, Planckstraße 8, 88677 Markdorf, Německo, Tel. +49 7544 9577-0, Fax +49 7544 9577-29, www.schaudt- gmbh.de... -
Page 2: Návod K Obsluze
Návod k obsluze a montáži nabíječky baterií LAS 1218-2 Návod k použití Bezpečnostní upozornění 1.1.1 Význam bezpečnostních symbolů NEBEZPEČÍ! Tento symbol znamená nebezpečí úrazu a smrti v případě nerespektování pokynů. VAROVÁNÍ! Nerespektování tohoto varování může vést ke zraněním. POZOR! Nerespektování tohoto upozornění může vést k poškození přístroje nebo připojených spotřebičů. -
Page 3: Úvod
Návod k obsluze a montáži nabíječky baterií LAS 1218-2 VAROVÁNÍ! Horké součástky! Spálené pojistky: Vadné pojistky vyměňujte, pouze pokud přístroj není pod proudem. Vadné pojistky vyměňujte, pouze pokud znáte a odstraníte příčinu chyby. Nepřemosťujte ani neopravujte pojistky. Používejte pouze originální pojistky s hodnotami uvedenými na přístroji, případně... -
Page 4: Obsluha
Návod k obsluze a montáži nabíječky baterií LAS 1218-2 Úkolem nabíječky baterií LAS 1218-2 je při zapojení do 230V sítě nabíjet vhodné baterie, nebo bez připojení baterie napájet proudem 12V spotřebiče. Tento přístroj je primárně taktovaný spínaný zdroj. Díky této moderní... - Page 5 Pokud to není možné, například protože jste na zahraniční dovolené, mohou vám nabíječku baterií opravit i v odborné dílně. V takovém případě však vezměte na vědomí, že při nesprávně provedené opravě zaniká záruka a společnost Schaudt GmbH neručí za škody vzniklé v důsledku takových oprav. Stav k 6. 11. 2014...
- Page 6 Návod k obsluze a montáži nabíječky baterií LAS 1218-2 Závada Možná příčina Řešení Palubní baterie se při v síti není napětí zapněte jistič ve vozidle provozu na 230 V nenabíjí (napětí baterie je trvale nechte zkontrolovat nižší než 13,3 V).
-
Page 7: 1.4 Údržba
Návod k obsluze a montáži nabíječky baterií LAS 1218-2 1.4 Údržba Nabíječka baterií je bezúdržbová. Čištění Nabíječku baterií můžete čistit měkkým, lehce navlhčeným hadříkem a jem- ným čisticím prostředkem. V žádném případě nepoužívejte alkohol, ředidlo ani podobné prostředky. Do přístroje nesmí proniknout žádné tekutiny. -
Page 8: Návod K Montáži
Návod k obsluze a montáži nabíječky baterií LAS 1218-2 Návod k montáži Úvod Tento návod k montáži je určen kvalifikovaným odborným pracovníkům. Obsahuje důležité pokyny k zapojení a bezpečnému provozování přístroje. Uvedené bezpečnostní pokyny je třeba bezpodmínečně dodržovat. Vedle montážního návodu je vždy třeba dbát i na příslušný návod k obsluze. -
Page 9: Elektrické Zapojení
6,3 x 0,8 4 x upevňovací otvor ø 4,5 v izolačním krytu Obrázek 1 Rozměrový výkres nabíječky baterií LAS 1218-2 (rozměry v mm) 2.2.2 Držák pojistky Pokud použití vyžaduje jednu nebo dvě pojistky navíc (viz kap. 1.1.1.2 a 1.1.1.3), je třeba k baterii zabudovat držák pojistek z připojovací sady. - Page 10 Zapojení přídavné nabíječky k elektroblokům Nabíječku baterií LAS 1218-2 můžete použít jako přídavnou nabíječku Přídavná k elektrobloku od firmy Schaudt. Je vhodná ke všem elektroblokům firmy nabíječka Schaudt, které obsahují nabíjecí modul typu LAS a 2pólovou MNL přípojku (např. EBL 99) nebo přípojku Minifit (např. EBL 220) na přídavnou nabíječku.
- Page 11 + pól LAS 1218-2 palubní baterie: plochá zásuvková koncovka 6,3 x 0,8 (obrázek 3, číslo 1) - pól LAS 1218-2: plochá zásuvková koncovka 6,3 x 0,8 (obr. 3, č. 2) MNL konektor (pohled X, obrázek 3, číslo 4/5), resp. Minifit k elektrobloku, podstavec „přídavná...
- Page 12 Návod k obsluze a montáži nabíječky baterií LAS 1218-2 1.1.1.2 Přímé připojení k palubní a startovací baterii Při tomto způsobu zapojení se přímo propojí nabíječka baterií LAS 1218-2 s oběma bateriemi obytného vozu (nebo také jen s jednou baterií, například u karavanu).
- Page 13 Návod k obsluze a montáži nabíječky baterií LAS 1218-2 Obrázek 5 Ukázka připojení nabíječky baterií LAS 1218-2 k palubní baterii a startovací baterii Pojistka F1 Pojistka F2 Palubní baterie Startovací baterie + pól LAS 1218-2 palubní baterie (plochá zásuvková koncovka 6,3 x 0,8) k F1 (plochá...
- Page 14 Délka vedení k přídavné baterii nesmí u průřezu kabelu 2,5 mm překročit 4 m (součet délky vedení tam a zpět), (viz také tabulka na straně 9). + pól LAS 1218-2 (plochá zásuvková koncovka 6,3 x 0,8) k F4 (plochá zásuvková koncovka 6,3 x 0,8) Stav k 6. 11. 2014...
- Page 15 F4 (plochá zásuvková koncovka 6,3 x 0,8) k + pólu baterie (uzavřené kabelové oko, M6 nebo M8) Připojení LAS 1218-2 k přídavné baterii - pól LAS 1218-2 (plochá zásuvková koncovka 6,3 x 0,8) - pól baterie (uzavřené kabelové oko, M6 nebo M8) Přídavnou pojistku označte cedulkou „F4 - přídavná baterie“.
-
Page 16: První Uvedení Do Provozu
Návod k obsluze a montáži nabíječky baterií LAS 1218-2 2.3.2 Připojení k síti NEBEZPEČÍ! Součástky jsou pod síťovým napětím 230 V. Nebezpečí smrti při zásahu elektrickým proudem nebo při požáru: Připojování provádějte, pouze pokud přístroj není napájen 230 V. Připojení k síti Připojení... -
Page 17: Technické Údaje
Návod k obsluze a montáži nabíječky baterií LAS 1218-2 Před přepnutím přepínače baterie vypojte nabíječku baterií ze sítě. Nastavte přepínač baterie (viz obr. 8) do požadované polohy pomocí tenkého předmětu (např. náplně propisky): Olověné gelové baterie: Přepínač nastavte na „Blei-Gel“. -
Page 18: Skladování - Balení - Přeprava
4 h u olověných kyselinových 16 h u olověných gelových Čas Obrázek 9 Příklad křivky napětí v průběhu nabíjení nabíječkou baterií LAS 1218-2 Hlavní nabíjení maximálním nabíjecím proudem 18 A, elektronicky omezené, až do dosažení napětí na konci nabíjení. Začátek nabíjení... -
Page 19: Příloha
Návod k obsluze a montáži nabíječky baterií LAS 1218-2 Příloha Prohlášení o shodě ES Firma Schaudt GmbH tímto potvrzuje, že konstrukce nabíječky baterií LAS 1218-2 odpovídá následujícím normám: Směrnice o nízkém napětí ES: 73/23/EHS ve znění ze dne 22. 7. 1993 Směrnice o elektromagnetické... - Page 20 Návod k obsluze a montáži nabíječky baterií LAS 1218-2 Protokol chyb V případě vad zašlete vadný přístroj výrobci spolu s vyplněným protokolem chyb. Typ přístroje: Číslo zboží: Vozidlo: Výrobce: Typ: Vlastní konstrukce? Doplňkové vybavení? Zakřížkujte prosím příslušnou vadu: Elektrické spotřebiče nefungují - jaké funkce nefungují? (Uveďte je prosím níže)
- Page 21 ..........E Schaudt GmbH, Elektrotechnik und Apparatebau, Planckstraße 8, 88677 Markdorf, Germany, Tel. +49 7544 9577-0, Fax +49 7544 9577-29, www.schaudt- -gmbh.de 810.523 BA / EN...
-
Page 22: Instruction Manual
Instruction Manual and Installation Instructions LAS 1218-2 Instruction Manual Safety Information 1.1.1 Meaning of safety symbols DANGER! Failure to heed this warning may result in death or serious injury. WARNING! Failure to heed this warning may result in personal injuries. -
Page 23: Introduction
Instruction Manual and Installation Instructions LAS 1218-2 WARNING! Hot components! Burns: Only change blown fuses when the device is completely de-energised. Only replace blown fuses once the cause of the fault has been identi- fied and rectified. Never bypass or repair fuses. -
Page 24: Operation
Instruction Manual and Installation Instructions LAS 1218-2 The LAS 1218-2 battery charger is for charging suitable batteries during 230V operation or supplying 12V consumers without connected battery with power. The device is a primary controlled switch-mode power supply unit. This mo- dern switching technology achieves high charging performance at a compact size and low weight. - Page 25 If this is not possible, e.g. if you are abroad, you can have the battery char- ger repaired at a specialist workshop. Please note that the warranty beco- mes void if incorrect repair work is carried out. Schaudt GmbH cannot ac- cept liability for any damages resulting from such repairs.
- Page 26 Instruction Manual and Installation Instructions LAS 1218-2 Fault Possible cause Remedy Living area battery is not No mains voltage Switch on the circuit charged during 230V breaker in the vehicle operation (battery voltage operation (battery voltage Have the mains voltage...
-
Page 27: Maintenance
Instruction Manual and Installation Instructions LAS 1218-2 Maintenance The battery charger is maintenance-free. Cleaning Clean the battery charger with a soft, slightly damp cloth and mild detergent. Never use spirit, thinners or similar substances. Do not allow liquids to enter the device. -
Page 28: Installation Instructions
Instruction Manual and Installation Instructions LAS 1218-2 Installation instructions Introduction These installation instructions are aimed at trained personnel. They contain important information on the connection and safe operation of the device. The safety information provided must be observed. Always follow the relevant instruction manual in addition to the installation in- structions. -
Page 29: Electrical Connection
4 x attachment- in the insulation housing holes, ø4.5 Fig. 1 Dimension diagram of LAS 1218-2 battery charger (dimensions in mm) 2.2.2 Fuse holder For applications that require one or two additional fuses (see sections 1.1.1.2 and 1.1.1.3 for example), fuse holders from the connector set must be installed. - Page 30 Connection as for auxiliary charger to the electroblock Auxiliary charger The LAS 1218-2 battery charger can also be used as an auxiliary charger for a Schaudt electroblock. Suitable for use here are all Schaudt electroblocks that include the LAS charger module and have the 2-pin MN connector (e.g.
- Page 31 Instruction Manual and Installation Instructions LAS 1218-2 The connector cable (Pos. 2 or 3) is required to connect the LAS 1218-2 battery charger to the electroblock. Fusing An additional fuse is not required as there is already one integrated in the electroblock.
- Page 32 Flat vehicle fuse, 20A Flat vehicle fuse, 10 A The connector set (Pos. 2 to 6) is required to connect the LAS 1218-2 bat- tery charger to up to two batteries. The length of the line to the starter battery may not exceed 4 m (supply and return lines together) for a cable cross-section of 2.5mm...
- Page 33 Living area battery Starter battery + terminal of LAS 1218-2 living area battery (flat push-on contact 6.3 x 0.8) to F1 (flat push-on contact 6.3 x 0.8) F1 (flat push-on contact 6.3 x 0.8) to + terminal of living area battery (ring terminal, M6 or M8) + terminal of LAS 1218-2 starter battery (flat push-on contact 6.3 x 0.8)
- Page 34 * Pos. 3 and 4 each only required 2 x, Pos. 5 only 1 x, Pos. 7 not used. The connector set (Pos. 2 to 6) is required to connect the LAS 1218-2 bat- tery charger to the additional battery.
- Page 35 F4 (flat push-on contact 6.3 x 0.8) to + battery terminal (ring terminal, M6 or M8) LAS 1218-2 to additional battery connection -- terminal of LAS 1218-2 (flat push-on contact 6.3 x 0.8) -- terminal of battery (ring terminal, M6 or M8) Label the additional fuse with sticker ”F4 -- additional battery”.
-
Page 36: Initial Use
Instruction Manual and Installation Instructions LAS 1218-2 2.3.2 Mains connection DANGER! 230V mains voltage carrying parts. Danger of death due to electric shock or fire: Only carry out electrical work once the 230V supply has been discon- nected. Mains connection... -
Page 37: Technical Details
230-V- mains cable of the LAS 1218-2 charger must be connected (the charger does not have its own mains switch). Check whether the batteries are being charged (display on the battery charger). -
Page 38: Storage - Packaging - Transportation
16 h with lead gel Time Fig. 9 Example of the charge voltage behaviour with the LAS 1218-2 battery charger Main charge with maximum 18 A charging current, electronically limi- ted, up to final charging voltage. Start of charge also for totally dischar- ged batteries. -
Page 39: Appendix
Instruction Manual and Installation Instructions LAS 1218-2 Appendix EC Declaration of Conformity Schaudt GmbH hereby confirms that the design of the LAS 1218-2 battery charger complies with the following relevant regulations: EC-Low Voltage Directive: 73/23/EEC edition with modifica- tions from 22.07.93... - Page 40 Instruction Manual and Installation Instructions LAS 1218-2 Fault report In the event of damage, please return the defective device together with the completed fault report to the manufacturer. Device type: _______________________ Item no.: _______________________ Vehicle: Manufacturer: _______________________ Model: _______________________ Own installation?
- Page 41 ..........E Schaudt GmbH, Elektrotechnik und Apparatebau, Planckstraße 8, 88677 Markdorf, Allemagne, Tel. +49 7544 9577-0, Fax +49 7544 9577-29, www.schaudt- -gmbh.de 810.523 BA / FR...
-
Page 42: Manuel D'utilisation
Manuel d’utilisation et de montage chargeur de batterie LAS 1218-2 Instructions de service Consignes de sécurité 1.1.1 Signification des consignes de sécurité DANGER ! Le non-respect de ce symbole peut mettre en danger la santé et la vie des personnes. -
Page 43: Introduction
Manuel d’utilisation et de montage chargeur de batterie LAS 1218-2 AVERTISSEMENT ! Composants brûlants ! Brûlures : Ne remplacer les fusibles déclenchés que lorsque l’appareil est hors tension. Ne remplacer les fusibles déclenchés que lorsque la cause de la défaillance est déterminée et éliminée. - Page 44 Manuel d’utilisation et de montage chargeur de batterie LAS 1218-2 Le chargeur de batterie LAS 1218-2 a pour fonction, avec un raccordement au secteur de 230 V, de charger des batteries appropriées ou bien d’alimen- ter des consommateurs 12 V sans batterie raccordée.
- Page 45 également habilité à réparer le chargeur de batterie. Dans ce cas, il faut prendre en compte que la garantie est supprimée si des répara- tions sont effectuées de manière incorrecte et que la société Schaudt GmbH n’est pas responsable des dommages en résultant.
- Page 46 Manuel d’utilisation et de montage chargeur de batterie LAS 1218-2 Défaut Cause possible Solution La batterie de l’espace Pas de tension du secteur Mettre en marche le habitable ne se charge disjoncteur automatique pas en mode 230 V dans le véhicule...
- Page 47 Manuel d’utilisation et de montage chargeur de batterie LAS 1218-2 Entretien Le chargeur de batterie n’exige aucun entretien. Nettoyage Nettoyer le chargeur de batterie avec un torchon doux, légèrement humidifié et avec un détergent doux. Ne jamais utiliser d’éthanol, de diluant ou de pro- duit semblable.
-
Page 48: Montage Mécanique
Manuel d’utilisation et de montage chargeur de batterie LAS 1218-2 Manuel de montage Introduction Ces instructions de montage s adressent au personnel spécialisé formé. Elles contiennent des instructions importantes pour le raccordement et le fonctionnement en toute sécurité de l’appareil. Les consignes de sécurité in- diquées doivent impérativement être appliquées. - Page 49 Languette enfichable 6,3x0,8 4xfixations- dans le boîtier isolant alésage ø4,5 Illustration 1 Plan coté du chargeur de batterie LAS 1218-2 (dimensions en mm) 2.2.2 Support de fusibles Dans les applications dans lesquelles un ou deux fusibles supplémentaires sont nécessaires (voir par ex. chapitres 1.1.1.2 et 1.1.1.3), des supports de fusibles du kit de raccordement devront être installés.
- Page 50 électrique de la société Schaudt. Tous les blocs électriques de la société Schaudt dotés du module de charge LAS et du connecteur bipolaire MLN (par ex. EBL 99) ou Minifit (par ex. EBL 220) pour un chargeur supplémentaires sont adaptés.
- Page 51 électrique. Illustration 3 Schéma de raccordement du chargeur de batterie LAS 1218-2 au bloc électrique Connecteur plat 6,3 x 0,8, câble rouge Connecteur plat 6,3 x 0,8, câble marron non occupé...
- Page 52 Raccordement à la batterie de l’espace habitable et du démarreur Dans ce mode de raccordement, la connexion entre le chargeur de batterie LAS 1218-2 et les deux batteries d’un camping-car (ou aussi d’une seule batterie, par ex. sur une caravane) est réalisée directement. Contenu de la livraison Pour ce cas d’application, nous livrons les éléments suivants sous la réf.
- Page 53 Manuel d’utilisation et de montage chargeur de batterie LAS 1218-2 Illustration 5 Schéma de raccordement du chargeur de batterie LAS 1218-2 aux batteries de l’es- pace habitable et du démarreur Fusible F1 Fusible F2 Batterie de l’espace habitable Batterie de démarrage Pôle + LAS 1218-2 batterie de l’espace habitable (connecteur plat 6,3 x...
- Page 54 à 4 m (somme du câble aller et retour) pour une section de câble de 2,5 mm (voir aussi le tableau en page 9). Pôle + LAS 1218-2 (connecteur plat 6,3 x 0,8) sur F4 (connecteur plat 6,3 x 0,8) Situation au : 06.11.2014...
- Page 55 EBL ... LAS 1218-2 12 V 230 V 230 V CC/CA Illustration 7 Exemple de schéma de connexion pour l’installation d’un onduleur (sur fond gris : Chargeur de batterie LAS 1218-2 avec kit de raccordement) Pos. Désignation Pos. Désignation CC/CA Onduleur Fusible de courant de charge de la batterie supplémentaire...
-
Page 56: Première Mise En Service
Manuel d’utilisation et de montage chargeur de batterie LAS 1218-2 2.3.2 Raccordement réseau DANGER ! 230 V pièces sous tension. Danger de mort par choc électrique ou incendie : Les raccordements doivent être effectués uniquement lorsque le système n’est pas alimenté à 230 V. - Page 57 Actionner l’interrupteur principal de 12 V situé sur le panneau de com- mande (voir le manuel d’utilisation du panneau de commande raccordé). 230Brancher le câble d’alimentation 230 V du chargeur LAS 1218-2 (le chargeur ne possède pas d’interrupteur secteur propre.
- Page 58 Manuel d’utilisation et de montage chargeur de batterie LAS 1218-2 Charge de la batterie en Batterie de l’espace habitable cas de Caractéristique de ligne IUoU raccordement réseau Tension finale de charge 14,3 V Courant de charge 18 A sur la gamme de tension de secteur, limité...
- Page 59 Manuel d’utilisation et de montage chargeur de batterie LAS 1218-2 Annexe Déclaration de conformité CE La société Schaudt GmbH déclare que la construction du chargeur de batte- rie LAS 1218-2 est conforme aux dispositions suivantes : Directive CE basse tension : 73/23/CEE selon sa modification du 22.07.93...
- Page 60 Manuel d’utilisation et de montage chargeur de batterie LAS 1218-2 Rapport d’erreur En cas de dommage, veuillez renvoyer l’appareil avec le rapport d’erreur rempli au fabricant. Type d’appareil : _______________________ N d’article : _______________________ Véhicule : Fabricant : _______________________ Type : _______________________ Réalisation personnelle ? Oui - Non -...
Need help?
Do you have a question about the LAS 1218-2 and is the answer not in the manual?
Questions and answers