Table of Contents
Advertisement
Quick Links
Installation and Owner's Manual
Manuel d'installation et d'utilisation
Manual de Instrucciones y del Propietario
Installations- und Bedienungsanleitung
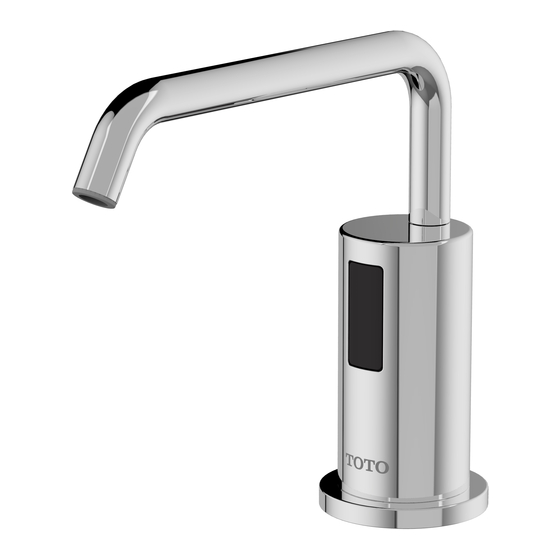
Automatic Soap Dispenser
Distributeur automatique de savon
Soap Dispenser automatico
Automatischer Seifenspender
Please visit our site http://eu.toto.com/
Veuillez consulter notre site http://eu.toto.com/
Head Office
TOTO Europe GmbH
Firmensitz
Zollhof 2, 40221 Düsseldorf GERMANY
Siége social
Tel: +49(0)700 8686 0700
Sede centrale
DSE101EEB
DSE101EEC
DSE101KE
Gli utenti sono invitati a visitare il sito Web http://eu.toto.com/
Besuchen Sie unsere Website http://eu.toto.com/
TOTO Ltd. All rights reserved.
TOTO Ltd. Alle lle Rechte vorbehalten.
TOTO Ltd. Tous droits réservés.
TOTO Ltd. Tuttii diritti riservati.
Printed in China.
Gedruckt in China.
Imprimé en Chine.
Stampato in Cina.
Advertisement
Table of Contents

Related Manuals for Toto DSE101EEB


Summary of Contents for Toto DSE101EEB
- Page 1 Automatischer Seifenspender DSE101EEB DSE101EEC DSE101KE Please visit our site http://eu.toto.com/ Gli utenti sono invitati a visitare il sito Web http://eu.toto.com/ Veuillez consulter notre site http://eu.toto.com/ Besuchen Sie unsere Website http://eu.toto.com/ Head Office TOTO Europe GmbH TOTO Ltd. All rights reserved.
-
Page 3: Table Of Contents
Rough-In Dimensions ..................16 THANK YOU FOR CHOOSING TOTO! The mission of TOTO is to provide the world with healthy, hygienic and more comfortable lifestyles. We design every product with the balance of form and function as a guiding principle. Congratulations on your choice. -
Page 4: Before Installation
BEFORE INSTALLATION Read these instructions carefully to ensure proper installation. ■ TOTO reserves the right to update product design without notice. ■ Check to make sure you have the parts indicated on the following page. ■ INCLUDED PARTS Spout Assembly... -
Page 5: Position Of The Dispenser And Tank
POSITION OF THE DISPENSER AND TANK Position of the Dispenser (1) Space between the dispenser and 1. Be sure to leave at least 4-3/4" the faucet to be 4-3/4”(120mm) minimum (120mm) of space between the soap dispenser and the faucet to prevent accidental Hole for installing the dispenser activation. -
Page 6: Installation Procedure
INSTALLATION PROCEDURE - Spout Top gasket 1.Remove nut, slip washer and bottom gasket. Bottom gasket Slip washer Remove 2.Install the spout on the countertop. Countertop 3.Install bottom gasket, slip washer Bottom gasket and nut in that order. Slip washer Sensor cable Tube 4.Confirm the alignment of spout and tighten nut. - Page 7 4.Insert self-tapping screws into the upper two holes until there is a 1/4”(6mm) gap between head of screw and wall. Use wall plugs if necessary. 1/4” (6mm) 5.Remove the tank from controller. Controller Tank 6.Hang the controller on the two screws. 7.Insert a self-tapping screw through bottom hole of controller and tighten.
- Page 8 NOTE: Fill the tank up to MAX fill line. Tank NOTE: Use only TOTO approved liquid soap. 3.Replace the pump by pushing it down firmly over the tank opening until it snaps in place.
- Page 9 4.Connect the tube to pump. (Insert the barb into the tube fully) NOTE:Make sure that the tube is not too long to prefent contacting the floor while the tank is removed for refilling. Tube Tube Pump 5.Mount the tank to the controller. Tank INSTALLATION PROCEDURE - Connection to Power Supply NOTE: Prepare an outlet position in advance that...
- Page 10 INSTALLATION PROCEDURE - Battery Box [DC Type] 1.Select position for the battery case. Make sure the power supply cable is capable of reaching the controller. 2.Mark the location of the mounting holes. 3.Drill 2 holes. Depth : 1”(25mm) Size : 7/64" (3mm) without anchor 1/4"...
-
Page 11: Testing
TESTING After installation is complete, confirm that the dispenser is working properly using the following method. 1.Place your hands under the spout and hold them in place until soap is discharged. NOTE: Make sure there is no soap leaking from the tube and connections. HOW TO USE THIS PRODUCT Place hands under spout. -
Page 12: Refilling The Soap
MAX fill line NOTE: Clean container before refilling. NOTE: Fill the tank up to MAX fill line. NOTE: Use only TOTO approved liquid soap. Tank 5.Replace the pump by pushing it down firmly over the tank opening until it snaps in place. -
Page 13: Replacing The Battery [Dc Type]
REPLACING THE BATTERY [DC Type] 1.Remove cover of battery case. Battery 2.Install four (4) D size alkaline batteries. case Battery case cover NOTE: Make sure the batteries are - installed in correct orientation + (polarity). 3.Replace battery case cover. Screws +... -
Page 14: Periodic Maintenance
Nozzle ● For Nozzle Cleaning Clean the nozzle with a soft brush to remove any dirt form the screen. Brush ● For Tank Cleaning Wash tank out with water to keep it clean. Tank ● For Pump Unit Cleaning If the pump sticks or backflow occurs, wash pump unit with water while holding upside down and manually squeeze pump several times. -
Page 15: Troubleshooting
Battery is low Replace batteries. Pump is sticking Clean the pump unit. No soap comes out Green LED solid on Change to TOTO Soap viscosity is high approved liquid soap. Sensor window is dirty Clean sensor window. Sensor cable is disconnected Connect cable. -
Page 16: Warranty
TOTO distributor or product service contractor, or directly to TOTO sales office. If, because of the size of the product or nature of the defect, the product can not be returned to TOTO, receipt by TOTO of written notice of the defect shall constitute delivery. -
Page 17: Rough-In Dimensions
ROUGH - IN / DIMENSIONS 1-7/16”(36mm) FRONT VIEW Min 1"(25mm) Max 1-3/16"(30mm) 1-3/16”(30mm) max deck thickness 5-3/16”(131mm) Tube lengh:17-3/4”(450mm) Sensor cable length:19-3/4”(500mm) Floor surface Power cord length: 59”(1500mm) SIDE VIEW 5-3/16”(131mm) Wall Surface 5-3/8”(135mm) Floor surface Unit: inches(mm)
Need help?
Do you have a question about the DSE101EEB and is the answer not in the manual?
Questions and answers