Table of Contents
Advertisement
Advertisement
Table of Contents

Related Manuals for DXG DXG-301V


Summary of Contents for DXG DXG-301V
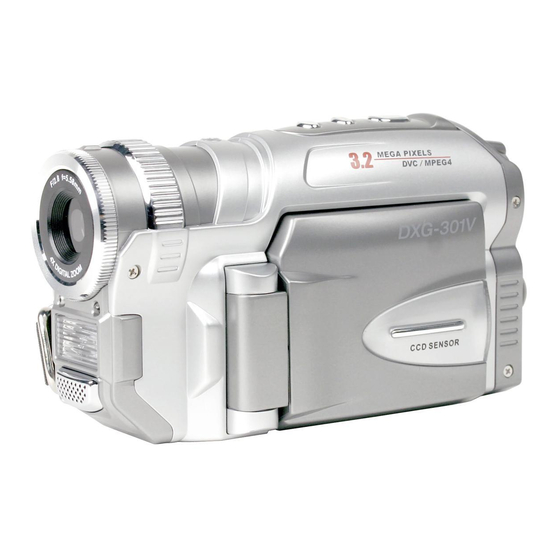
- Page 1 DXG-301V Video Camera User's Manual Ver 2.0 July 2004...
-
Page 2: Table Of Contents
Contents Getting Started Attention ■ Safety Precautions……………………………….………………………………………………3 Before You Start……………………………………………………………………………………3 Important Notices ……………………………………………………………………………..….….…4 Package Contents …………………………………………………………………………………5 ■ Preparing Your Camera Features Overview ■ Front……………………………………………………………………………………………………………6 Left………………………………………………………………………………………………………………7 Rear………………………………………………………………………………………………………………8 LCD………………………………………………………………………………………………………………9 Batteries…………………………… ………….…………………………………………………………10 ■ AC Adapter…..……………………………………………………………………………………….…11 ■ Memory ■ Internal vs. External Memory ……………………………………….…………..…………….12 Memory Card Use ………………………………………………………….…………..…………….12 Memory Card Handling………………………………………………………………………………13 Troubleshooting…………………………………………………………………………………………14... - Page 3 Audio….………………………………………………………………………………………………………25 White Balance ………………………………………………………………………………………25 Video Menu Navigation……………………………………………………………………………….27 Still Photos ■ Still Indicators ……………………………………………………………………………………………27 Taking Pictures………………………………………………………………………………………28 LCD Display Indicators………………………………………………………….……………………28 Flash……………………………………………………………………………………………………29 Self-Timer…………………………………………………………………………………………………29 Resolution……………………………………………………………………………………………29 Quality……………………………………………………………………………………………………29 Scenes………………………………………………………………………………………………30 White Balance………………………………………………………………………………………31 Exposure Value………………………………………………………………………………………….31 M e t e r i n g … … … … … … … … … … … … … … … … … … … … … … … … … … … … … … … … … 3 1 ISO …………………………………………………………………….…………………………….……..33 Still Menu Navigation…………………………………………………………………….…………33 Viewing Videos and Photos...
-
Page 4: Attention Safety Precautions
Please consult other sources. Test the camera. Before taking pictures formally with the DXG-301V camera, take time to get acquainted with the product’s features and functions. Test the camera before formal recording to ensure that it functions well. Any loss caused by the malfunction of this camera (such as costs of photography or any loss of benefit generated by the photography) is not the manufacturer’s... -
Page 5: Important Notices
■ This product consists of intricate electrical parts. To ensure proper performance, hold the camera steady when taking pictures. Do not use or place the camera in the following locations: 1. Damp and dusty places. 2. Sealed vehicles, direct sunlight exposure areas, or places with extremely high temperatures or heat. -
Page 6: Package Contents
Contents Carefully unpack and inspect package contents. Make sure the following items are inside. If anything is missing or damaged, please contact your vendor immediately. 1. DXG-301V 4. AA Alkaline Batteries x 4 Camera 2. USB Cable 3. TV-OUT Cable 5. -
Page 7: Front
Getting to Know Your Camera Front (1) Lens (2) Photo Sensor (3) Self-Timer LED Shutter button (Top) ● Press the Shutter button to take a picture or to start recording a video. (First you must press the Power button.) Menu button (Top) ●... -
Page 8: Left
Left (1) Mode Display Button (2) Speaker (3) Fast Forward (4) Playback/Stop/Self-timer Button (5) Fast Rewind (6) LCD Display (7) SD Memory Card Slot DISPLAY button ● Press this button to toggle between display modes. RWD, PLAY/STOP and FWD buttons ●... -
Page 9: Rear
Rear (1) Status LED (2) Multi-Select Button (3) Connector Cover (4) TV-OUT Port Multi-Select Button ● Use this button to access the menus and perform digital zoom and volume adjustment. Mode Buttons ● Press these buttons to switch to Video, Still, Setup, and Playback modes. USB Port DC-in Jack Mode Buttons... -
Page 10: Lcd
Rotating the LCD Display ■ Open the camera’s LCD display. The rotation directions and stop positions of the LCD display are as follows: Open Counterclockwise 90 degrees counterclockwise Do not rotate the LCD display past its stop positions. Clockwise 90 degrees clockwise Counterclockwise 180 degrees counterclockwise... -
Page 11: Batteries
Batteries AA Alkaline batteries typically last for 1.5 hours of continuous use. Longer run times are possible using AA NiMH or AA Lithium batteries. Always keep a spare set of fresh batteries on hand. See AC Adapter section for using an AC adapter as an alternative power source. -
Page 12: Ac Adapter
AC Adapter AC Adapter Specifications ■ Operation Input Output Connecting the AC adapter ● Turn the camera off and follow the instructions below: Open the connector cover and connect one end of the AC adapter to the DC-in jack on the camera. -
Page 13: Memory
Memory Internal vs. External Memory ■ The camera comes with internal memory built into the camera. You cannot see it, but it is there. If you have a memory card (external memory) the camera’s 16MB built-in memory can provide additional storage space when the external memory card is full. -
Page 14: Memory Card Handling
Memory Card Handling ■ Inserting ● Turn the camera off. Slide the battery cover open as indicated by the arrow. Removing ● Turn the camera off. Slide the battery cover open as indicated by the arrow. Withdraw the memory card. Insert the memory card as indicated by the arrow. -
Page 15: Troubleshooting
Use only SD or MMC (4MB~512MB) memory cards. Never force a card. Re-orient the card and try inserting it again if it does not fit. Format memory cards in the camera only. Format cards periodically. If the memory card is locked, a displayed on the LCD display. -
Page 16: Wrist Strap
Wrist Strap To adjust the wrist strap: Open the wrist strap pouch. Adjust the wrist strap to fit your wrist. Close the wrist strap pouch. -
Page 17: Power On And Led Indicators
Power On and LED Indicators Power Supply ● Press the Power Button to turn on the camera; press the Power Button again to turn it off. Without user input, the camera will turn OFF automatically (default: 3 minutes). You can select idle-off times. (See “Setup”). LED Indicators ●... -
Page 18: Practice
Power On and LED Indicators Practice with Your Camera Using the Mode Buttons ● Here are five easy practice steps to get you started. All revolve mostly around the use of the Mode Buttons, which are grouped around the Power Button in the lower right of the camera's rear side, and the Shutter Button, on the top of the camera. - Page 19 display. 3) Press and release the Shutter button again to stop recording. You have recorded a video. Good. If you are anxious to see what you have recorded, jump to step 3 below, “Review Your Shots,” otherwise, continue to step 2. 4) Optional: Change Video Settings When in Video Mode, change video recording settings by pressing the Menu Button.
- Page 20 3) (Optional Step): You can also Delete images by pressing the Menu Button and do other playback-related things. (Refer to User's Manual p. 38 for Playback mode explanation and navigational guidance.) ------------------- Format the Memory Press the button indicated by “SET.” You are now in Setup mode. This mode is for setting time and date, language, and formatting memory.
-
Page 21: Setup
Press the SET button to switch to the Setup mode. Setting the Date/Time ● The DXG-301V camera can record image dates and times. Set the current date and time for your location before using the camera. Refer to the Setup Mode section for more information. -
Page 22: Setup Menu Navigation
Setup Menu Navigation ●... - Page 23 Set the appropriate video output mode (NTSC/PAL) corresponding to your region’s TV standard to view videos on TV. (USA=NTSC. See Appendix C for others. Make sure you back up important data from the memory card before formatting. Formatting the memory card/internal memory will permanently erase all stored data.
-
Page 24: Video
Video The camera defaults to Video Mode upon power on. Press the button nearest the movie camera icon Video Indicators ■ Standby Image resolution Image quality Video mode Audio :Enable audio recording :Disable audio recording Memory status :Card full :Card half full :Card empty :Card protected :Internal memory full... -
Page 25: Recording Video
■ When recording videos, we recommend you take short clips. This way, if you decide to transfer your video clips to your computer, the files will be smaller, your computer will need fewer system resources, and you will be better able to process, playback and edit video files. -
Page 26: Display Toggle
Video mode to select resolutions and quality levels. Image Quality ■ The DXG-301V camera provides three image quality settings: Fine, Normal, and Basic. The main difference among these three image qualities is the video compression ratio. For example, Basic quality provides the highest compression ratio and smallest file size. - Page 27 Outdoor: For outdoor/sunny day photography. See White Balance section. Video Menu Navigation ■ Press the MENU button (camera top) to show/hide the menus.
-
Page 28: Video Menu Navigation
Still Photos To take photos, press the button nearest the still camera LCD Display Indicators ■ Standby Image Resolution Image Quality Record Mode Scene Mode Memory status :Card full :Card half full :Card empty :Card protected :Internal memory full :Internal memory empty Recorded images/Total Images Date/Time... -
Page 29: Taking Pictures
Taking Pictures ■ The DXG-301V can capture fine still images. The camera has a tripod mount for this purpose. The still image file format is JPEG. The maximum number of recordable images depends on the amount of memory space available to it. -
Page 30: Flash
Flash ■ Press button to toggle between flash modes. Display Flash mode Flash Off Auto Flash Auto Flash + Red-eye Reduction Forced Flash + Red-eye Reduction Slow Synchronize For taking pictures of night scenes or in dark Self-Timer Mode ■ See page 7, Playback/Stop/Self-timer Button. -
Page 31: Scenes
Scenes ■ The camera provides 13 scene modes for still photography. For your convenience you can select one of the following scene modes to automatically use pre-set White Balance, EV Compensation, Metering, and ISO settings. Symbol Mode Auto Manual Portrait Landscape Photographs of outdoor scenery. -
Page 32: White Balance
White Balance ■ There are six white balance settings in the Still mode: Auto: Automatic. For general-purpose photography. Sunny: For shooting outdoors on sunny days. Bulb: For indoors with fluorescent lighting. Neon: For indoors with tungsten lighting. Cloudy: For outdoor scenes with cloudy or overcast skies. Speed: For shooting fast-moving objects. - Page 33 Spot metering: measures a spot in the center which is about 1/25 of the viewfinder’s area to determine the exposure of the entire image. A square frame is displayed in the center and side of the LCD display. This mode is best applicable to objects with very bright or dark backgrounds.
-
Page 34: Iso
The DXG-301V camera provides four ISO settings: Auto, 100, 200 and 400. (100 is equivalent to the ISO 100 film, 200 is equivalent to ISO 200 film, and so on.) -
Page 36: Playback Indicators
Playback Press the Playback button to switch to the Playback mode. Indicators ■ Image Playback mode Current image (video) number/Recorded files count Image (video) recorded date and time Previous/next image (video) Image (video) indicator If there is no image/videos stored in the internal memory or memory card, a blinking "NO File"... -
Page 37: Display Toggle
LCD Display Toggle ■ Press DISPLAY button to toggle between display modes. Full display Standard display Thumbnail Display ■ Thumbnails are smaller representations of images, helpful for fast review where viewing space is limited. Press After entering the thumbnail display mode, press the (right arrow) to select the previous/next image (video);... -
Page 38: View Photos
Viewing Photos ■ Press the (left arrow) / Image Viewing Videos ■ Press the (left arrow) / The following screen will appear on the LCD display after a video is selected. Press the PLAY/STOP button to start playing a video. Press the PLAY/STOP button again to stop playing video. -
Page 39: Dpof
Slideshow ■ Slideshow plays back images (but not videos) automatically in sequential order. You can adjust the slideshow display interval within the range of 1 second to 10 seconds. Select (down arrow) to increase or decrease the interval. The symbols are to enable or disable the repeat function, respectively. Select the menu item and press the function. -
Page 40: Playback Menu Navigation
Playback Menu Navigation ■ In Playback, Press the MENU button to show/hide the menus. NEXT FILE... - Page 41 If the selected image/video is protected If the selected image/video is protected, the "Remove" sub-menu appears automatically.
- Page 43 Slideshow plays only still images, not videos.
- Page 44 If no image stored in the memory.
-
Page 45: Tv-Out
TV and video recorder standards. USA=NTSC (See Appendix B for a list of NTSC & PAL countries.) Use the video cable provided to connect the DXG-301V camera your output device. These two devices will then display the same image. -
Page 46: Installing The Camera Driver
Camera Driver Installing the Camera Driver ● The camera driver is not required for XP/Windows 2000 systems. For older Windows operating systems, install the camera driver to your PC: Insert the companion CD included in the retail package into the CD-ROM drive. -
Page 47: Camera Driver
5. Click "Finish" to restart the computer and installation completes. -
Page 48: Applications
Applications Installation Procedure ● Please feel free to use the bundled application software. If you have questions, please do not contact DXG, which does not provide assistance in the use of these programs. To install ArcSoft applications (Example: Photo Impression) Insert the Software CD included the package into the CD-ROM drive. - Page 49 Press "Yes" to accept the terms and conditions of Software License Agreement and continue. Follow the installation wizard to select the folder location and application components. Select the program folder. After the installation is completed, the following screen shows. Press "Finish"...
-
Page 50: File Transfers
File Transfers File Transfer Procedure ■ Use the Mass Storage function in the camera and your operating system to transfer files via USB. Do not use the PC application software for this purpose. Note: Windows XP and Windows 2000 users do not need to install the camera driver to transfer files. -
Page 51: Specifications
Appendix A. DXG-301V Specifications ■ Image sensor 1/2.7" CCD Pixels 3.2 mega pixels Focus F / 2.8 10 cm~∞ Focus range Shutter speed Electrical shutter (1/2 sec. ~ 1/1500 sec.) LCD display 1.8" TFT LCD (280 x 220 pixels) Storage... -
Page 52: System Requirements
Appendix B. System Requirements ■ These are minimum system requirements for use with the DXG-301V camera. We strongly recommend that you use a better computer system for optimal performance, as these are bare minimums. Microsoft Windows 98SE/Me/2000/XP Intel Pentium 166MHz or higher... -
Page 53: Ntsc & Pal Countries
Appendix C. Appendix C. NTSC & PAL Countries NTSC Countries: USA, Antigua, Bahamas, Barbados, Belize, Bermuda, Bolivia, Burma, Canada, Chile, Colombia, Costa Rica, Cuba, Dominican Republic, Ecuador, El Salvador, Greenland, Guam, Guatemala, Guyana, Honduras, Jamaica, Japan, South Korea, Mexico, Netherlands Antilles, Nicaragua, Panama, Peru, Philippines, Puerto Rico, St. - Page 54 DISCLAIMER The information in this document is believed to be reliable, though no responsibility is assumed for inaccuracies. DXG Technology reserves the right to make changes to the items described herein to improve reliability, function or design. Neither DXG nor any of its employees, assume any liability for...
Need help?
Do you have a question about the DXG-301V and is the answer not in the manual?
Questions and answers