Table of Contents
Advertisement
Advertisement
Table of Contents

Related Manuals for DXG DXG DXG-505V


Summary of Contents for DXG DXG DXG-505V
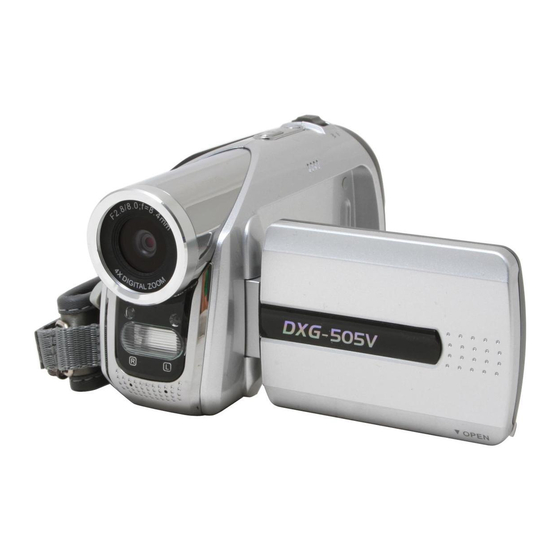
- Page 1 DXG-505V User Manual DXG USA...
- Page 2 Introduction This is a digital video camera of exceptional quality and value. You will be able to capture videos and pictures, then send and share them with friends and family. This digital video camera not only functions as a digital camera, it also functions as an MP3 player, a digital voice recorder, FM tuner, and when connected to your PC, acts as a webcam.
-
Page 3: Table Of Contents
Contents 1.Precautions……………………………………………..…….…..……5 Safety precautions………………………………………………………………………………5 Precautions before use………………………………………………………………………5 Precautions before operation……………………………………………………………………6 Package contents………………………………………………………………………………6 2.Understanding this digital video camera………………………...…….8 Digital video camera construction…...……………..………………………………….………….….8 Top view…………………………………………………………………………………………8 Front……………………………………………………………………………………… …… 8 Connector ports………………………………………………………………………………8 Back…………………………………………………………………………………… ………9 Left………………………………………………………………………………………………9 Right……………………………………………………………………………………………10 Battery status indicator…………………………………………………………………………10 3.How to use this digital video camera…..….…..……………..………11 Preparations before operation…………………………………………………... - Page 4 Color effects……………………………………………………………………………24 Auto shutter………………………………………………………………………………24 Select date indicator………………………………………………………………………24 Return to photo mode………………………………………………………………………25 Flash light function……………………………………………………………………………25 How to take a picture………………………………………………………………………25 Capturing close-up photos……………………………………………………………………25 Capturing general photos……………………………………………………… ………… …25 Photo playback…………………………………………………………………………25 Photo playback menu……………………………………………………………………25 Exit photo playback menu……………………………………………………………30 M P 3 p l a y e r … … … … … … … … … … … … … … … … … … … … … … … … … … … … 3 0 How to playback MP3 music…………………………………………………………………30 Volume control……………………………………………………………………………31 Previous, next song…………………………………………………………………………31...
- Page 5 5.How to record TV programs.….….………………..….…...41 6.Video/audio output.……………………….………………..…………43 7.How to connect to PC...….…..….….…...………………..….…...44 8.Driver installation………………..……..………………………...….47 Pr e st o ! Vi d e o Wo r k s 6 … … … … … … … … … … … … … … … … … … … … … … 4 9 P r e s t o ! Mr.
-
Page 6: Precautions
1. Precautions Please read this manual carefully and keep it in a safe place for future reference. Follow the instructions on this manual and observe proper handling and you’ll be enjoying this digital video camera for a long time. Safety precautions •... -
Page 7: Precautions Before Operation
Precautions before operation This product is composed electrical components, in order to ensure correct image recording, please do not apply heavy shock or impact of the digital video camera during operation. • Avoid operating and storing in the following areas: 1. - Page 8 Audio IN/OUT cable Video IN/TV OUT cable DC IN 5V Adapter (please base on actual DC-IN Connector content) NP-60 Li-Ion battery CD (includes drivers) (optional) Lens cap ●Digital Video camera ●wrist strap ●Leather case and ●Lens cap strap ●Headphones ●USB cable ●Audio IN/OUT cable ●Video IN/TV OUT cable ●“AA”...
-
Page 9: Understanding This Digital Video Camera
●NP-60 Li-Ion battery (optional) ●CD (includes drivers) ●Instruction manual ●Lens cap 2. Understanding this Digital Video Camera Product Views Top view: 1. Shutter button - filming 2. MUSIC button – enters MP3 playback mode, radio mode and swtiches back from the two modes 3. -
Page 10: Back
3. Audio plug – The audio plug connects the headphone. Listen to music on the digital video camera. At the same time, this can function as audio input/output plug. Note: if using the radio function, the headphones have to be plugged in to function as antenna to receive radio channels. -
Page 11: Right
Right: 1. Battery compartment lock – This is the lock to open the battery compartment. 2. Li-Ion battery support – After inserting the Li-Ion battery, pivot out this support to secure the battery. 3. DC power plug – Inserting the DC-IN 5V power plug can supply external DC voltage to the unit. -
Page 12: How To Use This Digital Video Camera
3. How to use this Digital Video Camera Preparations before operation ●First step: Please insert four AA alkaline or rechargable batteries and check the battery life. If the battery life is low, please immediately replace the batteries to ensure proper digital video camera operation. -
Page 13: Using This Digital Video Camera
4. Using this Digital Video Camera ●Step one Press the Power switch button, and the power indicator light will automatically light up. When the power indicator light is lit, release the power switch button. Function list Movie mode... - Page 14 Photo mode...
- Page 15 MP3 playback mode...
- Page 16 Setup mode Audio mode Radio mode...
-
Page 17: Video Mode
Video mode [ Switch the mode selection button to [Movie] Status indicator Movie mode indicator Image format White balance Color effects Image quality Battery status Image size Digital zoom status Built-in storage status Hotkey menu Under movie mode, continuously press the confirm button access the hotkey function selection;... -
Page 19: Capturing Video
Capturing video This digital video camera can capture video in MPEG4 format. Under movie mode, press the MENU button to enter the movie menu. Under the movie menu page, possible controls are as follows: Select image size: 1. Press the up button ▲ or down button ▼ to select the size option and press the confirm button 2. - Page 20 Image quality options: Best, standard. Select white balance mode: 1. Press the up button ▲ or down button ▼ to select the white balance option and press the confirm button 2. Use the up button ▲ or down button ▼ to select your desired white balance mode and press the confirm button .
-
Page 21: Video Playback
●Step two During filming, press the REC button to stop capturing, or automatically stop filming when memory is full. Video playback: Under movie mode, press the playback button to return to video playback mode. 1. Press the up button ▲ or down button ▼ to select the video to playback, then press the confirm button to begin playback (this camera supports MP4 video playback;... -
Page 22: Video Playback Menu
Video playback menu: Under the video playback mode, press the MENU button to return to the playback menu. Delete single video 1. Press up button ▲ or down button ▼ to select the single choice to delete, then press the confirm button 2. -
Page 23: Photo Mode
to either delete all files or cancel deletion (protected files cannot be deleted). Protect single video 1. Press up button ▲ or down button ▼ to select the single choice to protect, then press the confirm button 2. Press up button ▲ or down button ▼ to confirm or cancel, press the confirm button to either protect single video or cancel protection, a lock icon upper right corner of the screen (apply protection to protected files to unprotect it). - Page 24 access the hotkey function selection; this can control the captured video such as: Image file size, exposure, image quality, white balance, automatic, color effect setups. After pressing the Deleted: file format , press the up button ▲ or down button ▼ to select each submenu. confirm button The control procedures are as below:...
-
Page 25: Focus Locking
Focus locking:... -
Page 26: Photo Menu
When pressing the shutter button to the first stage, a green [ ] indicates the image is focused. Photo menu: Setup the desired options before filming. Press MENU button to access the photo menu. The control procedures are as below: Select image size: 1. -
Page 27: Select White Balance Mode
Select white balance mode: 1. Press up button ▲ or down button ▼ to select white balance option, then press the confirm button 2. Press up button ▲ or down button ▼ to select your desired white balance mode, press the confirm button White balance options: auto, sun light, cloudy, light bulb, florescent light. -
Page 28: Return To Photo Mode
Return to photo mode: Press the MENU button to return to photo mode. Flash light function: Under photo mode, press the up buttom ▲ to cycle through the flash light modes. How to take a picture: ●Step one Make sure the digital video camera is turned on ●Step two Aim the digital video camera at the object to capture, and view the filming angle from the LCD screen ●Step three Press the shutter button... - Page 29 Under photo playback mode, press the MENU button to display the photo playback menu. Control procedures are as below: Delete single photo 1. Press up button ▲ or down button ▼ to select the single photo choice to delete, then press the confirm button 2.
- Page 30 Delete all photos 1. Press up button ▲ or down button ▼ to select all to delete, then press the confirm button 2. Press up button ▲ or down button ▼ to confirm or cancel, press the confirm button to either delete all files or cancel deletion (protected files cannot be deleted). Undo all photo protection 1.
- Page 31 2. Press up button ▲ or down button ▼ to set the single option, then press the confirm button to enter the single setting interface. 3. At the single setting interface, the current photo will appear and then use the up button ▲ or down button ▼...
- Page 32 DPS (only supported for DPS (direct print service) enabled printers) Press up button ▲ or down button ▼ to select the print option, then press the confirm button . Connect the digital video camera and printer with the USB cable and after successful connection is established the digital video camera will show print single and print all options.
-
Page 33: Exit Photo Playback Menu
-Print: press the confirm button to begin printing. Print all 1. At the print menu, Press up button ▲ or down button ▼ to select to print single and then press the confirm button to go to the print all interface. 2. -
Page 34: Volume Control
Volume control During music playback, press the ZOOM-IN button and ZOOM-OUT button to adjust the volume level. Previous, Next song During music playback, press the up button ▲ or down button ▼ to skip to previous, next song. Turn off LCD screen During music playback, to conserve the batteries the LCD screen will be automatically turned off after 1 minute of music playback. -
Page 35: Stop Playback
Stop playback During music playback, press the confirm button to stop music playback. Control procedures are as below:... -
Page 36: Mp3 Player Menu
MP3 player menu When playback is stopped, press the MENU button to display the menu. Delete single track 1. Press up button ▲ or down button ▼ to select the single track choice to delete, then press the confirm button 2. -
Page 37: Return To Mp3 Player Interface
to either protect single track or cancel protection, a lock icon upper right corner of the screen (apply protection to protected files to unprotect it). Delete all tracks 1. Press up button ▲ or down button ▼ to select all to delete, then press the confirm button 2. -
Page 38: Listening To A Station
Listening to a station After auto tuning is complete, the user can use up button ▲ or down button ▼ to select the station to listen to, or tune in to the default station. As illustrated: Manual tuning While listening to a station, press the MENU button and press the up button ▲ or down button ▼... -
Page 39: Exit Radio Mode
Controls as illustrated: Exit radio mode Under radio mode, press the MUSIC button to exit the radio. Audio mode Rotate the mode selection dial to , the screen will display: Status indicator: Under the audio mode, press the REC button to begin audio recording, press the REC button to stop audio recording. -
Page 40: Volume Adjustment
button again to stop playback. During playback, press the REC button to pause playback, press the REC button again to continue playback. Volume adjustment: During recording playback, you can press the ZOOM-IN button and ZOOM-OUT button to adjust the volume level. Previous, Next song During recording playback, press the up button ▲... -
Page 41: Exit Audio Playback Menu
1. Press up button ▲ or down button ▼ to select all to delete, then press the confirm button 2. Press up button ▲ or down button ▼ to confirm or cancel, press the confirm button to either delete all files or cancel deletion (protected files cannot be deleted). Undo all audio protection 1. -
Page 42: Setup Mode
Under the audio playback menu interface, press the MENU button to exit audio playback menu interface; press the playback button to return to audio mode. Setup mode After pressing the MENU button in any modes, you can press DISP/SET button to enter the setup mode. -
Page 43: Setup
Setup: Exit setup To exit setup mode, press the DISP/SET button to return to the interface before pressing MENU button; then press MENU button to return to the interface before that. -
Page 44: How To Record Tv Programs
5. How to record TV programs The main procedures for recording TV programs are as below: 1. Rotate the mode selection dial to video mode 2. Press the MENU button to enter the video mode menu. 3. After entering the video mode menu, press the DISP/SET button to enter the camera setup menu. - Page 45 Use the audio cable and TV cable to connect the camera with your TV/DVD, the disappear and the TV/DVD image will be displayed on the LCD screen. To not display the icon on the LCD, press the DISP/SET button; press the ZOOM button to adjust the volume level, press the confirm button to enter the hotkey menu for the appropriate settings.
-
Page 46: Video/Audio Output
6. How to use USB Pen-Driver data copy 6. Video/audio out You can use the “video/audio out” on the digital video camera to output the video/audio to an external device (such as: TV), the method is as below: ●Step one Insert the black plug of the TV cable to the TV port on the back of the digital video camera, and the yellow plug to the video in of the TV. -
Page 47: How To Connect To Pc
7. How to connect to PC The digital video camera can also function as a webcam/storage device, procedures as below: ●Step one Make sure the digital video camera is installed with four “AA” batteries ●Step two Connect the smaller end of the USB cable plug to the USB port on digital video camera Note: Please make sure to connect the USB cable properly to prevent... -
Page 49: System Requirements
●Step four In a moment the camera will enter the connect to PC mode: ●Step five Press Up button ▲ or Down button ▼ to select Mass Storage (removable disk) or PC Camera (webcam) and then press confirm button, the camera screen will turnoff and enter the appropriate function. - Page 50 Others One standard USB 1.1 port For Microsoft Windows98SE/Me users, please connect the larger USB plug to the PC USB port and the other end to the digital video camera USB port after installing the drivers and application software. When the camera enters the “connection to PC” page, press the up button ▲ or down button ▼...
- Page 51 8.Drivers and software applications 1. Drivers When the camera is connected to a PC, you will be able to use the camera as removable storage or PC webcam. Removable storage The digital video camera is able to provide removable storage functions as a card reader. You can use this camera as an SD card, removable disk.
-
Page 52: Driver Installation
Displays the below screen. Install Press the install button to install the drivers. Please follow the on screen instructions. Press “finish” to restart the PC and complete the driver installation. Load the driver 1. Insert the included CD into the CD-ROM. 2. -
Page 53: Pr E St O ! Vi D E O Wo R K
2 . Presto! Video Works 6 Presto! Video Works 6 is an advanced application software for video editing. Install Presto! Video Works 6: 1. Insert the included CD into the CD-ROM. 2. If the CD does not auto-run, use Windows file manager to run the executable InstallMgr.exe under the root directory on the CD. -
Page 54: Xvid Codec For Pc
4. XviD codec for PC Installing the XviD codec program Insert the Software CD supplied into the CD-ROM drive Please double click on the "My Computer" icon on the desktop. Then double click the CD-ROM drive icon and click the setup file of Xvid in the root directory. Click "XviD.exe"... - Page 55 Click "Browse" to select the folder location and click "Next" to continue. Click "Browse" if you want to select a different program folder or click "Next" to continue. Enter the additional tasks setup screen and press "Next" to continue.
- Page 56 Enter the main program setup screen and press "Install" to start the installation. During the installation, press "Cancel" if you want to stop setup. 10. The following screen will appear after the installation is completed. Click "Finish" to complete the installation.
-
Page 57: Digital Video Camera Specifications
9. Digital video camera specifications Digital video camera specifications: ●Lens: f=8.4 ●Sensor: 5.17Mega pixel cmos sensor ●Aperture: F / 2.8, 8.0 ●Exposure: ISO 100 ●White balance setting: Auto, sun light, light bulb, florescent light, cloudy ●Shutter: Mechanical shutter + electrical shutter ●Shutter speed: 1/4 sec ~ 1/500 sec ●Storage format: Built-in 32MB, Flash Memory SD Card (MMC compatible) slot (maximum supported 2GB) -
Page 58: 10.Troubleshooting
10.Troubleshooting When the digital video camera hangs during operation and cannot accept input, please check the battery contacts and then restart. If not able to System hangs restart, check if unnecessary operation has caused damage to digital video camera. Do not attempt to disassemble and please return for repair. For error messages appearing when entering direct printing service, you Error message should remove the USB plug from the digital video camera and check... - Page 59 Website Please visit our website at www.dxgusa.com for any product updates or special announcements. You can also check out our online support desk where you can register your product, send emails to our technical support, and find a list of frequently asked questions (FAQs)
- Page 60 DXG USA...
Need help?
Do you have a question about the DXG DXG-505V and is the answer not in the manual?
Questions and answers