Barazza 1ABFY Installation And Use Manual
Blaster chiller
Hide thumbs
Also See for 1ABFY:
- Installation and use manual (48 pages) ,
- Installation and use manual (48 pages)
Table of Contents
Advertisement
Available languages
Available languages
Quick Links
Advertisement
Chapters
Table of Contents

Subscribe to Our Youtube Channel
Related Manuals for Barazza 1ABFY

Summary of Contents for Barazza 1ABFY
- Page 1 1ABFY Abbattitore Manuale d’installazione ed uso...
-
Page 2: Table Of Contents
Sommario INTRODUZIONE ..........................4 Avvertenze generali ....................... 4 Avvertenze sulla sicurezza ..................... 4 Trasporto e movimentazione ....................4 Disimballo ..........................5 INSTALLAZIONE ..........................5 Dati di targa ........................... 5 Avvertenze per l’installazione ....................7 Posizionamento ........................7 Temperatura ambiente e ricambio d’aria ................7 Verifiche finali ........................ - Page 3 MANUTENZIONE ORDINARIA ....................18 Informazioni sulla sicurezza ....................18 Pulizia superfici esterne ...................... 18 Pulizia cella .......................... 18 Periodi di inattività ......................18 MANUTENZIONE STRAORDINARIA.................... 19 Malfunzionamento ......................19 Smaltimento dell’apparecchiatura ..................19 RICERCA GUASTI ......................... 21 Tabella allarmi ........................21 DATI TECNICI ..........................
-
Page 4: Introduzione
INTRODUZIONE Avvertenze generali Il presente manuale costituisce parte integrante del prodotto, contiene informazioni sull’installazione, sull’utilizzo e sulla sicurezza dell’apparecchiatura. Leggere attentamente le istruzioni contenute. E’ obbligatorio, da parte dell’utilizzatore e dell’installatore, leggere attentamente questo manuale e fare sempre riferimento a esso. Si consiglia di conservare questo manuale in luogo noto e accessibile a tutti gli operatori autorizzati (installatore, utilizzatore, manutentore), per poterlo consultare in ogni momento e di allegarlo all’apparecchiatura in caso di cessione. -
Page 5: Trasporto E Movimentazione
Trasporto e movimentazione Il carico e lo scarico dell’apparecchiatura dal mezzo di trasporto devono essere eseguiti con mezzi idonei, quali ad esempio un carrello, in assenza dei quali sono necessarie almeno due persone. Attenzione! Durante le operazioni di movimentazione deve essere osservata ogni precauzione necessaria a non arrecare danno a persone, cose o all’apparecchiatura stessa. -
Page 6: Disimballo
Disimballo Aprire superiormente la scatola ripiegandone lateralmente i lembi per operare più facilmente, quindi rimuovere la protezione superiore e gli angolari laterali in polistirolo (fig.1). Sfilare il sacchetto di protezione (fig.2), infine, utilizzando le opportune maniglie di sollevamento, estrarre l’apparecchiatura dalla scatola sollevandola verso l’alto (fig.3). -
Page 7: Avvertenze Per L'installazione
Avvertenze per l’installazione L’installazione deve essere eseguita esclusivamente da personale autorizzato e specializzato, rispettando avvertenze, istruzioni e prescrizioni contenute nel presente documento. Prima di installare l’apparecchiatura accertarsi che gli impianti elettrici preesistenti siano a norma di legge e adeguati ai dati di targa dell’apparecchiatura da installare in termini di tensione [V], frequenza [Hz] e potenza [W]. -
Page 8: Temperatura Ambiente E Ricambio D'aria
Temperatura ambiente e ricambio d’aria Le prestazioni dell’apparecchiatura sono garantite fino a una temperatura ambiente di 32°C a condizione di garantire un adeguato ricambio d’aria come indicato al paragrafo 2.3. Verifiche finali Ultimati il posizionamento e il collegamento elettrico dell’apparecchiatura: •... -
Page 9: Contenitori E Coperchi Da Utilizzare
Nei programmi che prevedono l’utilizzo della sonda al cuore, la fine del processo avviene in modo automatico al raggiungimento della temperatura prevista nell’alimento. Nel caso in cui la sonda al cuore non sia collegata all’apparecchiatura e l’utente vuole utilizzare la modalità al cuore, appare sul display “Collegare la sonda per avviare il programma”. -
Page 10: Programmi
Programmi ABBATTIMENTO Permette di conservare gli alimenti in frigorifero per 5÷7 giorni, grazie a un rapido raffreddamento degli alimenti a +3°C. Questo raffreddamento blocca l’evaporazione dell’acqua dai prodotti appena sfornati e riduce la proliferazione batterica, allungando così il tempo di conservazione del cibo stesso. -
Page 11: Il Display E L'interazione Con L'utente
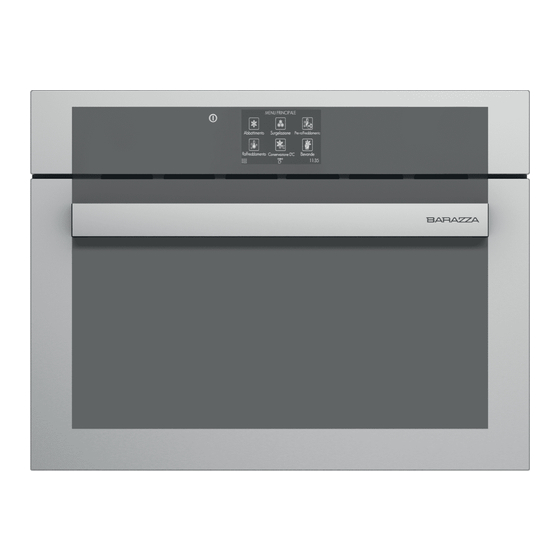
Il display e l’interazione con l’utente Il quadro comandi è composto da un display touch da 4,3 pollici e da un pulsante di accensione posto a lato. Fig.6 – Menù principale ed esempio di schermata di selezione 1. Icona “Programma”: il tocco dell’icona conduce alla schermata di esecuzione del relativo programma. 2. -
Page 12: Accensione E Spegnimento
3.11 Accensione e spegnimento Per accendere l’apparecchiatura premere il tasto ON/OFF posto a lato del display per almeno 2 secondi. Viene visualizzato il logo, quindi la schermata del “Menù principale”. In assenza di interazione per 5 minuti, sul display compare lo screensaver dell’ora corrente. Per spegnere l’apparecchiatura, premere il tasto ON/OFF posto a lato del display per almeno 2 secondi. -
Page 13: Pre-Raffreddamento
3.12.2 Pre-raffreddamento Il Pre-raffreddamento è consigliato per ridurre i tempi di esecuzione dei programmi di abbattimento e surgelazione. PRE-RAFFREDDAMENTO Prima di avviare il programma E’ possibile verificare le informazioni nella schermata di riepilogo. Programma in corso Il display visualizza le impostazioni e il tempo rimanente alla fine del ciclo. ALLA FINE DEL PROGRAMMA L’apparecchiatura emette un segnale acustico e visualizza una schermata di avviso. -
Page 14: Surgelazione
3.12.4 Surgelazione La surgelazione permette di ridurre rapidamente la temperatura di un alimento a -18°C, consentendo di conservarlo successivamente per diversi mesi in congelatore. Vengono mantenute intatte le qualità organolettiche, il sapore, l’aroma e l’aspetto degli alimenti mediante la micro- cristallizzazione rapida dell’acqua contenuta, evitando così... -
Page 15: Bevande
3.12.6 Bevande Il programma “Bevande” permette di ridurre la temperatura di una bevanda in base al tempo a disposizione. L’abbattitore ha caratteristiche prestazionali di grande utilità quando non si disponga di sufficiente tempo per la normale preparazione alla degustazione di bevande. Nota: questa apparecchiatura non è... -
Page 16: Scongelamento
PESCE CRUDO Prima di avviare il programma E’ possibile verificare le informazioni inserite attraverso una schermata di riepilogo. Programma in corso Il display visualizza le impostazioni e il tempo rimanente alla fine del ciclo. ALLA FINE DEL PROGRAMMA Al termine del programma l’apparecchiatura emette un segnale acustico e visualizza una schermata di avviso. Quindi entra in modalità... -
Page 17: Cottura Lenta
Il display visualizza le impostazioni selezionate, l’ora di fine ciclo e l’ora in cui avrà Periodo di attesa inizio il riscaldamento. Programma in corso Il display visualizza le impostazioni e il tempo rimanente alla fine del ciclo. ALLA FINE DEL PROGRAMMA Al termine del programma l’apparecchiatura emette un segnale acustico e visualizza una schermata di avviso. -
Page 18: Lievitazione
3.12.12 Lievitazione La lievitazione permette di creare un microclima a temperatura e umidità controllate per favorire l'attivazione e la trasformazione dei lieviti. In tal modo la fermentazione può aver luogo in condizioni ottimali producendo il naturale e desiderato rigonfiamento dell'impasto. Programmando la durata della lievitazione è... -
Page 19: Manutenzione Ordinaria
Prima di avviare il programma E’ possibile verificare le informazioni inserite attraverso una schermata di riepilogo. Il display visualizza le impostazioni selezionate, l’ora di fine ciclo e l’ora in cui avrà Periodo di attesa inizio la lievitazione. Programma in corso Il display visualizza le impostazioni e il tempo rimanente alla fine del ciclo. -
Page 20: Manutenzione Straordinaria
Al primo successivo riutilizzo svolgere le operazioni di pulizia preliminare indicate al paragrafo 3.2. MANUTENZIONE STRAORDINARIA Malfunzionamento Gli interventi di manutenzione straordinaria e/o sostituzione di ogni parte dell’apparecchiatura, nonché per ciò che riguarda il sistema di illuminazione, devono essere svolti da personale qualificato e autorizzato. Nota: nel caso si osservassero malfunzionamenti, prima di chiamare il centro di assistenza assicurarsi che il cavo di alimentazione sia correttamente inserito e che vi sia tensione. -
Page 21: Ricerca Guasti
RICERCA GUASTI Tabella allarmi CODICE DESCRIZIONE AZIONE Contattare l’assistenza per la Sonda aria guasta riparazione Comunicazione dati assente tra scheda Contattare l’assistenza per la di potenza e interfaccia utente riparazione DATI TECNICI Capacità abbattimento 3 kg Capacità surgelazione 3 kg Numero ripiani (per griglie) Parametri elettrici 220/240V 50Hz... -
Page 22: Schema Elettrico
SCHEMA ELETTRICO Fig.10 – Schema elettrico Scheda di potenza Ventilatore condensatore Fusibile Ventilatore condensatore Presa IEC con filtro EMI Display Morsetto di terra Spot-LED Resistenza di riscaldamento Ventilatore evaporatore Compressore Sonda aria Protezione a bimetallo Sonda cuore INFO Service L’assistenza tecnica al prodotto è offerta da Centri abilitati di Zona, i cui indirizzi di riferimento per la zona specifica sono riportati nell’allegato che completa il presente manuale. - Page 24 Barazza srl 31025 Sarano di S.Lucia di Piave (TV) ITALIA Via Risorgimento, 14 Tel. +39 0438 62888 Fax + 39 0438 64901 info@barazzasrl.it www.barazzasrl.it...
- Page 25 1ABFY Blaster chiller Installation and use manual...
- Page 26 Contents INTRODUCTION ............................4 General warnings ..........................4 Safety warnings ..........................4 Transport and handling ........................4 Unpacking ............................5 INSTALLATION ............................5 Plate data ............................5 Installation warnings ......................... 6 Positioning ............................6 Ambient temperature and air exchange ................... 7 Final checks ............................
- Page 27 ROUTINE MAINTENANCE ........................19 Safety information ........................... 19 External surface cleaning ......................... 19 Cell cleaning ............................. 19 Periods of inactivity ......................... 19 CORRECTIVE MAINTENANCE ........................20 Malfunctioning ..........................20 Disposal of device ..........................20 TROUBLESHOOTING ..........................21 Table of alarms ..........................21 TECHNICAL SPECIFICATIONS ........................
-
Page 28: Introduction
INTRODUCTION General warnings This manual constitutes an integral part of the product. It contains information on the installation, use and safety of the device. Read the instructions carefully. It is mandatory for the user and installer to read this manual carefully and to always use it as a reference. It is recommended to store this manual in a known location that is accessible to all authorised operators (installer, user, maintenance technician) for consultation at all times, and to attach it to the device if ownership is transferred. -
Page 29: Unpacking
Unpacking Open the box from the top, folding down the flaps to facilitate operations. Then remove the top and corner protections in polystyrene (fig.1). Extract the protective bag (fig.2), then using the dedicated lifting handles, extract the device from the box by lifting it upwards (fig.3). Fig.1 Fig.2 Fig.3... -
Page 30: Installation Warnings
Installation warnings Installation must be carried out only by authorised and specialised personnel in respect of the warnings, instructions and provisions contained in this document. Before installing the device, make sure the pre-existing electrical systems comply with current legislation and are compatible with the ID plate of the device being installed in terms of voltage [V], frequency [Hz] and power [W]. -
Page 31: Ambient Temperature And Air Exchange
Ambient temperature and air exchange The performance of the device is guaranteed up to an ambient temperature of 32°C provided there is a suitable air exchange as indicated in paragraph 2.3. Final checks Once the device has been positioned and electrically connected: •... -
Page 32: Usable Containers And Lids
Note: the core probe must be inserted through to the centre of the food to make sure it doesn’t fall out. To improve the efficiency of programmes, insert the probe in the largest piece. If the core probe is not inserted in the food because it has been forgotten on the floor of the cell or because it has fallen out of the food itself, after 5 minutes the device automatically switches to “recipe”... -
Page 33: Programmes
Programmes BLAST CHILLING Allows foods to be stored in the fridge for 5÷7 days thanks to their rapid cooling down to +3°C. This cooling blocks the evaporation of water from freshly cooked products and reduces the spread of bacteria, thus extending the preservation time of the food itself. BLAST FREEZING Allows foods to be stored in the freezer for several months thanks to their rapid cooling down to - 18°C. -
Page 34: Display And User Interaction
Display and user interaction The control panel consists in a 4.3 inch touch display and power-on button located on the side. Fig.6 - Main menu and example of selection screen 1. “Programme” icon: when this icon is touched, the run screen for the relative programme opens. 2. -
Page 35: Power-On And Power-Off
3.11 Power-on and power-off To power on the device press the ON/OFF key on the side of the display for at least 2 seconds. The logo will appear and therefore the “Main Menu” screen. After 5 minutes of no interaction, a screen-saver with the current time will appear on the display. To power off the device press the ON/OFF key on the side of the display for at least 2 seconds. -
Page 36: Pre-Cooling
3.12.2 Pre-cooling Pre-cooling is recommended to reduce the run time of blast chilling and blast freezing programmes. PRE-COOLING Before starting the It is possible to check the information in the summary screen. programme Programme running The display shows the settings and remaining time until the end of the cycle. AT THE END OF THE PROGRAMME The device emits an acoustic signal and opens up a notification screen. -
Page 37: Blast Freezing
3.12.4 Blast freezing Blast freezing rapidly reduces the temperature of food down to -18°C, thus allowing it to be stored for several months in the freezer. The sensory properties, taste, aroma and appearance of food is maintained through the rapid micro- crystallisation of the food's water content, thus preventing the destruction of its internal molecular structure. -
Page 38: Beverages
AT THE END OF THE PROGRAMME At the end of the programme the device emits an acoustic signal and opens up a notification screen. There is no cell temperature holding phase. There is no defrosting phase at the end. 3.12.6 Beverages The “Beverages”... -
Page 40: Thawing
RAW FISH Before starting the It is possible to check the data inserted through a summary screen. programme Programme running The display shows the settings and remaining time until the end of the cycle. AT THE END OF THE PROGRAMME At the end of the programme the device emits an acoustic signal and opens up a notification screen. -
Page 41: Slow Cooking
Before starting the It is possible to check the data inserted through a summary screen. programme The display shows the selected settings, the end cycle time and the time when Wait period heating will begin. Programme running The display shows the settings and remaining time until the end of the cycle. AT THE END OF THE PROGRAMME At the end of the programme the device emits an acoustic signal and opens up a notification screen. -
Page 42: Proofing
3.12.12 Proofing Proofing allows the creation of a micro-climate with controlled temperature and humidity to encourage the activation and transformation of the yeast. Fermentation thus occurs in best conditions, producing naturally, perfectly risen dough. By programming the duration of proofing, it is possible to reduce the amount of yeast, thus obtaining a lighter, more digestible product while at the same time encouraging the development of the desired aroma. -
Page 43: Routine Maintenance
Before starting the It is possible to check the data inserted through a summary screen. programme The display shows the selected settings, the end cycle time and the time when Wait period proofing will begin. Programme running The display shows the settings and remaining time until the end of the cycle. AT THE END OF THE PROGRAMME Regardless of the proofing mode selected, at the end of the programme the device emits an acoustic signal and opens up a notification screen. -
Page 44: Corrective Maintenance
CORRECTIVE MAINTENANCE Malfunctioning Corrective maintenance operations, the replacement of spare parts, and all operations regarding the lighting system must be carried out by qualified and authorised staff. Note: if malfunctions are identified, before calling the service centre make sure the power cord is properly inserted and check for power. -
Page 45: Troubleshooting
TROUBLESHOOTING Table of alarms CODE DESCRIPTION ACTION Faulty air probe Contact service centre for repair No data communication between Contact service centre for repair power board and user interface TECHNICAL SPECIFICATIONS Blast chilling capacity 3 kg Blast freezing capacity 3 kg Number of levels (for grilles) Electrical parameters 220/240V 50Hz... -
Page 46: Info
WIRING DIAGRAM Fig.10 - Wiring diagram Power board Capacitor fan Fuse Capacitor fan IEC outlet with EMI filter Display Ground terminal Spot-LED Heating element Evaporative cooler Compressor Air probe Bimetallic protection Core probe INFO Service Technical support for products is provided by authorised centres in your area. Addresses for specific areas are provided in the attachment to the manual. - Page 48 Barazza srl 31025 Sarano di S.Lucia di Piave (TV) ITALIA Via Risorgimento, 14 Tel. +39 0438 62888 Fax + 39 0438 64901 info@barazzasrl.it www.barazzasrl.it...
Need help?
Do you have a question about the 1ABFY and is the answer not in the manual?
Questions and answers