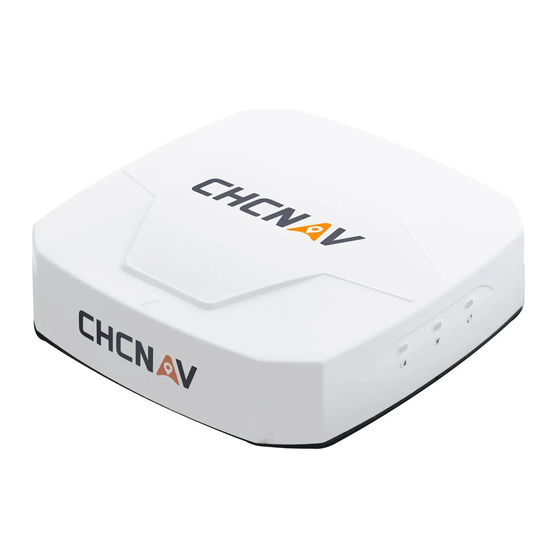
Summary of Contents for CHCNAV NX510 Pro
- Page 1 CHCNAV NX510 Pro Installation Guide Revision 1.0 June 01, 2018 Precision Agriculture | August 2021 Make your work more efficient...
-
Page 2: Table Of Contents
3. Wiring ........................17 3.1 Wiring harness and connection method ..............17 3.1.1 Wiring connection ..................17 3.2 Wiring Precautions ....................19 3.3 Electrical connection method and precautions ............19 CHCNAV NX510 PRO INSTALLATION GUIDE | 2021-08 P a g e | 2... -
Page 3: Preface
CE Interference Statement Declaration of Conformity: Hereby, Shanghai Huace Navigation Technology Ltd. declares that this NX510 Pro is in compliance with the essential requirements and other relevant provisions of Directive 2014/53/EU. A copy of the Declaration of conformity can be obtained from Shanghai Huace Navigation Technology Ltd. -
Page 4: Pre-Installation Preparation
1. Pre-installation Preparation 1.1 Introduction to the product package The NX510 Pro autosteering system is delivered in one box. NX510 Pro Autosteering System Product Package First layer Second layer CHCNAV NX510 PRO INSTALLATION GUIDE | 2021-08 P a g e | 4... - Page 5 (1) NX510 PRO Autosteering System Product Package Device name Quantity Image CES electrical steering wheel Universal holder T-type holder T-frame fixing splint Fixed screw pack CHCNAV NX510 PRO INSTALLATION GUIDE | 2021-08 P a g e | 5...
- Page 6 Device name Quantity Image PA-3 Controller CB-A10 Tablet 1 display with 1 Display fixed bracket GA-Sensor angle sensor Black Cable Tie Rear camera GASensor Angle Sensor Cable 3.0 CHCNAV NX510 PRO INSTALLATION GUIDE | 2021-08 P a g e | 6...
- Page 7 Device name Quantity Image Tablet Console Cable V510-A Camera Cable Main CableV510-A Motor Steering Wheel Cable V510 CHCNAV NX510 PRO INSTALLATION GUIDE | 2021-08 P a g e | 7...
-
Page 8: Vehicle Inspection Before Installation
If the owner requires the tractor to be installed first and then repair the tractor, you need to clarify the risks to the local businessperson in charge; CHCNAV NX510 PRO INSTALLATION GUIDE | 2021-08 P a g e | 8... -
Page 9: Hardware Installation
Be careful when hitting to avoid damage to the steering wheel of the original tractor; (4) After removing the steering wheel, be sure to store it for future use; CHCNAV NX510 PRO INSTALLATION GUIDE | 2021-08 P a g e | 9... - Page 10 You can do steering wheel cutting if it cannot be removed but must be careful not to damage the original spline (The premise is to get permission from the owner). CHCNAV NX510 PRO INSTALLATION GUIDE | 2021-08 P a g e | 10...
-
Page 11: Steering Wheel Installation
(3) Install the bottom fixing bracket of the motor, find two holes and fix the T2 fixing bracket or the universal fixing bracket on the bottom of the motor with M5 * 16 screws. You don't need to tighten it for later searching position; CHCNAV NX510 PRO INSTALLATION GUIDE | 2021-08 P a g e | 11... - Page 12 (3) The steering wheel is installed well, make sure that the steering wheel wiring port is in the front or right front to facilitate later wiring; (4) Hold the steering wheel by hand and tighten the spline screws of the original tractor with tools; CHCNAV NX510 PRO INSTALLATION GUIDE | 2021-08 P a g e | 12...
- Page 13 Fix the T-shaped bracket with U-shaped clamp (6) Shake the steering wheel, check whether the electric steering wheel is tight, and check again whether the steering wheel bearing clearance is too large; CHCNAV NX510 PRO INSTALLATION GUIDE | 2021-08 P a g e | 13...
-
Page 14: Controller Installation
◆ Keep it as level as possible (The level can be obtained by adjusting the screws on the four legs) CHCNAV NX510 PRO INSTALLATION GUIDE | 2021-08 P a g e | 14... -
Page 15: Display Installation
(3) After the installation of the monitor is completed, if you feel that the operating angle is not appropriate, you can loosen and adjust the monitor bracket to a suitable position; CHCNAV NX510 PRO INSTALLATION GUIDE | 2021-08 P a g e | 15... -
Page 16: Ga-Sensor Angle Sensor Installation
(3) Pay attention to install flat pad when fixing the mainframe fixing frame. 2.5 Camera installation The camera can be installed anywhere you want (within the wire harness length range). CHCNAV NX510 PRO INSTALLATION GUIDE | 2021-08 P a g e | 16... -
Page 17: Wiring
Cable diagram Connection A→ PA-3 B→ Battery C→ Steering wheel Main cable cable D→ Angle sensor E→ Console A→ Electric steering wheel Steering wheel cable B→ Main cable CHCNAV NX510 PRO INSTALLATION GUIDE | 2021-08 P a g e | 17... - Page 18 A→ Console Port1 B→ Main cable Console cable C→ Power D : Power Rocker Switch Angle sensor A → Main Line C Port wiring cable B → GA-Sensor host CHCNAV NX510 PRO INSTALLATION GUIDE | 2021-08 P a g e | 18...
-
Page 19: Wiring Precautions
12V / 24V battery, when the positive of original tractor battery is cut off or the original tractor has no switch, the power is directly connected to the positive and negative poles of original tractor battery. CHCNAV NX510 PRO INSTALLATION GUIDE | 2021-08 P a g e | 19... - Page 20 When the original tractor switch is disconnected, the equipment power line negative electrode is also disconnected with the battery. CHCNAV NX510 PRO INSTALLATION GUIDE | 2021-08 P a g e | 20...
- Page 21 CHC Navigation Building D, NO. 599 Gaojing Road, Qingpu District, 201702 Shanghai, China Tel: +86 21 542 60 273 | Fax: +86 21 649 50 963 Email: sales@chcnav.com | support@chcnav.com Skype: chcnav_support Website: www.chcnav.com Make your work more efficient...


Need help?
Do you have a question about the NX510 Pro and is the answer not in the manual?
Questions and answers