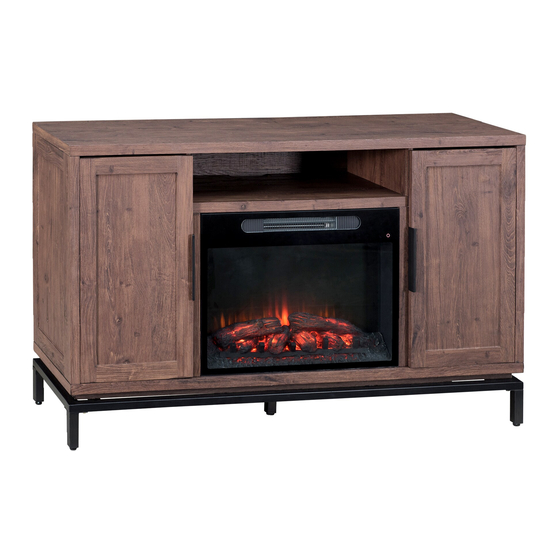
Table of Contents
Advertisement
Quick Links
WE HAVE YOU IN MIND, LET US SERVE YOU!
Nous pensons en vous, laissez nous vous aider!
Questions? Issues? / Questions? Problèmes?
Country of Origin: China
Pais d'origine: Chine
ASSEMBLY INSTRUCTION
Instructions De montage
ITEM/Article #:B120009204
CONTACT US / Contactez-nous
24 hours / 7 days a week
24 heures / 7 jours par semaine
www.sunjoyonline.com
Warranty Parts
Liste des pièces
sous garantie
customer.care@sunjoygroup.com
Production Number: xxxxxxxxxx
Numéro de fabrication: xxxxxxxxxx
Advertisement
Table of Contents

Subscribe to Our Youtube Channel
Related Manuals for Sunjoy B120009204


Summary of Contents for Sunjoy B120009204
- Page 1 ASSEMBLY INSTRUCTION Instructions De montage ITEM/Article #:B120009204 WE HAVE YOU IN MIND, LET US SERVE YOU! Nous pensons en vous, laissez nous vous aider! Questions? Issues? / Questions? Problèmes? CONTACT US / Contactez-nous 24 hours / 7 days a week 24 heures / 7 jours par semaine www.sunjoyonline.com...
- Page 2 2 / 25 IMPORTANT SAFETY INSTRUCTIONS/CONSIGNES DE SÉCURITÉ IMPORTANTES Warning! Please read and understand this entire manual before attempting to assemble or operate this product. Attention! Veuillez lire et comprendre l'intégralité de ce manuel avant d'essayer d'assembler ou d'utiliser ce produit. •...
- Page 3 3 / 25 EXPLODED DRAWING/DIAGRAMME AGRANDI PARTS LIST/LISTE DE PIÈCES Label Part Number Description Part Image Étiquette Numéro d'article La description Qté Image de la pièce Table Top P00210044301 Dessus de la table Side Panel P00380050401 Panneau latéral Country of Origin: China Production Number: xxxxxxxxxx Pais d’origine: Chine Numéro de fabrication: xxxxxxxxxx...
- Page 4 4 / 25 Label Part Number Description Part Image Étiquette Numéro d'article La description Qté Image de la pièce Left Middle Panel P00380053701 Panneau central gauche Right Middle Panel P00380053801 Panneau central droit Front Middle Panel P00390012401 Panneau central avant Shelf 1 P00420005001 Étagère 1 Front Shelf P00390012501 Tablette avant...
- Page 5 5 / 25 Label Part Number Description Part Image Étiquette Numéro d'article La description Qté Image de la pièce Back Horizontal Beam P00050157601 Poutre horizontale arrière 26” Electric Fireplace Insert (Packed In a Separate Box) Insertion de foyer électrique P005200025 de 26 po (emballé dans une boîte séparée) Adjust Foot Pad (preassembled)
- Page 6 6 / 25 Label Part Number Description Part Image Étiquette Numéro d'article La description Qté Image de la pièce Screw ST4.2*30 H030050024 Vis ST4.2*30 Screw ST3.5*12 H030040043 Vis ST4.2*30 Cam Bolt D6*35 H100010064 Boulon à came D6*35 Cam Lock Ø15*12 H100020003 Serrure à came Ø15*12 Handle P00510033201 Manipuler...
- Page 7 7 / 25 Cam Bolt + Cam Lock Hidden Connector System/Système de connecteur caché de verrouillage à came Assembly Technique/Technique d'assemblage Screw the cam bolt into the threaded inserts on the panel. Connect both panels together, making sure the cam bolt goes into the pre-drilled hole on the end of panel and is visible so the cam lock can be attached.
- Page 8 8 / 25 STEP 1/Étape 1 Country of Origin: China Production Number: xxxxxxxxxx Pais d’origine: Chine Numéro de fabrication: xxxxxxxxxx...
- Page 9 9 / 25 STEP 2/Étape 2 Country of Origin: China Production Number: xxxxxxxxxx Pais d’origine: Chine Numéro de fabrication: xxxxxxxxxx...
- Page 10 10 / 25 STEP 3/Étape 3 Country of Origin: China Production Number: xxxxxxxxxx Pais d’origine: Chine Numéro de fabrication: xxxxxxxxxx...
- Page 11 11 / 25 STEP 4/Étape 4 Country of Origin: China Production Number: xxxxxxxxxx Pais d’origine: Chine Numéro de fabrication: xxxxxxxxxx...
- Page 12 12 / 25 STEP 5/Étape 5 Country of Origin: China Production Number: xxxxxxxxxx Pais d’origine: Chine Numéro de fabrication: xxxxxxxxxx...
- Page 13 13 / 25 STEP 6/Étape 6 10 x Country of Origin: China Production Number: xxxxxxxxxx Pais d’origine: Chine Numéro de fabrication: xxxxxxxxxx...
- Page 14 14 / 25 STEP 7/Étape 7 Country of Origin: China Production Number: xxxxxxxxxx Pais d’origine: Chine Numéro de fabrication: xxxxxxxxxx...
- Page 15 15 / 25 STEP 8/Étape 8 Country of Origin: China Production Number: xxxxxxxxxx Pais d’origine: Chine Numéro de fabrication: xxxxxxxxxx...
- Page 16 16 / 25 STEP 9/Étape 9 Country of Origin: China Production Number: xxxxxxxxxx Pais d’origine: Chine Numéro de fabrication: xxxxxxxxxx...
- Page 17 17 / 25 STEP 10/Étape 10 Country of Origin: China Production Number: xxxxxxxxxx Pais d’origine: Chine Numéro de fabrication: xxxxxxxxxx...
- Page 18 18 / 25 STEP 11/Étape 11 3 6 x Country of Origin: China Production Number: xxxxxxxxxx Pais d’origine: Chine Numéro de fabrication: xxxxxxxxxx...
- Page 19 19 / 25 STEP 12/Étape 12 16 x Country of Origin: China Production Number: xxxxxxxxxx Pais d’origine: Chine Numéro de fabrication: xxxxxxxxxx...
- Page 20 20 / 25 STEP 13/Étape 13 Country of Origin: China Production Number: xxxxxxxxxx Pais d’origine: Chine Numéro de fabrication: xxxxxxxxxx...
- Page 21 21 / 25 STEP 14/Étape 14 16 x Country of Origin: China Production Number: xxxxxxxxxx Pais d’origine: Chine Numéro de fabrication: xxxxxxxxxx...
- Page 22 22 / 25 STEP 15/Étape 15 Country of Origin: China Production Number: xxxxxxxxxx Pais d’origine: Chine Numéro de fabrication: xxxxxxxxxx...
- Page 23 23 / 25 STEP 16/Étape 16 Country of Origin: China Production Number: xxxxxxxxxx Pais d’origine: Chine Numéro de fabrication: xxxxxxxxxx...
- Page 24 24 / 25 STEP 17/Étape 17 Country of Origin: China Production Number: xxxxxxxxxx Pais d’origine: Chine Numéro de fabrication: xxxxxxxxxx...
- Page 25 25 / 25 CARE AND MAINTENANCE/SOIN ET ENTRETIEN • Make sure the unit is turned OFF, unplugged and the heating elements of heater are cool whenever you are cleaning the heater or mantel. • Use a soft, clean cloth that will not scratch the surface when dusting. •...
-
Page 26: Assembly Instruction
ASSEMBLY INSTRUCTION Instructions De montage ITEM/Article #:P005200025 WE HAVE YOU IN MIND, LET US SERVE YOU! Nous pensons en vous, laissez nous vous aider! Questions? Issues? / Questions? Problèmes? CONTACT US / Contactez-nous 24 hours / 7 days a week 24 heures / 7 jours par semaine www.sunjoyonline.com Warranty Parts... -
Page 27: Important Safety Instructions
IMPORTANT SAFETY INSTRUCTIONS IMPORTANT NOTICE Please keep this user’s guide for future reference. When using electric appliances, basic precautions should always be followed to reduce the risk of fire, electric shock, and injury to persons, including the following: 1. Read all instructions before using this appliance. 2. -
Page 28: Site Selection And Preparation
SITE SELECTION AND PREPARATION Ensure the power cord is not installed so that it is pinched or against a sharp edge and ensure that the power core is stored or secured to avoid tripping or snagging to reduce the risk of fire, electric shock or injury to persons. Construction and electrical outlet wiring must comply with local building codesand other applicable regulations to reduce the risk of fire, electric shock and injury to persons. -
Page 29: Operation And Features
OPERATION AND FEATURES Adjust Brightness This function will Using the Control Panel cycle through the four different levels of flame brightness. Hold 10 seconds to Timer Adjust Heater switch readout This will allow you to set This function will cycle between℉... -
Page 30: Care And Maintenance
CARE AND MAINTENANCE Battery Replacement •Slide the battery cover open by squeezing the release lever while pulling the battery out. Please see the underside of remote for instructions. •Replace the dead battery with one CR2025 battery. Replacement batteries are not included with the firebox. -
Page 31: Troubleshooting
Troubleshooting PROBLEM ROOT CAUSE CORRECTIVE ACTION Unplug the fireplace, remove the back panel of the fireplace and check that the The thermostat sensor is broken thermostat is plugged into the main circuit Display shows or disconnected. board. If this does not solve the problem contact customer service for a replacement thermostat sensor. -
Page 32: Consignes De Sécurité Importantes
Consignes de sécurité importantes AVIS IMPORTANT Veuillez conserver ce guide de l'utilisateur pour référence future. Lors de l'utilisation d'appareils électriques, des précautions de base doivent toujours être suivies pour réduire les risques d'incendie, d'électrocution et de blessures corporelles, notamment les suivantes: Lisez toutes les instructions avant d'utiliser cet appareil. - Page 33 SÉLECTION ET PRÉPARATION DU SITE ATTENTION Assurez-vous que le cordon d'alimentation n'est pas installé de manière à être pincé ou contre un bord tranchant et assurez-vous que le noyau d'alimentation est stocké ou sécurisé pour éviter de trébucher ou de s'accrocher afin de réduire le risque d'incendie, d'électrocution ou de blessure.
-
Page 34: Fonctionnement Et Caractéristiques
FONCTIONNEMENT ET CARACTÉRISTIQUES Ajuster la luminosité Cette fonction fera défiler Utilisation du panneau de contrôle les quatre différents niveaux de luminosité de la flamme. Maintenez enfoncé 10 secondes pour basculer la lecture entre Minuteur Ajuster le chauffage ℉ et ℃. Cela vous permettra de Cette fonction fera défiler régler l'arrêt automatique... -
Page 35: Entretien Et Maintenance
Entretien et maintenance Remplacement de la batterie • Faites coulisser le couvercle de la batterie pour l'ouvrir en appuyant sur le levier de dégagement tout en retirant la batterie. Veuillez consulter le dessous de la télécommande pour les instructions. • Remplacez la pile déchargée par une pile CR2025. -
Page 36: Dépannage
Dépannage PROBLÈME CAUSE PREMIÈRE ACTION CORRECTIVE Débranchez le foyer, retirez le panneau arrière du foyer et vérifiez que le thermostat Le capteur du thermostat est cassé ou est branché sur le circuit imprimé principal. L'affichage montre déconnecté. Si cela ne résout pas le problème, contactez le service clientèle pour un capteur de thermostat de remplacement.
Need help?
Do you have a question about the B120009204 and is the answer not in the manual?
Questions and answers