Table of Contents
Advertisement
Quick Links
U P
®
C
ASME A112.18.1 / CSA B125.1
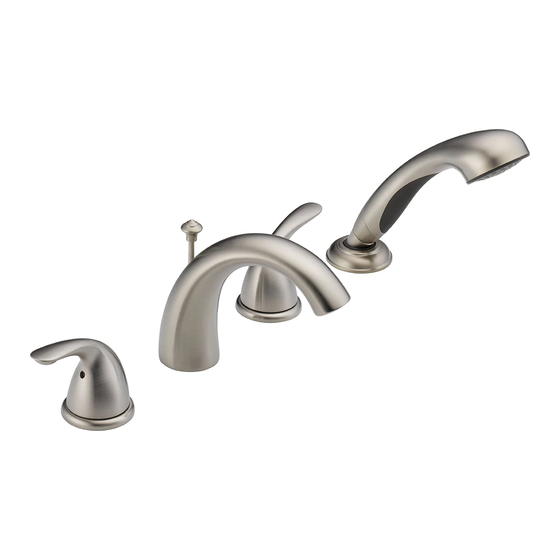
Models/Modelos/Modèles
T4705
Series/Series/Seria
Write purchased model number here.
Escriba aquí el número del modelo comprado.
Inscrivez le numéro de modèle ici.
You may need/Usted puede necesitar/Articles dont vous pouvez avoir besoin:
1/8" (3.17mm)
For easy installation of your Delta
faucet you will need:
• To READ ALL the instructions completely
before beginning.
• To READ ALL warnings, care, and maintenance
information.
• To complete the deck and valve rough-in prior to
installing this trim kit.
Para instalación fácil de su llave Delta
usted necesitará:
• LEER TODAS las instrucciones completamente
antes de empezar.
• LEER TODOS los avisos, cuidados, e
información de mantenimiento.
• Para completar el borde y la instalación de
válvulas dentro de las paredes previa a la
instalación de la llave y sus accesorios.
Pour installer votre robinet Delta
facilement, vous devez:
• LIRE TOUTES les instructions avant de débuter;
• LIRE TOUS les avertissements ainsi que toutes
les instructions de nettoyage et d'entretien;
• Installez le corps du robinet et terminez le
pourtour du bain avant de poser les accessories
de finition.
®
TWO HANDLE ROMAN TUB TRIM
LLAVE Y SUS ACCESORIOS
PARA BAÑERA ROMANA DE DOS
MANIJAS (MANERALES)
ACCESSOIRES DE FINITION DE
ROBINET À DEUX POIGNÉES POUR
BAIN ROMAIN
?
1
3/32" (2.38mm)
1/8" (3.17mm)
11/1/08
Rev. B
Advertisement
Table of Contents

Related Manuals for Delta T4705 Series


Summary of Contents for Delta T4705 Series
- Page 1 • To READ ALL warnings, care, and maintenance information. • To complete the deck and valve rough-in prior to installing this trim kit. Para instalación fácil de su llave Delta usted necesitará: • LEER TODAS las instrucciones completamente antes de empezar.
- Page 2 Delta Faucet Company recommends using a professional plumber for all installation & repair. Delta will replace, FREE OF CHARGE, during the warranty period, any part or finish that proves defective in material and/or workmanship under normal installation, use & service. Replacement parts may be obtained by calling 1-800-345-DELTA (in the U.S.
- Page 3 Dispositif anti-siphonnage Douche à main Delta comporte un dispositif anti-siphonnage qui a été éprouvé et qui est conforme aux normes ASME A112.18.3 et ASME A112.18.1 / CSA B125.1. Ce dispositif se compose de deux clapets indépendants homologués, montés en série dans le tube rigide, qui sont non réparables. Il est également doté d’un inverseur qui dirige automatiquement l’eau vers le bec en cas de diminution de la pression d’alimentation.
- Page 4 Maintenance If faucet leaks from spout outlet–Shut off water supplies– Replace Seats and Springs (1). * If leak persists–Shut off water supplies– Replace Stem Unit Assembly (2). * *Install stems (2) and 1/4 turn stops (3) correctly for proper handle rotation.
- Page 5 NOTE: The deck and valve rough-in must be finished before installing the trim kit. Remove set screw (1). Remove and discard test cap (2). NOTA: Las tuberías internas del borde y de la válvula deben terminarse antes de instalar el juego de guarnición. Quite los tornillos de ajuste (1).
- Page 6 Turn / thread lift rod (1) until it drops down and rotates freely. Remove and discard the test cap and gasket (1). NOTE: This is an extra gasket, one is supplied with the hose. Atornille la barrita de alzar (1) hasta que caiga y gire libremente. Quite y descarte la tapa de prueba y el empaque (1).
- Page 7 Install handles. If either handle does not rotate in the correct direction, do the following: 1. Be sure that the end valves are installed correctly (with the hot valve on the LEFT and both inlet tubes installed AWAY from the spout). Instale las manijas.
- Page 8 Pull hose (1) to its farthest extension and point it down into the tub. Turn faucet handles (2) all the way on. Pull the lift rod (3) up to the full on position and flush the hot and cold water lines for one minute.
Need help?
Do you have a question about the T4705 Series and is the answer not in the manual?
Questions and answers