Delta Cassidy Series Manual
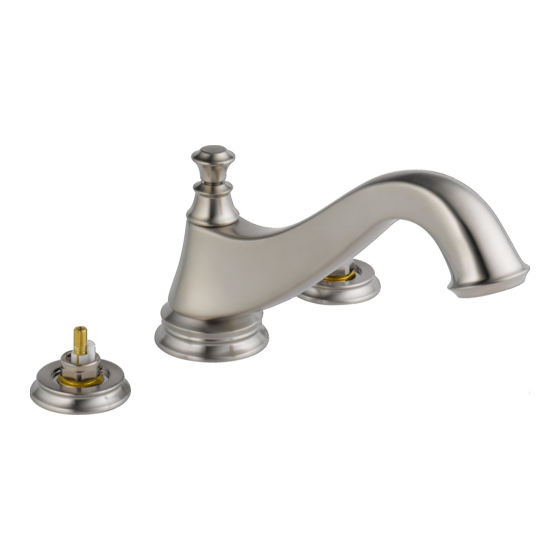
Two handle roman tub trim
Hide thumbs
Also See for Cassidy Series:
- Instructions manual (16 pages) ,
- Manual (9 pages) ,
- Quick start manual (7 pages)
Advertisement
Quick Links
Models / Modelos
T2795 & T4795
Series / Seria
Cassidy
TM
Write purchased model number here.
Escriba aquí el número del modelo comprado.
Inscrivez le numéro de modèle ici.
You may need/Usted puede necesitar/Articles dont vous pouvez avoir besoin:
1/8" (3.17mm)
For easy installation of your Delta
faucet you will need:
• To READ ALL the instructions completely
before beginning.
• To READ ALL warnings, care, and
maintenance information.
• To complete the deck and valve rough-in prior to
installing this trim kit.
Para instalación fácil de su llave
Delta
usted necesitará:
®
• LEER TODAS las instrucciones completamente
antes de empezar.
• LEER TODOS los avisos, cuidados, e
información de mantenimiento.
• Para completar el borde y la instalación de vál-
vulas dentro de las paredes previa a la
instalación de la llave y sus accesorios.
Pour installer votre robinet Delta
facilement, vous devez:
• LIRE TOUTES les instructions avant de déb-
uter;
• LIRE TOUS les avertissements ainsi que toutes
les instructions de nettoyage et d'entretien;
• Installez le corps du robinet et terminez le
pourtour du bain avant de poser les accessories
de finition.
www.deltafaucet.com
67777
®
3/32"
(2.38mm)
?
®
67777
1
TWO HANDLE ROMAN TUB TRIM
LLAVE Y SUS ACCESORIOS PARA BAÑERA
ROMANA DE DOS MANIJAS (MANERALES)
ACCESSOIRES DE FINITION DE ROBINET
À DEUX POIGNÉES POUR BAIN ROMAIN
T2795
T4795
3/32" (2.38mm)
1/8" (3.17mm)
11/13/2015
Rev. F
Advertisement

Related Manuals for Delta Cassidy Series


Summary of Contents for Delta Cassidy Series
- Page 1 Escriba aquí el número del modelo comprado. Inscrivez le numéro de modèle ici. You may need/Usted puede necesitar/Articles dont vous pouvez avoir besoin: 1/8" (3.17mm) 3/32" (2.38mm) For easy installation of your Delta ® faucet you will need: • To READ ALL the instructions completely 1/8" (3.17mm) before beginning.
- Page 2 January 1, 1995 and installed in the United States of America, Canada and Mexico. use and service. If repair or replacement is not practical, Delta Faucet Company may elect to DELTA FAUCET COMPANY SHALL NOT BE LIABLE FOR ANY SPECIAL, INCIDENTAL OR refund the purchase price in exchange for the return of the product. These are your exclusive CONSEQUENTIAL DAMAGES (INCLUDING LABOR CHARGES) FOR BREACH OF ANY remedies.
- Page 3 Model / Modelo / Modèle T2795 Model / Modelo / Modèle T4795 RP72717▲ Lift Rod RP72720▲ Barra de alzar Handle Button (2) Tige de Manoeuvre & Set Screw (2) RP73284▲ Botón de la manija (2) Set Screw & Button y Tornillo de Ajuste (2) RP72724▲ RP73284▲ Tornillo de Presión y Botón Vis de calage (2) et Finial Set Screw & Button Vis de Calage et Bouton bouton de manette (2) Pomo Tornillo de Presión y Botón Grain Vis de Calage et Bouton RP41896 Glide Ring RP72718▲ Aro para Deslizar Spout Base w/Gasket L’anneau de Glissement Base del Tubo de Salidacon con Empaque...
-
Page 4: Maintenance
T4795 RP40668 Diverter Assembly Ensamble del Desviador Dérivation Maintenance Model T4795 If faucet does not divert water from the spout to the hand shower, check If faucet leaks from spout outlet: Shut off water supplies – that the lift rod (1) is securely threaded into the diverter (2). If the problem Replace Seats and Springs (1). * persists remove the lift rod and spout. Replace the diverter assembly If leak persists: Shut off water supplies – Replace Stem Unit Assembly (2). * RP40668. *Install stem assemblies (2) and stem extenders (3) correctly for proper handle rotation: • For lever handles, the stops (3) must point to the right when installed. Mantenimiento Modelo T4795 Si la llave de agua no desvía el agua del surtidor hacia la regadera de mano, Si la llave de agua tiene filtración desde la salida del agua del surtidor: examine si la barrita de alzar (1) está fijamente enroscada en el desviador Cierre los suministros de agua – Reemplace los Asientos y Resortes (1).* (2). Si el problema persiste quite la barrita de alzar y el surtidor. Reemplace... - Page 5 T2795 T2795 T4795 T4795 3/32" (2.38 mm) 3/32 po Place bases (1) with gaskets (2) over end valves (3). OPTION: Use NOTE: The deck and valve rough-in must be finished before silicone under the gasket if deck is uneven. Install gasket (4) and installing the trim kit. spout (5) on the spout adapter (6). Be sure spout is resting firmly on the deck. Install set screw (7) and tighten to secure the spout (5). Insert Model T2795 button (8) into set screw hole. Model T2795 proceed to step 4. Unscrew the test cap (1) and discard. Model T4795 proceed to step 3. Model T4795 Remove set screw (1). Remove and discard test cap (2).
- Page 6 T4795 T4795 T4795 T4795 For Model T4795 Only Remove conical nut (1) from handshower nest (2) and insert braided metal hose through the handshower nest. Reassemble test cap (3) Install lift rod (1). Screw the lift rod until it drops down and to braided hose to hold hose in place. Place handshower nest (2) on rotates freely. mounting piece (4). align in selected direction and tighten by escutch- eon (5). OPTION: Use silicone under the base if deck is uneven. Remove and discard the test cap and gasket (1). NOTE: This is Slide hose (1) through conical nut (2). Remove test cap (3) from braided an extra gasket, one is supplied with the hose. hose (4) and attach hose (1) to braided metal hose (4) using gasket (5) and tighten. DO NOT install handshower piece yet. Sólo para los Modelos T4795 Quite la tuerca cónica (1) del soporte de la regadera manual (2) e introduzca la manguera trenzada de metal por el soporte de la rega- Instale la barrita de alzar (1). Atornille la barrita de alzar hasta que...
- Page 7 T2795 T4795 Install handles and secure with set screw (1). Be sure glide ring (5) is properly Model T2795 seated in bottom of handles before installing. Turn faucet handles (1) all the way on. Turn on hot and cold water supplies Push in button cover (3) to conceal set screw (1). and flush water lines for one minute. Important: This flushes away any either handle does not rotate in the correct direction, do the following: debris that could cause damage to internal parts. 1. Be sure that the end valves are installed correctly (with the hot v alve on Model T4795 the LEFT and both inlet tubes installed AWAY fro m the spout). Make sure the lift rod (1) is in the down position. Turn faucet handles (2) all 2. Turn off the water supplies and remove the handle, bonnet nut, and stem unit.
- Page 8 T4795 T4795 For Model T4795 Only Attach hand piece (1) to hose (2) with gasket (3) between Pull hose (1) to its farthest extension and point it down into the connection. Refer to maintenance section (page 4) for correct tub. Pull the lift rod (2) up to the full on position and flush water diverter and lift rod function. lines for one minute. After flushing turn off water at the bath valve handles. Return the lift rod to the down position. Sólo para los Modelos T4795 Conecte la pieza de mano (1) a la manguera (2) con el empaque Hale la manguera (1) a lo máximo que se pueda extender y (3) entre la conexión. Vea la sección de mantenimiento diríjala hacia abajo en la bañera. Hale la barrita de alzar (2) a (Página 4) para obtener la función correcta del desviador y el la posición completamente abierta y deje correr el agua por las de la barrita de alzar. líneas por un minuto. Después de dejar correr el agua cierre el agua con las manijas de la válvula de la bañera. Coloque la barrita de alzar en su posición normal. Modèles T4795 seulement Tirez sur le tuyau souple (1) pour le sortir entièrement et Fixez la douche à main (1) au tuyau souple (2) après avoir placé pointez-le vers le bas dans le bain. Tirez sur la tirette (2) pour le joint (3) dans le raccord. Consultez la section Entretien à la l’amener en position d’ouverture maximale et laissez couler page 4 au besoin pour ce qui concerne le f onctionnement de la l’eau une minute. Tournez ensuite les poignées du robinet de dérivation et de la tirette.
Need help?
Do you have a question about the Cassidy Series and is the answer not in the manual?
Questions and answers