Carrier 52C Series Service Technician Manual
Packaged terminal air conditioners and heat pumps
Hide thumbs
Also See for 52C Series:
- Owner's manual (36 pages) ,
- Architects and engineers' manual (56 pages) ,
- User manual (52 pages)
Table of Contents
Advertisement
Quick Links
SERVICE TECHNICIAN GUIDE
PACKAGED TERMINAL AIR CONDITIONERS
CONTENTS
INTRODUCTION . . . . . . . . . . . . . . . . . . . . . . . . . . . . . . . 2,3
SUMMARY OF DANGERS, WARNINGS,
AND CAUTIONS . . . . . . . . . . . . . . . . . . . . . . . . . . . . . . 2
UNIT DISASSEMBLY . . . . . . . . . . . . . . . . . . . . . . . . . . . 3,4
TOOLS NEEDED . . . . . . . . . . . . . . . . . . . . . . . . . . . . . . . 3
REMOVE FRONT PANEL . . . . . . . . . . . . . . . . . . . . . . . 3
CORD-CONNECTED UNIT . . . . . . . . . . . . . . . . . . . . . 3
CONNECTED (HARDWIRED) UNITS . . . . . . . . . . . . 3
OPEN THE CONTROL BOX . . . . . . . . . . . . . . . . . . . . . 4
ACCESSING UNIT COMPONENTS . . . . . . . . . . . . . .5-8
COMPONENTS . . . . . . . . . . . . . . . . . . . . . . . . . . . . . . . . 5
COMPONENTS . . . . . . . . . . . . . . . . . . . . . . . . . . . . . . . . 5
REINSTALL FRONT PANEL . . . . . . . . . . . . . . . . . . . . . 8
GENERAL CLEANING . . . . . . . . . . . . . . . . . . . . . . . . .9-12
CLEANING AND SAFETY . . . . . . . . . . . . . . . . . . . . . . 9
TOOLS NEEDED . . . . . . . . . . . . . . . . . . . . . . . . . . . . . . 10
MONTHLY CLEANING. . . . . . . . . . . . . . . . . . . . . . . . 10
SEASONAL CLEANING . . . . . . . . . . . . . . . . . . . . . . . 11
COMPRESSOR . . . . . . . . . . . . . . . . . . . . . . . . . . . . . . .13-17
COMPRESSOR TROUBLESHOOTING . . . . . . . . . . . 14
ELECTRICAL MEASUREMENTS . . . . . . . . . . . . . . . 14
COMPRESSOR REPLACEMENT . . . . . . . . . . . . . . . . 15
52C,P
SERIES
AND HEAT PUMPS
Page
HEATERS. . . . . . . . . . . . . . . . . . . . . . . . . . . . . . . . . . . . 18,19
COMMON CAUSES OF HEATER FAILURE. . . . . . . 18
HEATER REMOVAL . . . . . . . . . . . . . . . . . . . . . . . . . . . 18
OPERATING CONTROLS. . . . . . . . . . . . . . . . . . . . . 20-28
UNIT-MOUNTED CONTROLS . . . . . . . . . . . . . . . . . . 20
WALL-MOUNTED THERMOSTAT CONTROLS . . . 21
TROUBLESHOOTING . . . . . . . . . . . . . . . . . . . . . . . . . 21
NON-USER ADJUSTABLE CONTROLS . . . . . . . . . . 23
SEQUENCE OF OPERATION . . . . . . . . . . . . . . . . . . . 24
AND REPLACEMENT . . . . . . . . . . . . . . . . . . . . . . . . . 27
FAN MOTOR . . . . . . . . . . . . . . . . . . . . . . . . . . . . . . . . 29-31
FAN MOTOR TROUBLESHOOTING. . . . . . . . . . . . . 29
BASIC FAN MOTOR ELECTRICAL TESTS . . . . . . . . 29
FAN MOTOR REPLACEMENT . . . . . . . . . . . . . . . . . . 31
FIELD TEMPERATURE CHARTS . . . . . . . . . . . . . . 32-40
WIRING DIAGRAMS . . . . . . . . . . . . . . . . . . . . . . . . 41-45
MOST FREQUENT PTAC SERVICE
QUESTIONS . . . . . . . . . . . . . . . . . . . . . . . . . . . . . . . . . . . . 46
ACCESSORIES. . . . . . . . . . . . . . . . . . . . . . . . . . . . . . . . . . 47
52C PERFORMANCE AND PHYSICAL DATA. . . . . . 48
52P PERFORMANCE AND PHYSICAL DATA . . . . . . 49
PTAC Customer Support Center
1•800•894•6449
Page
Advertisement
Table of Contents
Troubleshooting

Related Manuals for Carrier 52C Series


Summary of Contents for Carrier 52C Series
-
Page 1: Table Of Contents
ACCESSORIES........47 52C PERFORMANCE AND PHYSICAL DATA..48 52P PERFORMANCE AND PHYSICAL DATA . -
Page 2: Introduction
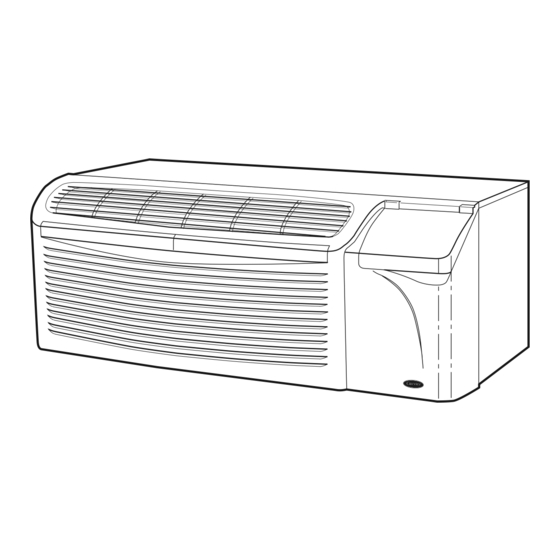
(PTAC) and heat pump units are self-contained for installation through the wall for individual room heat- ing and cooling. The Model 52C,P polymer and metal sleeves are permanently fastened to the wall; the unit chassis slides out of the sleeve to allow the service technician easy access. -
Page 3: Unit Disassembly
Series Designation PTAC (Packaged Terminal Air Conditioner) CE – Cooling with Electric Heat CQ – Heat Pump with Electric Heat PC – Cooling Only PE – Cooling with Electric Heat PQ – Heat Pump with Electric Heat Latest Revision A – Z Electric Heater Size 0 –... -
Page 4: Open The Control Box
52C,P SERIES REMOVABLE LOCATION OF LOCKING SCREW FILTER REMOVED FILTER (NOTE: 2nd LOCKING SCREW IS LOCATED BEHIND 2nd FILTER) FIGURE 3 — LOCATION OF LOCKING SCREWS BEHIND FILTERS FIGURE 4 — REMOVING FRONT PANEL eplacement Package Terminal Air Conditioner, LASSIFIED BY UNDERWRITERS LABORATO- IES INC., AS TO ELECTRIC SHOCK, FIRE AND... -
Page 5: Accessing Unit Components
1. Remove the 2 screws on each side that secure the gussets to the partition. 2. Remove the 2 screws that secure the gussets to the plastic condenser orifice and remove the gussets. -in. nut GE WALL SLEEVE HOLES CARRIER, BRYANT WALL SLEEVE HOLES... - Page 6 52C,P SERIES END CAP PLENUM SCREWS (2) BRACKET LEFT SCREWS BRACKET FIGURE 8 — PTAC UNIT WITH LATERAL DUCT ACCESSORY INSTALLED ATTACHMENT SCREWS DISCHARGE DISCHARGE DECK SCREEN FIGURE 9 — LOCATION OF ATTACHMENT SCREWS ON DISCHARGE DECK OF UNIT DETACH THE CONDENSER ORIFICE FROM THE CONDENSER COIL 1.
- Page 7 GUSSET GUSSET SCREWS PARTITION GUSSET SCREWS FIGURE 12 — GUSSET REMOVAL CONDENSER ORIFICE CAPTIVE SCREWS (2) FIGURE 13 — LOCATION OF CAPTIVE SCREWS ON CONDENSER ORIFICE CONDENSER ORIFICE (PLASTIC) FIGURE 14 — PRYING CONDENSER ORIFICE GUSSET CAPTIVE SCREWS (2) FIGURE 15 — REMOVING TOP OF AWAY FROM TUBE SHEET CONDENSER ORIFICE...
-
Page 8: Reinstall Front Panel
52C,P SERIES OUTDOOR COIL TUBE SHEET SCREWS FIGURE 16 — LOCATION OF OUTDOOR COIL TUBE SHEET SCREWS FIGURE 17 — REMOVING OUTDOOR COIL FROM CONDENSER FAN HUB CLAMP FIGURE 18 — REMOVING CONDENSER FAN HUB CLAMP CONTROL DOOR SCREW HINGE PINS... -
Page 9: General Cleaning
• The floor around the work area should be clean and free of debris. Seasonally Seasonally • The 52C,P unit weighs up to 150 pounds. Use a lift- Seasonally ing device or ask for assistance if the unit must be moved. -
Page 10: Tools Needed
1. Open vent door to access vent filter. 2. Remove vent door from hinges. 3. Using a small flat head screwdriver, pry the filter from the partition. 4. Replace vent filter using Carrier Part No. 52CQ500144. 5. Reverse Steps 1-3 to reattach vent door. CHASSIS Occasional cleaning of the exterior surfaces of the PTAC unit optimizes the unit’s appearance and... -
Page 11: Seasonal Cleaning
SEASONAL CLEANING The indoor and outdoor coils should be cleaned at least once during every season. Refer to ACCESSING UNIT COMPONENTS section to prepare unit. CLEANING THE INDOOR AND OUTDOOR COILS Coil fins are sharp and may cut hands. Wear heavy protective gloves when cleaning coils. - Page 12 52C,P SERIES FIGURE 23 — PTAC EXTERIOR SURFACES FIGURE 25 — CLEANING COILS FIGURE 24 — VACUUMING EVAPORATOR COIL DRAIN VALVE FIGURE 26 — BASEPAN SECTION...
-
Page 13: Compressor
A cutaway view of the rotary compressor with key components labeled is shown in Figure 27. The motor stator is rigidly attached to the compressor shell. The rotor is pressed onto the eccentric shaft, which is sup- ported by 2 bearings. Both the discharge valve and dis- charge muffler are attached to the motor bearing. -
Page 14: Compressor Troubleshooting
52C,P SERIES The rotary compression process (Figure 28), starts at top dead center as shown in (1). Suction gas flows through the suction inlet and into the cylinder area. As the shaft rotates through 90 degrees, the rolling piston moves to position A as shown in (2). The suction volume is now the area defined by point A and the tip of the vane. -
Page 15: Compressor Replacement
POSSIBLE CAUSE COILS/FILTERS DIRTY OR PLUGGED AIR OR NONCONDENSABLE GASES IN SYSTEM SYSTEM REFRIGERANT OVERCHARGED DISCHARGE LINE RESTRICTED CAPILLARY TUBE OR STRAINER RESTRICTED OR PLUGGED FAN BLADE OR MOTOR DEFECTIVE FAN BLADE OR BLOWER WHEEL STUCK SYSTEM REFRIGERANT UNDERCHARGED EVAPORATOR AIRFLOW RECIRCULATION UNIT OVERSIZED FOR APPLICATION COMPRESSOR REQUIRES START ASSIST NO POWER TO UNIT... - Page 16 See Figure 32. 4. Attach the piercing valve to the suction side pro- cess tube below the crimps. Attach Carrier TOTALTEST® kit (Part No. TT1-001), to the piercing valve to verify acidity of the system. After verifying the system acidity, remove the refriger- ant using a certified refrigerant recovery system.
- Page 17 Carrier RCD), into the unit. 13. Leak check the unit with 150 psi of nitrogen pressure. 14. For 52C,P units, the system should be evacuated from the high side to the low side to a minimum of 200 microns of mercury. This evacuation removes residual moisture from the system prior to charging.
-
Page 18: Heaters
52C,P SERIES The heater in 52C,P units is located directly behind the evaporator coil. The heater assembly includes the heater (2.3 kW, 3.4 kW or 5 kW), a primary limit switch, and a secondary limit switch. See Figure 34. The primary and secondary limit switches are safety switches that regulate heater operation. -
Page 19: Heaters
TOOLS NEEDED — The following list includes rec- ommended tools and devices for working on the heater section of 52C,P units. Phillips Head Screw Driver Needle Nose Pliers Volt-ohmmeter Nut Driver -in. Perform the following steps to remove the Heater Assembly. -
Page 20: Operating Controls
SERIES OPERATING CONTROLS UNIT-MOUNTED CONTROLS The controls and components used in the 52C,P cool- ing only or heat/cool units are as follows: the selec- tor switch, the indoor thermostat, the dual capacitor, the temperature limiter, the vent lever, and the fan cycle switch. -
Page 21: Wall-Mounted Thermostat Controls
Remote control is a factory or field-installed option. There are 3 styles of thermostats qualified for use with 52C,P series Remote Control units. See Fig- ures 38-40. On remote control units, the fan cycle func- tion is located on the wall thermostat. The rocker switch on the control box door is used to set fan speed to high or low. - Page 22 All units must be connected to same ground source. To accomplish this, be sure to connect all units back to the same breaker box. FIGURE 43 — TYPICAL WIRING FOR MULTIPLE 52C PTAC UNITS CONNECTED TO ONE WALL THERMOSTAT NOTES: 1.
-
Page 23: Description Of Selector Switch Settings (Figure 44)
TYPICAL 52C UNIT CONTROLS FIGURE 44 — TYPICAL CONTROL PANEL (52C Unit Shown) NON-USER ADJUSTABLE CONTROLS OUTSIDE OR VENT AIR — Slide the vent lever to the fully open position for outside air or fully closed position for vented air. -
Page 24: Sequence Of Operation
Untrained personnel may perform basic mainte- nance tasks such as cleaning and replacing filters. Refer to UNIT DISASSEMBLY section of this man- ual for proper procedures to disconnect power to 52C,P units. - Page 25 • Make sure tools are the correct tools for job, and that they are working properly and in good condition. • The 52C,P unit may weigh up to 150 pounds. Use a lifting device or ask for assistance if the unit must be moved.
- Page 26 2 and 3. 6. Once the test is complete, reconnect the leads. CAPACITOR — The 52C,P units use a dual capacitor. One part of the capacitor is used with the fan motor. The other part of the capacitor is used by the compressor.
-
Page 27: Electrical Components Removal
See Figure 53. FIGURE 52 — FAN CYCLE SWITCH (3 Terminal) TEMPERATURE CONTROL STANDOFF PINS FAN CYCLE SWITCH OUTDOOR FROST THERMOSTAT (HEAT PUMP UNITS ONLY) FIGURE 53 — 52C,P OPERATING CONTROLS SELECT0R SWITCH MOUNTING SCREWS... - Page 28 52C,P SERIES 4. Remove the thermostat capillary from the outdoor coil and clip any wire ties holding the capillary in place. 5. Disconnect the wires and carefully remove the thermostat and capillary from the unit, noting location of wires for easy re-assembly.
-
Page 29: Fan Motor
• Make sure tools are the correct tools for the job, and that they are working properly and in good condition. • The 52C,P unit may weigh up to 150 pounds. Use a lifting device or ask for assistance if the unit must be moved. - Page 30 Not Start Start TYPICAL 208/230 VOLT MOTORS 7,000/9,000 HC37GE237 5KCP29ECA299A TYPICAL 265 VOLT MOTORS 7,000/9,000 HC29GE236 5KCP29FCA315 FIGURE 57 — TYPICAL 52C,P FAN MOTORS SYMPTOM Starts But Starts Runs On Stops After But Runs One Speed, Short Time Slow Not On Others...
-
Page 31: Fan Motor Replacement
FAN MOTOR REPLACEMENT 1. DISCONNECT ALL POWER TO UNIT. 2. Remove the unit from the sleeve as detailed in the UNIT DISASSEMBLY section and place the unit on a large flat surface. 3. Remove the discharge deck and grille as detailed in Remove the Discharge Deck Assembly section. -
Page 32: Field Temperature Charts
52C,P SERIES FIELD TEMPERATURE CHARTS Refer to Figures 59-67 for field temperature data. Temperature Delta Coil Indoor... - Page 33 Temperature Delta Coil Indoor...
- Page 34 52C,P SERIES Temperature Delta Coil Indoor...
- Page 35 Temperature Delta Coil Indoor...
- Page 36 52C,P SERIES Temperature Delta Coil Indoor...
- Page 37 Temperature Delta Coil Indoor...
- Page 38 52C,P SERIES Rise Temperature Indoor...
- Page 39 Rise Temperature Indoor...
- Page 40 52C,P SERIES Rise Temperature Indoor...
-
Page 41: Wiring Diagrams
Refer to Figures 68-72 for Typical Wiring Schematics. NOTE: Figures 68-72 should not be substituted for the schematic located on control box. COMPONENT LEGEND Component Connection (Marked) Component Connection (Unmarked) Accessory or Optional Wiring To Indicate Common Potential Only Not To Represent Wire —... - Page 42 52C,P SERIES TYPICAL THERMOSTAT INTERFACE T’STAT OUTPUT: RC CONTROLER OUTPUT: ‘G’ — 24 VAC ‘FR’ — LINE VAC ‘G’ — 0 VAC ‘FR’ — 0 VAC ‘Y’ — 24 VAC ‘HR1 & HR2’ — LINE VAC HEATING ‘O’ — 0 VAC ‘RVR’...
- Page 43 COMPONENT LEGEND Component Connection (Marked) Component Connection (Unmarked) Accessory or Optional Wiring To Indicate Common Potential Only Not To Represent Wire — Capacitor COMP — Compressor — Fan Motor — Fan Cycle Switch — Heater — Indoor Thermostat — National Electrical Code —...
- Page 44 52C,P SERIES COMPONENT LEGEND Component Connection (Marked) Component Connection (Unmarked) Terminal Board Connection Field Splice Field Control Wiring Accessory or Optional Wiring To Indicate Common Potential Only Not To Represent Wire — Capacitor COMP — Compressor FIGURE 71 — 52CE AND 52PE — TYPICAL WIRING SCHEMATIC FOR WALL THERMOSTAT CONTROL HEAT/COOL UNITS —...
- Page 45 FIGURE 72 — 52PC — TYPICAL WIRING SCHEMATIC FOR STANDARD COOLING ONLY UNITS...
-
Page 46: Questions
1. Can remote wall thermostats be used on standard (AA) models? 2. Which remote thermostats are acceptable for use on 52C,P products? 3. How many 52C,P series units can be controlled by one remote thermostat? 4. What is the vent capacity of the 52C,P products? 5. -
Page 47: Accessories
Ductwork to allow one unit to heat and cool two rooms (plenum plus extension duct and registers) Lateral air deflector, with individually adjustable louvers, to enhance air circulation, 1 per pack Curtain deflector for 52C and 52P models — prevents curtains from blowing into discharge airstream. 1 per pack. -
Page 48: 52C Performance And Physical Data
52C,P SERIES 52C PERFORMANCE AND PHYSICAL DATA CATALOG COOLING ELECTRIC NUMBER (Btuh) HEAT (Btuh) 52CE-207---3 7,000/ 6,900 11.1/11.1 7,800/ 6,400 52CE-307---3 7,000/ 6,900 11.1/11.1 11,600/ 9,700 52CE-209---3 9,000/ 8,900 10.7/10.7 7,800/ 6,400 52CE-309---3 9,000/ 8,900 10.7/10.7 11,600/ 9,700 52CE-212---3 12,000/11,900 10.1/10.1 7,800/ 6,400 52CE-312---3 12,000/11,900 10.1/10.1 11,600/ 9,700... -
Page 49: Performance And Physical Data
52P PERFORMANCE AND PHYSICAL DATA CATALOG COOLING ELECTRIC NUMBER (Btuh) HEAT (Btuh) 52PE-207---3 7,200/ 7,100 12.7/12.7 7,800/ 6,400 52PE-307---3 7,200/ 7,100 12.7/12.7 11,600/ 9,700 52PE-209---3 9,100/ 9,000 11.5/11.5 7,800/ 6,400 52PE-309---3 9,100/ 9,000 11.5/11.5 11,600/ 9,700 52PE-212---3 12,100/12,000 11.1/10.7 7,800/ 6,400 52PE-312---3 12,100/12,000 11.1/10.7 11,600/ 9,700 52PE-512---3 12,100/12,000 11.1/10.7 17,000/13,600 52PE-215---3 14,500/14,000... - Page 52 Copyright 2002 Carrier Corporation Manufacturer reserves the right to discontinue, or change at any time, specifications or designs without notice and without incurring obligations. PC 132 Catalog No. 535-20050 Printed in U.S.A. Form 52C,P-2SM Pg 52 11-02 Replaces: 52C,P-1SM Book 1...
Need help?
Do you have a question about the 52C Series and is the answer not in the manual?
Questions and answers