
Related Manuals for Amcrest IP5M-1190W


Summary of Contents for Amcrest IP5M-1190W
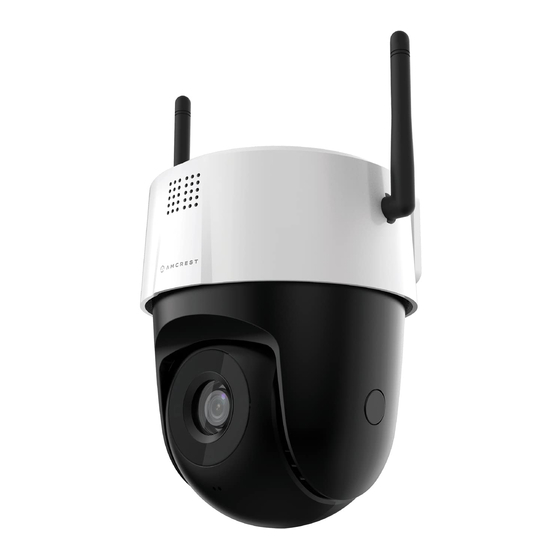
- Page 1 IP5M-1190W 5MP Wi-Fi Pan/Tilt Speed Dome Camera User Manual Version: 1.0.0 November 2 , 2021...
-
Page 2: Table Of Contents
Contents Welcome ......................................3 Overview ......................................4 Device Overview ....................................5 Physical Installation ..................................6 Camera Access Setup ..................................8 Live ........................................15 Playback ......................................16 Cloud Storage....................................17 Setup ....................................... 18 Camera ......................................18 Video ....................................... 22 Audio....................................... 24 Network ...................................... -
Page 3: Welcome
USA: +1-713-893-8956 Canada: 437-888-0177 UK: 203-769-2757 Important Security Warning To keep your Amcrest camera secure and prevent unauthorized access, please make sure to follow the steps below: • Always make sure that your camera has the latest firmware as listed on www.amcrest.com/firmware... -
Page 4: Overview
This camera features the latest JS technology which allows the camera to operate in any web browser without the use of a plugin. It uses a built-in hotspot to connect to your Wi-Fi network using the Amcrest View Pro app. The... -
Page 5: Device Overview
Device Overview The below represents the height and width of the camera. The camera weights roughly 1.1lbs. Installing a MicroSD Card The camera can support a microSD card of up to 256GB. To insert a microSD card, you will need a Phillips head screwdriver to open the "Reset"... -
Page 6: Physical Installation
Physical Installation Before physical installation of your camera please make sure the surface you are installing the camera on can support up to 3x the weight of the camera. Included with your device is a mounting bracket, two small security screws (to attach the camera to the bracket, four installation screws, 4 wall anchors, and installation screws. - Page 7 3. Insert the camera into the bracket and align the security holes of the camera to the security holes on the installation bracket. 4. Insert the included security screws into the security holes and use a Phillips head screwdriver to tighten these screws to secure the camera to the installation bracket.
-
Page 8: Camera Access Setup
The camera by default broadcasts a unique SSID that will be used for the SoftAP connection process. This means, if you are connecting your camera wirelessly, SoftAP must be used using the Amcrest View Pro app to connect the camera to your Wi-Fi network. - Page 9 Android 10 or higher will have to manually connect to the hotspot during setup. Download the Amcrest View Pro app from the App Open the app and allow all requested permissions. Store or Play Store. Open the app and allow all Tap Start to begin.
- Page 10 3. Tap WiFi Configuration Setup. 4. Scan the QR Code located on your camera. Note: If you do not have access to the QR code, tap Enter S/N Manually to enter the serial number for the camera manually. Tap Next to continue. Ensure the camera is powered on and disconnected 6.
- Page 11 If the app fails to automatically connect to the app 8. Locate your WiFi network then enter the WiFi on this step you will need to manually connect to the password in the interface. Tap Next and allow the hotspot. To manually connect to the hotspot, tap on camera to connect to your WiFi network.
- Page 12 Note: Connect your mobile device to the same network that your camera is on. 2. Register for an Amcrest Cloud account. To register click on Sign Up and fill out the form to complete registration. 3. Tap on Add Camera 4.
- Page 13 6. If you are adding a new camera that does not have a 5. Scan the QR code on the back/side/bottom of set password the app will automatically detect that a the camera or manually enter the camera’s serial new camera is being added. Tap OK to proceed. number in the Enter camera S/N (serial number field.
- Page 14 To access your camera from your computer you will need to first locate the camera’s IP address. To locate the camera’s IP address is it highly recommended to download our free Amcrest IP Config Tool software. The Amcrest IP Config Tool can be downloaded at the following web page: amcerest.com/downloads...
-
Page 15: Live
the web browser and enter this IP address into the browser. Press Enter to access the web user interface. Enter the username and password for your camera and click Login to access the web UI. Live The live view interface allows the user to see a live video feed from the camera, the current bit rate (Kbps), adjust PT controls, set PT functions, etc. -
Page 16: Playback
Button Function Name Function Description This button opens the image adjustment toolbar, which allows the user to Image Adjustment adjust brightness, contrast, saturation, and hue for the live feed’s picture. Only available in IE Mode This button allows the user to switch between displaying the original size of Adapt/Original Size the stream in its set resolution, or to adapt to the size of the monitor display the feed is being viewed on. -
Page 17: Cloud Storage
Cloud Storage The Cloud Storage button allows the user quick access to the Amcrest Cloud website. At this website (amcrestcloud.com) users can register for new accounts as well as view or modify existing accounts. -
Page 18: Setup
Setup The Setup tab allows the user to change different camera settings Below is a screenshot of the setup tab: There are 3 main sections to note in the Setup tab: 1. Menu Bar: The menu bar is composed of menu sections, which when clicked display any menu items that fall under their category. - Page 19 Contrast: This slider is used to adjust playback and recorded video window contrast. The value ranges from 0 to 100. The default value is 50. The larger the number is, the higher the contrast is. You can use this function when the whole video brightness is OK but the contrast is not correct.
- Page 20 gainFirst: Allows the user to prioritize gain levels based on the surrounding environment of the camera. The default gain value is from 0 ~ 50, however, can range from 0 ~ 100. Manual: Allows the user to manually control and adjust aperture, shutter, and gain priorities. Each value will be set to default unless modified by the user.
- Page 21 Customized: Allows the user to adjust the red and blue colors of the video stream. The default settings for both values are 50, but they can range from 0 ~ 100. Sodium Lamp: Allows the white balance of the video stream to be adjust according to light and dark environments.
-
Page 22: Video
Smart Illumination: Controls the intensity of the white light based on conditions in the area. It also allows you to set an illuminator delay which will illuminate the light based on a set duration. The default delay is 60 seconds however it can range from 30~300 seconds. Mode: Allows the user to set a selected night vision mode to activate manually, automatically, or turn it off. - Page 23 The overlay tab allows the user to customize channel titles, time, OSD information, and/or custom titles. This menu also allows the user to enable or disable the Amcrest overlay on the live view screen. Please note, due to certain limitations within the camera, it does not offer features such as privacy masking. Below is an explanation of the features in this menu.
-
Page 24: Audio
Custom Overlay: Create a custom text overlay that will be displayed on the live view screen. Use the Text Align dropdown menu to align the text left or right. To reset to default settings, click the Reset Defaults button. To refresh the page, click the Refresh button. To save the settings, click the Save button. -
Page 25: Network
This menu provides the ability to enable or disable P2P, the current P2P, the serial number of the camera, and a scannable QR code which can be used to link the camera to the Amcrest View Pro app or other applicable devices. - Page 26 QR code scanning feature cannot be used. QR Code: This image is a Quick Response (QR) code. By scanning this image using the Amcrest View app, this camera can establish a connection with the app.
- Page 27 SMTP (Email) This screen allows for the configuring of email settings to permit the camera to send emails when an alarm is triggered. Below is a screenshot of the email settings screen: Below is an explanation of fields on the SMTP (Email) settings screen: SMTP Server: SMTP stands for Simple Mail Transfer Protocol.
- Page 28 To connect to a different WiFi network, please factory reset the camera and connect to the new network using the Amcrest View Pro app. This menu will show the current WiFi IP address, subnet mask, and default gateway of the camera.
-
Page 29: Ptz
This menu allows the user to set PTZ presets, tours, scans, patterns, pan settings, and other PTZ related functions to the camera. Below is a screenshot of this menu: Below is an explanation of the features listed in this menu: Preset: Allows the user to add and delete preset options for PTZ functionality. -
Page 30: Event
In this field you will also notice an additional quick access to the PTZ control panel. The arrows on the PTZ control panel allow the user to move the camera’s position in a specific direction. The button in the middle of the direction arrow allows the user to select an area in the live view to zoom in on. - Page 31 Below is an explanation of the fields on the Motion Detect tab: Enable: This checkbox enables motion detection for the camera. Schedule: Clicking this button opens a weekly schedule that can be used to set times. Click and drag to set motion detection for certain days of the week. Also, periods of motion detection can be set for each day and enabled using the period settings on the bottom half of the screen.
- Page 32 Remember to click the save button on the motion detection settings screen, otherwise the motion detection zones will not go into effect. Clicking the cancel button to leave the motion detection zone and will not save the zone setup. Record: This checkbox allows the user to enable the camera to record video when a motion detection alarm is triggered.
- Page 33 Enable: This checkbox enables a video tamper alarm for the camera. Schedule: Clicking this button opens a weekly schedule that can be used to set times. Click and drag to set video tampering for certain days of the week. Also, periods of video tampering can be set for each day and enabled using the period settings on the bottom half of the screen.
- Page 34 Setting an IVS Rule All IVS rules can only be set and/or modified using the web user interface. They cannot be set using the Amcrest View Pro app or any other platforms associated with your device. For more information on setting IVS rule, refer to the information below.
- Page 35 3. Use the dropdown menu in the Rule Type column to select which IVS rule you want to use. Tripwire Tripwire allows the camera to trigger an event if an object, such as a human or vehicle, crosses the set tripwire line.
- Page 36 Record: This checkbox allows the user to enable the camera to record video when an IVS event is triggered. Record Delay: This field specifies, in seconds, how long the delay between IVS events should be. The default is 30 seconds however this can be modified between 15~300 seconds. Send Email: This checkbox allows the user to enable the camera to send an email when an IVS event is triggered.
- Page 37 Note: Target filtering can be used to refine the set rule however for optimal experience it is highly recommended to leave these settings as default To reset to default settings, click the Reset Defaults button. To refresh the page, click the Refresh button. To save the settings, click the Save button.
- Page 38 Below is a description of the features in this menu: No.: Provides the order in which the IVS rules will be displayed in the menu. Name: Allows the user to customize a name for their rule. Double click the name in the Rule column to modify. Rule Type: This dropdown menu allows the user to select an IVS rule type (Tripwire or Intrusion).
- Page 39 Play Duration: Use this dropdown menu to select how long the siren will play for after activated. Spotlight Activation: This checkbox allows the camera to activate the onboard spotlights once an event is detected. Mode: The flicker option indicates the spotlights will flicker on and off after an event is detected. Flicker Frequency: Use this dropdown menu to select how frequent the spotlights will flicker.
- Page 40 Note: Target filtering can be used to refine the set rule however for optimal experience it is highly recommended to leave these settings as default To reset to default settings, click the Reset Defaults button. To refresh the page, click the Refresh button. To save the settings, click the Save button.
- Page 41 Below is an explanation of the fields on the SD Card settings tab: Event Type: This dropdown box allows the user to select which SD card abnormality to set event triggers for. The 3 options are No SD Card, SD Card Error, and Capacity Warning. Enable: This checkbox enables the SD Card abnormality trigger for the camera.
- Page 42 Record: Enable this option for the event to be recorded to a microSD card. Record Delay: This field specifies, in seconds, how long the delay between events should be. The default is 30 seconds however this can be modified between 15~300 seconds. To reset to default settings, click the Reset Defaults button.
- Page 43 Enable: Enable the security exception abnormality option. Send Email: Receive an email notification when the abnormality is triggered. A valid email address must be established in the camera for this option to work. To reset to default settings, click the Reset Defaults button. To refresh the page, click the Refresh button. To save the settings, click the Save button.
- Page 44 Below is an explanation of the fields on the Record Schedule settings tab: Record Type: These checkboxes allow the user to select which recording type they want to configure on the schedule. There are 3 types of recordings: General: General recording means that the camera captures all footage for the specified time period. General recording is represented by the color green.
- Page 45 Record Type: These checkboxes allow the user to select which snapshot type they want to configure on the schedule. There are 3 types of snapshots: General: General means that the camera will take snapshots during the specified time period. General recording is represented by the color green.
-
Page 46: Destination
Destination This menu controls where recorded media is stored. There are 4 tabs in this menu: Path, SD Card, FTP, and NAS. Path This tab is where the user can designate a path for recorded video and snapshots to reside in. Please note, this camera does not support the ability to connect to a NAS. - Page 47 • Refresh: This button refreshes the SD card table. • Format: This button formats the SD card. This tab is where the user can change FTP settings. Below is a screenshot of the FTP tab: Below is an explanation of the fields on the FTP settings tab: Enable: This checkbox allows the user to enable FTP uploading for the camera’s recorded media.
-
Page 48: System
Below is an explanation of the fields on the Record Control settings tab: Pack Duration: This field allows the user to set how many minutes each file is comprised of. Pre-event Record: This field allows the user to specify how many seconds before an event should be recorded. Disk Full: This dropdown box allows the user to designate what the camera should do when the disk is full. - Page 49 Date & Time This tab is where the user can configure the date and time settings for the camera. Below is an explanation of the fields on the Date & Time settings tab: Date Format: This dropdown box allows the user to change the date format used in the camera. Time Format: This dropdown box allows the user to change the time format used in the camera.
- Page 50 User Name: This tab shows the usernames available on the camera. Group: This tab shows the user groups available on the camera. No.: This column shows the user’s number on the user list. User Name: This column shows the usernames of the different accounts on the camera. Group Name: This column shows the group of the different accounts on the camera.
- Page 51 Below is an explanation of the items listed in this field: Default Settings: Only the IP address, user management, and other settings can be recovered after reset. Factory Default: Completely resets the camera to factory default settings. No settings can be recovered after the camera has been returned to its factory default settings.
- Page 52 To upgrade the firmware for your camera, follow the steps provided below: Go to amcrest.com/firmware-subscribe Search for the model number of your camera and download the latest firmware file. Return to the web user interface for your camera and press the Browse button to locate and import the firmware file you just downloaded.
- Page 53 Version This screen allows the user to see various information about the camera’s software versions, as well as other information. On this screen, software version, web interface version, and ONVIF version are displayed. Also, the S/N (Token ID) is displayed here. This screen is where the camera’s activity log is kept.
-
Page 54: Alarm
To use this menu, check the enable check box to enable remote log functionality. Enter the IP address, port number and device number of the device you would like to pull remote logs from. To save your settings, click Save. If you would like to refresh the screen to show applied settings, click Refresh. To set the screen back to its original default settings, click Reset Defaults. -
Page 55: Fcc Statement
FCC Statement This device complies with Part 15 of the FCC Rules. Operation is subject to the following two conditions: (1) this device may not cause harmful interference, and (2) this device must accept any interference received, including interference that may cause undesired operation. The user’s manual or instruction manual for an intentional or unintentional radiator shall caution the user that changes, or modifications not expressly approved by the party responsible for compliance could void the user's authority to operate the equipment. -
Page 56: Appendix A: Toxic Or Hazardous Materials Or Elements
This user manual is for reference only. Slight differences may be found in the user interface. All the designs and software here are subject to change without prior written notice. All trademarks and registered trademarks mentioned are the properties of their respective owners. To contact Amcrest support, please do one of the following: Visit https://amcrest.com/contactus and use the email form.
Need help?
Do you have a question about the IP5M-1190W and is the answer not in the manual?
Questions and answers