Table of Contents
Advertisement
Available languages
Available languages
Quick Links
Download this manual
See also:
User Manual
Advertisement
Table of Contents

Related Manuals for ClearSounds TALK500


Summary of Contents for ClearSounds TALK500
-
Page 1: User Guide
Talking Telephone Featuring UltraClear Sound Shaping Technology Talk500 User Guide V2.08 1 – ENGLISH... -
Page 2: Conditions For Use
WARNING: The Talk500 phone is capable of amplifying sounds to a loud volume. It is important to instruct all potential users of its proper operation. It is advised to adjust the volume control to its minimum level (Low) when not in use and alert other users that hearing damage can potentially result from misuse. -
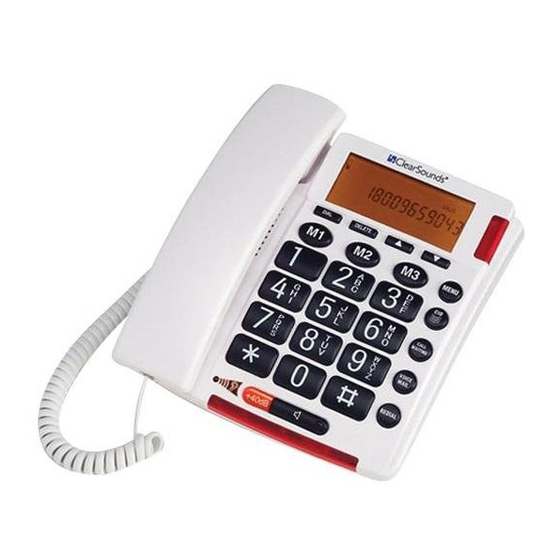
Page 3: Location Of Controls
LOCATION OF CONTROLS 1. Telephone Line Jack TEL.LINE 14. LCD Display 2. Hook switch 3. Delete Button 4. Holder 5. Dial Button 6. Memory Buttons (M1-M3) 7. Speaker 8. Keypad 9. Handset volume control 10. Boost LED 11. Volume Booster 12. -
Page 4: Fcc Wants You To Know
The REN is useful to determine the quantity of devices you may connect to your telephone line and still have all of those devices ring when your telephone number is called. In most, but not all areas, the sum of the REN’s of all devices connected to one line should not exceed five (5.0). -
Page 5: Installation
2. Plug the other end of the telephone line cord into the wall outlet. 3. Plug one end of the coil cord into the handset’s modular jack. 4. Plug the other end of the coil cord into the left side of the telephone base. Connecting The Power Supply Plug the AC adapter into the AC Power Jack on the back of your phone, then into an electrical outlet or surge protector, if you are using one. -
Page 6: Setting The Contrast
Then press down and slide the bracket upward until the tabs snap into place. 4. Plug one end of the telephone line cord into the TEL. LINE jack at the back of the base. -
Page 7: Setting Tone /Pulse Dialing Mode
Setting The Voice Prompt YES/NO The telephone is factory preset with all voice features ON. The volume of the voice features is regulated through the VOLUME HI/LO slide switch. If the user does not wish to hear the voice prompts, they can turn off the voice feature. -
Page 8: Dialing A Call
1. Pick up the handset or press for a dial tone. 2. Press the keypad for the telephone number you wish to dial. The display will show the number that you dialed on the keypad. If you dial a number over 14 digits long, it will show the last 14 digits only. -
Page 9: Call Waiting
Your Talk500 will display MESSAGE WAITING if a recorded message has been left. The New Call LED will blink until the message is retrieved. -
Page 10: How To Enter Names
After a short time, the display will show the first stored telephone number with this initial letter, say the name and VOICE icon is shown if it was recorded, or voice the telephone number. - Page 11 -OR- 1. Pick up the handset or press for a dial tone. 2. Press and release 3. Review the stored phone number by pressing 4. Press DIAL button. Recording / Editing / Deleting Voice Prompt Of Name Of Phonebook With Caller ID service activated, when an incoming call is received, the unit will display and announce the caller’s phone number.
-
Page 12: Voice Mail
1. Press and release the MENU button until the STORE NUMBER is shown. 2. Press the DIAL button. The cursor will flash in the first position. 3. Enter the required telephone number with a maximum of 22 digits using the number pad and confirm with DIAL button. - Page 13 This product can provide information only if both you and the caller are in areas offering Caller ID service, and if both telephone companies use compatible equipment. Important: When using the Caller ID features, please note it is only available at Caller ID mode (CLIP icon turns on).
-
Page 14: Call Back (Redial) From The Caller Id Memory
View the Caller ID Memory Press to review more recent calls. The CALL# will decrease. After you view the most recent data in memory, the display will show END OF LIST. Press to review older calls. The CALL# will increase. After you view the oldest data in memory, the display will show END OF LIST. -
Page 15: Copy From The Caller Id To The Phonebook
No dial tone 1. Check that all phone cord connections (including the curly cord) and AC Adapter are securely plugged into the telephone & wall jack. 2. Check that the phone is in the correct dialing mode, Touch-Tone / Pulse Setting. -
Page 16: Warranty And Service
ClearSounds Communications™ shall not be responsible for loss of time, inconvenience, loss of use of your Talk500 phone, property damage by your Talk500 or any other or consequential damages. Warranty service is available only with proof of purchase. -
Page 17: Manual Del Usuario
Teléfono parlante con tecnología de modelado sonido UltraClear Talk500 Manual del Usuario V2.08 1 – SPANISH... -
Page 18: Instrucciones De Seguridad Importantes
ADVERTENCIA: El teléfono Talk500 puede amplificar el volumen del sonido. Es importante que todos los posibles usuarios conozcan cómo manejar este aparato correctamente. Se recomienda poner el volumen del teléfono en el nivel mínimo (Low) cuando el aparato no esté... -
Page 19: Ubicación De Los Controles
UBICACIóN DE LOS CONTROLES 1. Conector de línea telefónica 2. Gancho conmutador 3. Tecla Delete (Borrar) 4. Soporte 5. Tecla Dial (Marcar) 6. Teclas de memoria (M1-M3) 7. Altavoz 8. Teclado 9. Control de volumen del auricular 10. LED de aumento 11. - Page 20 Este equipo cumple con la Sección 68 de los reglamentos de la FCC y con los requisitos adoptados por ACTA. En la parte inferior de este equipo se encuentra una etiqueta que contiene, entre otra información, el identificador del producto en el formato US: AAAEQ##TXXXX.
-
Page 21: Conexión Del Teléfono
• conectar el equipo a una salida en un circuito distinto al circuito al que está conectado el receptor. • consultar con el distribuidor o con un técnico experimentado en radio/TV para recibir ayuda. Conexión a la fuente de energía principal Inserte el conector de la fuente de energía en la toma de alimentación de la parte posterior del teléfono y conecte la fuente de energía a un tomacorriente correctamente instalado. -
Page 22: Configuración De Fecha Y Hora
Configuración del contraste de la pantalla 1. Presione la tecla MENU. La pantalla muestra LCD CONTRAST. 2. Presione la tecla DIAL. La pantalla muestra la configuración de contraste actual con valores entre 1 y 5. 3. Presione para seleccionar el nivel de contraste y confirme con la tecla DIAL. -
Page 23: Funcionamiento Del Teléfono
Configuración de Tono/Pulso Puede seleccionar el tipo de marcado necesario: TONO O PULSO. 1. Presione y suelte la tecla MENU hasta que aparezca TONE/PULSE (Tono/Pulso). 2. Presione la tecla DIAL. 3. Seleccione el tipo de marcado necesario con Control de volumen del timbre El nivel de sonido del timbre se puede ajustar deslizando el interruptor RINGER (Timbre) para seleccionar HI, MID y LO. -
Page 24: Control De Volumen Del Altavoz
telefónica; si eso no es así, pronuncia los números de la llamada entrante. Esta función le permite decidir si desea contestar o no la llamada dependiendo de quien llame. Si desea hablar con la persona que llama: 1. Levante el auricular o presione la tecla para atender la llamada. -
Page 25: Compatibilidad Con Aparatos Auditivos
Compatibilidad con aparatos auditivos Esta unidad es compatible con aparatos auditivos con acoplamiento inductivo. AGENDA TELEFóNICA Importante: cuando use las funciones de la agenda telefónica, observe que sólo está disponible en el modo de agenda telefónica (el icono el icono está... - Page 26 Las entradas incorrectas se pueden eliminar con la tecla DELETE. Para hacerlo, mueva el cursor a la posición correcta con DELETE. Para revisar la memoria de la agenda telefónica 1. Presione y suelte la tecla 2. Revise el número telefónico almacenado al presionar la letra inicial del nombre de la persona a la que desea llamar usando el teclado numérico.
- Page 27 3. Presione para seleccionar la lista para la cual desea grabar un mensaje o nombre. 4. Para grabar o editar su voz, mantenga presionada la tecla DIAL, hable claro en el micrófono luego de escuchar un tono y de ver el icono “VOICE” parpadeando.
-
Page 28: Identificador De Llamadas
Almacenamiento de números en la tecla MEMORY (Memoria) 1. Presione y suelte la tecla MENU hasta que aparezca el mensaje STORE NUMBER. 2. Presione la tecla DIAL. El cursor parpadeará en la primera posición. 3. Ingrese el número telefónico requerido con un máximo de 22 dígitos usando el teclado numérico y confírmelo con la tecla DIAL. - Page 29 • Si se recibe el nombre y número telefónico de la persona que llama, la pantalla muestra el nombre y número telefónico de esta persona con la hora y fecha de recepción de la llamada. El icono “NEW” se activa y el LED de llamada nueva parpadea.
-
Page 30: Garantía Y Servicio Técnico
Guarde su comprobante de compra para demostrar la fecha que adquirió el aparato en caso que requiera el servicio contemplado por la garantía. Dentro del plazo de un año contado a partir de la fecha de compra, ClearSounds Communications™ reparará o reemplazará (de acuerdo a nuestro propio criterio) el teléfono Talk500, si se detectara algún defecto de material o mano de obra. - Page 31 ClearSounds Communications™ no se hará responsable del tiempo perdido, alguna dificultad, la pérdida de uso del teléfono Talk500, daños materiales causados por este mismo aparato u otros daños indirectos o emergentes. La garantía de servicio es aplicable únicamente contra presentación del comprobante de compra (factura).
- Page 32 NOTES/NOTA: 16 – SPANISH...
Need help?
Do you have a question about the TALK500 and is the answer not in the manual?
Questions and answers