
Related Manuals for Clarion CZ200


Summary of Contents for Clarion CZ200
- Page 1 Owner’s manual & Installation manual Mode d’emploi et manuel d’installation Manual de instrucciones y de instalación CD/USB/MP3/WMA RECEIVER LECTEUR CD/USB/MP3/WMA RECEPTOR CD/USB/MP3/WMA...
-
Page 3: Table Of Contents
Contents Thank you for purchasing this Clarion product. • Please fully read this owner’s manual before operating this equipment. • Check the contents of the enclosed warranty card and store it in a safe place with this manual. 1. FEATURES ... 4 Expanding Systems ... -
Page 4: Features
1. FEATURES Compatible with iPod 4ch/2V RCA Output with Subwoofer Control and BEAT-EQ with 3 Band Parametric Equalizer Detachable Front Panel with 3.5 mm Auxiliary Input MP3/WMA compatible with ID3-TAG display Expanding Systems Expanding audio features iPod/ iPhone Note: Items outside of the frames are commercially available. -
Page 5: Precautions
(2)THIS DEVICE MUST ACCEPT ANY INTERFERENCE RECEIVED, INCLUDING INTERFERENCE THAT MAY CAUSE UNDESIRED OPERATION. THIS DEVICE COMPLIES WITH DHHS RULES 21 CFR SUBCHAPTER J APPLICABLE AT DATE OF MANUFACTURE. CLARION CO.,LTD. 7-2,SHINTOSHIN,CHUO-KU,SAITAMA-SHI,SAITAMA-KEN,JAPAN MANUFACTURED: INFORMATION FOR USERS: CHANGES OR MODIFICATIONS TO... -
Page 6: Front Panel
“USB mass storage class” to work properly. Some models may not operate correctly. Clarion will not be held liable in the unlikely event of loss of or damage to memorized data. When using an USB memory stick, we recommend that you backup your data on a personal computer. -
Page 7: Remove The Dcp
Remove the DCP The control panel can be detached to prevent theft. When detached, keep it in a safe place where it will not be subject to scratches. We recommend taking the DCP with you when leaving the car. 1. Press the [ ] button (2 sec.) to turn off the power. -
Page 8: Controls
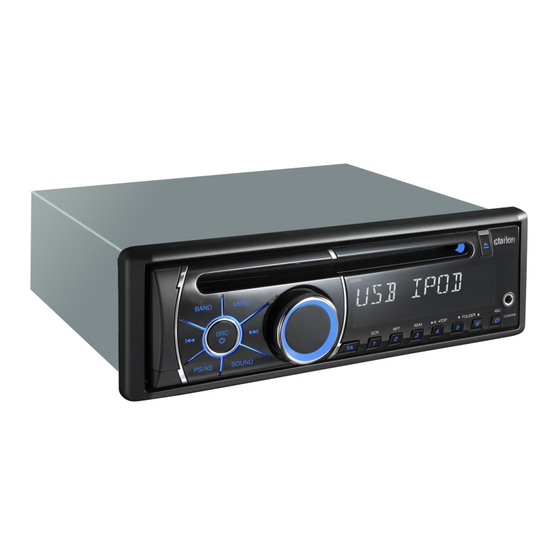
3. CONTROLS Operational Panel [BAND] [MENU] [PS/AS] [SOUND] [OPEN] [POWER/SRC] Names of Buttons / SRC] button • Power/Toggle the audio source [BAND] button • Select tuner band [MENU] button • System menu ] button • Eject the disc in the unit. ] button •... -
Page 9: Remote Control
Remote Control [POWER/SRC] button • Toggle the audio source/Power on/ Power off (long press) ] button • Preset station up/down/Previous/ next track/Search (long press) [SCN/PS/AS] button • Scan play/Preset scan/Auto memory store [BND/TOP] button • Select tuner band/Top play (long press) ] button •... -
Page 10: Cautions On Handling
4. CAUTIONS ON HANDLING Handling Discs Handling • New discs may have some roughness around the edges. If such discs are used, the player may not work or the sound may skip. Use a pen or similar tool to remove any roughness from the edge of the disc. -
Page 11: Operations
5. OPERATIONS Basic Operations Note: Be sure to read this chapter referring to the chapter “3. CONTROLS.” CAUTION Before turning off the unit, return the volume to a lower level. Restarting playback with the volume at maximum increases the possibility of damage to the speakers or your hearing. -
Page 12: Radio Operations
2. The unit has four bands: FM1, FM2, FM3 and AM. FM3 and AM can store by AS function. Each bands can store six stations, CZ200 can store 24 stations in total. Manual store While tuned into a desired radio station, press and hold number button 1–6 to store it... -
Page 13: Cd/Mp3/Wma Operations
CD/MP3/WMA Operations This unit can play back MP3/ WMA files Note: If you play a file with DRM (Digital Rights Management) for WMA remaining ON, no audio is output (The WMA indicator blinks). To disable DRM (Digital Rights Management) When using Windows Media Player 9/10/11, click on Tool ->... -
Page 14: Pausing Play
CD/MP3/WMA Operations • If the CD is not inserted easily, there may be another CD in the mechanism or the unit may require service. • Discs not bearing the and CD-ROMs cannot be played by this unit. • Some CDs recorded in CD-R/CD-RW mode may not be usable. -
Page 15: Usb Operations
CD/MP3/WMA Operations 2. For MP3/WMA files, press the [RPT] button again, “FOLDER RPT” appears on the display for folder repeat play. 3. Press [RPT] button twice to cancel repeat playback, “RPT OFF” appears on the display, and “RPT” goes off. USB Operations 1. -
Page 16: Aux Operations
AUX Operations Press the [SRC] button on the panel or remote control to select AUX. AUX is just for Audio content with 3.5 mm Jack connector plugged into audio-in socket on the front panel. AUX input sensitivity setting 1. Press the [ADJ] button. 2. -
Page 17: Audio Setup
Audio Setup Press the [SOUND] button to enter sound effect setting mode. First press shows current EQ. Rotate the [VOLUME] knob to change the options in the following order: OFF -> B-BOOST -> IMPACT -> EXCITE -> CUSTOM Press the [SOUND] button, then press ] to select USER preset including: System Setup In the radio mode, press and hold the [ADJ]... -
Page 18: Trouble Shooting
6. TROUBLE SHOOTING General Problem Unit fuse blown. Unit does not turn Car battery fuse blown. Unit does not turn Nothing happens when buttons are Illegal operation. pressed. Display is not accurate. Battery depleted. Remote control does not work. Battery installed incorrectly. Improper audio output connection. -
Page 19: Error Display
USB devices Problem The USB device has been inserted with wrong direction. USB device cannot be inserted. The USB connector is broken. The USB device is damaged. USB device is not recognized. Connectors are loose. No sound heard with No MP3/WMA file is stored in the the display “No File”... -
Page 20: Specifications
8. SPECIFICATIONS FM tuner Frequency range: 87.9–107.9 MHz Usable sensitivity: 8 dBμ Frequency response: 30 Hz–15 kHz Stereo separation: 30 dB (1 kHz) Signal/noise ratio: >55 dB AM tuner Frequency range: 530–1,710 kHz Usable sensitivity (S/N=20 dB): 30 dBμ System: Disc digital audio system Frequency response: 20 Hz–20 kHz Signal/noise ratio: >75 dB Total harmonic distortion: Less than 0.1% (1 kHz) -
Page 21: Installation / Wire Connection Guide
1. Do not open the case. There are no user- serviceable parts inside. If you drop anything into the unit during installation, consult your dealer or an authorized Clarion service center. Car battery Figure 1 L-key ... 2 Wire connector ... 1 Remote control unit (with battery)... -
Page 22: Cautions On Installation
Notes: 1. Some car models require special mounting kits for proper installation. Consult your Clarion dealer for details. 2. Fasten the front stopper securely to prevent the source unit from coming loose. • Console opening dimensions 7 3/16”... -
Page 23: Notes On Installation
Notes on installation 1. Before installation, please make sure that all connections have been properly made and the unit operates normally. Improper connection may result in damage to the unit. 2. Use only accessories designed and manufactured for this unit. The use of other unauthorized accessories may result in damage to the unit. -
Page 24: Removing The Source Unit
Method B M5×6 Mounting frame 1. Insert this unit directly to the opening of the dashboard. 2. Place M5×6 cylindrical screw through the holes of the mounting frame located inside the opening to holes of the unit and fasten the screws to left & right. Trim ring installation Attach the trim ring around the front panel. -
Page 25: Wiring And Connections
7) Wiring and Connections Black USB connector Black Steering wheel control terminal ANTENNA (Black) Black White Rear audio output (Left) Subwoofer output 1 Black Rear audio output (Right) Subwoofer output 2 White Left Right Gray Black 4-channel amplifier Refer to the next page. Front audio output terminal... -
Page 26: Connecting The Accessories
Gray Front right Gray/Black White Front left White/Black Purple Front right Purple/Black Green Front left Green/Black 4-speaker system 2-speaker system Gray Front right Gray/Black White Front left White/Black Purple Purple/Black Green Green/Black Not used. Insulate each wire 8) Connecting the Accessories •... - Page 27 Clarion Co., Ltd. All Rights Reserved. Copyright © 2010: Clarion Co., Ltd. Printed in China / Imprimé en Chine / Impreso en China PN:127075002440...
Need help?
Do you have a question about the CZ200 and is the answer not in the manual?
Questions and answers