
Related Manuals for Ingersoll-Rand THERMO KING E-200 Series


Summary of Contents for Ingersoll-Rand THERMO KING E-200 Series
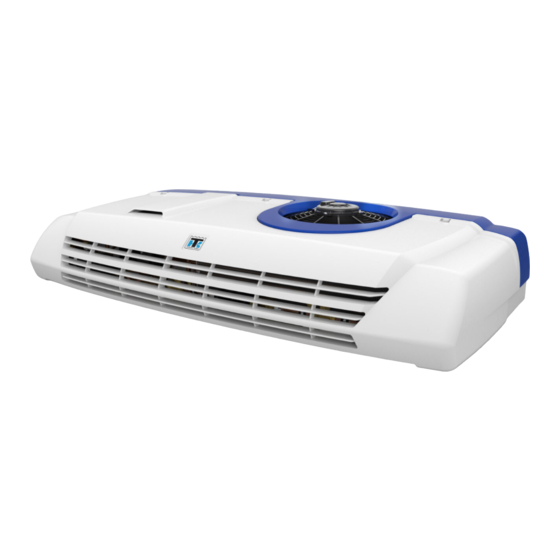
- Page 1 Installation Manual Vehicle Powered Truck Edition E-200 Series Single and Multi Temperature Systems Revision A T T K K 6 6 1 1 6 6 9 9 4 4 - - 1 1 8 8 - - I I M M - - E E N N July 2019...
- Page 2 Introduction This manual was written to assist with the basic installation of a Thermo King components onto trucks designed and built for refrigerated applications. The T T h h e e r r m m o o K K i i n n g g I I n n s s t t a a l l l l a a t t i i o o n n S S t t a a n n d d a a r r d d s s a a n n d d P P r r o o c c e e d d u u r r e e s s G G u u i i d d e e provides more detailed information that must be followed to safely and properly complete the entire installation.
-
Page 3: Table Of Contents
Table of Contents S S a a f f e e t t y y P P r r e e c c a a u u t t i i o o n n s s ................................5 5 Danger, Warning, Caution, and Notice . - Page 4 T T a a b b l l e e o o f f C C o o n n t t e e n n t t s s ES-200 ..................41 C C o o m m p p l l e e t t i i n n g g t t h h e e I I n n s s t t a a l l l l a a t t i i o o n n .
-
Page 5: Danger, Warning, Caution, And Notice
Safety Precautions Danger, Warning, Caution, and Notice Thermo King® recommends that all service be performed by a Thermo King dealer and to be aware of several general safety practices. Safety advisories appear throughout this manual as required. Your personal safety and the proper operation of this unit depend upon the strict observance of these precautions. - Page 6 Required Tools N N o o t t e e : : Equipment such as scales, gauges, refrigerant leak detectors, and torque wrenches should be in good working condition and routinely calibrated to assure accurate readings. Figure 1. BED760 Electric drill Protective gloves Electrical terminal press File...
-
Page 7: R R E E Q Q U U I I R R E E D D T T O O O O L L S
R R e e q q u u i i r r e e d d T T o o o o l l s s Adhesive tape Electric connectors Leak detector Measuring tape Electrical wire Nitrogen cylinder Drilling template Voltmeter Refrigerant cylinders Pencil... - Page 8 Required Support Materials Please have the following support materials to hand prior to starting your installation - as they are listed as reference throughout this manual: 1. Vehicle Powered Truck Installation Standards and Procedures Guide EMEA - located in Infocentral: Technical Publications 2.
- Page 9 Auto Start Hard Stop / Disable Connector D D A A N N G G E E R R H H a a z z a a r r d d o o u u s s V V o o l l t t a a g g e e ! ! T T a a k k e e c c a a r r e e t t h h a a t t t t h h i i s s c c o o n n n n e e c c t t o o r r d d o o e e s s n n o o t t d d i i s s c c o o n n n n e e c c t t t t h h e e A A C C v v o o l l t t a a g g e e i i n n p p u u t t .
-
Page 10: Cover And Fan Housing Removal (All Models)
Preparing Condenser for Installation Cover and Fan Housing Removal (All Models) To access the unit mounting holes: 1. Remove plastic condenser cover. 2. Remove the fan housing assembly. (Remove the fan connector) 3. Remove “Power Off Device” Connector and Electric Box Cover 4. - Page 11 Condenser Installation I I m m p p o o r r t t a a n n t t : : See Section 4 - Unit Installation Standards and Procedures in the Thermo King Vehicle Powered Truck Installation Standards and Procedures Guide. THESE PROCEDURES MUST BE FOLLOWED! N N o o t t e e : : Nose mount and roof top condenser mounting and access hole dimensions can be found at the back of this manual.
- Page 12 Evaporator Installation I I m m p p o o r r t t a a n n t t : : See Section 4 - Unit Installation Standards and Procedures in the Thermo King Vehicle Powered Truck Installation Standards and Procedures Guide (TK 61588). THESE PROCEDURES MUST BE FOLLOWED! N N o o t t e e : : Evaporator mounting hole locations can be found at the back of this manual.
- Page 13 Hose Connections I I m m p p o o r r t t a a n n t t : : See Section 6 - Refrigerant Hose and Fittings Standards in the Thermo King Vehicle Powered Truck Installation Standards and Procedures Guide (TK 61588). THESE PROCEDURES MUST BE FOLLOWED! C C A A U U T T I I O O N N S S e e r r v v i i c c e e P P r r o o c c e e d d u u r r e e ! ! T T h h i i s s u u n n i i t t i i s s s s u u p p p p l l i i e e d d w w i i t t h h s s e e r r v v i i c c e e v v a a l l v v e e s s c c l l o o s s e e d d .
-
Page 14: H H O O S S E E C C O O N N N N E E C C T T I I O O N N S
H H o o s s e e C C o o n n n n e e c c t t i i o o n n s s Figure 4. Hose Connection Single Temperature Model 20 TK 61694-18-IM-EN... - Page 15 H H o o s s e e C C o o n n n n e e c c t t i i o o n n s s Legend O-RING (#4, o-ring seal) 90 degree Fitting (straight, #6 fitting, #4 hose) Straight Fitting (female o-ring seal, #4 fitting, #4 hose) O-RING (#10, o-ring seal) O-RING (#6, o-ring seal)
- Page 16 H H o o s s e e C C o o n n n n e e c c t t i i o o n n s s Figure 5. Hose Connection Single Temperature Model 50 Legend O-RING (#4, o-ring seal) Straight Fitting (female o-ring seal, #6 fitting, #8 hose) Straight Fitting (female o-ring seal, #4 fitting, #4 hose) O-RING (#10, o-ring seal)
- Page 17 H H o o s s e e C C o o n n n n e e c c t t i i o o n n s s Figure 6. Hose Connection Multi Temperature (2 Zone) Legend O-RING (#4, o-ring seal) O-RING (#10, o-ring seal) Straight Fitting (female o-ring seal, #4 fitting, #4 hose) EE - splicer (#4)
- Page 18 H H o o s s e e C C o o n n n n e e c c t t i i o o n n s s 90 degree Fitting (female o-ring seal, #4 fitting, #4 hose) Hose (Suction Line) (#10, 50 ft) 90 degree Fitting (female o-ring seal, #10 fitting, #10 hose) TK 61694-18-IM-EN...
- Page 19 Installing the Filter Drier and Sight Glass C C A A U U T T I I O O N N S S e e r r v v i i c c e e P P r r o o c c e e d d u u r r e e ! ! T T h h i i s s u u n n i i t t i i s s s s u u p p p p l l i i e e d d w w i i t t h h s s e e r r v v i i c c e e v v a a l l v v e e s s c c l l o o s s e e d d .
- Page 20 Wiring Connections Model 20 & 50 I I m m p p o o r r t t a a n n t t : : See Section 7 - Electrical Standards in the Thermo King Vehicle Powered Truck Installation Standards and Procedures Guide .THESE PROCEDURES MUST BE FOLLOWED! TK 61694-18-IM-EN...
-
Page 21: W W I I R R I I N N G G C C O O N N N N E E C C T T I I O O N N S S M M O O D D E E L L 2 2 0 0 & & 5 5 0 0
W W i i r r i i n n g g C C o o n n n n e e c c t t i i o o n n s s M M o o d d e e l l 2 2 0 0 & & 5 5 0 0 I I m m p p o o r r t t a a n n t t : : When installing the Power Receptacle. - Page 22 In-Cab Controller Installation 1. Install the mounting bracket for the in-cab control box. Its design allows the mounting bracket to be positioned in various places in the cab interior. Find a a l l o o c c a a t t i i o o n n w w h h i i c c h h i i s s a a c c c c e e s s s s i i b b l l e e a a n n d d v v i i s s i i b b l l e e f f r r o o m m t t h h e e d d r r i i v v e e r r ’ ’ s s s s e e a a t t , and which does not restrict the mobility or visibility of either the driver or the vehicle’s instruments and levers.
-
Page 23: I I N N - - C C A A B B C C O O N N T T R R O O L L L L E E R R I I N N S S T T A A L L L L A A T T I I O O N
I I n n - - C C a a b b C C o o n n t t r r o o l l l l e e r r I I n n s s t t a a l l l l a a t t i i o o n n 4. - Page 24 I I n n - - C C a a b b C C o o n n t t r r o o l l l l e e r r I I n n s s t t a a l l l l a a t t i i o o n n 6.
- Page 25 Optional DIN Adaptor (by order only) 1. Place the metal box (J J ) supplied in the housing designed for the radio. Raise the tabs (M) sufficiently to fit the box into the housing. 2. Attach the control to the plastic bracket (L L ) using the 4 screws (K K ). 3.
- Page 26 Battery Connection 1. Pass electrical wires CHA (black), 01, BAT and 2 (brown) to the battery. 2. Using the recommended tools, cut the wires to the proper length. D D o o n n o o t t c c o o i i l l o o r r s s p p l l i i c c e e t t h h e e e e x x c c e e s s s s w w i i r r e e . . 3.
- Page 27 Holdover Battery Option This option uses an auxiliary battery provided by your vehicle manufacturer. It allows the user to maintain the temperature control of the compartment for a certain period when there is no alternator or stand-by power sources available. •...
-
Page 28: H H O O L L D D O O V V E E R R B B A A T T T T E E R R Y Y O O P P T T I I O O N
H H o o l l d d o o v v e e r r B B a a t t t t e e r r y y O O p p t t i i o o n n Hold-over Option Installation Guidelines N N O O T T I I C C E E E E q q u u i i p p m m e e n n t t D D a a m m a a g g e e ! ! - Page 29 H H o o l l d d o o v v e e r r B B a a t t t t e e r r y y O O p p t t i i o o n n TK 61694-18-IM-EN...
-
Page 30: Concept
Start/Stop Functionality I I m m p p o o r r t t a a n n t t : : The presented proposal does not cover all the diversity of vehicle manufacturer implementations. An adaptation to each application will be required. A carefully revision of your vehicle documentation is advised. -
Page 31: Parts Required Before Starting Installation
S S t t a a r r t t / / S S t t o o p p F F u u n n c c t t i i o o n n a a l l i i t t y y Vehicle Battery Fuse (150 A) Ignition Switch... -
Page 32: Installation Guidelines
S S t t a a r r t t / / S S t t o o p p F F u u n n c c t t i i o o n n a a l l i i t t y y Description: TK Service Parts Number: Seal Cable Yellow - Outside Diameter 1.8-2.4mm... - Page 33 S S t t a a r r t t / / S S t t o o p p F F u u n n c c t t i i o o n n a a l l i i t t y y TK 61694-18-IM-EN...
-
Page 34: Concept
Increased Idle Speed Setup I I m m p p o o r r t t a a n n t t : : The presented proposal does not cover all the diversity of vehicle manufacturer implementations. An adaptation to each application will be required. A carefully revision of your vehicle documentation is advised. -
Page 35: Parts Required Before Starting Installation
I I n n c c r r e e a a s s e e d d I I d d l l e e S S p p e e e e d d S S e e t t u u p p Vehicle Battery Fuse (150 A) Ignition Switch... -
Page 36: Installation Guidelines
I I n n c c r r e e a a s s e e d d I I d d l l e e S S p p e e e e d d S S e e t t u u p p Description: TK Service Parts Number: Seal Cable Yellow - Outside Diameter 1.8-2.4mm... - Page 37 I I n n c c r r e e a a s s e e d d I I d d l l e e S S p p e e e e d d S S e e t t u u p p TK 61694-18-IM-EN...
- Page 38 Standby Receptacle Box Installation (Models 20 and 50 Only) I I m m p p o o r r t t a a n n t t : : See Section 7 - Electrical Standards in the Thermo King Vehicle Powered Truck Installation Standards and Procedures Guide (TK 61588).
-
Page 39: Es-100N/Es150
Evaporator Drain Hose Installation I I m m p p o o r r t t a a n n t t : : 1. See Section 8 - Evaporator Drain Hose Standards in the Thermo King Vehicle Powered Truck Installation Standards and Procedures Guide . - Page 40 E E v v a a p p o o r r a a t t o o r r D D r r a a i i n n H H o o s s e e I I n n s s t t a a l l l l a a t t i i o o n n Figure 10.
- Page 41 E E v v a a p p o o r r a a t t o o r r D D r r a a i i n n H H o o s s e e I I n n s s t t a a l l l l a a t t i i o o n n ES-200 1.
- Page 42 Completing the Installation I I m m p p o o r r t t a a n n t t : : BEFORE COMPLETING THE INSTALLATION, YOU MUST PERFORM THE FOLLOWING PROCEDURES IN ACCORDANCE WITH THE THERMO KING INSTALLATION STANDARDS AND PROCEDURES GUIDE: •...
- Page 43 Suction Pressure Regulator (SPR) Adjustment Procedures - MAX I I m m p p o o r r t t a a n n t t : : Using the absence of bubbles in the sight glass as an indicator of correct refrigerant charge can be misleading, Y Y O O U U M M U U S S T T refrigerate the box to 0-5ºC to get a more precise indication from the sight glass.
- Page 44 Discharge Pressure Regulator (DPR) Adjustment Procedures - MAX W W A A R R N N I I N N G G E E q q u u i i p p m m e e n n t t D D a a m m a a g g e e ! ! L L o o w w e e r r s s e e t t t t i i n n g g s s c c a a n n b b e e s s e e l l e e c c t t e e d d b b a a s s e e d d o o n n l l o o c c a a l l p p r r e e f f e e r r e e n n c c e e s s t t o o o o p p t t i i m m i i z z e e h h e e a a t t i i n n g g o o p p e e r r a a t t i i o o n n .
- Page 45 Compressor Oil Amounts and Type I I m m p p o o r r t t a a n n t t : : Using the absence of bubbles in the sight glass as an indicator of correct refrigerant charge can be misleading, Y Y O O U U M M U U S S T T refrigerate the box to 0-5ºC to get a more precise indication from the sight glass.
- Page 46 Recommended Refrigerant Charge by Model I I m m p p o o r r t t a a n n t t : : Failure to add the proper amount of refrigerant will result in decreased system performance. Refer to the Thermo King Vehicle Powered Truck Installation Standards and Procedures Guide for information on proper system charging procedures.
- Page 47 Condenser and Evaporator Dimensions N N o o t t e e : : Paper Templates are available to assist in the installation of the Condenser and Evaporator. These Templates provide the installer with a footprint of the component and provide the correct mounting and access hole locations.
- Page 48 C C o o n n d d e e n n s s e e r r a a n n d d E E v v a a p p o o r r a a t t o o r r D D i i m m e e n n s s i i o o n n s s Figure 13.
- Page 49 N N o o t t e e s s TK 61694-18-IM-EN...
- Page 50 N N o o t t e e s s TK 61694-18-IM-EN...
- Page 51 N N o o t t e e s s TK 61694-18-IM-EN...
- Page 52 Ingersoll Rand (NYSE: IR) advances the quality of life by creating comfortable, sustainable and efficient environments. Our people and our family of brands — including Club Car ® , Ingersoll Rand ® , Thermo King ® Trane ® — work together to enhance the quality and comfort of air in homes and buildings; transport and protect food and perishables;...
Need help?
Do you have a question about the THERMO KING E-200 Series and is the answer not in the manual?
Questions and answers