Advertisement
Quick Links
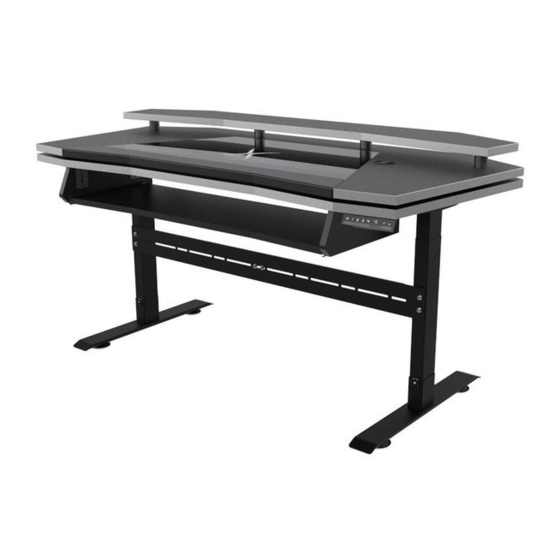
XTRMB01
Xtreme Standing workstation
WE ENCOURAGING YOU WATCHING STEP BY STEP VIDEO MANUALS
For XTREME step by step assembly manual on You tube scan code on the right
For Pull out keyboard assembly manual on You tube scan code on the right
!
Please assemble your product on soft
surface to avoid scratches and damages
on lacquer.
www.studiodesk.net
Advertisement

Related Manuals for StudioDesk Xtreme XTRMB01 Series


Summary of Contents for StudioDesk Xtreme XTRMB01 Series
- Page 1 XTRMB01 Xtreme Standing workstation WE ENCOURAGING YOU WATCHING STEP BY STEP VIDEO MANUALS For XTREME step by step assembly manual on You tube scan code on the right For Pull out keyboard assembly manual on You tube scan code on the right Please assemble your product on soft ...
- Page 2 The Desk You Deserve Thank you for making StudioDesk your desk of choice! Before beginning assembly of your stand, let s get familiar with the parts you have received in your package. Please match the corresponding numbers on this page with the drawings. Parts 1. Motorized Electric legs 2. Bottom desk surface 3. Spacer desk surface 4. Top desk surface 5. Top shelf 6. Padded armrest Hardware Tools needed (Not included) Pillars M6 Screw Screws for wood 4 pcs 2 pcs 4 x 20 8 pcs...
- Page 3 Step One Place bottom desk surface on the floor. Place U profiles as shown on the illustration on it and make sure that central bigger holes are facing towards out. Screw them with M6 screws included in the set. Step Two Place Central support as shown on the illustration. Step Three Make sure that central part is inserted evenly on both sides. Step Four Fix central part to the desk surface using M6 screws. Fix central support using M6 screws. ...
- Page 4 Step Five Add columns with electric motors as shown on the illustration and fix it with M6 Screws. Do the same on the both sides. Step Six Put on foots to the columns and fix it as shown on the illustration. Step Seven Screw in the glides. Fix the foot to the column with longer M6 screws included in the set. Step Eight Install bridge in between two legs. Fix it with M6 screws. Two bridges should be connected with the M6 screws and nuts as shown on the illustration. ...
- Page 5 Step Nine Install Control box by sliding it in the place as shown in the illustration. Install Memory controller using small screws for wood. Connect power cables and network cables to control box. Scan code for detailed video. Step Ten Install optional pull out holders as shown in the illustration using M6 screws. Scan code for more detailed video about installing pull out option. Step Eleven Turn desk in standing position. Install wooden dowels as shown on the illustration and install Spacer desk surface on the top. Step Twelve Carefully stick included long LED strip to the Spacer surface as shown on the illustration. ...
- Page 6 Step Thirteen Install armrest to the main desk surface using screws for wood. Once armrest is in the place, install main desk surface on the top of the middle desk surface as shown on the illustration on the right. Step Fourteen Carefully remove the glass from the main desk surface and install shorter LED strip as shown in the illustration. Connecting cable should go out trough the hole towards down. Carefully put the glass back in the place. Step Fifteen If you purchase optional rack rails option, now is the time to screw it in the place using M6 screws. Step Sixteen Place the pillars on the positions so the long screws (13) can pass trough all three desk surfaces, pillars (7) and end in the top shelf (5). Fasten long screws using wrench tool. Note! Washers should be used from the bottom.
- Page 7 Step Seventeen As the last step, install USB hub cable inlay to your desk and connect it to your computer.
Need help?
Do you have a question about the Xtreme XTRMB01 Series and is the answer not in the manual?
Questions and answers