Table of Contents
Advertisement
Quick Links
- 1 Table of Contents
- 2 Summary
- 3 Terminology
- 4 System Features and Examples
- 5 Examples of Applications Using External Control Input Terminals, Operation Monitor Output Terminals and Malfunction Monitor Output Terminals
- 6 Installation Method (Model Lgh-Rx -E Series)
- 7 (Operation Setting, Initial Setting, Group Configuration Setting, Interlocked Operation Setting)
- Download this manual
Advertisement
Table of Contents

Related Manuals for Mitsubishi Electric Lossnay LGH-15RX3-E


Summary of Contents for Mitsubishi Electric Lossnay LGH-15RX3-E
- Page 1 TECHNICAL MANUAL (CONTROLS) I Lossnay Unit Models LGH-15RX LGH-25RX LGH-35RX LGH-50RX LGH-80RX LGH-100RX LGH-150RX LGH-200RX I Lossnay Remote Controller PZ-41SLB-E PZ-52SF-E...
-
Page 2: Table Of Contents
CONTENTS 1. Summary ................1 2. -
Page 4: Summary
G Lossnay M-NET Remote Controller ( PZ-52SF-E ) It can be used in combination with Mitsubishi Electric Air conditioner Network system ( MELANS ) . Refer to page 69. Since this remote controller is supplied the power from the M-NET transmission line, it cannot be linked with Mr. Slim and other such systems that do not use M-NET. -
Page 5: Terminology
3. Terminology G Interlocked Lossnay This is a Lossnay linked to City Multi, or Mr. Slim indoor units. This is a Lossnay that has been set to interlocked group set- → indoor unit → Lossnay. ting to receive signals and operate via indoor unit’s remote controller G Non-interlocked Lossnay This is a Lossnay that is not set to interlocked group setting with City Multi nor Mr. -
Page 6: System Features And Examples
4. System Features and Examples Features Classification Item Notes/Cautions Control • Multiple unit operation Maximum 15 units with PZ-41SLB-E; 16 units with PZ- 52SF-E or other M-NET controller. • Remote controller operation Last touch priority • External device operation Signal form: 12VDC, 24VDC, uncharged a-contact •... - Page 7 System Example 1 Lossnay with 1 remote controller Multiple Lossnay units with 1 remote controller 2 remote controller system with 1 Lossnay Non-polar Lossnay Non-polar 2 wires Lossnay Non-polar 2 wires (Main) Lossnay 2 wires Power supply Lossnay Power supply Power supply Remote (Sub)
- Page 8 2 remote controller system with multiple Lossnay units Use Lossnay remote controller PZ-41SLB-E . (Do not use PZ-52SF-E). Lossnay transmission connection terminal Power supply Power supply LGH-15 to 100RX LGH-150 and 200RX Remote controller PZ-41SLB-E G It is also possible to operate 2 remote controller units when using multi- Remote Controller Input Terminal ple Lossnay units.
- Page 9 System Selection Interlocked with City Multi ( Refer to page 16 ) M-NET transmission cable Lossnay operation when indoor unit is stopped Lossnay stopping when indoor unit is operating Switching Lossnay fan speed When interlocked with indoor unit for compatibility with both R22 and R407C High/Low When interlocked with indoor unit for other than the above Fixed to high...
- Page 10 Central Controller System Outdoor unit Centralised Controller Indoor unit Lossnay Indoor unit Power supply unit PAC-SC34KUA Remote controller Remote controller A-control Mr.Slim outdoor unit Lossnay A-control Mr.Slim indoor unit Mr.Slim A-control remote controller Central Con- K-transmissoin troller Sys- converter Lossnay K-control Mr.Slim indoor unit Mr.Slim K-control...
- Page 11 Reference: Remote controller for the Lossnay and indoor unit. Refer to the technical documentation related to the Remote controller for the indoor unit. Remote controllers for Lossnay unit Lossnay remote controller (PZ-41SLB-E) Lossnay M-NET remote controller (PZ-52SF-E) With Lossnay interlock switches and indicators. Without Lossnay interlock switches and indicators.
- Page 12 Basic System 4.4.1 System Summary Design Example 1 Basic system Design Example 2 Lossnay control of multiple units G Up to 15 Lossnay units can be controlled at one time with 1 Lossnay Non-polar Lossnay Non-polar 2 wires remote controller switch. 2 wires (Main) (up to 7 units when using LGH-...
- Page 13 Combined Line Method Connect the transmission cable from the first Lossnay to the second, the second to the third, and so on up to a maximum of 15 units. (1) Up to four wires can be connected to one signal terminal when a transmission cable is ø0.65 or strand wire 0.3 mm , or up to 2 wires in other cases.
- Page 14 4.4.3 Operation with 2 Remote controllers Characteristics Remote controller Note • Lossnay can be operated from two remote locations. • Use only up to 2 remote controller • Lossnay conditions can be checked from two remote Lossnay remote controller (Operation will not go normally if 3 locations.
- Page 15 Interlocking with Mr. Slim 4.5.1 Interlocked Mr. Slim and Lossnay System Features G Interlocked operation with Mitsubishi air-conditioners is possible. System Example A-control or K-control Mr.Slim outdoor unit A-control or K-control Mr.Slim indoor unit Lossnay unit LGH-RX Slim-Lossnay connection cable ( Enclosed accessory ) A-control or K-control remote controller...
- Page 16 Controller Function Table especially regarded to the Lossnay unit Local Remote A-control remote K-control Lossnay remote Model controller remote controller controller PAR-S27AA PZ-41SLB-E, PZ-52SF-E « Start/Stop « × Fan speed switching « × (Automatic) × (Automatic) Ventilation mode switching Priority instructions. Local ×...
- Page 17 4.6.1 Independent Lossnay System with Lossnay M-NET Remote Controller and MELANS Features G The Mitsubishi Electric air-conditioner network system ( MELANS ) can operate and monitor each group of Lossnay units and air-conditioners. G Can also perform operations using Lossnay M-NET remote controller.
- Page 18 Lossnay Function Table ( Group Setting ) Item Details Number of Lossnay remote controllers and/or MELANS 5 units ( Number of Lossnay remote controller is 2 units max. ) units that can be connected to 1 Lossnay unit Operation of 2 remote controllers in 1 group Possible Fan speed switching High/Low...
- Page 19 4.6.2 City Multi and Lossnay Interlocked System Characteristics G Interlocked operation with Mitsubishi air-conditioners is possible. G Can also perform independent Lossnay operations using MA remote controller or ME remote controller. System Examples The following groups can be configured. Single Refrigerant System Outdoor unit (051) Lossnay remote controller PZ-41SLB-E can not be used with any group.
- Page 20 Lossnay Function Table (Interlocked Settings) Item Details Number of indoor units that can be set to interlocked opera- 16 units per group tion with 1 Lossnay unit in each group Number of Lossnay units that can be set to interlocked oper- 1 unit ation with 1 indoor unit Independent start/stop of ventilation (Lossnay)
- Page 21 4.6.3 MA Remote Controller/ME Remote Controller in Combination with Lossnay M-NET Remote Controller System The MA remote controller, ME remote controller, and Lossnay M-NET remote controller can be used in combination. Combination of Air Conditioner Remote Control and Lossnay Remote Control Indoor Unit Lossnay LGH-RX «...
- Page 22 System Examples: 2 A mixed system including the City Multi can also be configured. Centralised controller ( 000 ) ( ) address Lossnay Lossnay Lossnay Lossnay Lossnay Lossnay Lossnay Lossnay(008) Power (001) (002) (003) (004) (005) (006) (007) supply ( 101 ) ( 103 ) ( 106 ) ( 156 )
- Page 23 ® 4.6.4 When Using the LONWORKS Compatible Adaptor (LMAP02-E) ® to Connect to LONWORKS ® By using the LON adaptor (model name: LMAP02-E), it is possible to control and observe Lossnays on a building management ® system using the LONWORKS ®...
-
Page 24: Examples Of Applications Using External Control Input Terminals, Operation Monitor Output Terminals And Malfunction Monitor Output Terminals
5. Examples of Applications Using Exter- nal Control Input Terminals, Operation Monitor Output Terminals and Malfunc- tion Monitor Output Terminals Various applications are possible by using the input/output termi- nals as shown below. Input/Output Specifications Terminal Specification Page External control input ter- This is the input terminal block for start/stop the Lossnay unit using external 22/24·25·26 equipment, such as a Mr. - Page 25 External Control Operating Mode Selection There are four modes when operating using signals from external equipment. 1. ON/OFF interlock ( the last trigger from either external signal or remote control switch has priority ) 2. ON interlock 3. OFF interlock 4.
- Page 26 Delayed Interlocked Operation (PZ-41SLB-E, M-NET) (1) It is possible to delay operation of the Lossnay with respect to the operation of the external device. (Energy saving effect.) (2) The times that can be set for delayed operation are 10, 20, 30, 40, 50, and 60 minutes. (3) Delayed operation does not occur if the Lossnay operation was cancelled within the last 2 hours.
- Page 27 Multiple Lossnay Units in Interlocked Opera- tion with One Indoor Unit. (M-NET only) [ Example: System 1 ] Set the Main/Sub switch of the Lossnay connected to the M-NET transmission cable to “Main,” set the second and following Lossnay units to “Sub,” and connect 5 and 6 of the Lossnay remote controller’s (PZ-41SLB-E) transmission cable terminal (TM2) to the corresponding point on the next unit.
- Page 28 To Pick Up an Error Signal Externally (PZ-41SLB-E, M-NET) [ Example System ] M-NET transmission cable Lossnay Indoor unit Lamp on monitoring unit Operation moniter output MA remote controller Connection Method (PZ-41SLB-E, M-NET) 1. Using a Mr. Slim (A- Example: Slim-Lossnay connection cable ( Lossnay’s enclosed accessory ) control or K-con- trol) indoor unit...
- Page 29 5. Connecting to equipment such as an electrically operated damper and picking up the operating signals. Connect the power supply cable from the electrically operat- Lossnay ed damper to 9 and 0 of the operation monitor output ter- minal ( TM3 ) . Note : Electrically operated damper Operation...
- Page 30 1 When using PZ-41SLB-E to connect multiple units G Connect the sensor to the Lossnay with the “Main” setting. G It is not necessary to connect to any Lossnay with the “Sub” setting. G Connect any sensor, etc., connected to external change input to the Lossnay with the “Main” setting. G Any Lossnay with the “Sub”...
-
Page 31: Precautions When Designing Systems Of M-Net
6. Precautions When Designing Sys- tems of M-NET Power Supply of the M-NET Transmission Cable On an M-NET system, the remote controller or central controller operate on power received from the transmission cable. Accord- ingly, there is need to provide power to the transmission cable. There are two systems for supplying power. - Page 32 Wiring Example Example <Centalised controller and Lossnay units> Centralised controller Ground Lossnay unit Lossnay unit Lossnay unit Lossnay unit Lossnay unit Lossnay unit Power supply unit Lossnay Lossnay Lossnay Lossnay Lossnay Lossnay remote remote remote remote remote remote controller controller controller controller controller...
- Page 33 Power Supply to the Indoor Unit Transmission Cable. In principle, the number of indoor units ME remote controllers and Lossnay M-NET remote controllers that can be connected to one outdoor unit will depend on the type of outdoor unit. The following are the general guidelines when connecting multiple indoor units and Lossnay units to an outdoor unit.
-
Page 34: Cable Installation Of The M-Net
7. Cable Installation of the M-NET Precautions When Installing Wiring. 1. When routing transmission cable outside of the unit, position it 5 cm or more away cable for the power supply so that it will not pick up electrical noise. ( Never use multi- core cable or place the transmission cable in the same conduit as the power supply cable. - Page 35 Electrical Wiring Types of control cables 1. Wiring the M-NET transmission cables • Types of transmission cables Design cable in accordance with the following < Table 1 > . • Cross-sectional area 1.25 mm to 2.00 mm < Table 1 > System configuration Single-refrigerant system Multi-refrigerant system...
- Page 36 Length of Control Cable G Maximum power supply cable length. ( L1 + L2, L1 + L3, L1 + L4 ) : The longest length of the cable from the power supply unit or the indoor unit to the farthest terminal shall be less than 200 m. G Maximum distance between ends ( L2 + L3, L2 + L4, L3 + L4 ) : The length of cable between ends shall be less than 500 m.
-
Page 37: System Designs Of M-Net
8. System Designs of M-NET Address Definitions An address is a unique number used to identify each air conditioner and controller. Device Description Address definition range Indoor unit Set to specify in order each refrigerant system. 001 to 050 001 to 050 ( Note ) Lossnay Set to specify in order each refrigerant system. - Page 38 Precautions When Performing Group Settings ( when not interlocked with City Multi indoor unit ) Precautions The maximum number of Lossnay units in one group is 16. ( Refer to page 15. ) When two remote controllers are used within the same group, set one remote controller as the master ( address 101 to 150 ) and the other as the slave ( address 151 to 200 ) .
-
Page 39: Automatic Ventilation Switching
9. Automatic Ventilation Switching Effect of Automatic Ventilation Mode The automatic damper mode automatically provides the correct ventilation for the conditions in the room. It eliminates the need for troublesome switch operations when setting the Lossnay ventilator to “By-pass” ventilation. The following shows the effect “By-pass”... -
Page 40: Cold Weather Area Operation Specifications
( °C ) ( °C ) 4°C 4°C 10°C 4°C 8°C ( °C ) ( °C ) 24°C ( a ) When there is no target temperature ( b ) When there is no target temperature and the outside temperature has been 28°C or higher in the last 24 hours. ( °C ) ( °C ) 4°C... -
Page 41: Troubleshooting
11. Troubleshooting 11.1 Service Flow Confirmation items Trouble Mode 1 The system will not start properly. 1 Condition of trouble – remote controller dis- play, etc. • Check the initialization checklist from 2 Frequency of trouble – date of start of opera- installation to operation (table 1-1). - Page 42 11.1.1 Error List Cancellation measures Remote LED 1 LED 2 controller (green) (red) Error Measures taken by Loss- Reset Stop Error item display Display Display monitor Change Error ↓ power error (No. of (No. of output address delete supply Start code blinks) blinks)
- Page 43 11.2 Items to Check Trouble Mode 1: The system will not start properly. Initialization checklist from installation to operation (Table 1-1) After checking the system, check the points below up to operation. Checkpoint Do the capacity of the main power supply on/off unit and wiring span meet specification? Is the specified power supplied to the Lossnay power terminal (TM1)? (refer to page 54) Is the wiring length of the transmission cable within specifications? When using PZ-41SLB-E:...
- Page 44 System checklist (1) Use this checklist when using a PZ-41SLB-E or an external device (Table 1-2-1) Symptom Cause Corrective action « Power is not supplied to the Lossnay, or power « Check the power supply to the Remote controller display does not outside specifications is connected.
- Page 45 (2) System checklist when using the M-NET (Table 1-2-2) Symptom Cause Corrective action « The Lossnay is not set for interlocked opera- « Check the Lossnay address, and Does not interlock with City Multi. (The Lossnay tion, or is set for interlocked operation at the set for an address correspond- cannot be operated by wrong address.
- Page 46 Symptom Cause Corrective action 1 When using City Multi and Lossnay interlocked The power display “ ” system (connected to the indoor unit system) does not display when power is supplied to the « The transmission cable is not correctly con- «...
- Page 47 (1) Checklist of error codes displayed on the PZ-41SLB and LED displays LED1 LED 2 Error code Symptom Cause Corrective action (green) (red) « When using multiple Lossnay units, the « Turn off the main power supply and set the LC 6608 —...
- Page 48 (2) Checklist of error codes displayed on the PZ-52SF-E, M-NET controllers, and LED dis- plays (Table 2-2) LED1 LED 2 Error code Symptom Cause Corrective action (green) (red) « There is another unit with the same « Check the addresses of devices in 6600 —...
- Page 49 Trouble Mode 3: The remote controller does not operate or operates irregularly. (1) Checklist for when using the PZ-41SLB-E (Table 3-1) Symptom Cause Corrective action « Transmission cable is connected to the wrong « Check the transmission cable Nothing displays on the LCD.
- Page 50 Symptom Cause Corrective action « It is less than 10 minutes since the power was « After supplying power to the sys- Displays “HO” and does not start. supplied to the system. tem, HO blinks for a maximum of about 10 minutes. (This is not an error.) «...
- Page 51 Trouble Mode 4: The Lossnay does not operate or operates irregularly. Lossnay checklist (Table 4). Symptom Cause Corrective action « Connectors for the fan connection or connec- « Check the lead wire connectors The fan does not operate. tors for the control circuit section connection and the control circuit section The fan does not operate are not secure.
- Page 52 Symptom Cause Corrective action « When the outdoor air temperature is -10°C or « This is no error. Supply air fan periodical- ly stops operating. less, operation stops after a fixed period of about 10 minutes to keep the Lossnay Core from freezing.
- Page 53 Temperaturers vs. thermistor resistance table Temperature Resistance Temperature Resistance Temperature Resistance Temperature Resistance Temperature Resistance (°C) value (kΩ) (°C) value (kΩ) (°C) value (kΩ) (°C) value (kΩ) (°C) value (kΩ) 88.85 - ∞ 17.92 9.57 5.38 3.17 17.16 9.20 5.19 3.06 32.43 16.43...
- Page 54 11.3 Circuit Test Point LED1 (green) • When blinking, there is an error with the Lossnay unit (number of blinks indicates the type of error). • Blinks at 1 second intervals when starting. • Lit during delayed start, normally off at other times. Exhaust fan operation unit (combined) Exhaust fan operation unit 220 V to 240 V AC: up to 50 Hz...
-
Page 55: Installation Method (Model Lgh-Rx -E Series)
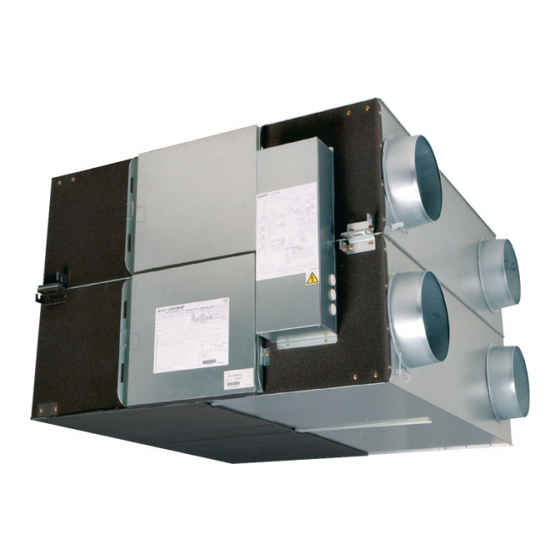
12. Installation method (Model LGH-RX -E series) 12.1 Electrical installation With this product, the wiring installation method will vary according to the design of the system. Perform electrical installation for each of the required sections. 12.1.1 Names of components in control box LGH-15 to LGH-100RX LGH-150 and LGH-200RX Earth pole... - Page 56 12.1.3 Wire connection diagram ----- Models LGH-150 and 200RX * Connect the wires shown as dotted lines. * Be sure to connect the grounding wire. * Breaker should be provided by the customer. TH1 (OA) TH2 (RA) BROWN (CN16) BLUE FUSE (TB5) 250V6.3A...
- Page 57 12.2 Connecting the power supply cable LGH-15 to 100RX 1. Remove the screws and open the control Control box cover Screw box cover LGH-150 and 200RX Control box cover Screw 2. Connecting the power supply cable and LGH-15 to 100RX PG connection transmission cable Power supply...
- Page 58 LGH-15 to 100RX LGH-150 and 200RX 3. When installing upside down Protective cover Protective cover CAUTION: G If installing and using this product upside down, the power supply cable outlet will be at the top. Be sure to attach the protective cover so that no drops of water can get inside the Control box Control...
- Page 59 4. When operating multiple Lossnay units. 5. When connecting to CO sensor when switching the High/Low switch externally. 6. When connecting to City Multi, Lossnay remote controller (PZ-52SF-E) or Mitsubishi Electric Air-Conditioner Network System (MELANS). 1. When connecting to remote controller...
- Page 60 Lossnay External control input (TM2) When the external device has a charged operating signal of 12V DC or 24 V DC 0.5 mm to 1 mm sheathed PVC cable • Connect the operating signal (wire) from the external device via the remote output retrieval component (sold separately) to 1 and 2 on the external control input terminal block (TM2).
- Page 61 10 m 6. When connecting to the City Multi, Round terminal M-NET transmission cable input terminal block Lossnay M-NET remote controller (PZ- 52SF-E) or Mitsubishi Electric Air- LGH-15 to 100RX LGH-150 and 200RX Conditioner Network System (MELANS) Switch A B S...
- Page 62 When interlocking with the City Multi • Keep the overall length of the transmission cable within 500 Lossnay meters. Note that the wiring length between the Lossnay and City City power supply unit (sold separately) or outdoor unit should be Multi Multi 200 meters or less.
- Page 63 12.3.2 Switching function selection switches (SW-2 and 5) Perform the necessary function settings using the function selection switches (SW-2 and 5). G The setting can be changed at any time. G On the LGH-150 and 200RX , set both the upper and lower circuit boards the same. 1.
- Page 64 7. Settings for automatic recovery following power supply interruption (cannot be set when PZ-41SLB-E is used) Sets for automatic recovery following power supply interruption. Mode Operation No automatic recovery Stop after recovery (factory setting) Automatic recovery Recover to operate in mode used before power outage 8.
- Page 65 12.4.2 Lossnay independent trial operation (1) Remove the control box cover. (2) Turn the trial operation switch (SW2-1and SW2-3) “ON.” • Operation will start with the “High” setting and with Bypass ventilation operating. (This will take approximately 45 seconds after the power is turned on.) •...
-
Page 66: Lossnay Remote Controller (Pz-41Slb-E)
13. Lossnay Remote Controller (PZ-41SLB-E) 13.1 Operation [2-CONTROLLERS] Display [INTERLOCKED] Display Displayed when two Lossnay remote Displayed when the Lossnay starts off by controllers operate the Lossnay unit(s). interlocked indoor unit or external signal. Note that the most recent button operations of either one will be given priority in such a case. - Page 67 13.2 Mode of Use G Independent Operation of the Lossnay Unit: Operation Relevant button Relevant display items Sequence Press the ON/OFF button and confirm that the 1. Starting the Operation lamp turns on. Lossnay unit AUTO BY-PASS HEAT EX. The 2CONTROLLERS display item will be turned on if a double set of remote controllers is currently in use.
- Page 68 Mode of Use (cont.) Interlocked Operation mode types and actions Display Interlocked Action Action (of the external unit) number Operation mode (of the building-management system) ON/OFF Interlocking: When the external device begins to operate, the The Lossnay unit toggles between ON and Subsequent opera-tion Lossnay unit will also begin to operate;...
- Page 69 13.5 Component Names and External Dimensions Typical System Setup Mounting holes (x 2) <Independent operation of the Lossnay unit:> Lossnay Display section Remote controller(s) Power supply Function Selector • When two individual remote controllers have button been installed, the most recent control signals will be given priority.
- Page 70 Interlock terminals 3. Connection of wiring and remote-controller mount- ing: Insert the signal wire. (1) Fully insert the (non-polar) signal wiring into the connection terminals. (2) Gently tug on the wiring to confirm that it is being securely gripped. Press this button (3) Mount the remote controller on the switch box using the two screws to release.
- Page 71 13.7 Trial Operation After installation has been completed, it is of the utmost impor- tance that trial operation of the Lossnay unit and any external device such as an air conditioner is carried out. When power supply is supplied to the remote controller the [HO] display will flash (for approximately 40 seconds); following this, the system will switch to operation-start mode.
-
Page 72: Lossnay M-Net Remote Controller (Pz-52Sf-E)
14. Lossnay M-NET Remote Controller (PZ-52SF-E) 14.1 Operation [CENTRAL] Display [INTERLOCKED] Display Displayed when remote operation is Displayed when the Lossnay unit starts due prohibited by a centralised control unit, etc. to interlocked indoor unit or external signal. Ventilation Modes [Fan speed] Display Indicates the ventilation mode. - Page 73 14.2 Installing the Lossnay M-NET Remote Controller 14.2.1 Mount the switch box. 1. Install the switch box ( purchased separately ) as explained below. Projecting Switch box object such as Note: a stud G Be sure to install the switch box with the clearance shown in the illustration at Outline of Lossnay the left.
- Page 74 5. Set the Lossnay M-NET remote controller address. Set the Lossnay M-NET remote controller address using the rotary switches SW1 and SW2 on the front of the Lossnay M-NET remote controller. I Setting range: 101 to 200 G Rotary switch SW1 indicates the tens column and SW2 indicates the ones Rotary switches column.
- Page 75 14.3 Registering the Lossnay Unit with the Lossnay M-NET Remote Controller Initial registration mode operation A Lossnay unit must be registered with the Lossnay M-NET remote controller in a group arrangement. Register a Lossnay unit using the initial registration mode as shown below. In addition, the initial registration mode can be used to search for a Lossnay unit registered to the group or to delete a registration.
- Page 76 Confirmation of registered address 6 To display the addresses of the Lossnay units that are registered with this Lossnay M-NET remote controller. Each press of in step 2 or 4 displays the address of a registered Lossnay unit and its type, “LC”. FILTER If no Lossnay unit is registered, “...
-
Page 77: Appendix
15. Appendix 15.1 Centralised Controller (MJ-103MTRA) 15.1.1 Operation setting G There are two methods for the operation, performing the operation classified by groups or collective operation. Group operation setting ON/OFF OPERATION SETTING TEST RUN 1F1ROOM ON/OFF MODE FAN SPEED GROUP SELECT (HEAT RECOVERY) DIRECTION... - Page 78 Name of switches Function Display Operation status display → [ON] → [OFF] The ON/OFF condition of the displayed ON/OFF button group is switched. * When there is an interlocked Lossnay unit, turning this switch ON starts opera- tion in a [High] fan speed state. On the group composed of independent Lossnay units, operation mode is selected in a sequence that goes from HEAT...
- Page 79 15.1.2 Initial setting DIP switch and rotary switch setting G Remove the cover from the controller and perform the DIP switch and rotary switch setting. 1 Remove the cover screw. Rotary switches DIP switch Note: G When this controller is shipped from the factory, the screw is contained in the same package.
- Page 80 15.1.3 Group configuration setting G Registration can be made for the indoor units, local remote controllers and slave system controllers in the same group. G Registration can also be performed for the group that is composed of only Lossnay. Example of a group configuration G Supply the power from the power supply unit (PAC-SC34KUA) through the M-NET transmission cable.
- Page 81 This is the procedure for registering all units and controllers in the displayed group GROUP SETTING number. 6 Repeat operation 3 to 5 to set all the groups controlled by this controller. ADDRESS BACK 7 When all settings have been completed, press the button.
- Page 82 15.1.4 Interlocked operation setting G This is the procedure for registering the interlocked operation of an Lossnay unit with a single or multiple indoor units. All indoor units to be interlocked with an Lossnay unit for operation should be registered as group before- hand. Example of an interlocked group configuration Duct Outdoor unit...
- Page 83 6 Use the numeric keypad to set the address of the indoor unit to operate with INTERLOCKED SETTING the displayed Lossnay unit. INTERLOCKED UNIT ADDRESS Operation example UNIT ADDRESS For an indoor unit with an address of 012. 1) Input “0”. 2) Input “1”.
-
Page 84: Remote Controllers For Mr. Slim Indoor Unit
15.2 Remote Controllers for Mr. Slim indoor unit A-control remote controller (PAR-27AA) Without Lossnay interlock switches and indicators. ON/OFF – CENTRALLY CONTROLLED 1Hr. ON OFF ˚C CHECK CLOCK FILTER ˚C CHECK MODE STAND BY INDOOR UNIT ERROR CODE TEST RUN NOT AVAILABLE DEFROST ADDRESS NO. -
Page 85: Network Remote Controller (Par-F25Ma) (Interlocked Registration)
15.3 Network Remote Controller (PAR-F25MA) ON/OFF – CENTRALLY CONTROLLED 1Hr. ON OFF ˚C CHECK CLOCK FILTER ˚C CHECK MODE STAND BY INDOOR UNIT ERROR CODE TEST RUN NOT AVAILABLE DEFROST ADDRESS NO. OA UNIT ADDRESS NO. CLOCK ON OFF FILTER CHECK TEMP. - Page 86 4 To register the interlocked operation of the Lossnay unit and the indoor unit. Use the [TEST RUN] buttons (shown as D) to register the relationship of the interlock between the Lossnay indicated in • “OA UNIT ADDRESS NO.” and the indoor unit indicated in “INDOOR UNIT ADDRESS NO.” •...
- Page 87 9 Press the “Timer/continuous” button (shown as E) once again. The display will now alternate between the registered unit and the address of the next registered unit. (The way of display is the same as in step 8.) Address of another INDOOR UNIT ADDRESS NO.
- Page 88 MEMO...
- Page 89 MEMO...
- Page 90 01.03<MEE>...
- Page 91 Related Links Model Number: LGH-150RX3-E LGH-RX3_Installation_Manual LGH-RX3_Instruction_Book LGH-RX3_Lossnay_Handbook_(U042_A) LGH-RX3_Parts_Catalog_(U042_A) LGH-RX3_Technical_Manual_Controls...
Need help?
Do you have a question about the Lossnay LGH-15RX3-E and is the answer not in the manual?
Questions and answers