
Related Manuals for BE Power Equipment 96393-LJ


Summary of Contents for BE Power Equipment 96393-LJ
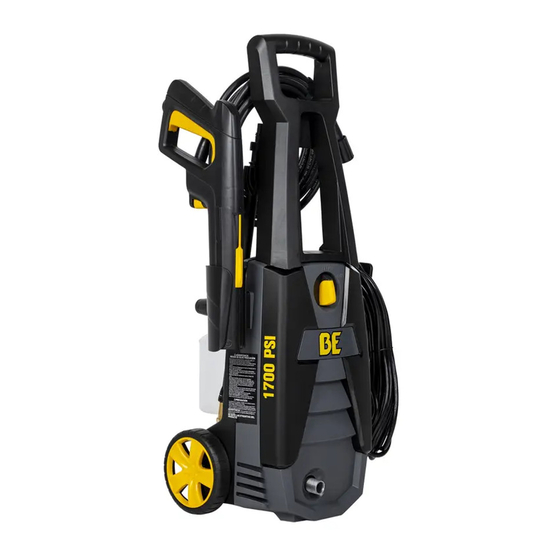
- Page 1 P1715EN 96393-LJ 700 PSI ELECTRIC PRESSURE WASHER OPERATOR'S MANUAL MANUEL D’UTILISATION DU LAVEUSES PRESSION MANUAL DEL OPERADOR DE LA LAVADORA A PRESIÓN 12.2021...
- Page 2 All the information in this manual is based on the latest product information available at the time of printing. BE Power Equipment reserves the right to make changes at any time without notice or incurring any obligation.
-
Page 3: Table Of Contents
TABLE OF CONTENTS Product Specifications ..................3 Package Contents ....................4 Hardware Contents....................4 Safety Information ....................5 Assembly Instructions................... 7 Operating Instructions ..................11 Care and Maintenance ..................13 Pump Saver ......................14 Troubleshooting ....................15 Limited Warranty ....................16 Replacement Parts List .................. -
Page 4: Package Contents
PACKAGE CONTENTS PACKAGE CONTENTS OFF/O ON/I PW95824 15° – Yellow 750ml 600ml 450ml 300ml 150ml PART DESCRIPTION PART DESCRIPTION QUANTITY QUANTITY Spray Gun Holster Spray Gun Lock/Unlock Handle Foam Cannon Power Washer Unit Extension Lance 15°Quick Connect Nozzle Cord Hook Nozzle Cleaning Wire Super Soft High Pressure Hose... -
Page 5: Safety Information
SAFETY INFORMATION SAFETY INFORMATION Please read and understand this entire manual before 9. DO NOT use your power washer when you are under the attempting to assemble and operate the product. influence of alcohol or drugs. Use this power tool carefully and only when you are alert. - Page 6 SAFETY INFORMATION SAFETY INFORMATION 30. NEVER use a water supply to your power washer that 25. Protect eyes, lungs, and skin from exposure to detergent. exceeds 150 PSI maximum. 31. NEVER disconnect the high pressure hose from the 26. Warning-If connection is made to a potable water system, the system Should be protected against power washer while the system is pressurized.
-
Page 7: Assembly Instructions
PREPARATION PREPARATION Before beginning assembly of product, make sure all parts Estimated Assembly Time: 5 minutes. are present. Compare parts with package contents list and hardware contents list. If any part is missing or damaged, Tools Required for Assembly (not included): Phillips DO NOT attempt to assemble the product. - Page 8 ASSEMBLY INSTRUCTIONS OFF/O ON/I Super Soft High Pressure Hose Assembly Slide cord hook holster (D) onto right side, when facing Screw Super Soft high pressure hose (E) clockwise onto thepower washer unit (C) as shown. bottom front of power washer unit (C). Pull back collar and insert o-ring post into water outlet far enough so collar can Note: This step does not require any screws.
- Page 9 ASSEMBLY INSTRUCTIONS Extension Lance Installation With spray gun (F) in locked position, attach extension Unlocked Locked lance (I) directly to spray gun. Insert lance extension into gun, pushing together and turning clockwise Locking Spray Gun (Before Lance Installation) To lock trigger of spray gun (F), point gun away simultaneously.
- Page 10 ASSEMBLY INSTRUCTIONS ASSEMBLY INSTRUCTIONS 750ml 600ml 450ml 300ml 150ml Foam Cannon Installation Insert foam cannon (H) into spray gun (F), push in The foam cannon comes with a straw which is fitted and turn clockwise. into high pressure top. If you do not see the straw, look inside the foam cannon and attach it to the high Note: Always lock spray gun when changing the foam pressure top.
-
Page 11: Operating Instructions
OPERATING INSTRUCTIONS back down to lock back into place. • Turn the power switch to the “ON” (|) position. The unit will turn on for 1 - 2 seconds and shut off. This is a normal function of the auto start feature. •... - Page 12 OPERATING INSTRUCTIONS OPERATING INSTRUCTIONS Operation Tips • Test the GFCI (For US unit only) before each Note: use: 1. Plug GFCI into power outlet. Indicator should turn green to show that cord has power. 2. Press test button, green indicator should turn off to verify that GFCI cut off power to the cord.
-
Page 13: Care And Maintenance
CARE AND MAINTENANCE Detergents Cleaning Nozzles • Use detergents designed for power washers. • A clogged or partially clogged nozzle can cause Hardware stores or home centers also have power significant reduction of water pressure coming out washer detergents for different cleaning projects. of the nozzle and/or cause the unit to pulsate while The cleaning solution should be the consistency of spraying. -
Page 14: Pump Saver
3) Turn the power on. Equipment part number is: 85.490.046. Purchase at a 4) Squeeze bottle to help it into the pump. BE Power Equipment retailer near you. 5) Turn power off when pump saver exits the machine’s water outlet. -
Page 15: Troubleshooting
TROUBLESHOOTING If you have any questions regarding the product,please call customer service at 1-866-850-6662. PROBLEM CORRECTIVE ACTION Unit will not turn on. 1. The GFCI module on the end of the power cord must be plugged directly into an outlet. 2. -
Page 16: Limited Warranty
BE Power Equipment Inc. warrants the original retail purchaser that this pressure washer is free from defects in material and workmanship for the periods set forth below. If defects are found in BE Power Equipment products within the limitations outlined in this warranty statement, BE Power Equipment, at its sole discretion, will repair or replace the product free of charge. -
Page 17: Replacement Parts List
REPLACEMENT PARTS LIST For replacement parts, call our customer service department at 1-866-850-6662 8 a.m. - 4:30 p.m., PST, Monday - Friday. 750ml 600ml 450ml 300ml 150ml 15° – Yellow PW95824 PART DESCRIPTION PART DESCRIPTION Foam Cannon (25 oz.) Cord Hook Super Soft Hose Gun Holder Spray Gun... - Page 19 P1715EN 96393-LJ 700 PSI LAVEUSE À PRESSION ÉLECTRIQUE MANUEL D’OPÉRATEUR ELECTRIC PRESSURE WASHER OPERATOR'S MANUAL MANUAL DEL OPERADOR DE LA LAVADORA A PRESIÓN 12.2021...
-
Page 20: Spécifications Du Produit
TABLE DES MATIÈRES Spécifications du produit ..................20 Contenu de l'emballage ..................21 Matériel inclus..................... 21 Consignes de sécurité ..................22 Instructions d'assemblage .................. 24 Mode d’emploi ..................... 28 Entretien et maintenance..................30 Protecteur de pompe ..................31 Dépannage ......................32 Garantie limitée .................... -
Page 21: Contenu De L'emballage
CONTENU DE L'EMBALLAGE OFF/O ON/I PW95824 15° – Yellow 15°– Jaune 750ml 600ml 450ml 300ml 150ml PIÈCE DESCRIPTION QUANTI- PIÈCE DESCRIPTION QUANTI- TÉ TÉ Étui à pistolet pulvérisateur Pistolet pulvérisateur Poignée Cran de verrouillage/déverrouil- lage Laveuse à pression Canon mousse Crochet pour cordon d’alimenta- Rallonge pour lance d’arrosage tion... -
Page 22: Consignes De Sécurité
CONSIGNES DE SÉCURITÉ CONSIGNES DE SÉCURITÉ 10. Toujours garder une position stable et sûre pendant euillez lire et comprendre tout ce manuel avant d’essayer l'utilisation de la laveuse à pression. Les surfaces mouillées de monter et de faire fonctionner le produit. sont glissantes et l'utilisation de détergent les rend encore plus dangereuses. - Page 23 CONSIGNES DE SÉCURITÉ CONSIGNES DE SÉCURITÉ 26. AVERTISSEMENT-Si la connexion est faite à un système 31. NE JAMAIS débrancher le tuyau à haute pression de d’eau potable, le système doit être protégé contre les reflux. la laveuse à pression pendant que le système est sous pression.
-
Page 24: Instructions D'assemblage
PRÉPARATION PRÉPARATION Avant de commencer l'assemblage de l'appareil, assurez- Temps d'assemblage approximatif : 5 minutes. vous que toutes les pièces sont dans l'emballage. Comparez les pièces à la liste des pièces et du Outil nécessaire pour l'assemblage (non compris) : matériel. - Page 25 INSTRUCTIONS D’ASSEMBLAGE INSTRUCTIONS D'ASSEMBLAGE OFF/O ON/I Assemblage du souple tuyau à haute pression Placez l’appareil face contre vous, puis faites glisser le crochet Vissez le souple tuyau à haute pression (E) dans le sens horaire à tuyau (D) sur le côté droit de l’appareil (C) tel qu’illustré. sur le raccord situé...
- Page 26 INSTRUCTIONS D'ASSEMBLAGE Installation de la lance d’arrosage Verrouillage Déverrouillage Verrouillez le pistolet pulvérisateur (F), puis assemblez la lance Unlocked Locked d'arrosage (I) directement dans le pistolet. Insérez la lance Pistolet de pulvérisation de blocage (avant l’installation de la d'arrosage dans le pistolet, puis poussez et tournez la lance Lance) dans le sens horaire.
- Page 27 INSTRUCTIONS D’ASSEMBLAGE INSTRUCTIONS D'ASSEMBLAGE 750ml 600ml 450ml 300ml 150ml Installation de la mousse canon La mousse canon dispose d’un bouchon haute pression Insérez la canon mousse haute pression (H) pistola muni d’une paille. Si vous ne voyez pas la paille, regardez rociadora (F), puis poussez et tournez dans le sens à...
-
Page 28: Mode D'emploi
MODE D’EMPLOI • Relâchezla gâchette pour arrêter le lavage à pression. • Laissez le moteur s’arrêter complètement avant d’appuyer de nouveau sur la gâchette. • Le fait de serrer la gâchette trop rapidement nuit au bon fonctionnement de la fonction de démarrage automatique qui pourrait sauter un cycle marche/arrêt. - Page 29 MODE D’EMPLOI MODE D'EMPLOI d’eau est supérieure à la résistance de la surface. Il est Conseils d'utilisation possible de pénétrer le bois nu, d'écailler la peinture, • Remarque: tester le GFCI (Pour l’unité américaine seu- etc. On peut modifier la pression de l'appareil en lement) avant chaque utilisation: agissant sur les éléments suivants : 1.
-
Page 30: Entretien Et Maintenance
ENTRETIEN ET MAINTENANCE ENTRETIEN ET MAINTENANCE Détergents Nettoyage des buses • Utilisez un détergent conçu pour les laveuses à pression. Les • Une buse obstruée ou partiellement obstruée peut provoquer quincailleries ou centres de rénovation offrent également des une importante réduction de la pression d’eau à la sortie ou détergents pour laveuse à... -
Page 31: Protecteur De Pompe
Il aide également à protéger l’appareil de la corrosion interne. Le numéro de pièce BE Power Equipment est le : 85.590.046 Instructions relatives au protecteur de pompe Suivez les instructions d’entreposage de la laveuse à... -
Page 32: Dépannage
DÉPANNAGE Pour toute question concernant le produit, communiquez avec le service à la clientèle au 1-866-850-6662. PROBLÈME MESURE CORRECTRICE L’appareil ne se met 1. Le disjoncteur de fuite de terre à l’extrémité du cordon d'alimentation doit être branché pas en marche. directement dans une prise. -
Page 33: Garantie Limitée
Pour obtenir la garantie, le demandeur doit apporter le produit, avec la copie d’achat originale, dans un centre de service autorisé BE Power Equipment. Ces centres de services se trouvent sur notre site web: Si vous ne pouvez résoudre la réclamation de garantie de manière satisfaisante, contacter le département de BE Power Equipement ( 1 866 850 6662). -
Page 34: Liste Des Pièces De Rechange
LISTE DES PIÈCES DE RECHANGE Pour les pièces de rechange, communiquez avec le service à la clientèle au numéro 1-866-850-6662, 8 h à 16:30 h, HNC, du lundi au vendredi, heure normale du Pacifique. 750ml 600ml 450ml 300ml 150ml 15°– Jaune 15°... - Page 35 P1715EN 96393-LJ 700 PSI MANUAL DEL OPERADOR LAVADORA A PRESIÓN ELÉCTRICA ELECTRIC PRESSURE WASHER OPERATOR'S MANUAL MANUEL D’UTILISATION DU LAVEUSES À PRESSION 12.2021...
-
Page 36: Especificaciones Del Producto
TABLA DE CONTENIDO Especificaciones del producto ..................36 Contenido del paquete ....................37 Aditamentos........................37 Información de seguridad ....................38 Instrucciones de montaje....................40 Instrucciones de operación....................44 Cuidado y mantenimiento ....................46 Protector de la bomba ..................... 47 Solución de problemas ....................48 Garantía limitada ...................... -
Page 37: Contenido Del Paquete
CONTENIDO DEL PAQUETE CONTENIDO DEL PAQUETE OFF/O ON/I PW95824 15°– Amarillo 15° – Yellow 750ml 600ml 450ml 300ml 150ml PIEZA DESCRIPCIÓN CANTI- PIEZA DESCRIPCIÓN CANTI- Funda de la pistola rociadora Bloqueo/desbloqueo de la pistola rociadora Manija Cañón de espuma Unidad de la lavadora a presión Lanza de extensión Gancho del cordón 15°Boquillas de conexión rápida... -
Page 38: Información De Seguridad
INFORMACIÓN DE SEGURIDAD INFORMACIÓN DE SEGURIDAD INFORMACIÓN DE SEGURIDAD Por favor lea y entienda todo este manual antes de intentar Asociación de Normas Canadiense (CSA) y otras normas ensamblar y operar el producto. de seguridad y del consumidor. NO modifique o reconstruya ninguna pieza de la lavadora a presión. - Page 39 INFORMACIÓN DE SEGURIDAD INFORMACIÓN DE SEGURIDAD INFORMACIÓN DE SEGURIDAD afilados e inspeccione la manguera con regularidad. 30. NUNCA utilice para la lavadora a presión un suministro de Reemplace si se daña. Debido a la alta presión implicada, no agua que exceda los 150 PSI máximo. se puede reparar si se corta o daña.
-
Page 40: Instrucciones De Montaje
PREPARACIÓN PREPARACIÓN Antes de comenzar el montaje del producto, asegúrese Tiempo de montaje estimado: 5 minutos. de que todas las piezas estén presentes. Compare las piezas con la lista de contenido del paquete y la lista de Herramientas requeridas para el montaje (no incluidas): aditamentos. - Page 41 INSTRUCCIONES DE MONTAJE INSTRUCCIONES DE MONTAJE OFF/O ON/I Montaje de la suave manguera de presión alta Deslice la funda del gancho del cable (D) en el lado derecho, Atornille la suave manguera de presión alta (E) hacia la derecha en la parte inferior delantera de la unidad de la lavadora a estando frente a la unidad de la lavadora a presión (C), tal presión (C).
- Page 42 INSTRUCCIONES DE MONTAJE Instalación de la lanza de extensión Con la pistola rociadora (F) en posición bloqueada, Bloquear Desbloquear Unlocked Locked acople la lanza de extensión (I) directamente a la pistola Pistola de cierre (antes de la instalación de la lanza) rociadora.
- Page 43 INSTRUCCIONES DE MONTAJE 750ml 600ml 450ml 300ml 150ml Instalación de la espuma del cañón La espuma del cañón viene con una pajilla que se adapta Inserte la cañón de espuma de alta presión (H) en la en la tapa con presión alta. Si no ve la pajilla, mire dentro lanza de extensión (F ), presione y gire hacia la derecha.
-
Page 44: Instrucciones De Operación
INSTRUCCIONES DE OPERACIÓN y se apagará. Este es un procedimiento normal de la función de arranque automático. • Comience el lavado a presión apretando el gatillo de la pistola rociadora completamente en la manija. • Libere el gatillo de la pistola rociadora para detener la lavadora a presión. - Page 45 INSTRUCCIONES DE OPERACIÓN INSTRUCCIONES DE OPERACIÓN Consejos para la operación funcionará. • Nota: Pruebe el GFCI (Sólo para unidades de EE. UU.) antes de cada uso: Cómo evitar dañar las superficies 1. Enchufe el GFCI en la toma de corriente. El •...
-
Page 46: Cuidado Y Mantenimiento
CUIDADO Y MANTENIMIENTO Detergentes Limpieza de las boquillas • Utilice detergentes diseñados para lavadoras a presión. • Una boquilla obstruida o parcialmente obstruida puede Las ferreterías o los centros para el hogar también ocasionar una reducción significativa de la presión del tienen detergentes para lavadora a presión para agua que sale de la boquilla y hacer que la unidad vibre diferentes trabajos de limpieza. -
Page 47: Protector De La Bomba
Dirección. También ayuda a proteger contra la corrosión interna. El 3) encender la unidad. N.° de pieza de BE Power Equipment es: 85.490.046 4) Squeeze Bottle para ayudar en la bomba. (botella de 16 onzas). 5) Apague la energía cuando la máquina bomba Saver salidas Salida de agua. -
Page 48: Solución De Problemas
SOLUCIÓN DE PROBLEMAS Si tiene alguna pregunta sobre el producto, llame a Servicio al cliente al 1-866-850-6662. PROBLEMA ACCIÓN CORRECTIVA La unidad no enciende. 1. El módulo del GFCI en el extremo del cable de alimentación se debe conectar directamente a una toma de corriente. -
Page 49: Garantía Limitada
Si se encuentran defectos en los productos BE Power Equipment dentro de las limitaciones descritas en esta declaración de garantía, BE Power Equipment, a su entera discreción, reparará o reemplazará el producto sin cargo. -
Page 50: Lista De Piezas De Repuesto
LISTA DE PIEZAS DE REPUESTO Para obtener piezas de repuesto, llame a nuestro Departamento de Servicio al Cliente al 1-866-850-6662, 8:00 a. m.–4:30 p. m., hora estándar del pacifico. 750ml 600ml 450ml 300ml 150ml 15°– Amarillo 15° – Yellow PW95824 PIEZA DESCRIPCIÓN PIEZA... - Page 51 MAINTENANCE NOTES bepowerequipment.com...
- Page 52 CLIENTE si necesita ayuda con el ensamblaje, el funcionamiento o si tiene algún problema con su hidrolimpiadora, llame al 1-866-850-6662 Lunes a Viernes, de 8AM a 430PM PST. ELECTRIC PRESSURE WASHER OPERATOR'S MANUAL MANUEL D’UTILISATION DU LAVEUSES PRESSION MANUAL DEL OPERADOR DE LA LAVADORA A PRESIÓN 96393-LJ...
Need help?
Do you have a question about the 96393-LJ and is the answer not in the manual?
Questions and answers