Table of Contents
Advertisement
Quick Links
G904 User Guide
----------------------------------------------------------------------------------------------------------------------------- ----------------
G904 Quad Channel UHD Video Wall Controller
Input: up to 4096*2160 @60Hz, 7680*2160 @30Hz,
Programmable Output: up to 4096*2400 @60Hz, RGB 4:4:4
(Important Note: If the output resolution can't be supported by the
monitor, user will not see any image on the screen.)
Tel: +886-2-2792-2819
The absolute opposite of ordinary
User Guide
7680*1200 @60Hz, 4:4:4 chroma sampling
Support HDR 10, BT 2020 signal processing
Integrated Multi-Viewer function
Programmable output refresh rate
Quick seamless input swap
with matrix SW function
Technical support:
E-mail: sales@vnstw.com
Skype: vns-inc
Version: 1.03
Website:
www.vnstw.com
Cell: +886-935-678-033
0
Document: G904-2
Advertisement
Table of Contents

Related Manuals for VNS G904


Summary of Contents for VNS G904
- Page 1 G904 User Guide Document: G904-2 ----------------------------------------------------------------------------------------------------------------------------- ---------------- The absolute opposite of ordinary G904 Quad Channel UHD Video Wall Controller User Guide Input: up to 4096*2160 @60Hz, 7680*2160 @30Hz, 7680*1200 @60Hz, 4:4:4 chroma sampling Programmable Output: up to 4096*2400 @60Hz, RGB 4:4:4...
-
Page 2: Table Of Contents
G904 User Guide Document: G904-2 ----------------------------------------------------------------------------------------------------------------------------- ---------------- Table of Contents Disclaimer/Copyright statement......................Warranty/RMA and FCC/CE statement....................Introduction ……………………………………………………………………………......User Guide 1. How to use IR Remote Controller....................1.1. Key pad functions and extension cable……………………………………………………… 1.2. Change OSD language…………………………………………………………………………… 1.3. Individual OSD control in multiple unit application………………………………………... - Page 3 23.1. Case study A--Single G904 creative video wall……………………………………………. 23.2. Case study B—Multiple G904 creative video wall…………………………………………. 23.3. Case study C—Multiple G904 creative video wall with different size of monitor……. 24. LED application: split and crop image for LED display…………………………………………… 25. Front end processor 25.1.
-
Page 4: Disclaimer/Copyright Statement
This information contained in this document is protected by copyright. All rights are reserved by VNS Inc. VNS Inc. reserves the right to modify this document without any obligation to notify any person or entity of such revision. Copying, duplicating, selling, or otherwise distributing any part of this document without signing a non-disclosure agreement with an authorized representative of VNS Inc. -
Page 5: Introduction
Multiple units can be cascaded to build big scale display system. One G904 has four 4k/60 output channels. Each channel has 3x HDMI 2.0 inputs (one port is shared with another channel) and 1x HDMI 2.0 outputs. Input supports up to 4096*2160 @60Hz, 7680*2160 @30Hz with 4:4:4 chroma sampling. -
Page 6: User Guide
IR receiver is on Front Panel. One 3.5ø mm audio connector for IR extender is located at Back Panel of G904. 1.8m IR extension cable is equipped in the packing. User can add audio cable to extend the control distance up to 20 meters. -
Page 7: Change Osd Language
G904 User Guide Document: G904-2 ----------------------------------------------------------------------------------------------------------------------------- ---------------- 1.2. Change OSD language User can change OSD language through below OSD menu: [Options]→ [Language]→ select [English], [繁體中文], or [簡體中文] 1.3. Individual OSD control in multiple unit application When multiple units are used and all boxes or IR extender receivers are installed together, user can control individual unit through below method: ➢... -
Page 8: System Reset
Insert small pin into RESET hole on back panel for 5 seconds will reset the system to default settings. User will see “Reset to Default” message. ➢ Reset through RESET hole will erase all the settings saved inside G904, including Profile Index Data. 2.2. Reset system but keep data in Profile Index ➢... -
Page 9: Front Panel
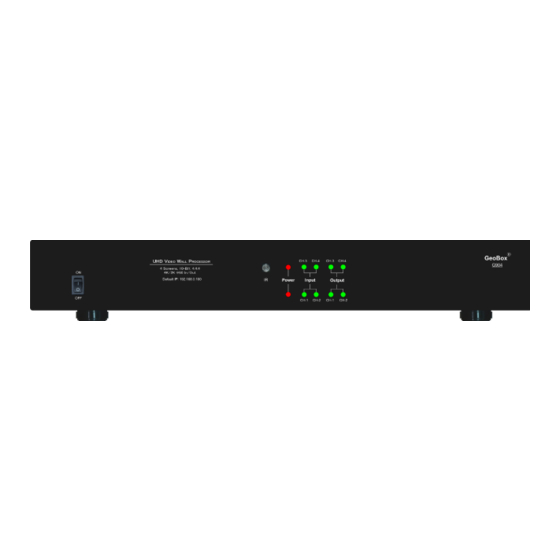
➢ Input LED will turn to Green when G904 has detected input signal. ➢ Output LED will turn to Orange when G904 has detected the device in the output. ➢ Power LED: Red: Power connected and has been turned off by remote controller. Need to turn on by remote controller again. -
Page 10: System Structure
----------------------------------------------------------------------------------------------------------------------------- ---------------- System structure ➢ G904 consists of two G902 processing modules. It can be treated as one 4 channel processor or two dual channel processors. ➢ Processing module A & B are independent. The input signals in each module are only for that processing module and user needs to share to another processing module through loop out port. -
Page 11: Output Signal And Output Port Configuaration
GeoBox through Loop out port daisy chain connection. In normal condition, it can be connected up to 5 units of G904. The maximum connection unit is related to HDMI cable quality and signal source resolution. -
Page 12: Typical System Connection
G904 User Guide Document: G904-2 ----------------------------------------------------------------------------------------------------------------------------- ---------------- ➢ All output default output is FHD with 60Hz refresh rate, full color RGB 4:4:4 and progressive. If the output resolution is set at 4k/2k, full HD monitor will not show any image. Please click [1080] key on the remote controller to set the output to 1080p. -
Page 13: Select Input Port
G904 User Guide Document: G904-2 ----------------------------------------------------------------------------------------------------------------------------- ---------------- 9. Select input port 9.1. Select input port from OSD ➢ Select Channel #. ➢ Open OSD→ [Image properties]→ [Input Signal]→ select input port ➢ Default is HDMI-1 in CH1 & CH2 ➢... -
Page 14: Set Output Resolution And Signal Type
10. Set output resolution and signal type ➢ If G904 output is the same as display device native resolution, it will perform the best video quality. ➢ Please note that if the output is 4k/2k and connect to FHD monitor, it will not show up the image. -
Page 15: Programmable Output Resolution
Document: G904-2 ----------------------------------------------------------------------------------------------------------------------------- ---------------- 10.3. Programmable output resolution and refresh rate ➢ Programmable output resolution in embedded in G904. User can activate OSD [Image Properties]→ [Output]→ Customize]→ [Width] / [Height] ➢ The maximum output resolution range is H: 800-4096 (8 pixels/step), V: 720-3840 (1 pixel/step), H x V shall be equal or less than 9,830,400. -
Page 16: Enable 10-Bit Deep Color Output
G904 User Guide Document: G904-2 ----------------------------------------------------------------------------------------------------------------------------- ---------------- The output refresh rate can be selected from 24/30/50/60/100/120 Hz. If the input and output refresh rate is not the same, it is possible to cause synchronization issues in different output channels. 10.4. Enable 10-bit deep color output ➢... -
Page 17: How To Check System Information
G904 User Guide Document: G904-2 ----------------------------------------------------------------------------------------------------------------------------- ---------------- G904 How to check system information ➢ The picture showed in below is the system information in each channel. Each channel is independent. ➢ The content showed in System Information will include below items:... -
Page 18: System Control And Setup
G904 User Guide Document: G904-2 ----------------------------------------------------------------------------------------------------------------------------- ---------------- Please see the result in previous section. 11.2. Check by remote controller System Information shortcut key System control and setup ➢ The setting for Box ID, RS232 and Ethernet can be executed via OSD, WebGui or GCT PC Tool. -
Page 19: Multi-Units Controlled By One Remote Controller
G904 User Guide Document: G904-2 ----------------------------------------------------------------------------------------------------------------------------- ---------------- 12.2. Multiple units controlled by one Remote Controller ➢ When multiple units are used and all boxes or IR extender receivers are installed together, user can control individual unit through below method: To Press 851 number keys on remote controller, then all the following operations in remote controller will take effect only in ID #1 GeoBox and lock all other GeoBox. - Page 20 There is no additional software is required. ➢ If user can’t connect the network, please power off/on G904 again to let PC detect G904 network. ➢ User can set DHCP for the connection. If necessary, please [Renew] DHCP to get IP address before network connection.
-
Page 21: Pip/Pop Multiple Image Display
G904 User Guide Document: G904-2 ----------------------------------------------------------------------------------------------------------------------------- ---------------- 13. PIP/POP multiple image display 13.1. PIP/POP main menu 13.1.1. [Display] ➢ [Disable]: Disable PIP/POP display. ➢ [PIP]: Picture in Picture display with any two inputs in each channel. ➢ [SBS]: Side by Side display. - Page 22 G904 User Guide Document: G904-2 ----------------------------------------------------------------------------------------------------------------------------- ---------------- PIP/POP source selection ➢ The input source for main and sub-images can be selected separately without limitation. ➢ Any signal from input ports can be displayed on PIP/POP screen up to 4k/2k 60Hz.
- Page 23 G904 User Guide Document: G904-2 ----------------------------------------------------------------------------------------------------------------------------- ---------------- Main image source selection Sub-image source selection 13.1.2. PIP/POP image rotation (not available in 4 split views) ➢ Main and sub-images can be rotated separately at 90/180/270 degrees based on the installation direction of the monitor.
- Page 24 G904 User Guide Document: G904-2 ----------------------------------------------------------------------------------------------------------------------------- ---------------- 13.1.3. Maintain original aspect ratio or follow output aspect ratio ➢ Main Image: can be selected through [Scaling] OSD menu under [Image Properties]. ➢ Sub-Image: can be selected through [Ratio] OSD menu under [PIP Settings].
-
Page 25: Pip (Picture In Picture)
[4x T/B]: Display 4 split views with one image at the top and 3 images at the bottom. Below 3 windows keep 16:9 aspect ratio. Main image can keep full screen or original aspect ratio. POP function is independent in each channel. One G904 can display 7 contents in one 4k monitor. - Page 26 G904 User Guide Document: G904-2 ----------------------------------------------------------------------------------------------------------------------------- ---------------- Independent aspect ratio in main and sub-images 13.3.2. [Orientation] Image rotation in main and sub-image can be executed separately. Image rotation can be executed together with image cropping and aspect ratio adjustment functions to create more display styles.
- Page 27 G904 User Guide Document: G904-2 ----------------------------------------------------------------------------------------------------------------------------- ---------------- ➢ User can feed the PIP image to each channel and apply [Size], [Position] and [Overlap] to achieve one PIP image across entire video wall.
-
Page 28: Quick Pip On/Off And Two Input Seamless Swap
G904 User Guide Document: G904-2 ----------------------------------------------------------------------------------------------------------------------------- ---------------- 14. Quick PIP ON/OFF and two inputs quick seamless swap ➢ CH A/B key in remote controller can execute quick PIP image on/off switching in each channel. Quick PIP ON/OFF & main/sub images quick seamless swap ➢... -
Page 29: Advanced System Settings
G904 User Guide Document: G904-2 ----------------------------------------------------------------------------------------------------------------------------- ---------------- 15. Advanced system settings 15.1. Image rotation and flip ✓ This image orientation function will be applied to both main and sub-image image. This function can support up to 4k/60Hz input signal. ✓... -
Page 30: Image Cropping In Main And Pip/Pop (Sub-Images)
G904 User Guide Document: G904-2 ----------------------------------------------------------------------------------------------------------------------------- ---------------- 15.2. Image Cropping in main and PIP/POP (Sub-images) ✓ Image cropping in both main and PIP/POP (sub-image) can be done separately. ✓ [Video Wall] setting is for main image cropping. ✓ [Overlap] setting under [PIP setting] menu is for sub-image cropping. -
Page 31: System Standby And Automatically Turn Off Output Signal
If detects input signal again, it will automatically turn on the system again. During Standby period, G904 will be still in ON status. ➢ If the monitor can automatically turn off/on function by detecting input signal, user can control signal source to execute entire system on/off control. -
Page 32: Turn Off Splash Screen Logo
G904 User Guide Document: G904-2 ----------------------------------------------------------------------------------------------------------------------------- ---------------- 15.6. Turn off splash screen Logo ➢ Use can turn off splash screen Logo through [Options]→ [Accessibility]→ [Logo Time Out] and set the value at “0”. Default setting is 10 seconds. ➢ It will reduce some boot up time. -
Page 33: Video Wall Settings
It is designed for the video wall with UHD monitors. ➢ G904 is integrated with common input port to be shared with two channels as well as loop out port for daisy chain connection to build big scale video wall. Usually, it can be connected up to 10 steps daisy chain connection from one input signal (about 5 to 6 units of G904). -
Page 34: Pan] - Assign Image Position
G904 User Guide Document: G904-2 ----------------------------------------------------------------------------------------------------------------------------- ---------------- For 3x1 video wall displays Horizontal Zoom= 3, Vertical Zoom = 1 For 3x3 video wall displays Horizontal Zoom = 3, Vertical Zoom =3 16.2. [Pan] [Pan] will assign the location of each split image in the display in both horizontal and vertical directions. -
Page 35: Overlap] - Bezel Compensation And Position Alignment
G904 User Guide Document: G904-2 ----------------------------------------------------------------------------------------------------------------------------- ---------------- 16.3. [Overlap] – Bezel Compensation and Position Alignment [Overlap] adjustment changes the cropping area of the image so that image position in each monitor will be shifted. It can compensate Bezel Size of the monitor and correct misalignment in monitor installation. -
Page 36: Passive 3D Application And 3D Format Conversion
G904 User Guide Document: G904-2 ----------------------------------------------------------------------------------------------------------------------------- ---------------- 17. Passive 3D application and 3D format conversion 17.1. Passive 3D System Configuration G900 can support 3D signal from all kinds of 3D video sources, including Blue Ray DVD, STB, Media player, Game console and PC… 3D signal will be decoded by G900 into signals for Right/Left eyes for passive 3D application or convert into specific 3D format for 3D display devices. - Page 37 G904 User Guide Document: G904-2 ----------------------------------------------------------------------------------------------------------------------------- ---------------- ➢ Install polarized filter at some distance from projector lens to avoid thermal damage (at least 5-10 cm depending on projector lumens). The polarized filter only allows up to 70°C temperature. ➢ Setup the polarized filter and glasses so that right/left eye can only see the scene for one eye.
- Page 38 G904 User Guide Document: G904-2 ----------------------------------------------------------------------------------------------------------------------------- ---------------- 17.3.2. [Output Format] ➢ Passive 3D application: To set [Right Eye Frame] for RH eye projector and [Left Eye Frame] for LH eye projector. It should match the RH/LH polarized filter location. ➢ SBS & T/B outputs are for 3D format conversion. Some 3D display devices can only support specific 3D format.
-
Page 39: Webgui And Gct Pc Tool (Geobox Control Tool)
The connection can go through Ethernet router LAN port, WiFi Router or Cross Over Cat 5/6 cable. User can set each unit of G904 with different static IP address (default is 192.168.0.100 ) in the same domain, then open Google Chrome or Microsoft Edge with IP address to access each unit of G904 for independent operation. -
Page 40: Geobox Control Tool (Gct)
----------------------------------------------------------------------------------------------------------------------------- ---------------- 18.2. GeoBox Control Tool (GCT) ➢ GCT is a PC tool executed through PC. User needs to download this tool from VNS website. Once user connects G904 with PC through Ethernet or USB and open GCT, user can access GCT and execute all operation similar to OSD menu through PC keyboard and mouse. -
Page 41: Load Profile Index Through Remote Controller
Hotkey Number ➢ When user power off the system, G904 will save user setting without loss even the setting is not saved into Profile Index, unless someone to change the setting. ➢ When system has been reset from OSD menu or update new Firmware, Profile data will still be kept inside G904. -
Page 42: Application Case Study
21.1. Two 3 split views & [SBS 2/1] in two UHD monitors Each channel in G904 can create one 3 split views for one UHD monitor by input 3 signal sources. By using two channels can create two 3 split views for two UHD monitors from one G904. The rest two channels can be reserved for another application. - Page 43 G904 User Guide Document: G904-2 ----------------------------------------------------------------------------------------------------------------------------- ---------------- ➢ For portrait monitor application, user needs to rotate the main image through [Image Properties] → [Orientation] menu and rotate Sub-image through [PIP Setting]→ [Orientation] menu. ➢ User can adjust aspect ratio or cropping area for main image through [Video wall]→ [Overlap] function and adjust sub-image aspect ratio or cropping area through [Image Properties]→...
-
Page 44: Split Views In One Uhd Monitor
➢ Due to only 3 input port in each channel, user needs to use two channels to achieve 4 Split view function. User can apply [4x Split] or [4x T/B] + one [PIP] to get one 4 split view. One G904 can achieve two 4 split view windows for two UHD monitor. - Page 45 G904 User Guide Document: G904-2 ----------------------------------------------------------------------------------------------------------------------------- ---------------- CH1: To implement [SBS] with A&B inputs CH2: To implement [SBS] with C&D inputs CH3: To implement [Top/Bottom] with CH1 & CH2 outputs CH4: To input [PIP] with CH3 output and E input...
-
Page 46: Split Views In One Uhd Monitor
G904 User Guide Document: G904-2 ----------------------------------------------------------------------------------------------------------------------------- ---------------- 21.3. 6 split views in one UHD monitor CH1: To implement [3x SBS] with A, B, C input CH3: To implement [3x SBS] with E, E, F input CH4: To implement [Top/Bottom] with CH1 & CH3 outputs... -
Page 47: Split Views In One Uhd Monitor
CH2: implement [SBS] with input I & H, then output to CH4. CH4: implement [SBS 2/1] with input G & output signal from CH2, then output to G901 HDMI-1. d. G901: implement [3X T/B] with three outputs from G904, then output to one 4k UHD monitor. -
Page 48: Conventional Video Wall Application
22.1. Case study A--Conventional 4k video wall ➢ User can connect 4k LCD panel with any output from G904, then use [Pan] to assign the location. User can also apply [Overlap] to do image position fine-tune and bezel correction. ➢... -
Page 49: Case Study B-Video Wall With Different Display Styles In Each Monitor
Below are the settings: TV1: POP1, TV2 & TV4: video wall across two monitors, TV3: PIP 22.3. Case study C—Video wall with PIP in each monitor ➢ G904 can execute video wall with one content across entire video wall through daisy chain connection of the signal source and video wall settings. ➢... -
Page 50: Case Study D-True 8K/2K Video Wall With 8 Fhd Monitors
22.4. Case study D—True 8k/2k video wall with 8 FHD monitors ➢ G904 can support 7680*2160 @30Hz input signal. Two G904 can be cascaded through loop out port connection and output signal for 8 monitors to get pixel by pixel video quality. -
Page 51: Case Study E-Multiple Units Cascaded To Build Different Size Video Wall
22.5. Case study E—Multiple units cascaded to build different size video wall ➢ Below example is a six monitors’ video wall to be built by one G904 (4 channels) and one two channel processor G902. There is no limitation in the cascade. -
Page 52: Case Study--Various Video Wall With Monitor At Landscape And Portrait Position
➢ G904 can support up to 7680x2160 or 2160x7680 input resolution. It is an ideal solution to build video wall with super wide or super high video wall and still keep high resolution with superior video quality. -
Page 53: Case Study A--Single G904 Creative Video Wall
G904 User Guide Document: G904-2 ----------------------------------------------------------------------------------------------------------------------------- ---------------- 23.1. Case study A: Single G904 creative video wall 23.2. Case study B: Multiple G904 creative video wall ➢ Multiple units of G900 can be cascaded to create big scale create video wall. -
Page 54: Case Study C-Multiple G904 Creative Video Wall With Different Size Of Monitor
It doesn’t have flexibility to output specific timing based on the requirement in LED or other big display system. ➢ G904 can crop the right image from any video and output the timings that can match the system resolution of the display device to get the best video quality. - Page 55 832*1440 resolution outputs for LED controller. ➢ G904 output settings shall be the same as LED module resolution to get the best video quality. Please set 832*1440 as the output resolution in each channel through programmable output setting.
-
Page 56: Front End Processor
25.1. Split 8k/2k image for projector edge blending ➢ G904 can split the source image and assign to each projector as well as set overlap pixels for edge blending based on the overlap region. ➢ The projectors require warp and edge blending functions. If the projectors have no warp and edge blending function, user can use GeoBox edge blending processor (UD100 or M800) to implement complete edge blending function. -
Page 57: Adjust Aspect Ratio And Add Pip In Projection System
G802. − The center image size is adjustable to give 16:9 or any other aspect ratio. − If replace G901 with G904, user can build 6 split view image from G904 and output to G802 for further edge blending. - Page 58 G904 User Guide Document: G904-2 ----------------------------------------------------------------------------------------------------------------------------- ---------------- − 6 signal sources input to G904. − G904 implements two 3 split views in CH1 & CH3, then output to CH2 or CH4 to implement T/B POP then sends the image to projector. −...
-
Page 59: Technical Support
G904 User Guide Document: G904-2 ----------------------------------------------------------------------------------------------------------------------------- ---------------- Technical support Trouble Shooting 26.1. No image on the screen ➢ If G900 output resolution is 4k/2k/60Hz and the monitor can’t support 4k input, user will see no display image in the monitor. -
Page 60: Video Quality Issue
G904 User Guide Document: G904-2 ----------------------------------------------------------------------------------------------------------------------------- ---------------- ➢ It is possible to have signal compatibility issue. User can add one HDMI splitter/switcher in the middle to change signal impedance. It may fix the issue. ➢ We propose to use signal enhanced cable, HDBaseT or Optical Fiber cable for long distance connection. -
Page 61: Synchronization Issue In The Outputs
Apart from what is detailed in User Guide, maintenance should be carried out by competent technician assigned by VNS. If GeoBox is physically damaged, it should be returned for repair using VNS RMA procedures. If the unit is opened by user, it will lose the right for warranty protection. -
Page 62: Warranty And Rma Policy
G904 User Guide Document: G904-2 ----------------------------------------------------------------------------------------------------------------------------- ---------------- 28. Warranty and RMA policy 28.1. Warranty and RMA policy This device is designed and tested to the highest standards and backed by two years’ parts and labor warranty. Warranties are effective upon the first delivery date to the end customer and are non- transferable. -
Page 63: Specifications
Document: G904-2 ----------------------------------------------------------------------------------------------------------------------------- ---------------- Specifications Two processing modules in each G904. Each OSD menu position can be shifted for processing module has 5x HDMI 2.0b input convenient OSD operation. ports, 2x HDMI 2.0b output port and 1x HDMI Each channel has independent PIP/POP 2.0b loop out port for daisy chain connection. -
Page 64: Revision History
G904 User Guide Document: G904-2 ----------------------------------------------------------------------------------------------------------------------------- ---------------- Revision History Revision Date Originator Comments V1.0 2021-0105 Steve Wang First version V1.01 2021-0121 Steve Wang Add 3 split view function V1.02 2021-0710 Steve Wang Add programmable refresh rate V1.03 2021-0720 Steve Wang...
Need help?
Do you have a question about the G904 and is the answer not in the manual?
Questions and answers