Advertisement
Available languages
Available languages
Quick Links
Advertisement

Related Manuals for Lacertosus Pro Power Rack


Summary of Contents for Lacertosus Pro Power Rack
-
Page 2: Flat Washer
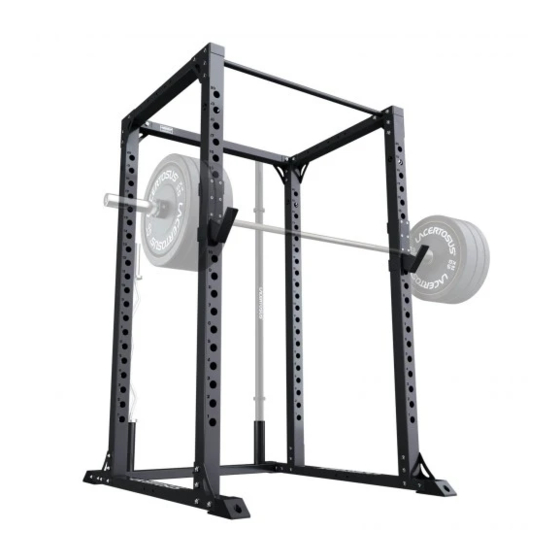
Thank you for choosing another high quality product from Lacertosus®, enjoy the installation and please get back to us in case you are facing problems! And if this manual isn’t enough: [cm] Scan this qr code for the online instructions... - Page 3 qnty qnty name name left base tubular rear upright pole right base tubular left top tubular rear base tubular right top tubular fixing plate pull up bar front upright pole rear top tubular before starting the assembly, remove all the components from the boxes and make sure that everything is there according to the list and previous indications.
- Page 4 Assemble the U-base on the ground using the left [1], right [2] and rear [3] base tubular and the fixing plates [4], tightening the bolts x4 x8 Assemble the front [5] and rear [6] upright poles to the U-base tightening the bolts. x8 x8 x16...
- Page 5 Assemble the left [7] and right [8] top tubular to the upright poles tightening the bolts. x8 x8 x16 Assemble the pull up bar [9] and the rear top tubular [10] tightening the bolts. x8 x8 x16 detail of the back view...
- Page 6 Add the Hooks and enjoy your new training partner!
- Page 7 © 2020 Lacertosus SRL | Lacertosus ® is a registered trademark | info@lacertosus.com release date 12/2020 rev. 1 5/2020...
- Page 9 Grazie per aver scelto un altro prodotto di qualità firmata Lacertosus®, goditi l’installazione e qualora dovessi riscon- trare problemi ti preghiamo di contattarci! E se pensi che questo manuale non sia abbastanza [cm] Scannerizza il codice QR per accedere alle...
- Page 10 qntà qntà nome nome profilo sx base palo verticale post profilo dx base profilo sx superiore profilo post base profilo dx superiore piastra di fissaggio sbarra per trazioni palo verticale ant profilo post superiore prima di iniziare il montaggio, rimuovere tutti i pezzi dalle scatole e assicurarsi che siano presenti tutti i componenti precedentemente indicati...
- Page 11 Assemblare a terra la base a U utilizzando il profilo sinistro [1], destro [2] e posteriore[3] impiegando le due piastre di fissaggio[4], stringere bene le viti. x4 x8 Assemblare alla base ad U i pali anteriori [5] e posteriori [6] sfruttando le apposite piastre e stringere le viti.
- Page 12 Assemblare il profilo superiore sinistro [7] e destro [8] ai pali verticali sfruttando le apposite piastre e stringendo bene le viti. x8 x8 x16 Assemblare ai profili appena installati la sbarra per trazioni [9] e il profilo posteriore [10] assicurando bene le viti. x8 x8 x16 dettaglio della vista posteriore...
- Page 13 Aggiungi gli accessori e goditi la tua nuova attrezzatura!
- Page 14 © 2020 Lacertosus SRL | Lacertosus ® is a registered trademark | info@lacertosus.com release date 12/2020 rev. 1 5/2021...
Need help?
Do you have a question about the Pro Power Rack and is the answer not in the manual?
Questions and answers