
Related Manuals for Viconics GW2

Summary of Contents for Viconics GW2
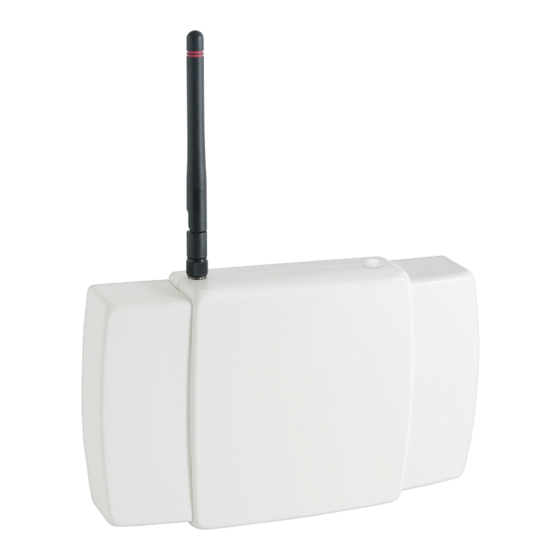
- Page 1 Wireless to BACnet/IP Gateway with GW2 Using GW2 as a Wireless ZigBee Pro to BACnet/IP Gateway with VT7000/VT8000 Series Room Controllers...
- Page 2 This document shows how the GW2 integrates wireless solutions to a wired building automation system. The GW2 is interoperable with any BACnet compliant building management system and can communicate with ZigBee Pro devices. No Software or Server is required. The procedures in the document show you how to integrate the VT7000 and VT8000 Series Room Controllers with the GW2.
- Page 3 From Control Panel, open Network Connections (Windows XP) or Network and Sharing Center (Windows 7). Select Internet Protocol Version 4 (TCP/IPv4) and click Properties. Complete dialog box with identical information shown below and click OK. Viconics Technologies 028-0465-00 October 2015...
- Page 4 NOTE: For Building Expert version 2.14 and higher, you must the user name and password in the browser before you get to building expert. Then Building Expert loads again and prompts you to enter a new password. Viconics Technologies 028-0465-00...
- Page 5 Click Save. NOTE: if the GW2s IP address changed, you must log back in to Building Expert using the new GW2 IP address. Also, you may have to change the IP address on your PC to match the new subnet of the GW2.
- Page 6 In Explorer tab, select BACnet Configuration Object. In Network Number field, enter Network Number. NOTE: The network number of the GW2 CAN NOT be the same as the network number attached to the BACnet controller. In Protocol field, enter Ethernet or BACnet IP .
- Page 7 Toggle Enable DST if your region observes daylight savings time. In Save Period field, select desired period (hourly, daily). NOTE: The Save Period is the frequency at which the database is automatically backed up to the storage card of the controller. Click Save. Viconics Technologies 028-0465-00 October 2015...
- Page 8 NOTE: write down channel number and PAN ID number and keep in a safe place. These values will be needed when pairing the room controllers to the GW2. NOTE: if using multiple networks, the following parameters must be unique on each network: 1.
- Page 9 Room Controllers This section shows you how to add VT7000/VT8000 Series Room Controllers as well as how to integrate them with the GW2. Note The below example applies to the VT7200 series room controller. Refer to the installation manual of your room controller model for the exact key sequence used to navigate the various menus on the room controller.
- Page 10 Using Up or Down arrow button, set Channel to match channel set in GW2. Push OVERRIDE after Channel is set. Record Channel value for later use. Press OVERRIDE until COM Address shows. 10. Enter COM Address value. NOTE: The COM address is a unique identifier for the Room Controller and is used facilitate commissioning. Also, each device must have a unique number.
-
Page 11: Press And Hold
In top-middle area of room controller, press and hold this point for 3 seconds to enter setup mode. Press and hold Tap Network. 1/2 Setup Network Configuration Setpoints - Display Service View Test Outputs Language Selection Viconics Technologies 028-0465-00 October 2015... - Page 12 COM address. Tap ZigBee Pan ID. Using Up or Down arrow button, enter the PAN ID (dec) value from the GW2 to the ZigBee Pan ID field of the room controller. Tap ZigBee channel. Using Up or Down arrow button, enter the channel value from the GW2 to the ZigBee channel field of the room controller.
- Page 13 Add Device to GW2 This procedure shows you how to add a Room Controller to the GW2. In Explorer tab of Building Expert, click Add Device button. A new window opens. Select Device you want to add. NOTE: You must add the same Device model from the Device list which is identical to the model number of your Device. This number is shown on the packing box.
- Page 14 In Devices pane, select newly added Device. In Object field of Explorer tab, select ZigBee Room Controller Config. Push Bind. A new window opens and Building Expert searches for the Com Address and Extended Node ID for your device. Viconics Technologies 028-0465-00 October 2015...
- Page 15 From Select device window, select the device to bind with GW2. Click Bind device. Viconics Technologies 028-0465-00 October 2015...
- Page 16 Assign Device Data Points In Object field of Explorer tab, select ZigBee Room Controller Config. Toggle any box under Controller object to assign any Device data point up to a maximum of 60. Viconics Technologies 028-0465-00 October 2015...
- Page 17 In COV field, toggle any data set point you want to have poll GW2 whenever Device has change in present value up to a maximum of 20 per device. NOTE: The GW2 polls a point at a regular interval unless COV is checked. When COV is checked, the Room Controller sends (pushes) updated values back to GW2 whenever they change.
- Page 18 Commission BACnet/IP Front End with JACE This procedure shows an example on how to commission the Tridium Jace BACnet Controller with the GW2. Launch Workbench. In Open Platform dialog box, enter IP address of your BACnet Controller. NOTE: The IP address used in this procedure is an example. Use the IP address of the BACnet Controller or similar.
-
Page 19: Troubleshooting
System Troubleshooting Recommendations If a Room Controller is not detected by a GW2, verify the LED is blinking at least 4 times. If it is only blinking twice, ensure the PAN ID and Channel values of the Room Controller are set to the same value as the GW2 for which it communicates.
Need help?
Do you have a question about the GW2 and is the answer not in the manual?
Questions and answers