Table of Contents

Related Manuals for Vaillant recoVAIR VAR 260/4


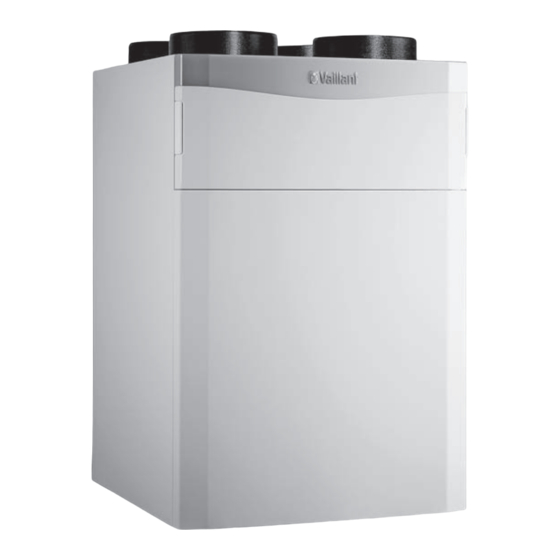
Summary of Contents for Vaillant recoVAIR VAR 260/4
- Page 1 Installation and maintenance instructions recoVAIR VAR 260/4 (E), VAR 360/4 (E) AT, CH (de), DE Publisher/manufacturer Vaillant GmbH Berghauser Str. 40 D-42859 Remscheid Tel. +49 21 91 18‑0 Fax +49 21 91 18‑2810 info@vaillant.de www.vaillant.de...
-
Page 2: Table Of Contents
Contents Contents Fault messages – Overview......20 Limp home mode messages – Overview..21 Troubleshooting ..........21 Safety ..............3 Check programmes – Overview ....... 23 Action-related warnings ......... 3 Maintenance messages – Overview....23 Intended use ............3 Technical data............ 23 General safety information ........ -
Page 3: Safety
Safety 1 use. Any direct commercial or industrial use Safety is also deemed to be improper. Action-related warnings Caution. Classification of action-related warnings Improper use of any kind is prohibited. The action-related warnings are classified in accordance with the severity of the possible General safety information danger using the following warning signs and 1.3.1 Risk caused by inadequate... -
Page 4: Regulations (Directives, Laws, Standards)
1 Safety 1.3.4 Access to the mains plug/circuit breaker must be guaranteed ▶ Ensure that the mains plug/circuit breaker (depending on the country) is always ac- cessible after the installation. Regulations (directives, laws, standards) ▶ Observe the national regulations, stand- ards, guidelines and laws. -
Page 5: Notes On The Documentation
Notes on the documentation 2 Notes on the documentation Product design Observing other applicable documents ▶ You must observe all the operating and installation in- structions included with the system components. Storing documents ▶ Pass these instructions and all other applicable docu- ments on to the system operator. -
Page 6: Information On The Identification Plate
Meaning Ø 180 ation plate Read the installation and maintenance instructions. VAR 260/4 (E) Type designation VAR 360/4 (E) Vaillant ventilation unit with heat recovery Max. air volume flow in m Unit generation Enthalpy Max. power consumption 4.2.2 Side view Max. -
Page 7: Observing The Requirements For The Installation Site
Set-up 4 4.2.5 View from above Minimum clearances and installation clearances 4.2.6 Dimensions, fixing bracket ▶ Observe the minimum clearances and installation clear- ances. ▶ Plan sufficient space for installing the ventilation system. ▶ In order to minimise pressure losses, ensure that the dis- Observing the requirements for the tances between the header line of the ventilation system installation site... -
Page 8: Installing The Product On The Wall
4 Set-up ▶ If particular acoustic requirements are in place at the Danger! installation site, you should take corresponding on-site Risk of injury caused by a heavy weight measures to prevent noise. when mounting the product. Installing the product on the wall The product weighs 41 kg. -
Page 9: Connecting The Pipelines
Set-up 4 Caution. Risk of material damage caused by con- densate. If a condensate discharge pipe has been con- nected incorrectly, a build-up of condensate and uncontrolled condensate drainage may damage the product. Furthermore, the con- densate may leak out of the product and onto the floor. -
Page 10: Opening/Closing The Product
(→ Page 10) 5.1.1 Connecting the stage switch Note If a Vaillant controller is connected, the step switch will not work. Attach the front plate (2) to the product. Open the lower twist locks (6) on the control panel fas- cia (5). -
Page 11: Connecting The Vr 32 Bus Coupler
Connecting the VR 32 bus coupler Note If you want a system control to control other Vaillant heat generators in addition to the product, the VR 32 bus coupler is required. Open the product. (→ Page 10) Opening the electronics box Undo the screws on the electronics box. -
Page 12: Connecting The Product To The Power Supply In A Fixed Installation
6 Operation Connecting the product to the power Installation assistant supply in a fixed installation As a prerequisite for running the installation assistant, the product must have been installed completely and correctly If no suitable country-specific earthed socket outlet is avail- and the system must have been started up completely and able at the installation site, a fixed connection to the power correctly (including the pipelines and all valves). -
Page 13: Product Adjustment
Product adjustment 8 7.2.8 Setting the air/earth collector Function Explanation ▶ Set whether an air/earth collector is available. Red. ventil. vol. You can use this function to set the per- flow centage value for the reduced ventila- – Adjustment range: Not available/Available tion. -
Page 14: System Efficiency
9 Handing the product over to the operator 8.1.1.2 Measuring/initialising the system Function Explanation Call up the installer level. (→ Page 12) Appliance type You can use this function to set whether you are installing/have installed a wall Navigate to the Test menu → Check programmes → unit or a ceiling unit. -
Page 15: Replacing The Mains Connection Line
Customer Service department. Unscrew the condensate siphon from the product. ▶ Only use Vaillant genuine spare parts. If they are dirty, clean the condensate discharge pipe, ▶ Replace the defective mains connection line. -
Page 16: Detecting And Rectifying Faults, Fault Messages And Limp Home Mode Messages
If required, re-adjust the supply-air and exhaust-air Applicability: Austria valves. Clean the outside air's intake tract and the exit air's Vaillant Group Austria GmbH outlet openings. Clemens-Holzmeister-Straße 6 Carry out maintenance on the product filter. 1100 Wien (→ Page 15) Österreich... -
Page 17: 13 Decommissioning
Anrufen aus dem Mobilfunknetz ggf. abweichende Tarife - nähere Information erhalten Sie bei Ihrem Mobilnetzbetrei- ber) Der flächendeckende Kundendienst für ganz Österreich ist täglich von 0 bis 24 Uhr erreichbar. Vaillant Kundendienst- techniker sind 365 Tage für Sie unterwegs, sonn- und feier- tags, österreichweit. Applicability: Switzerland... -
Page 18: Appendix
Appendix Appendix Installer level – Overview Setting level Values Unit Increment, select Default setting Min. Max. Installer level → Enter code 1 (competent person code 17) Installer level → List of faults → Delete F. XXX – F.XXX Installer level → Test menu → Statistics → Operating hours Current value Pass. - Page 19 Appendix Setting level Values Unit Increment, select Default setting Min. Max. T.19 Alarm signal on, off Installer level → Configuration → Language Current lan- Languages available for selection English guage Contact data Phone number 0 - 9 −200 Installation height 2000 Nominal flow (VAR 260/4) m³/h...
-
Page 20: B Fault Messages - Overview
Appendix Setting level Values Unit Increment, select Default setting Min. Max. Nominal flow (VAR 260/4) m³/h Nominal flow (VAR 360/4) m³/h −40 Exh. air nom. flow corr. −40 Sup. air nom. fl. corr. Heat exchanger type Standard, Enthalpy Standard Frost prot. element Not available, Electrical, Hydraulic Not avail- able... -
Page 21: C Limp Home Mode Messages - Overview
Appendix Message Possible cause Measure ▶ F.812 Failure: Exhaust air Exhaust-air temperature sensor Check that the exhaust-air temperature sensor works correctly. temp. sensor does not work/is defective ▶ F.813 Exh. air ventilator un- Incorrect fan specification Check the fan connection, the fan size (up to 260 m /h or der-dimensioned 360 m... - Page 22 Appendix Symptom Possible cause Measure ▶ Product with increased noise System components (e.g. heat Clean dirty system components. level exchanger, fan) are dirty Fan runs at maximum rotational Check whether the pressure hoses are bent. speed Reduce the air volume flow at the lowest ventilator speed. ▶...
-
Page 23: E Check Programmes - Overview
Appendix Check programmes – Overview Prüfprogramme Meaning P.01 Bypass test The bypass flap is actuated and moved to the closed and open position. In the event of a negative test result, Test not OK is shown in the display. Then check that the bypass is connected correctly and works correctly. - Page 24 Appendix VAR 260/4 VAR 260/4 E VAR 360/4 VAR 360/4 E Specific power consumption in accordance with the 0.33 W/(m 0.31 W/(m 0.34 W/(m 0.35 W/(m Passivhaus Institut (Passive House Institute) at 200 m at 200 m at 277 m at 277 m 100 Pa 100 Pa...
- Page 28 0020159949_07 0020159949_07 12.07.2017 Supplier Vaillant Deutschland GmbH & Co.KG Berghauser Str. 40 D-42859 Remscheid Telefon 021 91 18‑0 Telefax 021 91 18‑2810 Auftragsannahme Vaillant Kundendienst 021 91 5767901 info@vaillant.de www.vaillant.de Vaillant Group Austria GmbH Clemens-Holzmeister-Straße 6 1100 Wien Telefon 05 7050 Telefax 05 7050‑1199 Telefon 05 7050‑2100 (zum Regionaltarif österreichweit, bei Anrufen aus dem Mobilfunknetz ggf. abweichende Tarife - nähere Information erhalten Sie bei Ihrem Mobilnetzbetreiber)
Need help?
Do you have a question about the recoVAIR VAR 260/4 and is the answer not in the manual?
Questions and answers