
Related Manuals for Bertazzoni REF36FDFZXNT


Summary of Contents for Bertazzoni REF36FDFZXNT
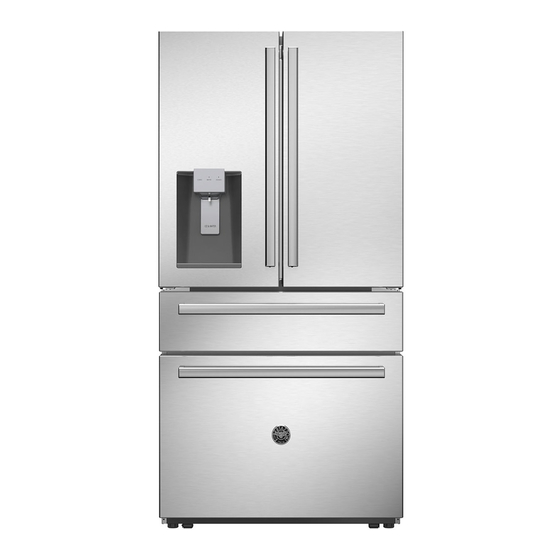
- Page 1 BERTAZZONI INSTALLATION AND USER MANUAL REFRIGERATOR-FREEZER REF36FDFZXNT TAZZONI.COM...
-
Page 2: Table Of Contents
CONTENTS 1 Safety warnings Warning 1 2 Meanings of safety warning symbols 1 3 Electricity related warnings 1 4 Warnings for use 1 5 Warning for placement of items Warnings for energy 1 7 Warnings for disposal 2 Installation instructions 2 1 Installation location 2 2 Leveling the refrigerator 2 3 Leveling the doors... -
Page 3: Safety Warnings
1 Safety warnings 1.1 Warning Warning risk of fire / flammable materials THIS appliance is intended for use in residential environments for the storage of food items. It may also be used in similar settings: staff kitchen areas in offices, shops, farmhouses, and hospitality locations such as hotels, motels, and bed and breakfast establishments. - Page 4 refrigerator must be disconnected from the source of electrical supply before attempting the installation of accessory REFRIGERANT and cyclopentane foaming material used for the appliance are flammable. Therefore, when the refrigerator is scrapped, it shall be kept away from any fire source and be recovered by a qualified company with proper equipment to recover the refrigerant according to state or federal requirements, so as to prevent damage to the environment or any other har m.
-
Page 5: 2 Meanings Of Safety Warning Symbols
1.2 Meaning of safety warning symbols This is a prohibition symbol. Any incompliance with instructions marked with this symbol may damage the product or endanger Prohibition symbol the user's safety. This is a warning symbol. It is required to operate in strict observance of instructions marked with this symbol;... -
Page 6: 5 Warning For Placement Of Items
1.4 Warnings for using Do not arbitrarily disassemble or reconstruct the refrigerator, nor damage the refrigerant circuit; maintenance of the appliance must be conducted by a qualified serviceperson. Damaged power cord must be replaced by the manufacturer, its maintenance department or qualified technicians in order to avoid danger. -
Page 7: 6 Warnings For Energy
Do not store beer, carbonated beverages or other fluids stored in Freezing chamber pressurized containers in the freezer of the refrigerator; the bottles or enclosed containers may crack due to freezing causing damage to the appliance and other food items. 1.6 Warnings for energy 1)Refrigerating appliances might not operate consistently (possibility of defrosting of contents or temperature becoming too warm in the freezer) when sitting for an extended period of time in an... - Page 8 I NSTALLATION DIMENSIONS FRONT VIEW SIDE VIEW TOP VIEW DIMENSIONS SIZE (INCHES)
-
Page 9: Installation Instructions
2 Installation instructions 2.1 Installation location This refrigerator is designed for indoor, household use only. • Keep away from heat and avoid direct sunlight or places near a heat • source, like an oven or a radiator. Do not place the refrigerator in moist or damp places to prevent •... -
Page 10: 2 Leveling The Refrigerator
Leveling the refrigerator Diagram of the leveling feet. Lower Higher 1. Before the operation, it shall be ensured that the refrigerator is disconnected from power source. Before adjusting the leveling feet, precautions shall be taken to prevent any personal injury. 2. -
Page 11: 3 Leveling The Doors
Leveling the doors List of tools to be provided by the user Pliers Hinge Pliers grommet Fastener ring Lower hinge Diagram of adjusting the door. Precautions before operation 1. Before the operation, it shall be ensured that the refrigerator is disconnected from power source. Before adjusting the door, precautions shall be taken to prevent any personal injury. -
Page 12: 4 Installing Door Handles
Installing door handles... -
Page 13: 5 Adjusting The Shelves
Adjusting the shelves The cantilever rack could be adjusted to the proper height as required by food. Please adjust the cantilever rack by following the arrows as shown in the diagram. Raise it upward first and then take it out by tilting it upward. During installation, put the upper end of the fixed leg into one of the upper slots on the supporting iron first and then put the lower end of the fixed leg into the third slot on the lower part of the supporting iron. -
Page 14: 6 Installing The Water Filter
2.6 Installing the water filter 1. When the refrigerator is used for the first time, press on both sides of the filter cover by hand and open the filter cover downward. See figure above. 2.Then rotate the dustproof plug anticlockwise and remove the dustproof plug; 3. -
Page 15: 7 Connecting The Water Line
Connecting the water line Connecting the water line Water line installation kits are available as an additional accessory from your delaer or at a local hardware store. 1 Shut off the main water supply line. 2 Install a shut off valve and water line compression thread UNS 7 16 24 accessible with product in place Refer to local code and instructions with water line installation kit not included... -
Page 16: 8 Changing The Light
2.8 Changing the Light Any replacement or maintenance of the LED lamps is intended to be made by the manufacturer, its service agent or similar qualified person. -
Page 17: 1 Key Components
3.1 Key components LED Lighting Water Filter Ice Maker Box Door Bin Slide-in Door Bin Shelf Turnover Box Shelf Humidity Controlled Crispers Door Bin Flex Drawer Freezer Drawer Humidity Control for Crispers... - Page 18 Dispay screen Flex Drawer Upper freezer drawer Lower freezer drawer Refrigerator - The refrigerator is suitable for storing a variety of fruits, vegetables, beverages, and other foods consumed in the short term. - Cooked foods should not be put in the refrigerator until cooled down to room temperature. - Foods are recommended to be sealed in appropriate containers before placing them inside the refrigerator.
-
Page 19: 2 Functions
3.2 Functions ② ① Display screen ① Temperature zone display ② Quattro Temp Zone Preset Temperature Modes Operation key A. Temperature Decrease B. Temperature Increase C. Refrigerator Temperature/Super Cool D. Freezer Temperature/Super Freeze E. Quattro Temp Zone F. Ice Maker On/Off G. - Page 20 Quattro Temp Zone Press the QUATTRO TEMP ZONE key to select one of the four preset temperature modes. Upon every press, the temperature mode switches from MEAT & FIS H (-1˚C /30˚ F) to BEVERAGES (1˚C/34˚F) to DELI (3˚C/37˚F) to WINE (5˚C/41˚F), and a corresponding tem e p rature is indicated at the Temperature Zone display.
- Page 21 ECO mode Press the ECO MODE key to enter the Eco mode, and the backlight will illuminate; the SUPER FREEZE mode is automatically canceled. The freezer temperature is adjusted to -14°C/7°F and the refrigerator temperature to 7°C/44°F. Press the ECO MODE key again to exit the Eco mode: the backlight will turn off; the freezer and refrigerator temperature will return to the temperature set before entering the ECO mode.
-
Page 22: 3 Ice/Water Dispenser
3.3 Ice/Water Dispenser The ice/water dispenser is located on the outside of the refrigerator door. You may select cubed ice, crushed ice, or cold water. The dispenser only works when the refrigerator door is closed. 1) For cold water 1. Press the WATER key until the indicator light turns on. 2. -
Page 23: 4 Disassembly Of The Refrigerator Doors/Drawers
3.4 Disassembly of the refrigerator doors/drawers In some cases you need to remove the fridge doors and drawer doors to move the refrigerator through a doorway. The doors can be removed by the following steps. IF NOT NECESSARY, DO NOT REMOVE THOSE DOORS/DRAWERS. Water line locking ring 1. - Page 24 Removal of the stainless-steel cooling plate 1. Use a small flat screwdriver tool to pry up a corner of the cooling plate. 2. Place a hand along the warped gap (waring work gloves is recommended) and gently remove the plate. See Figure 7.
-
Page 25: Maintenance And Care Of The Refrigerator
4. Maintenance and care of the refrigerator 4.1 Overall cleaning - Regularly clean the dust and debris behind the refrigerator appliance and the floor to improve cooling performance and energy savings. - Check the door gasket regularly to make sure there is no debris. Clean the door gasket with a soft cloth dampened with soapy water or diluted detergent. -
Page 26: Cleaning Of Drawers
4.3 Cleaning of drawers Quattro Temp Zone drawer Open the Quattro Temp Zone drawer to the maximum, hold the left and right sides of the drawer with both hands, lift the front, exert a little force to pull down the drawer back for about 9/16" until the support claw of the slide rail is s eparated from the drawer. -
Page 27: 4 Cleaning Of The Ice Maker Box
4.4 Cleaning of the ice maker box When you need to use a lot of ice or clean the ice storage box, you can remove the ice storage box. Be sure to replace the ice storage box before turning on the ice maker. Hold the ice storage box, press downward, and pull horizontally. -
Page 28: 5 Defrosting
4.5 Defrosting The refrigerator is made based on the air-cooling principle and thus has automatic defrosting function. Frost formed due to change of season or temperature may also be manually removed by disconnection of the appliance from power supply or by wiping with a dry towel. 4.6 Out of operation Power failure: In case of power failure, foods inside the refrigerator can be kept for several hours;... -
Page 29: Trouble Shooting
For further assistance, please get in touch with your local dealer or please check our website: - in the US http://us.bertazzoni.com/care-service - in Canada https://ca.bertazzoni.com/more/support You can also write us an e-mail at: aftersaleservice@bertazzoni.com - Verify that the appliance is connected to a power source and securely plugged into electrical outlet. - Page 30 - After you install the water line and start the refrigerator, it takes 12 hours to start ice making. - Please turn on the ice making function. - Check whether the water pressure meets 30-100 psig and whether the water line is connected properly. Ice maker does - Check whether the water supply valve is open and whether the water pipe has a restriction.
-
Page 31: Assistance
COVERAGE INFORMATION Bertazzoni SpA will repair or replace any component part which fails or proves defective due to materials and/or workmanship within 2 years from the date of installation and under conditions of normal residential use. Repair or replacement will be free of charge, including labor at standard rates and shipping expenses.
Need help?
Do you have a question about the REF36FDFZXNT and is the answer not in the manual?
Questions and answers