Tennant T581 Operator's Manual
Battery floor scrubber
Hide thumbs
Also See for T581:
- Operator's manual (614 pages) ,
- Technical & service manual (92 pages) ,
- Quick manual (2 pages)
Table of Contents
Advertisement
Model Part No.:
LPTB03284 - SCRUBBER [T581, PD,CE, No Charger]
LPTB03285 - SCRUBBER [T581, PD,CE, Off Board Charger]
LPTB03286 - SCRUBBER [T581, PD,UL, No Charger]
LPTB03287 - SCRUBBER [T581, PD,UL, Off Board Charger]
LPTB03288 - SCRUBBER [T581, PD,UL, On Board Charger]
SOUTH EAST ASIA & KOREA
To view, print or download
the parts manual, visit:
www.tennantco.com/manuals
www.tennantco.com
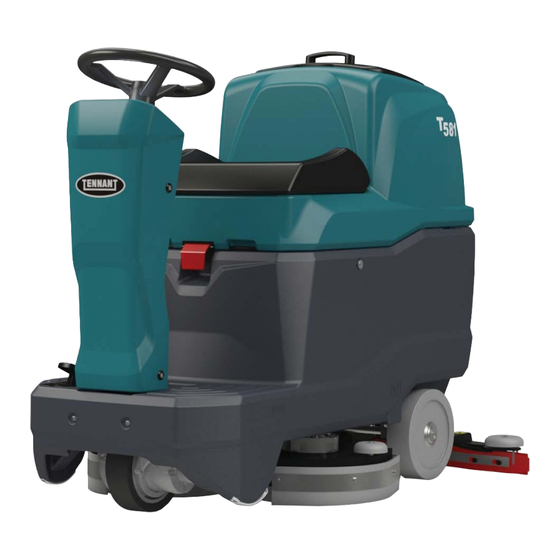
T581
BATTERY FLOOR SCRUBBER
OPERATOR'S MANUAL (EN)
PLDC04581
Rev. 00 (10-2021)
Advertisement
Table of Contents

Subscribe to Our Youtube Channel
Related Manuals for Tennant T581


Summary of Contents for Tennant T581
- Page 1 OPERATOR’S MANUAL (EN) Model Part No.: LPTB03284 - SCRUBBER [T581, PD,CE, No Charger] LPTB03285 - SCRUBBER [T581, PD,CE, Off Board Charger] LPTB03286 - SCRUBBER [T581, PD,UL, No Charger] LPTB03287 - SCRUBBER [T581, PD,UL, Off Board Charger] LPTB03288 - SCRUBBER [T581, PD,UL, On Board Charger] SOUTH EAST ASIA &...
- Page 2 ENGLISH (Translation of original instructions)
-
Page 3: Table Of Contents
TABLE OF CONTENTS TECHNICAL SPECIFICATIONS ................4 MACHINE DIMENSIONS ..................6 SAFETY SYMBOLS ....................7 GENERAL INFORMATION ..................8 Purpose of this manual ........................8 Identifying the machine ........................8 Documentation provided with the machine ..................8 TECHNICAL INFORMATION ..................9 General description ........................9 Parts of the machine ........................ -
Page 4: Technical Specifications
TECHNICAL SPECIFICATIONS Cleaning width inch Squeegee width inch 3180 Cleaning capacity per hour 34229 Number of brushes n° Brush diameter inch g/cm 10,3 Maximum brush pressure 0,98 g/1° Brush rotation speed Brush motor power 0,53 Drive motor power Km/h Maximum speed 480 (2 stadi) Suction motor power 0,64... - Page 5 Transported weight 645,9 Number of batteries n° Battery voltage Individual battery capacity Ah (20h) 140 - 150 Power system voltage X=1310 Z=673 Y=1030 Machine dimensions X=51,5 inch Z=26,4 Y=40,5 390x478x260 Battery compartment dimensions (length, width, height) inch 15,3x18,8x10,2 1445x795x1140 Packed size (length, width, height) inch 56,8x31,2x44,8 57 dB...
-
Page 6: Machine Dimensions
MACHINE DIMENSIONS X-Y-Z: See “TECHNICAL SPECIFICATIONS” table... -
Page 7: Safety Symbols
SAFETY SYMBOLS MAXIMUM SLOPE OPERATOR’S MANUAL, OPERATING INSTRUCTIONS READ THE OPERATOR’S MANUAL DIRECT CURRENT SYMBOL INSULATION CLASS, THIS CLASSIFICATION ONLY AP- PLIES TO MACHINES POWERED BY BATTERIES. -
Page 8: General Information
GENERAL INFORMATION Purpose of this manual This manual has been written by the Manufacturer and is an integral part of the machine It defines the purpose for which the machine has been designed and constructed and contains all the information required by operators In addition to this manual, which contains information for operators, other publications are available providing specific information for... -
Page 9: Technical Information
TECHNICAL INFORMATION General description This machine is a scrubber drier for sweeping, washing and drying flat, horizontal, smooth or mod- erately rough, even and obstacle free floors in civil and industrial premises. The scrubber drier spreads a solution of water and detergent in the correct concentration on the floor and then scrubs it to remove the dirt. -
Page 10: Danger Zones
Danger zones ► Control panel: risk of injury from short circuits. ► Tank assembly: when using certain detergents, danger of irritation for eyes, skin, mucous membranes and respiratory tract and of asphyxia. Danger represented by the dirt collected from the environment (germs and chemical substances). Danger of crushing between the two tanks when the dirty water tank is replaced on top of the detergent tank. -
Page 11: Safety Information
SAFETY INFORMATION Safety precautions ! DANGER! Read this Operator’s Manual carefully before start-up and use and before performing any maintenance or other work on the machine. ! WARNING! Rigorously follow all the instructions in this Operator’s Manual (in particular those marked “Danger!”... - Page 12 respiratory tract. Keep hands away from moving parts. Make sure the power sockets used for the battery charger are connected to a suitable earth system and protected by thermal magnetic and earth leakage breakers. Make sure the electrical characteristics of the machine (voltage, frequency, power) given on the nameplate correspond to those of the mains electricity supply.
- Page 13 Only use original accessories and spare parts supplied by the Manufacturer to guarantee safe and problem-free operation of the machine. Never use parts removed from other machines or from other kits. The machine is designed and constructed to provide ten years’ service from the date of manufac- ture shown on the nameplate.
-
Page 14: Movement Installation
MOVEMENT INSTALLATION Lifting and transporting the packaged machine ! WARNING! During all lifting operations, make sure the packaged machine is firmly secured to avoid it tipping up or being accidentally dropped. Always load/unload lorries in adequately illuminated areas. The machine is packaged on a wooden pallet by the Manufacturer. It must be loaded on to the trans- porting vehicle using suitable equipment (see EC Directive 89/392 and subsequent amendments and/or additions). -
Page 15: Batteries: Preparation
! IMPORTANT! Follow the instructions below to configure the machine’s software for the type of batteries installed: see the “Technical menu section”. Batteries: preparation ! DANGER! During battery installation and any type of battery maintenance, the operator must be pro- vided with the necessary personal protection devices (gloves, goggles overalls, etc.) to limit the risk of injury. -
Page 16: Batteries: Removal
Batteries: removal ! DANGER! When removing the batteries, the operator must be equipped with suitable personal protec- tion devices (gloves, goggles, overalls, safety shoes, etc.) to reduce the risk of injury. Make sure the switches on the control panel are in the “0” position (off) and the machine is turned off. -
Page 17: Squeegee Installation And Adjustment
Squeegee installation and adjustment Switch the machine on, lower the squeegee by pressing the suction motor button. Place the squeegee in the slots provided on the support (fig. 4), then tighten the fastening knobs and insert the suction hose. Squeegee adjustment The squeegee blades scrape the film of water and detergent from the floor and prepare the way for perfect drying. -
Page 18: Brush Installation
Brush installation Single-brush machine: position the brush underneath the head, in the centre (Fig. 7); switch the machine on. Pressing the ATTACH/RELEASE button once after starting the machine releases the brushes, pressing the button a second time activates automatic brush attachment; the button is only enabled when all the functions are deactivated (suction motor and brushes). -
Page 19: Lifting And Transporting The Machine
! IMPORTANT! Follow the instructions given below to configure the machine’s control software to use the display language you require. See the “Technical menu” section. Lifting and transporting the machine ! WARNING! All phases of lifting and moving must be performed in an adequately illuminated environment with the adoption of the safety measures most appropriate to the situation. -
Page 20: Practical Guide For The Operator
PRACTICAL GUIDE FOR THE OPERATOR ! WARNING! Before starting work, wear overalls, ear protectors, non-slip and waterproof shoes, mask to protect the respiratory tract, gloves and all other personal protection devices necessitated by the work environment. ! WARNING! Do not leave the machine unattended or parked with the key in the switch and the parking brake disengaged. -
Page 21: Controls
Controls ► Emergency switch (fig. 9, ref. 1): pushing the safety lever towards the tank, when nec- essary or in the event of imminent danger, stops all the machine’s functions, opening the electrical circuit that supplies power to the machine. Accelerator pedal (fig. - Page 22 ► Suction button (fig. 12, ref. 1): during operation with the AUTO, ECO or APC programs, starts/stops the suction motor; outside of these programs, starts the suction motor in ma- nual mode, lowering the squeegee. Water/detergent button (fig. 12, ref. 2): during operation with the AUTO, ECO and APC ►...
- Page 23 ► Horn button (fig. 12, ref. 5): Press to sound the horn. ► Forwards travel button (fig. 12, ref. 6): selects the machine’s travel direction; when se- lecting reverse gear, the display shows the letter “R” and the buzzer sounds intermittently. ECO program button (fig.
-
Page 24: Working
Working ► Sit correctly in the seat. ► Turn the main switch to position “1”. ► Select the direction of travel with the direction selector. ► Select the AUTO or ECO program. ► Press the accelerator pedal to move off and start work. Some useful tips to get the most from your scrubber drier In the event of particularly stubborn dirt on the floor, washing and drying can be performed in two separate operations. -
Page 25: Emptying The Water/Detergent Tank
Emptying the water/detergent tank To empty the tank, follow the instructions shown below: ► Switch off all the machine’s functions. ► Take the machine to the disposal area. ► Stop the machine. ► Detach the hose (fig. 14, ref. 3) from its holder and unscrew the cap (fig. 14, ref. 1). ►... -
Page 26: Finishing Work
Finishing work ! IMPORTANT! Empty the dirty water tank and recharge the batteries When ending work, switch off the machine at the main switch. The machine does not have a parking brake as it is fitted with an electric brake, which automatically brakes the machine when the drive pedal is not pressed. -
Page 27: Periods Of Inactivity
PERIODS OF INACTIVITY If the machine is not used for some time, for example, on display in a showroom or stored in the warehouse for a period or more than one month, the following operations are required: ► Completely recharge the batteries before storing them. During long periods of inactivity, you should charge the batteries regularly (at least once every two months) to keep them constantly at maximum charge. -
Page 28: Maintenance Instructions
MAINTENANCE INSTRUCTIONS ! DANGER! Never perform any maintenance operations without first disconnecting the batteries. Maintenance of the electrical circuit and all other operations not expressly required by this manual must be performed by specialised personnel only, in compliance with current safety legislation and as described in the maintenance manual. -
Page 29: Cleaning The Water/Detergent Tank Filter
Cleaning the water/detergent tank filter To clean the filter, proceed as follows: ► Close water valve (tap) (fig. 18, ref. 1) on the front left of the machine, next to the drive wheel. ► Unscrew the filter cover (fig. 18, ref. 2), remove the filter, then wash it under running water or using the same detergent dispensed by the machine. -
Page 30: Fuses: Replacing
Fuses: replacing ! DANGER! This operation must be performed with the machine switched off and the key removed. ! WARNING! Never use a fuse with a higher amperage than specified. ! DANGER! Do not rest the electronic board panel on the batteries, as a short-circuit may cause the bat- teries to explode. - Page 31 (fig. 22, ref. 1) main fuse 100A. (fig. 23, ref. 1-2) brush motor fuses 30A. (fig. 23, ref. 3) head actuator, squeegee actuator fuse 5A. (fig. 23, ref. 4) suction motor fuse 30A. (fig. 23, ref. 5) solenoid valve fuse 5A. (fig.
-
Page 32: Battery Maintenance And Charging
Battery maintenance and charging ! DANGER! Do not check the batteries by sparking. The batteries give off flammable fumes. Put out all fires and hot embers before checking or topping up the battery level. ! DANGER! Perform the operations described below in a ventilated area. ! WARNING When recharging the batteries, the dirty water tank must be open (rotated backwards) so as to allow correct air flow in the battery and battery charger compartment. - Page 33 “ONBOARD” battery charger: ► Lift the dirty water tank ► Unplug the battery charger. ► Plug the cable into the power socket (fig. 25). ► Start the recharge cycle. ► The display will show when the recharge cycle ends, see “Display alarms”...
-
Page 34: On Board Charger Setting Instructions
On Board Charger Setting Instructions ! WARNING For machines shipped with batteries pre-installed, the battery charger and machine battery settings are factory set. Machine is ready for charging. ! IMPORTANT! For machines shipped without batteries, the machine and battery charger are factory set for generic wet lead-acid batteries as the default (See table below). -
Page 35: Replacing The Squeegee Blades
Replacing the squeegee blades ► Switch the machine on, lower the squeegee by pressing the suction motor button. ► Remove the suction hose from the squeegee (fig. 26). ► Unscrew the fastening knobs. ► Remove the squeegee from the slots on the support. ►... -
Page 36: Pushing And Pulling The Machine
Pushing and pulling the machine: When the electric drive cannot be used, the machine can be easily pushed or pulled by turning the lever (fig. 28) clockwise, so as to release the electric brake. After moving the machine, set the lever back to the original position. -
Page 37: Periodic Checks
Periodic checks The table below indicates the Person Responsible for each procedure. O = Operator. T = Trained Personnel. Interval Person Description Procedure Lubricant/ Resp. Fluid Daily Pad(s) Check, flip or replace Brush(s) Check, clean Squeegee Clean, check for damage and wear Scrub head skirt Check for damage and wear recovery tank... -
Page 38: Troubleshooting
TROUBLESHOOTING PROBLEM CAUSE REMEDY The machine does not work The batteries are disconnected Connect the batteries to the machine The batteries are flat Recharge the batteries Battery disconnect lever pressed Return the lever to its correct position The brushes do not turn The dirty water tank is full Empty the dirty water tank Blown fuse... -
Page 39: Display Alarms
DISPLAY ALARMS Alarm Possible cause What to do BRUSH PROTECTOR The brush motor has overheated. Wait for the brush motors to cool down. Faulty thermal protector contact on the mo- Replace the brush motor. tors. Check the connection. Faulty connection. DRIVE PROTECTOR The drive wheel has overheated. - Page 40 DISCONNECT EMERGENCY Electronic board communication problem Press the emergency switch and reset it after 10 seconds. If following this procedure, the “update software” message is shown on the di- splay, do not switch the machine off, but rather wait for the procedure to end. DRIVE BOARD DISPLAY ALARMS DRIVE BOARD Board temperature between -10°C and...
-
Page 41: Technical Menu
TECHNICAL MENU Enter the menu by pressing “+” and “-” together when no functions are active. The “+” button increases the selected parameter or the variable relating to the selected parameter. The “-” button increases the selected parameter or the variable relating to the selected parameter. The “Attach-release brushes”... -
Page 42: Recommended Spare Parts
RECOMMENDED SPARE PARTS Part Number Description SPPV01495 BRUSH ASSY, DISK, SCB, 50CM, PYP, SOFT SPPV01332 BRUSH ASSY, DISK, SCB, 50CM, PYP SPPV01335 PAD DRIVER 50CM [STANDARD] 9017755 BLADE, SQGE, FRONT, 815L, LATEX [OPTION] 9017756 BLADE, SQGE, REAR, 815L, LATEX [OPTION] 9017757 BLADE, SQGE, FRONT, 815L, PYU [OPTION] 9017758... - Page 44 Tennant Company PO. Box 10400 Clean Street Eden Prairie, MN 55344-2650 Phone: (800) 553- 8033 www.tennantco.com Copyright © 2021 Tennant Company. All rights reserved.
Need help?
Do you have a question about the T581 and is the answer not in the manual?
Questions and answers