Table of Contents
Advertisement
Available languages
Available languages
Quick Links
allen + roth
and logo design are trademarks or
®
registered trademarks of LF, LLC. All rights reserved.
ATTACH YOUR RECEIPT HERE
Serial Number
Questions, problems, missing parts? Before returning to your retailer, call our customer
service department at 1-866-439-9800, 8 a.m. - 8 p.m. EST, Monday - Sunday.
You could also contact us at partsplus@lowes.com or visit www.lowespartsplus.com.
SM20658
welcoming
•
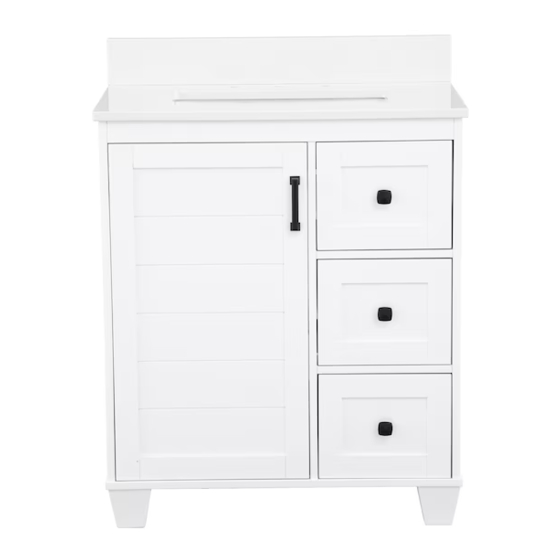
RIGSBY 30-IN VANITY WITH TOP
Purchase Date
sophisticated
1
•
inspiring
ITEM #2694600
Model #RGWVT3039D
Français p. 9
Español p. 17
Advertisement
Table of Contents

Related Manuals for Allen + Roth RGWVT3039D


Summary of Contents for Allen + Roth RGWVT3039D
- Page 1 • sophisticated • inspiring allen + roth and logo design are trademarks or ® ITEM #2694600 registered trademarks of LF, LLC. All rights reserved. RIGSBY 30-IN VANITY WITH TOP Model #RGWVT3039D Français p. 9 ATTACH YOUR RECEIPT HERE Español p. 17...
-
Page 2: Package Contents
PACKAGE CONTENTS PART DESCRIPTION QUANTITY Vanity with Top and Hardware Backsplash Interior Adjustable Shelf HARDWARE CONTENTS Shelf Pin Handle Long Screw Knob Short Screw Qty: 4 Qty: 1 Qty: 2 Qty: 3 Qty: 3 SAFETY INFORMATION Please read and understand this entire manual before attempting to assemble or install this product. WARNING •... -
Page 3: Installation Instructions
PREPARATION Before beginning assembly of product, make sure all parts are present. Compare parts with package contents list and hardware contents list. If any part is missing or damaged, do not attempt to assemble the product. Estimated Installation Time: 10 minutes (24 hours for adhesive to dry). Tools Required for Installation (not included): Silicone compound, Philips Head Screwdriver. - Page 4 INSTALLATION INSTRUCTIONS Step 2: Installing the Shelf 2. Insert four shelf pins (AA) into the four pre-drilled holes at the desired height inside the vanity (A) compartment. Slide the shelf (C) into the compartment above the pins (AA). Step 3: Door Insert Panel Installation 3a.
- Page 5 INSTALLATION INSTRUCTIONS Step 4: Optional Hardware Installation 4. This unit is shipped with hardware already attached. If desired, you can replace it with the optional finish hardware included. Remove and replace door handles (BB) with Philips head screwdriver and long screws (CC) and drawer knobs (DD) with Philips head screwdriver and short screws (EE).
- Page 6 INSTALLATION INSTRUCTIONS Step 6: Optional Drawer Removal 6a. Fully extend the drawer. 6b. Pull the two latches outward on the underside of the drawer to release the lock. 6c. Simultaneously tilt and lift the drawer upwards to pull it out of the cabinet (A).
-
Page 7: Care And Maintenance
CARE AND MAINTENANCE • Dust the vanity regularly with a soft, non-lint producing cloth or household dusting product. • You can clean the vanity with a gentle, non-abrasive household cleaner. • Make sure to dry the wood immediately with a soft cloth or towel. •... -
Page 8: Replacement Parts List
Drawer Knob with Screw (Brushed Nickel) PB-KNOB-H009 Slow Close Drawer Undermount Slides PB-SCDRW SLIDE-H001 Matte Black Matte Black Brushed Brushed Nickel Nickel allen + roth and logo design are trademarks or ® registered trademarks of LF, LLC. All rights reserved. - Page 9 • sophisticated • inspiring allen + roth et le logo sont des marques de commerce ou des ® ARTICLE #2694600 marques de commerce déposées de LF, LLC. Tous droits réservés. MEUBLE-LAVABO AVEC COMPTOIR RIGSBY DE 76,2 CM Modèle #RGWVT3039D JOIGNEZ VOTRE REÇU ICI...
-
Page 10: Quincaillerie Incluse
CONTENU DE L’EMBALLAGE PIÈCE DESCRIPTION QUANTITÉ Meuble-lavabo avec comptoir et quincaillerie Dosseret Tablette intérieure ajustable QUINCAILLERIE INCLUSE Taquet Poignée Vis longue Bouton Vis courte Qté : 4 Qté : 1 Qté : 2 Qté : 3 Qté : 3 CONSIGNES DE SÉCURITÉ Assurez-vous de lire et de comprendre l’intégralité... -
Page 11: Instructions Pour L'installation
PRÉPARATION Avant de commencer l’assemblage de l’article, assurez-vous d’avoir toutes les pièces. Comparez le contenu de l’emballage avec la liste de la quincaillerie incluse. S’il y a des pièces manquantes ou endommagées, ne tentez pas d’assembler l’article. Temps d’installation approximatif : 10 minutes (24 heures pour le séchage de l’adhésif). Outils nécessaires pour l’installation (non inclus) : composé... - Page 12 INSTRUCTIONS POUR L’INSTALLATION Étape 2 : Installation de la tablette Insérez les quatre taquets (AA) dans les quatre trous prépercés à la hauteur désirée à l’intérieur du meuble-lavabo (A). Faites glisser la tablette (C) dans le compartiment au-dessus des taquets Étape 3 : Installation de la garniture de panneau de porte 3a.
- Page 13 INSTRUCTIONS POUR L’INSTALLATION Étape 4 : Installation de quincaillerie facultative 4. Cet article est livré avec une quincaillerie préassemblée. Si vous le souhaitez, vous pouvez la remplacer par la quincaillerie de finition facultative incluse. Retirez et remplacez les poignées de porte (BB) à l’aide d’un tournevis cruciforme et des vis longues (CC).
- Page 14 INSTRUCTIONS POUR L’INSTALLATION Étape 6 : Retrait du tiroir facultatif 6a. Ouvrez complètement le tiroir. 6b. Pour libérer le verrou, tirez vers l’extérieur les deux loquets se trouvant sur le dessous du tiroir. 6c. Inclinez et soulevez simultanément le tiroir vers le haut pour le sortir du meuble-lavabo (A).
-
Page 15: Entretien
ENTRETIEN • Époussetez régulièrement le meuble-lavabo à l’aide d’un linge doux et non pelucheux ou d’un accessoire pour l’époussetage domestique. • Vous pouvez nettoyer le meuble-lavabo à l’aide d’un nettoyant doux et non abrasif. • Essuyez immédiatement le bois à l’aide d’un linge doux ou d’une serviette. •... -
Page 16: Liste Des Pièces De Rechange
Glissière à montage sous plan pour une PB-SCDRW SLIDE-H001 fermeture lente du tiroir Noir mat Noir mat Nickel Nickel brossé brossé allen + roth et le logo sont des marques de commerce ou des ® marques de commerce déposées de LF, LLC. Tous droits réservés. - Page 17 • sofisticado • inspirador allen + roth y el diseño del logotipo son marcas comerciales o ® ARTÍCULO #2694600 marcas registradas de LF, LLC. Todos los derechos reservados. TOCADOR RIGSBY DE 76,2 CM CON CUBIERTA Modelo #RGWVT3039D ADJUNTE SU RECIBO AQUÍ...
- Page 18 CONTENIDO DEL PAQUETE PIEZA DESCRIPCIÓN CANTIDAD Tocador con cubierta y aditamentos Protector contra salpicaduras Repisa interior ajustable ADITAMENTOS Pasador de repisa Manija Tornillo largo Perilla Tornillo corto Cant.: 4 Cant.: 1 Cant.: 2 Cant.: 3 Cant.: 3 INFORMACIÓN DE SEGURIDAD Lea y comprenda completamente este manual antes de intentar ensamblar o instalar este producto.
-
Page 19: Instrucciones De Instalación
PREPARACIÓN Antes de comenzar a ensamblar el producto, asegúrese de tener todas las piezas. Compare las piezas con la lista del contenido del paquete y la lista del contenido de aditamentos. No intente ensamblar el producto si falta alguna pieza o si están dañadas. Tiempo aproximado para la instalación: 10 minutos (24 horas para que se seque el adhesivo). - Page 20 INSTRUCCIONES DE INSTALACIÓN Paso 2: instalar la repisa Introduzca los cuatro soportes para estantes (AA) en los cuatro orificios pretaladrados a la altura deseada, dentro del las paredes del compartimiento del tocador (A). Deslice el estante (C) en el compartimento sobre los soportes. Paso 3: instalar el panel accesorio para puertas Los paneles de las puertas son reversibles.
- Page 21 INSTRUCCIONES DE INSTALACIÓN Paso 4: instalar los aditamentos opcionales 4. Esta unidad se envía con los aditamentos ya instalados. Si lo desea, puede reemplazarlos por los aditamentos de acabado opcionales que se incluyen. Retire y reemplace las manijas de las puertas (BB) con un destornillador Philips y los tornillos largos (CC), y las perillas de la gaveta (DD) con un destornillador Philips y tornillos cortos (EE).
- Page 22 INSTRUCCIONES DE INSTALACIÓN Paso 6: remoción de la gaveta opcional 6a. Extienda la gaveta completamente. 6b. Tire de los dos pestillos hacia afuera en la parte inferior de la gaveta para liberar el bloqueo. 6c. Al mismo tiempo, incline y levante la gaveta para retirarla del gabinete (A).
-
Page 23: Cuidado Y Mantenimiento
CUIDADO Y MANTENIMIENTO • Limpie el tocador regularmente con un paño suave que no deje pelusas o con un producto de limpieza doméstico. • Puede limpiar el tocador con un limpiador doméstico suave no abrasivo. • Asegúrese de secar la madera inmediatamente con un paño o una toalla suave. •... -
Page 24: Lista De Piezas De Repuesto
Deslizadores de gaveta de montaje inferior para PB-SCDRW SLIDE-H001 un cierre lento Negro mate Negro mate Níquel Níquel cepillado cepillado allen + roth y el diseño del logotipo son marcas comerciales o ® marcas registradas de LF, LLC. Todos los derechos reservados.
Need help?
Do you have a question about the RGWVT3039D and is the answer not in the manual?
Questions and answers