Table of Contents
Advertisement
allen + roth® is a registered trademark of LF, LLC.
All Rights Reserved.
allen + roth® est une marque de commerce
déposée de LF, LLC. Tous droits réservés.
allen + roth® es una marca registrada de LF, LLC.
Todos los derechos reservados.
Questions?/Des questions?/¿Preguntas?
Call customer service at 1-866-439-9800,
8 a.m. - 8 p.m., EST, Monday - Sunday .
Appelez notre service à la clientèle au 1 866 439-9800,
entre 8 h et 20 h (HNE), du lundi au dimanche.
Llame a nuestro Departamento de Servicio al Cliente al
1-866-439-9800, de lunes a domingo de 8 a.m. a 8 p.m.
hora estándar del Este.
PACKAGE CONTENTS/CONTENU DE L'EMBALLAGE/CONTENIDO DEL PAQUETE
A
X 1
Mounting Bracket
AA
Charnière
Abrazaderas de montaje
23 in. - 47 in. = x 2
52 in. - 70 in. = x 3
58,42 cm - 119,38 cm = x 2
132,08 cm - 177,8 cm = x 3
SM20217
ITEM/ARTICLE/ARTICULO #2318931, 2318932, 2318933, 2318934, 2318935, 2318936,
®
2318937, 2318938, 2318939, 2318940, 2318941, 2318942, 2318943, 2318944, 2318945,
2318946, 2318947, 2318948, 2318949, 2318950, 2318951, 2318952, 2318953, 2318954,
ATTACH YOUR RECEIPT HERE/JOIGNEZ VOTRE REÇU ICI/ADJUNTE SU RECIBO AQUÍ
B
X 1
BB
2318955, 2318956, 2318957, 2318958, 2318959, 2318960
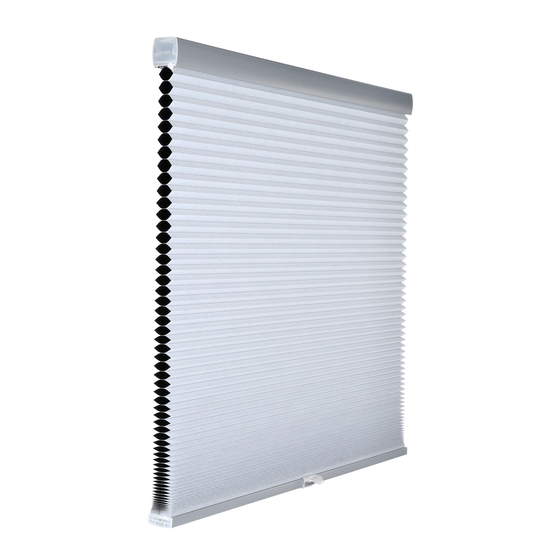
1-1/2 IN MOTORIZED BLACKOUT CELLULAR SHADE
STORE CELLULAIRE OCCULTANT MOTORISÉ DE
PERSIANA CELULAR MOTORIZADA PARA
MODEL/MODÈLE/MODELO #78619 - 78648
Serial Number/Numéro de série/Número de serie
Purchase Date/Date d'achat/Fecha de compra
Shade Battery
Pile pour le store
Batería de la persiana
x1
BLOQUEAR LA LUZ DE 1,5 PULG.
Wood Screw
CC
Vis/Tornillo para madera
23 in. - 47 in. = x 4
52 in. - 70 in. = x 6
58,42 cm - 119,38 cm = x 4
132,08 cm - 177,8 cm = x 6
3,81 CM
Advertisement
Table of Contents

Related Manuals for Allen + Roth 78619


Summary of Contents for Allen + Roth 78619
- Page 1 2318937, 2318938, 2318939, 2318940, 2318941, 2318942, 2318943, 2318944, 2318945, 2318946, 2318947, 2318948, 2318949, 2318950, 2318951, 2318952, 2318953, 2318954, 2318955, 2318956, 2318957, 2318958, 2318959, 2318960 allen + roth® is a registered trademark of LF, LLC. All Rights Reserved. 1-1/2 IN MOTORIZED BLACKOUT CELLULAR SHADE STORE CELLULAIRE OCCULTANT MOTORISÉ...
- Page 2 Battery should not be left discharged for an extended period of time. Battery should not be charged while in contact with flammable material like textiles. This battery can only be applied to select allen + roth motorized cellular shades. Do not modify, disassemble, open, drop, crush, puncture, or shred battery.
- Page 3 SAFETY INFORMATION/CONSIGNES DE SÉCURITÉ/INFORMACIÓN DE SEGURIDAD Température recommandée pour l’utilisation du chargeur : entre 0 et 45 °C. Guarde estas instrucciones para su uso posterior. La batería se debe reciclar. Es necesario hacerlo cuando se trata de una batería recargable. Es normal que la batería se caliente mientras se carga;...
- Page 4 SAFETY INFORMATION/CONSIGNES DE SÉCURITÉ/INFORMACIÓN DE SEGURIDAD radiofréquence et, s’il n’est pas installé et utilisé conformément aux instructions, risque de provoquer des interférences nuisibles aux communications radio. Toutefois, il n’est pas garanti qu’une interférence ne puisse pas se produire dans une installation particulière.
- Page 5 PREPARATION/PRÉPARATION/PREPARACIÓN Bracket Location and Installation: The shade may be installed either inside or outside the window frame. A mounting bracket should be positioned on each end of the headrail. Wider shades that require 3 or more brackets should be spaced evenly between the two outermost brackets.
- Page 6 ASSEMBLY INSTRUCTIONS/INSTRUCTIONS POUR L’ASSEMBLAGE/INSTRUCCIONES DE ENSAMBLAJE 4. Once the shade battery (BB) is For inside mounting, clip the mounting brackets (AA) onto the finished charging, unplug it from the USB cord (GG). Locate the headrail of shade (A). Hold shade battery compartment on the (A) in place and make pencil mark at shade (A) in the right side of the...
- Page 7 SHADE BATTERY RECHARGING/RECHARGE DE LA PILE DU STORE/ RECARGA DE LA BATERÍA DE LA PERSIANA 3. Once the LED has turned solid 1. The shade (A) battery compartment is located in the right green charging is complete. side of the bottom rail. Open the Disconnect the shade battery (BB).
- Page 8 REMOTE BATTERY INSTALLATION/INSTALLATION DE LA PILE DE LA TÉLÉCOMMANDE/ INSTALACIÓN DE LA BATERÍA DEL CONTROL REMOTO CAUTION CHOKING HAZARD: When installing the battery be sure to keep safely out of reach of small children, primarily those age 6 and under. CAUTION: If recharged, disposed of in a fire, or incorrectly installed, battery may leak or explode ATTENTION RISQUE D’ÉTOUFFEMENT : Lorsque vous installez la pile, veillez à...
- Page 9 OPERATION/FONCTIONNEMENT/FUNCIONAMIENTO This device complies with Part 15 of the FCC Rules. Operation is subject to the condition that this device does not cause harmful interference. Cet appareil est conforme à l’alinéa 15 du règlement de la FCC. Son fonctionnement est soumis à la condition que cet appareil ne provoque pas d’interférences nuisibles.
- Page 10 REMOTE PAIRING/JUMELAGE DE LA TÉLÉCOMMANDE /VINCULACIÓN REMOTA Hold the Shade Remote (B) close to the wireless shade you want to add. No more than one Yard On the remote, press the Shade Selection button until the desired LED, 1 - 6, turns blue. The channel you have selected will be assigned to the shade module that you are pairing to.
- Page 11 SETTING DOWN POSITION/RÉGLAGE DE LA POSITION ABAISSÉE/AJUSTE DE LA POSICIÓN bouton « STOP » (Arrêter) lorsque vous avez atteint la To set the shade to remember a position souhaitée. fixed lowered position remove the back cover of shade remote (B), Después de que la persiana (A) vibre una sola vez, press and hold “Learn”...
- Page 12 REMOTE WALL MOUNTING/INSTALLATION DU SUPPORT MURAL DE LA TÉLÉCOMMANDE/ MONTAJE DE PARED PARA EL CONTROL REMOTO 1. To install Remote Wall Mount 3. Find an easily accessible location (DD) slide Shade Remote (B) into on the wall you wish to mount. the wall mount.
- Page 13 CARE INSTRUCTIONS/INSTRUCTIONS POUR L’ENTRETIEN/INSTRUCCIONES DE CUIDADO To clean the wireless shade remote (B) and shade (A), wipe with a soft dry cloth. Never use abrasive cleaners or chemical solvents as this can damage the product. Pour nettoyer la télécommande du store sans fil (B) et le store (A), essuyez avec un chiffon doux et sec. N’utilisez jamais de nettoyants abrasifs ou de solvants chimiques, car ils pourraient endommager l’article.
- Page 14 TROUBLESHOOTING/DÉPANNAGE/SOLUCIÓN DE PROBLEMAS Possible cause and solution/Cause possible et solution/ Issue/Problème/Problema Causa posible y solución 1. Batteries in remote are dead. Replace the batteries. 2. Batteries are installed backwards. Double-check orientation of batteries. 3. Ensure both the shade and remote are placed into pairing mode. Both should have blinking LEDs.
Need help?
Do you have a question about the 78619 and is the answer not in the manual?
Questions and answers
Where can I purchase a battery and battery charger for a Allen-Roth 34 x 72 cordless cellular shade? Battery model. 2INCMR19/66
You can obtain a replacement battery and battery charger for the Allen + Roth cordless cellular shade by contacting customer service at 1-866-439-9800, available from 8 a.m. to 8 p.m. EST, Monday through Sunday.
This answer is automatically generated
I closed the blinds and left. When I came home they were all the way opened and I could not get them to go back down more the a few inches. When pressing the down arrow they went up and pressing the up arrow they moved down a few inches so it’s backwards controls now. What could have happened to cause this. They were fine when I left the house.
The Allen + Roth blinds (part number 78619) could open unexpectedly and have reversed controls if the batteries in the remote are installed backwards. This can cause the remote to malfunction. Double-checking the battery orientation may resolve the issue.
This answer is automatically generated
Blind falls after installation and will not go back up.
The manual does not provide a specific reason why the Allen + Roth blind (part number 78619) falls after installation and does not go back up. However, possible causes could include improper installation, a pairing issue with the remote, or a mechanical failure. Checking the installation steps, ensuring the remote is correctly paired, and verifying that the motorized mechanism is functioning properly may help resolve the issue.
This answer is automatically generated
Hi, I need a replacement battery for my blind Allen+Roth model 78619-78648
WHERE CAN I GET A BATTERY ??,, 2INCMR19/66
The side of the blind has fallen/sagging. Remote works fine but need to know how to bring the one sagging side back to level.