Table of Contents
Advertisement
Available languages
Available languages
Quick Links
Advertisement
Table of Contents

Related Manuals for Steren DIS-150


Summary of Contents for Steren DIS-150
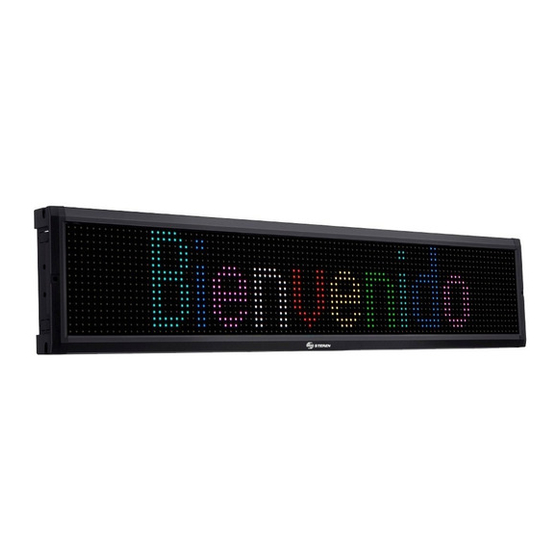
- Page 1 DIS-150 Letrero led programable de 7 colores V0.0 / 0616v...
- Page 2 La información presentada sirve únicamente como referencia sobre el producto. Debido a actualizaciones pueden existir diferencias. Consulte nuestra página web www.steren.com para obtener la versión más reciente de este manual. PRECAUCIONES • Este producto NO es un juguete; manténgalo fuera del alcance de los niños.
-
Page 3: Modo De Uso
CONTENIDO MODO DE USO Conecte el letrero El letrero encenderá automáticamente... - Page 4 1. Inserte el disco de instalación en la PC. 2. Ingrese a la carpeta DIS-150 USB TO RS323 DRIVER y ejecute el archivo SETUP. 3. En caso de que se le soliciten, otorgue los permisos necesarios para la instalación.
- Page 5 4. Cuando aparezca la ventana de instalación, dé clic en INSTALL. 5. Una vez instalado el driver, haga clic en Aceptar.
- Page 6 ANTES DE EMPEZAR A PROGRAMAR… Identifique en qué puerto USB de la PC está conectado el letrero 1. Ingrese a Panel de Control, y seleccione Administrador de dispositivos. 2. Despliegue la pestaña Puertos (COM y LPT). Ubique en qué puerto está el letrero (USB-SERIAL CH340).
- Page 7 Abra la aplicación para programación 1. En el CD busque la aplicación MiniLEDDisplayEditorV2 y dé doble clic para ingresar. 2. Ingrese al menú de Ajustes, y en la opción Com. Port: Seleccione el puerto en el que está conectado el letrero. 3.
-
Page 8: Descripción De La Interfaz
COMIENCE A PROGRAMAR SUS MENSAJES Descripción de la interfaz Cargar mensajes Salir Ajustes Mensajes que se van a transmitir 1. Haga clic en uno de los renglones de texto del área de edición. 2. Escriba uno de los siguientes comandos para el color del texto: <CR>... - Page 9 3. Sin dejar espacios, después del comando ingrese su mensaje. 4. Seleccione un modo de animación. 5. Habilite la casilla File en los mensajes que desea cargar en el letrero. Si desea que su mensaje tenga dos líneas, introduzca el comando <L1> al inicio, y el comando <L2>...
- Page 10 INSTALACIÓN EN MURO 1. Realice marcas de perforación en la superficie 2. Perfore e inserte taquetes y tornillos (no deseada. incluidos). Recuerde que los tornillos deben sobresalir de superficie para poder montar el letrero 3. Coloque los soportes sobre los orificios del 4.
-
Page 11: Especificaciones
ANEXO Consideraciones importantes • Los comandos deben escribirse con mayúsculas. • No deje espacios entre el comando y los mensajes. • Evite utilizar acentos o cualquier tilde. • La letra ñ/Ñ y los signos de apertura ¿¡ no están permitidos. •... - Page 12 1.- Para hacer efectiva la garantía, presente esta póliza y el producto, en donde fue adquirido o en Elec- trónica Steren S.A. de C.V. 2.- Electrónica Steren S.A de C.V. se compromete a reparar el producto en caso de estar defectuoso sin ningún cargo al consumidor. Los gastos de transportación serán cubiertos por el proveedor.
-
Page 13: Led Panel
DIS-150 RGB PROGRAMMABLE LED PANEL V0.0 / 0616v... - Page 14 Before tu use the product, please read carefully this manual to avoid any malfunction. The info in this manual is shown as reference. Because to updates can exist difference. Consult our website www.steren.com.mx to obtain the most actual version of this manual. CAUTIONS •...
- Page 15 CONTENT HOW TO USE Connect the panel The panel turns on automatically...
-
Page 16: Install The Driver
For this test, it was used a PC with Windows 10, may exists variations in the installation 1. Insert the installation CD into the PC. 2. Enter to DIS-150 USB TO RS323 DRIVER and run the SETUP 3. If required, you must give the necessary permissions to the installation. - Page 17 4. When appears the installation window, click INSTALL. 5. Once installed the driver, make click ok.
- Page 18 BEFORE TO START PROGRAMMING… Identify in which USB port of the PC is connected the panel 1. Enter to Control Panel, select Devices Manager. 2. Check the option Ports (COM y LPT). Verify in which port is connected the panel (USB-SERIAL CH340).
- Page 19 Open the programming app 1. In the CD, search the MiniLEDDisplayEditorV2 2. Enter to the Settings menu, and in the Com. Port option: Select the port where is connected the panel 3. Press Save and Exit to save changes.
-
Page 20: Interface Description
START PROGRAMMING YOUR MESSAGES Interface description Send messages Exit Settings Transmitted messages 1. Make click in one of the text lines. 2. Write one of the next commands to color the text: <CR> <CY> YELLOW <CG> GREEN <CC> CYAN <CB> BLUE <CP>... - Page 21 3. After the commands with no spaces between them, enter your message. 4. Select an animation mode. 5. Enable the checkbox File in the messages that you want to appears in the panel. If you wish that your messages have two lines, enter <L1> at the begin- ning, and without leaving spaces enter the <L2>...
- Page 22 MOUNTING INTO THE WALL 1. Make the drill marks into the desired surface. 2. Drill and insert anchors and screws (not included). Remember that the screws should be a little out of the surface to mount the panel 3. Place the supports into the holes of the panel 4.
-
Page 23: Important Considerations
APPENDIX Important considerations • The commands must be written be with capital letter. • Do not let spaces between the command and the messages. • Avoid the use of accents and tildes. • The ñ/Ñ and the overture signs ¿¡ are not allowed. •... - Page 24 Product: RGB programmable led panel Number part: DIS-150 Brand: Steren This Steren product is warranted under normal usage against defects in workmanship and materials to the original purchaser for one year from the date of purchase. CONDITIONS 1. This warranty card with all the required information, invoice or purchase ticket, product box or package, and product, must be presented when warranty service is required.
Need help?
Do you have a question about the DIS-150 and is the answer not in the manual?
Questions and answers