Table of Contents
Advertisement
Available languages
Available languages
Quick Links
Advertisement
Table of Contents

Related Manuals for Steren PAR - 030


Summary of Contents for Steren PAR - 030
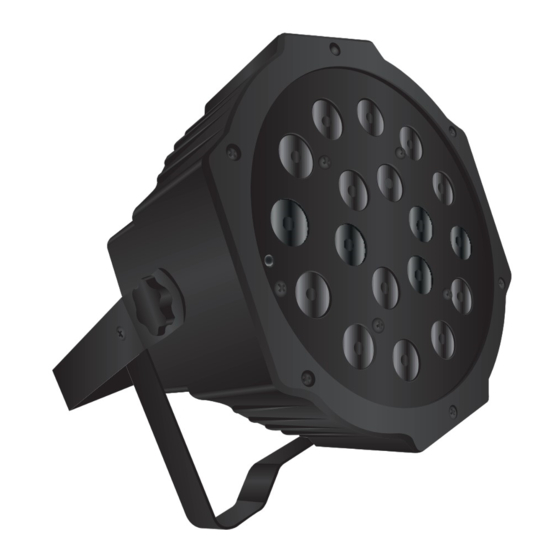
- Page 1 PAR - 030 Lámpara PAR de 18 LED Manual de instrucciones V0.2 0717A...
- Page 2 Por favor lea cuidadosamente este instructivo para evitar cualquier mal funcionamiento. • No intente abrir el equipo; puede ocasionar mal funcionamiento y se anulará la garantía. • Mantenga el equipo fuera del alcance de los niños. • No exponga el equipo a temperaturas extremas. •...
- Page 3 1. MODE: Elegir modo 2. Up/Down: Ajustar valores 3. Enter: Confirmar selección 4. Entrada de señal DMX 5. Salida de señal DMX 6. Micrófono para función audiorrítmica DMX IN DMX OUT MODE DOWN ENTER CONTROLES...
-
Page 4: Conexión Y Operación
Conexión sin controlador DMX Conecte el cable de alimentación a un contacto eléctrico para encender la lámpara. Para apagarla simplemente desconéctela. Modo de uso manual 1. Use el botón MODE para seleccionar una de las modalidades de operación MODE (ver la tabla en la siguiente página). 2. - Page 5 ó i ó i d001 (001 - 512) DMX – modo 3 canales (001 - 512) A001 DMX – modo 7 canales (001 - 255) R255 R (rojo) de oscuros a claros G (verde) de oscuros a claros (001 - 255) G255 (001 - 255) B255...
- Page 6 Para realizar las conexiones, tome en cuenta que este equipo está provisto de conectores XLR de 3 polos con la siguiente con figuración de pines: 1 = tierra, 2 = DMX-, 3 = DMX+. Puede manipular las lámparas individualmente mediante un controlador. Use un cable cannon para conectar la entrada DMX IN de la PAR-030 a la salida del controlador DMX.
- Page 7 Modo 7 canales Canal Función Instrucción Dimmer Dimmer total (RGB) rojo, verde, azul oscuro a brillante total Dimmer Dimmer rojo oscuro a brillante rojo Dimmer Dimmer verde oscuro a brillante verde Dimmer Dimmer azul oscuro a brillante azul Estrobo rojo, verde y azul estrobo total lento a rápido 051 - 100: Cambio entre 8 colores 101- 150: cambio de colores Opción...
-
Page 8: Instalación
1. Atornille el soporte en la lámpara 2. Elija alguna de las dos formas de colocarla: A) Colóquela sobre una superficie plana B) Coloque el soporte en una superficie sólida y estable (muro o techo). INSTALACIÓN... -
Page 9: Especificaciones
Alimentación: 85 - 240 V~ 50/60 Hz 20 W máx. Temperatura de operación: -20 a 45 °C Humedad relativa: 0 - 90% no condensada Consumo: 18 W/h Consumo en espera: 2 W/h ESPECIFICACIONES... -
Page 10: Póliza De Garantía
1.- Para hacer efectiva la garantía, presente esta póliza o factura, comprobante y el producto, en donde fue adquirido o en Electrónica Steren S.A. de C.V. 2.- Electrónica Steren S.A de C.V. se compromete a reparar el producto en caso de estar defectuoso sin ningún cargo al consumidor. Los gastos de transportación serán cubiertos por el proveedor. - Page 12 PAR - 030 18 LED PAR lamp Instruction manual V0.2 0717A...
- Page 13 Please read this instruction manual carefully to avoid any malfunc- tion. • Do not attempt to open the device; May cause malfunction and void the warranty. • Keep the equipment out of the reach of children. • Do not expose the equipment to extreme temperatures. •Do not use or store this equipment in places where leaks exist It may cause malfunction or an electric shock.
- Page 14 1. MODE: Choose Mode 2. Up / Down: Adjust values 3. Enter: Confirm selection 4. DMX Signal Input 5. DMX Signal Output 6. Microphone for audiorrhythmic function DMX IN DMX OUT MODE DOWN ENTER CONTROLS...
-
Page 15: Connection And Operation
Connection without DMX controller Connect the energy cable to an electrical contact to turn on the lamp. To turn it off simply unplug it. Manual mode of use 2. Use the UP and DOWN buttons to adjust the values of the selected mode. MODE CONNECTION AND OPERATION... - Page 16 Modalidad de operación Descripción d001 (001 - 512) DMX – 3 channel mode (001 - 512) A001 DMX – 7 channel mode (001 - 255) R255 R (red) from dark to light G (green) from dark to light (001 - 255) G255 (001 - 255) B255...
- Page 17 To make the connections, note that this equipment is provided Of 3-pin XLR connectors with the following pin configuration: 1 = tierra, 2 = DMX-, 3 = DMX+. You can manipulate the lamps individually using a controller. Use a cannon cable to connect the DMX IN input of the PAR-030 to the output of the DMX controller.
- Page 18 7 channel mode Channel Function Instruction Dimmer Total dimmer (RGB) red, green, dark blue to bright total Dimmer Dark red to bright dimmer Dimmer Dark green to bright dimmer green Dimmer Dark blue to bright dimmer blue Strobo Red, green and blue total strobe slow to fast 051 - 100: Change between 8 colors 101- 150: Change of colors Option...
-
Page 19: Installation
1. Screw the stand into the lamp 2. Choose one of two ways to place it: A) Place it on a flat surface B) Place the stand on a solid, stable surface (wall or ceiling). INSTALLATION... -
Page 20: Specifications
Input: 85 - 240 V~ 50/60 Hz 20 W max. Operating temperature: -20 a 45 °C RH: 0 - 90% non condensed Consumption: 18 W/h Standby power consumption: 2 W/h SPECIFICATIONS... -
Page 21: Warranty
Model: PAR-030 Brand: Steren WARRANTY This Steren product is warranted under normal usage against defects in workmanship and materials to the original purchaser for one year on the other parts from the date of purchase. CONDITIONS 1. This warranty card with all the required information, invoice or purchase ticket, product box or package, and product, must be presented when warranty service is required.
Need help?
Do you have a question about the PAR - 030 and is the answer not in the manual?
Questions and answers