
Related Manuals for Morco FEB-24E


Summary of Contents for Morco FEB-24E
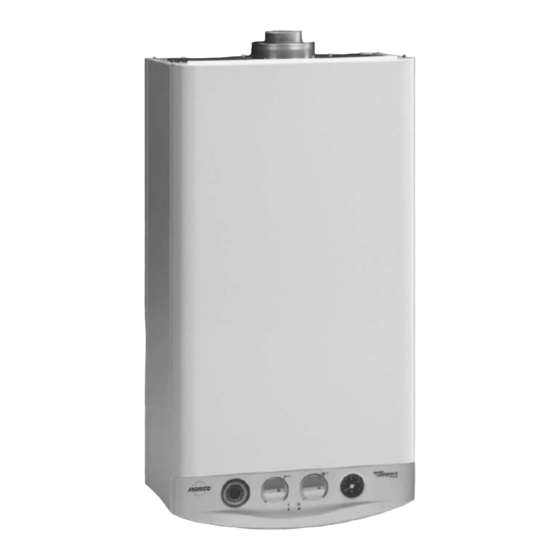
- Page 1 FEB-24E UK SUPERCOMPACT COMBINATION BOILER TECHNICAL & FAULTFINDING GUIDE Morco Products Ltd Riverview Road, Beverley, East Yorkshire, HU17 0LD Telephone 01482 325456 Fax 01482 212869...
- Page 2 ISSUE NUMBER 1.0 Contents 1. Quick Guide to Trouble Shooting 2. Electrical Components 3. Central Heating Logic Programme 4. Explanation of Self Diagnostics 5. Self Diagnostic Flow Charts...
- Page 3 1. Quick Guide to Trouble shooting This section outlines the most common problems and helps to guide you through the rest of the workshop manual. (Read this section first, before you make any adjustments. It will save you time.) CHECK HOT WATER SYSTEM FIRST, BEFORE THE CENTRAL HEATING CIRCUIT HOT WATER SYSTEM Here are some common problems: GAS REGULATORS...
- Page 4 QUICK PLUMBING CHECK A simple solution if cross contamination of hot and cold water is suspected, is to disconnect the hot water outlet pipe from the boiler (under the van), this procedure eliminates faulty mixer valves and crossed pipes from the system and will allow the boiler to operate without any water starvation or back pressure.
- Page 5 Important - Leaks on the heating circuit can occur anywhere on the system. It is important to locate and rectify any leak however small it may be. One way of detecting minute leaks is to pressurise the boiler to 2.0bar. Using toilet or tissue paper, wipe around any joints on the system.
- Page 6 Another associated problem with sluggish radiator performance can be attributed to un- circulated undiluted anti freeze in the boiler and pipe work. This problem is usually worse in cold conditions. In order to cure the problem, try the following method. 1.
- Page 7 AT THE BOILER, REMOVE THE FRONT COVER AND CHECK THE FOLLOWING: The 2 white modulation solenoid wires are connected The spark generator is attached to the gas valve correctly Both the H.T leads from the spark generator are attached correctly ...
- Page 8 fault code has a description as to the cause of the problem in the workshop manual – read this carefully. N.B. there will be a time delay of between a few seconds and 3 minutes between the boiler locking out and showing the self diagnostic fault code. The workshop manual shows each component of the boiler, a functional description and the operating voltages where applicable.
- Page 11 2. Electrical Components Electrical Circuit Diagram...
-
Page 12: Table Of Contents
26. Red LED Lockout/Fault Indicator page 21 30. Time Clock page 21 S1 Boiler Model Selector Bridges (FEB-24E Make) S2 Boiler Model Selector Bridges (FEB-24E Make) S3 Boiler Model Selector Bridges (FEB-24E Open) S4 Gas Type Selector Bridge (Propane Make, Natural Open) -
Page 14: Electrical Filter
The Heading Numbers refer to the Electrical Circuit Diagram 1. ELECTRICAL FILTER This cleans the incoming mains supply voltage to the PCB It is wired as follows: Live In (Brown) Neutral In (Blue) Live Out (Grey) Neutral Out (Grey) Earth to Chassis (Green &... -
Page 15: Spark Generator
SPARK GENERATOR The spark generator is located as a separate component on the gas valve and has two functions. 1. To produce a high tension voltage to produce an ignition spark at the electrode 2. To supply the 230V ac from the PCB to the main gas valve solenoids. (See section 7&8) The 230V ac fed from J8 (brown) is transformed to HT voltage by the spark generator and the maximum duration of the spark is 18 seconds in 3 x 6 second sequences. -
Page 16: Hydraulic Unit 3 Way Valve Microswitch
TEMPERATURE CONTROL P.C.B. The temperature control PCB provides three types of functions for the boiler as follows. 1. on /off selection for domestic hot water / central heating /reset boiler after lock out 2. Temperature selection for either domestic hot water/central heating. 3. -
Page 17: Room Thermostat
Bottom tube from venturi to P1 on air pressure switch (right hand side) provides positive pressure to the air pressure switch. To check for correct operation of the venturi place a manometer on one of test points located on the top of the boiler. With the fan running note the reading on the manometer and then take a 2 reading from the other test point. -
Page 18: Ionisation Electrode
IONISATION ELECTRODE The ionisation electrode is located on the left hand side of the burner and is responsible for detecting that a flame is present across the entire burner. The electrode is reliant on the ability of the flame to conduct an electric current. During combustion large numbers of free electrons and ions are present in the burner flame, which acts as an electrolyte in which a current can flow. -
Page 19: Central Heating Thermistor
To check values by resistance, remove the multi pin plug from the P.C.B and check values on the (black/ black) using 20 Ω range. IMPORTANT. The D.H.W. thermistor on the FEB-24E is the same type as the central heating thermistor used on the FEB-20E. New thermistors are not supplied with the sealing “O”... -
Page 20: Central Heating Low Pressure Switch
23. CENTRAL HEATING LOW PRESSURE SWITCH Located on the on the return pipe (above the pump) the low pressure switch provides protection for the boiler in the event of pressure loss in the primary system. Voltage to the switch (22V dc) is supplied from the PCB junction J4 (left hand red wire) and returns to the PCB J4 (right hand red wire). -
Page 21: Red Led Lockout/Fault Indicator
TIME CLOCK Two different types of time clocks have been fitted to the boiler serial numbers 050512656 onwards have a basic time clock without an override facility, and rely on the tappets on the clock to be in the outward position for the heating to work. Later models incorporate a clock with a built in override switch. - Page 22 PCB. No damage or danger will result from this mistake – the boiler simply will not work. If a FEB-20E PCB is fitted to a FEB-24E boiler the following will occur: 1. With jumpers S1 and S2 open – no green or red LED’s will work 2.
- Page 23 The PCB generates a wide range of different voltages both ac and dc. With care these can be checked from the multi pin sockets as shown on the circuit diagram. In most cases when checking voltages the return (neutral) will be to earth and occasionally in parallel (across the two connections), this applies to the thermistors and the modulating gas valve solenoid.
- Page 24 The voltage generated by the PCB can vary according to the incoming mains voltage and therefore it maybe necessary to select a different range on your multimeter. These are DC voltages which can fluctuate from 19 – 22V DC. It is important to understand that the PCB generates a voltage that requires switching at the relative component in order for the lighting up sequence to activate.
- Page 25 3. Central Heating Logic Programme PLEASE NOTE: With the appliance operating in central heating mode a built in logic programme will monitor the modulation to determine the heat load of the appliance. Subsequent heating cycles will be automatically pre-determined to avoid excessive gas use and un-necessary cycling of the heating system.
- Page 26 Central Heating Logic Programme Figure 1 Figure 2...
- Page 30 4.Explanation of Self-Diagnostics The FEB-24E has a built in self diagnostic fault finding system incorporated into the P.C.B. Should a fault develop on the boiler which could cause an unsafe situation the boiler will “fail safe”. It does this by suspending all operations or “locking-out” and displaying a fault code via the 'red LED' on the control panel.
- Page 31 Flame Fails to Establish / Flame Fails After Ignition 5 seconds - 5 seconds The FEB-24E will attempt 3 times to establish main burner flame, each ignition sequence will last 6 seconds, with a 5 second pause between each sequence. If by the third ignition sequence no flame has been established and detected then the boiler will lock- out and fault code 0 will be displayed.
- Page 32 By following the flow diagram number 6 “NO FLAME”, the point of failure can be diagnosed. POSSIBLE CAUSES No gas Faulty gas valve/ solenoid Faulty spark generator Faulty ionisation electrode Faulty P.C.B Minimum burner / ignition pressure low ...
- Page 33 FAULT 2 Central Heating Pressure below 0.7 bar. 5 seconds - 1 sec - 1 sec - 5 seconds If the pressure in the heating circuit falls below 0.7 bar the low pressure switch contacts open and the boiler is totally disabled until the pressure is increased, or the faulty switch replaced.
- Page 34 POSSIBLE CAUSES Faulty PCB FAULT 5 Flame Supervision Failure, Indicator Light On, Burner Off 5 seconds - 1 sec - 1 sec - 1sec - 1 sec - 1 sec - 5 seconds If a flame is detected 10 seconds after shut down has occurred, the boiler will lock out. During this lock out sequence, both the pump and fan will continue to run.
- Page 35 FAULT 7 Control Panel Failure 5 seconds – seven 1 second flashes - 5 seconds Before the start up sequence commences the PCB carries out a functional check of the potentiometers (temperature controls), if a fault is detected within 5 seconds, the ignition sequence will not take place and lock out will be displayed.
- Page 36 The potential for the printed circuit board /gas valve failure does exist and therefore testing the gas valve soundness after the boiler shuts down should be checked as a matter of routine. Printed circuit boards that have locked with fault 9 can be reused once the software has been re- booted.
- Page 37 POSSIBLE CAUSES Faulty thermistor Thermistor wiring open circuit Poor or faulty connections at thermistor or PCB. The central heating mode of the boiler is not affected by a faulty D.H.W. thermistor. Lock out will only occur during a demand for hot water. Also note that during the lockout sequence (no burner running);...
- Page 38 DEMAND Green led on? Go to 1 DHW works? CH works? Go to 2 CH works? Go to 3 Fan or Pump Go to 4 working? Spark at the Go to 5 electrode? Spark/no flame Go to 6 Flame fails after ignition? Modulates correctly? Go to 7...
- Page 39 1. NO GREEN L.E.D DISPLAYED. Is the main Turn it on and select control on? max DHW temperature. 230V ac before Check electrical the electrical supply to the boiler filter? and the fuse (3 amp). 230V ac after the Replace the electrical electrical filter.
- Page 40 2. HEATING DOESN’T WORK BUT HOT WATER WORKS. Is the central heating service and Turn on the heating temperature selector in the on selector to the maximum position? position. Are the time clock and (room Check for correct operation thermostat if fitted) calling for of the clock/room heat? (Contacts closed) Check for thermostat and the wiring...
- Page 41 3. DHW DOES NOT WORK BUT CH DOES. When you open any Check for blockages in hot tap is there a flow the cold water inlet of at least 2 l/min and that supply is not through the boiler. restricted. With the hot tap running does Check that the boiler is not cross the hydraulic 3 way valve port...
- Page 42 4. FAN OR PUMP WILL NOT WORK. Is the heating pressure above 0.7bar and are the Increase the heating contacts in the low pressure to 1.6 bar or pressure switch are Is the pump replace the central closed. Check for Running? heating low pressure continuity through...
- Page 43 5. FAN WORKS BUT THERE IS NO SPARK. Do the air pressure switch contacts Is there a pressure differential close as the fan runs? Check for of at least 1.4 mbar when 21v dc on both sides of air pressure measured between the two test switch or on J4 at the PCB, black/ points.
- Page 44 6. SPARK WORKS BUT NO FLAME/FLAME FAILS AFTER IGNITION. Is there a 230v Check the ac supply to the wiring & gas valve connections at solenoids, EV1 J8 on PCB, if Regulated gas Flame & EV2 J8 PCB ok replace supply to inlet black/red? main PCB.
- Page 45 7. MODULATION INCORRECT. DHW modulates CH modulates correctly? correctly? Adjust the gas valve to the correct pressures Are the gas Is the boiler Refill and (4.0mbar Minimum) valve pressures vented of air vent the (35.0mbar Maximum) and the CH system heating to 1.6bar pressure set...
- Page 46 8.NOISY. What type of noise? WATER Is the boiler fully vented and the Is the flue restrictor ring fitted on boilers heating circuit pressure at 1.6 bar? with a flue length less than 1 m.? Check the flue pipe is correctly connected and not allowing flue gas to re-circulate.
- Page 47 CHANGING TO A DIFFERENT TYPE OF GAS. ● Adjust the burner pressure to the value indicated in Should a different gas be used from the gas for which the boiler has been equipped, the following parts chart 1. Holding hexagonal nut (E) with the spanner, must be replaced.
- Page 48 Figure 2 Figure 3 Chart Burner pressure mbar Output inch wg (kW) Natural Propane Natural Propane 18.0 35.0 14.0 23.7 Ignition 3.20 Pressure Ø Injectors 1.14 0.75 1.14 0.75 (mm) Gas valve details Figure 6 Figure 4 Figure 5 P1 Maximum power adjustment P2 Minimum Lighting pressure P3 Output for central heating adjustment...
- Page 49 MORCO PRODUCTS LTD MORCO HOUSE RIVERVIEW ROAD BEVERLEY HU17 0LD TEL: 01482 325456 FAX: 01482 212869...
Need help?
Do you have a question about the FEB-24E and is the answer not in the manual?
Questions and answers
Boiler fires up on both hot water and central heating then goes off and red light comes 0n reset boiler and the same thing happens
A Morco FEB-24E boiler could fire up for hot water and central heating, then turn off with a red light indicator due to several possible faults. These include:
1. Lack of gas or ignition problems – indicated by fault code 0 (repeating 5-second red flashes with no 1-second flashes).
2. Water overheating – indicated by fault code 6 (six 1-second red flashes between two 5-second red flashes).
3. Air in the gas pipes – especially after installing a new gas bottle or when the boiler has been idle. This may cause ignition failure until the air is purged.
4. Air pressure switch failure – indicated by fault code 1 and may take up to 3 minutes before lock-out is displayed.
5. Insufficient system pressure – can cause fault code 2 and boiler lock-out.
The red light will stay on until the fault is resolved or the boiler is reset.
This answer is automatically generated
How do you top up a Morco feb-24E
To top up a Morco FEB-24E boiler, increase the pressure in the sealed system if it is low. This is typically done via the filling loop. Ensure the pressure is around 1 bar (14 PSI). If the expansion vessel pressure is low, it can be increased using a bicycle pump through the valve, which is similar to a car or bike valve.
This answer is automatically generated