Yamaha F6A Owner's Manual
Hide thumbs
Also See for F6A:
- Owner's manual (244 pages) ,
- Owner's manual (242 pages) ,
- Owner's manual (134 pages)
Table of Contents
Advertisement
Quick Links
Advertisement
Table of Contents

Subscribe to Our Youtube Channel
Related Manuals for Yamaha F6A


Summary of Contents for Yamaha F6A
- Page 1 FT8D OWNER’S MANUAL 60R-F8199-73-E0...
- Page 2 Read this owner’s manual carefully before operating or working on your outboard motor. Keep this manual onboard in a waterproof bag when boating. This manual should stay with the outboard motor if it is sold.
- Page 3 If there is any To the owner question concerning this manual, please con- Thank you for choosing a Yamaha outboard sult your Yamaha dealer. motor. This Owner’s Manual contains infor- To ensure long product life, Yamaha recom-...
-
Page 4: Table Of Contents
Table of contents Without a rectifier or Rectifier General information ......1 Regulator ........12 Identification numbers record ..1 Propeller selection ......12 Outboard motor serial number ... 1 Start-in-gear protection ....12 Key number ........1 EC label........... 1 Basic components ...... - Page 5 Table of contents Operation ......... 25 Cruising in other conditions... 45 Installation ........25 Maintenance ........47 Mounting the outboard motor ... 25 Clamping the outboard motor... 26 Specifications........ 47 Breaking in engine ......27 Transporting and storing outboard Procedure for 4-stroke models ..27 motor..........
- Page 6 Table of contents Trouble Recovery ......71 Troubleshooting ......71 Temporary action in emergency..74 Impact damage......... 74 Replacing fuse........74 Power tilt will not operate ....75 Starter will not operate ..... 75 Emergency starting engine....76 Engine fails to operate ....77 Emergency engine operation ...
-
Page 7: General Information
Record your outboard motor serial number in the spaces provided to assist you in ordering spare parts from your Yamaha dealer or for reference in case your outboard motor is sto- len. EMU25190... -
Page 8: Emission Control Information
General information Approval label of emission control certifi- cate 1. EC label location 1. Approval label location YAMAHA MOTOR CO.,LTD. Motorfamilie Abgastypenpruf- Nummer 1. EC label location ZMU04492 Fuel requirement label ZMU01696 EMU25221 Emission control information 1. Fuel requirement label location... -
Page 9: Read Manuals And Labels
Read any manuals supplied with the boat. Read all labels on the outboard motor and the boat. If you need any additional information, contact your Yamaha dealer. EMU33831 Warning labels If these labels are damaged or missing, contact your Yamaha dealer for replacements. F6AMH, F8CMH, FT8DMH... - Page 10 General information FT8DE, FT8DEP...
- Page 11 General information ZMU05706 EMU33911 Contents of labels EWM01670 The above warning labels mean as follows. WARNING Read Owner’s Manuals and labels. EWM01690 Wear an approved personal flotation de- WARNING vice (PFD). Emergency starting does not have start- Attach engine shut-off cord (lanyard) to in-gear protection.
- Page 12 General information EMU33841 Electrical hazard Symbols The following symbols mean as follows. Caution/Warning ZMU05666 Remote control lever/gear shift lever operat- ing direction, dual direction ZMU05696 Read Operator’s Manual ZMU05667 Engine start/ Engine cranking ZMU05664 Hazard caused by continuous rotation ZMU05668 ZMU05665...
-
Page 13: Safety Information
Safety information EMU33621 EMU33670 Safety information Engine shut-off cord Attach the engine shut-off cord so that the en- Observe these precautions at all times. gine stops if the operator falls overboard or EMU33630 Rotating parts leaves the helm. This prevents the boat from Hands, feet, hair, jewelry, clothing, PFD running away under power and leaving peo- straps, etc. -
Page 14: Carbon Monoxide
Have an approved personal flotation device distribution can compromise the boats han- (PFD) on board for every occupant. Yamaha dling and lead to an accident, capsizing or recommends that you must wear a PFD swamping. whenever boating. At a minimum, children... -
Page 15: Weather
Safety information Avoid areas with submerged objects or shallow water. Ride within your limits and avoid aggressive maneuvers to reduce the risk of loss of con- trol, ejection, and collision. Take early action to avoid collisions. Re- member, boats do not have brakes, and stopping the engine or reducing throttle can reduce the ability to steer. -
Page 16: Basic Requirements
Basic requirements EMU25540 If knocking or pinging occurs, use a different Fueling instructions brand of gasoline or premium unleaded fuel. EWM00010 EMU25683 WARNING Engine oil GASOLINE AND ITS VAPORS ARE HIGH- Recommended engine oil: LY FLAMMABLE AND EXPLOSIVE! 4-stroke motor oil with a combination of Do not smoke when refueling, and keep the following SAE and API oil classifi- cations... -
Page 17: Installation Requirements
Contact does not exceed the boats maximum horse- your Yamaha dealer. power rating. See the boats capacity plate or EMU25693 contact the manufacturer. -
Page 18: Without A Rectifier Or Rectifier Regulator
Install an optional Rectifier Regulator or use accessories rated to withstand 18 volts or higher with the above models. Consult your Yamaha dealer for details on installing an op- ZMU04606 tional Rectifier Regulator. 1. Propeller diameter in inches... - Page 19 Basic requirements permits the engine to be started only when it is in neutral. Always select neutral before starting the engine.
-
Page 20: Basic Components
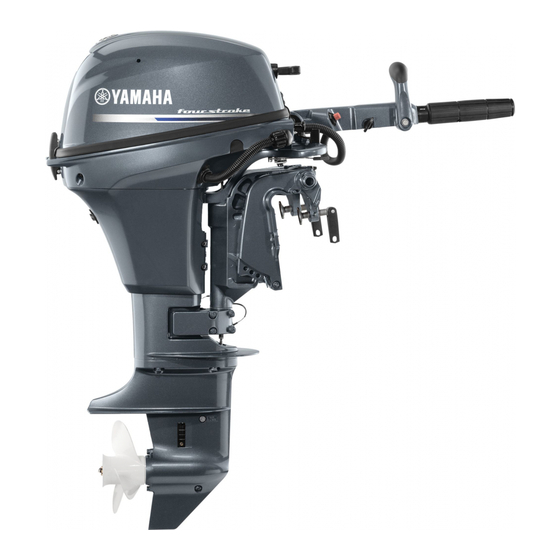
Basic components EMU2579D Main components NOTE: * May not be exactly as shown; also may not be included as standard equipment on all models. F6A, F8C 1. Top cowling 17.Throttle grip 2. Top cowling lock lever 18.Throttle friction adjuster 3. Anti-cavitation plate 19.Tilt lock lever... -
Page 21: Fuel Tank
Basic components FT8D 1. Top cowling 22.Remote control box (side mount type)* 2. Top cowling lock lever 23.Fuel tank 3. Anti-cavitation plate EMU25802 Fuel tank 4. Propeller If your model was equipped with a portable 5. Cooling water inlet 6. Drain screw fuel tank, its function is as follows. -
Page 22: Fuel Joint
Basic components ZMU01992 1. Power tilt switch 1. Air vent screw 2. Remote control lever 2. Fuel gauge 3. Neutral interlock trigger 3. Fuel joint 4. Neutral throttle lever 4. Fuel tank cap 5. Main switch / choke switch EMU25830 Fuel joint 6. -
Page 23: Neutral Interlock Trigger
Basic components EMU26201 EMU26221 Neutral interlock trigger Choke switch To shift out of neutral, first pull the neutral in- To activate the choke system, press in the terlock trigger up. main switch while the key is turned to the “ ”... -
Page 24: Throttle Grip
Basic components EMU25961 Throttle indicator The fuel consumption curve on the throttle in- dicator shows the relative amount of fuel con- sumed for each throttle position. Choose the setting that offers the best performance and fuel economy for the desired operation. 1. -
Page 25: Engine Shut-Off Switch
Basic components cord will pull out the clip, stopping ignition to the engine. This will prevent the boat from running away under power. EWM00121 WARNING Attach the engine shut-off cord to a se- cure place on your clothing, or your arm or leg while operating. -
Page 26: Engine Stop Button
Basic components 1. Cord EMU26011 Choke knob for pull type 2. Clip To supply the engine with the rich fuel mixture required to start, pull out this knob. 1. Cord 2. Clip EMU26070 EMU26001 Manual starter handle Engine stop button To start the engine, first gently pull the handle To open the ignition circuit and stop the en- out until resistance is felt. -
Page 27: Main Switch
Basic components EMU26090 Main switch The main switch controls the ignition system; its operation is described below. “ ” (off) With the main switch in the “ ” (off) posi- tion, the electrical circuits are off, and the key can be removed. “... -
Page 28: Trim Rod (Tilt Pin)
Basic components EMU26261 Trim rod (tilt pin) The position of the trim rod determines the minimum trim angle of the outboard motor in relation to the transom. ECM00660 CAUTION: Do not use the tilt support lever or knob when trailering the boat. The outboard mo- tor could shake loose from the tilt support EMU30530 and fall. -
Page 29: Power Tilt Unit
Basic components mal running position, use an additional support device to secure it in the tilt posi- tion. EMU26361 Power tilt unit This unit tilts the outboard motor up and down and is controlled with the power tilt switch. ECM00630 CAUTION: Do not step on or exert pressure on the power tilt motor. -
Page 30: Low Oil Pressure-Warning Indicator
ECM00090 CAUTION: Do not continue to operate the engine if a warning device has activated. Consult your Yamaha dealer if the problem cannot be located and corrected. EMU30168 Low oil pressure warning If the oil pressure drops too low, the warning 1. -
Page 31: Operation
Operation EMU26902 Installation The information presented in this section is in- tended as reference only. It is not possible to provide complete instructions for every possi- ble boat and motor combination. Proper mounting depends in part on experience and the specific boat and motor combination. EWM01590 WARNING ZMU01760... -
Page 32: Clamping The Outboard Motor
Otherwise the optimum mounting height. Consult your the engine could be completely lost if it Yamaha dealer or boat manufacturer for accidentally falls off the transom. further information on determining the prop- er mounting height. -
Page 33: Breaking In Engine
Your new engine requires a period of ten- board (if packed). For details, consult hours break-in to allow mating surfaces of your Yamaha dealer. moving parts to wear in evenly. Correct break- EWM00650 in will help ensure proper performance and WARNING longer engine life. -
Page 34: Fuel
Check fuel line connections to be sure they are tight (if equipped Yamaha fuel tank or boat tank). Be sure the fuel tank is positioned on a se- cure, flat surface, and that the fuel line is not... -
Page 35: Filling Fuel
Operation EMU27433 from smoking, and keep away from Filling fuel open flames and sparks while loosening EWM00060 the air vent screw. WARNING This product emits exhaust gases which Gasoline and its vapors are highly flam- contain carbon monoxide, a colorless, mable and explosive. -
Page 36: Starting Engine
Operation EMU27506 Manual start models (tiller control) Place the gear shift lever in neutral. ZMU02024 If a steering friction adjuster is provided on your outboard motor, securely attach the fuel line to the fuel line clamp. NOTE: During engine operation place the tank hori- zontally, otherwise fuel cannot be drawn from the fuel tank. - Page 37 Operation Avoid accidentally pulling the cord dur- Pull out / turn the choke knob fully. After ing normal operation. Loss of engine the engine starts, replace / return the power means the loss of most steering knob to the home position. control.
- Page 38 Operation Attach the engine shut-off cord to a se- cure place on your clothing, or your arm or leg. Then install the clip on the other end of the cord into the engine shut-off switch. EWM00121 WARNING Attach the engine shut-off cord to a se- cure place on your clothing, or your arm ZMU02030 or leg while operating.
- Page 39 Operation ZMU01880 Open the throttle slightly without shifting NOTE: using the neutral throttle lever or free ac- It is not necessary to use the choke when celerator. You may need to change the starting a warm engine. throttle opening slightly depending on en- Push in the main switch fully, or the remote gine temperature.
-
Page 40: Warming Up Engine
Until the engine is warm, the idle level and add oil if necessary. Consult speed may be higher than normal. High your Yamaha dealer if the cause for the idle speed can prevent you from shifting low oil pressure-warning indicator can- back to neutral. - Page 41 Operation Move the remote control lever / gear shift lever firmly and crisply forward (for for- ward gear) or backward (for reverse gear) [about 35° (a detent can felt) for re- mote control models]. Be sure to check that the tilt lock lever is in the lock/down position (if equipped) before operating in reverse.
-
Page 42: Stopping Boat
Operation Do not shift into reverse while traveling at planing speeds. Loss of control, boat swamping, or damage to the boat could occur. The boat is not equipped with a separate braking system. Water resistance stops it af- ter the throttle lever is moved back to idle. The stopping distance varies depending on gross weight, water surface conditions, and wind di- rection. -
Page 43: Procedure
Operation After stopping the engine, tighten the air vent screw on the fuel tank cap and set the fuel cock lever or knob to the closed position, if equipped. After stopping the engine, disconnect the fuel line or close the fuel cock if there is a fuel joint or a fuel cock on the boat. -
Page 44: Adjusting Trim Angle For Manual Tilt Models
Operation the possibility of an accident. If the boat begins to feel unstable or is hard to steer, slow down and/or readjust the trim angle. 1. Trim rod Reposition the rod in the desired hole. To raise the bow (“trim-out”), move the rod away from the transom. -
Page 45: Adjusting Trim Angle (Power Tilt Models)
Operation EMU27903 Make test runs with the trim set to different an- Adjusting trim angle (power tilt mod- gles to find the position that works best for els) your boat and operating conditions. EWM00752 EMU27911 WARNING Adjusting boat trim Be sure all people are clear of the out- When the boat is on plane, a bow-up attitude board motor when adjusting the tilt an- results in less drag, greater stability and effi-... -
Page 46: Tilting Up And Down
Operation EWM00221 WARNING Be sure all people are clear of the out- board motor when tilting up and down, Body parts can be crushed between the motor and the clamp bracket when the mo- tor is trimmed or tilted. EWM00250 WARNING Leaking fuel is a fire hazard. -
Page 47: Procedure For Tilting Up (Power Tilt Models)
Operation ECM01640 CAUTION: Do not use the tilt support lever or knob when trailering the boat. The outboard mo- tor could shake loose from the tilt support and fall. If the motor cannot be trailered in the normal running position, use an addi- tional support device to secure it in the tilt position. -
Page 48: Procedure For Tilting Down (Manual Tilt Models)
Operation Models equipped with trim rods: Once the outboard motor is supported with the tilt support lever, press the power trim and tilt switch / power tilt switch “ ” (down) to retract the trim rods. ECM00250 CAUTION: Be sure to retract the trim rods completely during mooring. -
Page 49: Cruising In Shallow Water
Operation Do not rotate the outboard motor 180° and operate the boat in reverse. Place the gear shift in reverse to operate the boat in reverse. Use extra care when operating in re- verse. Too much reverse thrust can cause the outboard motor to lift out of the water, increasing the chance of acci- dent and personal injury. - Page 50 Operation Slightly tilt the outboard motor up. The tilt support bar will lock automatically, sup- porting the outboard motor in a partially raised position. NOTE: This outboard motor has 2 positions for shal- low water cruising. To return the outboard motor to the nor- mal running position, place the gear shift lever in neutral, then place the tilt lock le- Place the tilt lock lever in the release/up...
-
Page 51: Power Tilt Models
EMU32950 the cowling. Power tilt models Cruising in muddy or turbid water Place the remote control lever in neutral. Yamaha strongly recommends that you use the optional chromium-plated water pump kit (available for V4 and large engines) if you use... - Page 52 Operation the outboard motor in water with a lot of sedi- ment in it, such as muddy or other turbid (cloudy) water. Cruising in acidic water Water in some areas can be acidic. After op- erating in such water, flush the cooling pas- sages with fresh water to prevent corrosion.
-
Page 53: Maintenance
Maintenance EMU34520 Transom height L: Specifications F6AMH 562 mm (22.1 in) F8CMH 562 mm (22.1 in) NOTE: FT8DE 557 mm (21.9 in) “(AL)” stated in the specification data below FT8DEP 557 mm (21.9 in) represents the numerical value for the alumi- FT8DMH 557 mm (21.9 in) Transom height X: num propeller installed. - Page 54 Maintenance Ignition system: Trim and tilt system: F6AMH Manual tilt Spark plug (NGK): F8CMH Manual tilt BR6HS-10 FT8DE Manual tilt Spark plug gap: FT8DEP Power tilt 0.9–1.0 mm (0.035–0.039 in) FT8DMH Manual tilt Control system: Propeller mark: F6AMH Tiller F6AMH N F8CMH Tiller F8CMH N FT8DE Remote control...
-
Page 55: Transporting And Storing Outboard Motor
Noise and vibration level: Operator sound pressure level (ICOMIA 39/94 tion using a motor support device such as a and 40/94): transom saver bar. Consult your Yamaha 77.0 dB(A) dealer for further details. Vibration on tiller handle (ICOMIA 38/94): EMU28235 Vibration on tiller handle is under 2.5 m/s²... -
Page 56: Storing Outboard Motor
Remove the engine top cowling and si- It is advisable to have your outboard motor lencer cover. Remove the propeller. serviced by an authorized Yamaha dealer pri- Install the outboard motor on the test or to storage. However, you, the owner, with a tank. -
Page 57: Lubrication
Run the engine at a fast idle for a few with oil is recommended. Contact your minutes in neutral position. Yamaha dealer for information about fogging Just prior to turning off the engine, quickly oil and procedures for your engine. -
Page 58: Flushing Power Unit
Maintenance KEEP BATTERIES AND ELECTROLYTIC FLUID OUT OF REACH OF CHILDREN. Follow the manual of the battery for the han- dling of the battery. Batteries vary among manufacturers. Therefore the following proce- dures may not always apply. Consult your battery manufacturer’s instructions. Procedure Disconnect and remove the battery from the boat. -
Page 59: Cleaning The Outboard Motor
When flushing the engine with the boat in chine servicing, this work should be done the water, tilting up the outboard motor until by your Yamaha dealer or other qualified it is completely out of the water will achieve mechanic. -
Page 60: Maintenance Chart 1
When operating in salt water, muddy, other turbid (cloudy), acidic water, the engine should be flushed with clean water after each use. The “ ” symbol indicates the check-ups which you may carry out yourself. The “ ” symbol indicates work to be carried out by your Yamaha dealer. Initial Every Item Actions... - Page 61 Maintenance Initial Every Item Actions 20 hours 100 hours 300 hours 500 hours (3 months) (1 years) (3 years) (5 years) Fuel filter (disposal Replacement type) Inspection or replace- Fuel pump ment as necessary Fuel/oil leakage Inspection Inspection or replace- Fuel pipe ment as necessary Fuel pipe...
-
Page 62: Maintenance Chart 2
(1 years) (3 years) (5 years) Wire harness connec- Inspection or replace- tions/Wire coupler con- ment as necessary nections Inspection and clean- (Yamaha) Fuel tank ing as necessary EMU34450 Maintenance chart 2 Every Item Actions 1000 hours Guide exhaust/ex- Inspection or replace-... -
Page 63: Greasing
Maintenance EMU28941 Greasing Yamaha grease A (water resistant grease) Yamaha grease D (corrosion resistant grease; for propeller shaft) F6A, F8C... -
Page 64: Cleaning And Adjusting Spark Plug
Maintenance FT8D sparks, which could lead to explosion or EMU28953 Cleaning and adjusting spark plug fire. EWM00560 WARNING When removing or installing a spark plug, be careful not to damage the insulator. A damaged insulator could allow external... -
Page 65: Checking Fuel System
Instead, take correct torque is 1/4 to 1/2 a turn past finger- the outboard motor to a Yamaha dealer. You tight. Have the spark plug adjusted to the cor- should periodically remove and inspect the... -
Page 66: Checking Fuel Filter
Yamaha dealer or other ter is found in the filter, replace it. For replace- qualified mechanic. ment of the fuel filter, consult your Yamaha dealer. Verify whether the idle speed is set to specification. For idle speed specifica- tions, see page 47. - Page 67 Maintenance Be sure the outboard motor is securely drain hole. Then remove the oil filler cap. fastened to the transom or a stable Let the oil drain completely. Wipe up any stand. spilled oil immediately. ECM00970 CAUTION: Do not overfill the oil, and be sure the outboard motor is upright (not tilted) when checking and changing the engine oil.
-
Page 68: Checking Wiring And Connectors
Start the engine and check that no water leaks from the joints between the exhaust cover, cylinder head, and body cylinder. EMU29140 Engine oil leakage Check for oil leaks on the around the engine. NOTE: If any leaks are found, consult your Yamaha dealer. ZMU02058... -
Page 69: Checking Power Tilt System
Check that the tilt rod is free of corrosion or other flaws. Tilt the outboard motor down. Check that the tilt rod operates smoothly. NOTE: Consult your Yamaha dealer if any operation is abnormal. ZMU01897 Checkpoints... -
Page 70: Removing Propeller
Be sure to use a new cotter pin and bend the ends over securely. Otherwise the propeller could come off during opera- tion and be lost. Apply Yamaha marine grease or a corro- sion resistant grease to the propeller shaft. Install the spacer (if equipped), thrust washer, washer (if equipped), and pro- 1. -
Page 71: Changing Gear Oil
Inspect the used oil after it has been the outboard motor falls on you. drained. If the oil is milky, water is getting into the gear case which can cause gear damage. Consult a Yamaha dealer for re- pair of the lower unit seals. -
Page 72: Cleaning Fuel Tank
Maintenance EMU29302 NOTE: Cleaning fuel tank For disposal of used oil, consult your Yamaha EWM00920 WARNING dealer. Gasoline is highly flammable, and its va- With the outboard motor in a vertical po- pors are flammable and explosive. sition, and using a flexible or pressurized... -
Page 73: Inspecting And Replacing Anode(S)
Do not paint anodes, as this would render them ineffective. NOTE: Inspect ground leads attached to external an- odes on equipped models. Consult a Yamaha dealer for inspection and replacement of inter- nal anodes attached to the power unit. ZMU03231 Remove the screws holding the fuel joint assembly. -
Page 74: Checking Battery (For Electric Start Models)
Maintenance DO NOT SMOKE when charging or han- dling batteries. KEEP BATTERIES AND ELECTROLYTIC FLUID OUT OF REACH OF CHILDREN. ECM00360 CAUTION: A poorly maintained battery will quickly deteriorate. Ordinary tap water contains minerals harmful to a battery, and should not be EMU29320 used for topping up. -
Page 75: Connecting The Battery
Maintenance 2. Black cable NOTE: 3. Battery Consult a Yamaha dealer when charging or EMU29370 re-charging batteries. Disconnecting the battery Disconnect the BLACK cable from the NEGA- EMU29332 Connecting the battery TIVE (-) terminal first. Then disconnect the EWM00570 RED cable from the POSITIVE (+) terminal. - Page 76 Maintenance ZMU01943...
-
Page 77: Trouble Recovery
Yamaha outboard motors. Therefore Q. Has fuel pump malfunctioned? some items may not apply to your model. A. Have serviced by a Yamaha dealer. If your outboard motor requires repair, bring it to your Yamaha dealer. Q. Are spark plug(s) fouled or of incorrect... - Page 78 A. Return to normal operating position. A. Fill tank with clean, fresh fuel. Q. Is carburetor clogged? Q. Is fuel filter clogged? A. Have serviced by a Yamaha dealer. A. Clean or replace filter. Q. Is fuel joint connection incorrect? Q. Have ignition parts failed? A.
- Page 79 Q. Is fuel system obstructed? Q. Is water pump or thermostat faulty? A. Check for pinched or kinked fuel line or oth- A. Have serviced by a Yamaha dealer. er obstructions in fuel system. Q. Is there excess water in fuel filter cup? Q.
-
Page 80: Temporary Action In Emergency
Be sure to use the specified fuse. An in- Q. Is steering pivot loose or damaged? correct fuse or a piece of wire could allow A. Tighten or have serviced by a Yamaha excessive current flow. This could cause dealer. -
Page 81: Power Tilt Will Not Operate
Trouble Recovery EWM01022 WARNING Use this procedure only in an emergen- cy to return to the nearest port for re- pairs. When the emergency starter rope is used to start the engine, the start-in- gear protection device does not operate. Make sure the remote control lever is in neutral. -
Page 82: Emergency Starting Engine
Trouble Recovery Do not touch the ignition coil, spark plug wire, spark plug cap, or other electrical components when starting or operating the motor. You could get an electrical shock. EMU29562 Emergency starting engine Remove the top cowling. Remove the start-in-gear protection ca- ZMU01880 ble from the starter, if equipped. -
Page 83: Engine Fails To Operate
EMU29760 Treatment of submerged motor If the outboard motor is submerged, immedi- ately take it to a Yamaha dealer. Otherwise some corrosion may begin almost immediate- If you cannot immediately take the outboard motor to a Yamaha dealer, follow the proce- dure below in order to minimize engine dam- age. - Page 84 YAMAHA MOTOR CO., LTD. Printed in France April 2007–0.3 × 1 CR...
Need help?
Do you have a question about the F6A and is the answer not in the manual?
Questions and answers