
Related Manuals for KTM S5-E


Summary of Contents for KTM S5-E
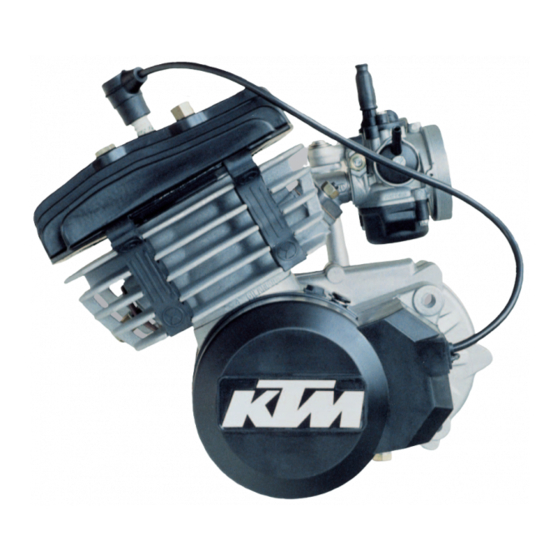
- Page 1 M O T O R C Y C L E S REPARATURANLEITUNG MOTOR REPAIR MANUAL ENGINE MANUEL DE RÉPARATION MOTEUR S5-E / S5-T / S5-GS ´97 3.97 ART. NR. 3.205.19...
- Page 2 DAMAGE OF MOTORCYCLE COMPONENTS OR RENDER MOTORCY- CLES UNFIT FOR TRAFFIC ! „NOTE” POINTS OUT USEFUL TIPS. ORIGINAL KTM SPARE PARTS SE ONLY WHEN REPLACING PARTS HE ENGINE IS ONLY ABLE TO MEET USER EXPECTATIONS IF THE MAINTENANCE WORK IS PERFORMED REGULARLY AND PROFESSIONALLY...
-
Page 3: Table Of Contents
INDEX Page SPECIAL TOOLS ........3 REMOVING THE ENGINE ......3 DISASSEMBLING THE ENGINE . -
Page 4: Special Tools
1.0 SPECIAL TOOLS FIG. DESCRIPTION PART NR. Holding wrench for flywheel and clutch hub 151.12.021.000 Extractor for clutch hub and primary gear 160.12.005.000 Loctite 242 blue 6.899.785 Extractor for flywheel 151.12.009.000 Engine holder 450.29.001.000 2.0 REMOVING THE ENGINE – Clean motorcycle –... -
Page 5: Disassembling The Engine
3.0 DISASSEMBLING THE ENGINE – Secure the engine with two screws (M8 x 45) in the engine holder. 3.1 Draining the gear oil – Remove the gear oil drain plug and the seal ring and drain the gear oil. 3.2 Ignition –... -
Page 6: Engine Sprocket
– Mount the extractor and pull off the flywheel. – Take the woodruff key out of the crankshaft. CAUTION EVER USE A HAMMER OR A SIMILAR TOOL ON THE FLYWHEEL – Remove the 3 screws and take off the base plate. 3.3 Engine sprocket –... -
Page 7: Piston
– Lift the cylinder off the studs. ’ HEN REMOVING THE CYLINDER MAKE SURE THAT THE PISTON DOESN T HIT THE HOUSING 3.5 Piston – Place the piston on the wooden fork. – Remove the piston pin locking devices and push the piston pins out of the piston without applying force. -
Page 8: Clutch, Primary Drive
3.7 Clutch, primary drive – Remove all 7 screws and lift off the clutch cover and the gasket. HEN REMOVING THE CLUTCH COVER KEEP IN MIND THE STOP DISK OF THE KICK STARTER SHAFT CAN STICK TO THE INSIDE OF THE CLUTCH COVER –... -
Page 9: Separating The Two Housing Halves
3.8 Separating the two housing halves – Remove all 7 housing screws and clamp the engine holder together with the engine sideways into the vise in such a way that the clutch side of the engine is on top. – Lightly tap the right housing half with a rubber hammer until the housing half can be removed. -
Page 10: Work On Individual Components
4.0 WORK TO BE PERFORMED ON INDIVIDUAL COMPONENTS NGINE HOUSING EAD THROUGH THE FOLLOWING SECTION BEFORE COMMENCING WORK HEN DETERMINE IN WHICH ORDER THE PARTS MUST BE MOUNTED TO ENSURE THAT THE HOUSING HALVES NEED NOT BE HEATED MORE THAN ONCE TO INSERT THE BEARINGS EFORE PRESSING OR IF NECESSARY HAMMERING OUT THE BEARINGS... -
Page 11: Piston
– The piston is measured at the piston skirt at a right angle to the piston pin as shown in the illustration. – The piston fitting clearance is the cylinder diameter minus the piston diameter. (S5-E) : . 0.070 (0.0028... -
Page 12: Crankshaft
4.5 Crankshaft When intending to reuse the crankshaft, check the crankshaft journals for runout. . 0.05 (0.002 RANKSHAFT JOURNAL RUNOUT Check the radial and axial clearance of the conrod bearing. . 0.020 (0.001 ADIAL CLEARANCE . 0.045 (0.0018 XIAL CLEARANCE 4.6 Reed valve housing (S5-T) –... -
Page 13: Clutch Cover
4.7 Clutch cover – Use a suitable pair of pliers to remove the circlip from the kickstarter shaft. – Pull the ratchet gear together with the ratchet gear spring off the kickstarter shaft (kickstarter shaft must be turned from outside). –... -
Page 14: Preassembling Of Kickstarter Shaft
4.8.1 Preassembling the kickstarter shaft – Mount the kickstarter shaft in a vise with the teeth of the ratchet gear down (use protective jaws). – Mount the kickstarter gear with the teeth for the ratchtet gear showing down- wards. – Mount disk and circlip with the sharp edge facing up. -
Page 15: Assembling The Engine
5.0 ASSEMBLING THE ENGINE 5.1 Mounting the crankshaft – Place left-hand housing half in engine holder. – Grease the shaft seal ring of the crankshaft. – Heat the left housing half to approximately 100° C and mount the crankshaft. CAUTION EVER APPLY FORCE WHEN MOUNTING THE CRANKSHAFT T A HOUSING TEMPERATURE OF 100°... -
Page 16: Mount And Set The Ignition Coil
– Insert the woodruff key into the crankshaft and slide the flywheel onto the crankshaft. – Mount washer and hexagon nut. – Hold the flywheel with the holding wrench and tighten the hexagon nut with 30 Nm (22 ft.lb.). 5.6 Mount and set the ignition coil –... -
Page 17: Piston, Cylinder
– Put on a new cylinder head gasket and mount the cylinder head. – Mount the 4 nuts of the cylinder head and tighten with 10 Nm (7.5 ft.lb.). – Twist in and tighten the spark plug. S5-E, T THE ENGINE THE HIGH HEXAGON NUT MUST BE MOUNTED TO THE STUD ON THE RIGHT FRONT SIDE 5.9 Primary drive, clutch... -
Page 18: Kickstarter
– Degrease cone and thread of the crankshaft and slide the washer onto the crankshaft. – Apply Loctite 242 to the crankshaft thread. – Mount clutch hub, washer and hexagon nut. – Hold the clutch hub with the holding wrench and tighten the nut with approxi- mately 35 Nm (25 ft.lb.). -
Page 19: Gear Oil
5.11 Gear oil – Mount the drain plug with a new seal ring and tighten with 10 Nm (7.5 ft.lb.). – Remove the filling plug on the clutch cover and fill in 0.25 l gear oil SAE 80. 6.0 INSTALLING THE ENGINE –... -
Page 22: Periodic Maintenance Schedule
8.0 PERIODIC MAINTENANCE SCHEDULE 50 SXR rider dealer 3.97 ● Check transmission oil level ● Change transmission oil ● Check spark plug and electrode gap ● ● Check carburetor for tight fit on the intake flange ● ● Drain and clean carburetor float chamber ●... - Page 23 K T M - S P O R T M O T O R C Y C L E A K T I E N G E S E L L S C H A F T A - 5 2 3 0 M a t t i g h o f e n • P o s t f a c h 9 1 • A u s t r i a I n t e r n e t : h t t p : / / w w w .
Need help?
Do you have a question about the S5-E and is the answer not in the manual?
Questions and answers