Samsung HT-DL100 Instruction Manual
Hide thumbs
Also See for HT-DL100:
- Service manual (71 pages) ,
- Instruction manual (48 pages) ,
- User manual (48 pages)

Related Manuals for Samsung HT-DL100


Summary of Contents for Samsung HT-DL100
- Page 1 DIGITAL HOME THEATER SYSTEM HT-DL100 Instruction Manual Volume Standby V I D E O Function Open/close Phones COMPACT COMPACT DOLBY D I G I T A L DIGITAL AUDIO DIGITAL VIDEO V I D E O...
-
Page 2: Safety Warnings
Safety Warnings CLASS 1 LASER PRODUCT CLASS 1 LASER PRODUCT KLASSE 1 LASER PRODUKT This Compact Disc player is classified as a CLASS 1 LUOKAN 1 LASER LAITE LASER product. KLASS 1 LASER APPARAT PRODUCTO LASER CLASE 1 Use of controls, adjustments or performance of CAUTION procedures other than those specified herein may result RISK OF ELECTRIC SHOCK. -
Page 3: Precautions
Precautions Volume Standby V I D E O MIC Vol . Function OPEN/CLOSE Phones Setting up Ensure that the mains supply in your house complies whit that indicated on the identification sticker located at the back of your play. Install your player horizontally, on a suitable base (furniture), with enough space around it for ventilation (7~10cm). - Page 4 DVD (Digital Versatile Disc) offers fantastic audio and video, thanks to Dolby Digital surround sound and MPEG-2 video compression technology. Now you can enjoy these realistic effects in the home, as if you were in a movie theater or concert V I D E O hall.
-
Page 5: Table Of Contents
Contents Safety Warnings Precautions Description Remote Control Unit Connections Before using the DVD Player DVD Playback Forward/Reverse Searching Slow Playback/checking the Remaining Time Repeat Playback Using Disc Menu/Title Program Playback Selecting the Audio Language/ Subtitle Language Various DVD Functions ¥ To erlarge an image ¥... -
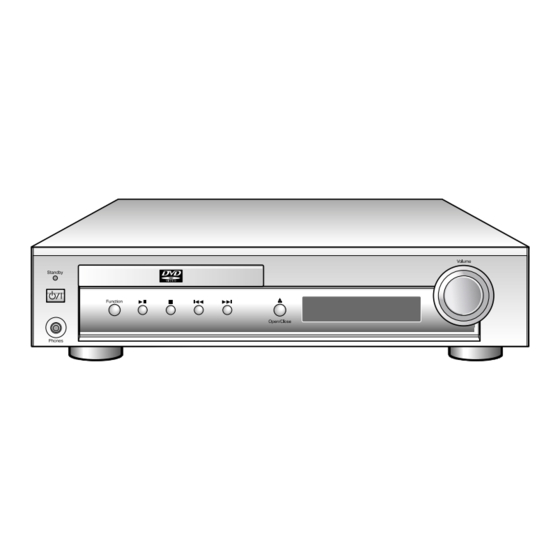
Page 6: Description
Description Front Panel Function button Play/Pause ( ) button Stop ( ) button Tuning Down & Skip ( ) buttons Tuning up & Skip ( ) buttons Power ( ) button Standby indicator Volume control Volume Standby V I D E O Function Open/Close Phones... - Page 7 Rear Panel External Digital Component External Video Component Input Connector Input Connectors External Audio Component Input Connector Use these for connections to external equipment capable of digital output. AM Antenna Connector FM Antenna Connector S-Video Output Connector 5.1 Channel Speaker If the TV is equipped with an S-Video input connector (S-VIDEO IN), connect it Output Terminals...
-
Page 8: Remote Control Unit
Remote Control Unit DVD POWER button TV Power button Channel TV Channel Selection button DVD button TV Volume Control button TUNER TUNER button Band V/VIDEO TUNER TV/VIDEO button Band AUX button Title Menu Channel Title Play/Pause button Title button Audio Subtitle Volume MO/ST... - Page 9 Range of Operation of the Remote Control Insert Remote Batteries The remote control can be used up to approximately 23 feet/7 meters in a straight line. Remove the battery cover on It can also be operated at a horizontal angle of the back of the remote by up to 30°...
- Page 10 Place and Connect Speakers Speaker Place ment Arrange the 6 speakers as shown in your listening area. Front Speakers : Set the front speakers so that they are aligned at ear level and at a horizontal angle of 45 degrees to the primary listening area.
- Page 11 Connect Antenna AM Loop Antenna ANTENN ANTENNA VIDEO S-VIDEO 1. Complete assembly of the supplied AM loop antenna by rotating the base and snapping it into place. 2. Connect the two wires from the AM loop antenna to the AM ANTENNA connector on the back panel.
-
Page 12: Connections
Connections AUX Connections Use these connections if necessary. External Digital Components For connection to external Picture can be shown equipment with digital only when the TV’s video output. output connector (VIDEO Example: CD recorders, MD OUT) is connected to the VIDEO IN (Mini Disc) D/A converters or AUX IN connector. -
Page 13: Before Using The Dvd Player
If this message appears on the TV screen while buttons are being operate, the operation is not possible with that particalar disc. ¥ If your TV model is not SAMSUNG, refer to “Remote Control Unit Setup” on page 26. TV System... -
Page 14: Dvd Playback
DVD Playback Press the Open/Close button to open the disc tray. OPEN/CLOSE ¥ The button is located only on the Front Panel of the player (not on the remote). Insert a DVD disc. Playback starts automatically. V I D E O ¥... - Page 15 Display Using the On-Screen Display Press the Display button on the remote. Display 00:00:00 V I D E O TITLE indicator DVD indicator TITLE ELAPSED CHAPTER indicator indicator Display V I D E O ANGLE indicator REPEAT indicator SUBTITLE LANGUAGE indicator DISC TYPE indicator AUDIO LANGUAGE...
-
Page 16: Forward/Reverse Searching
Forward/Reverse Searching During playback, you can search quickly through a chapter or track for a specific scene or tune. High-Speed Playback Press the button. Each time the button is pressed Each time the button is pressed PLAY PLAY Skipping through a Chapter Press the button. -
Page 17: Slow Playback/Checking The Remaining Time
Slow Playback/Checking the Remaining Time Slow Playing Slowly Press the Slow button. Each time the Slow button is pressed SLOW 1/2 The slow playback speed changes and the selections (1/2X, 1/4X, 1/8X, 1/16X and normal play) are repeated. SLOW 1/4 PLAY When playing a VCD or CD, the reverse slow playback will... -
Page 18: Repeat Playback
Repeat Playback Repeat playback allows you to repeat a chapter, title, or track. Repeat Playing Repeatedly Press the Repeat button. Each time the Repeat button is pressed REPEAT : CHAPTER REPEAT : ONE REPEAT : TITLE REPEAT : DISC REPEAT OFF REPEAT OFF Repeat playback operation is not possible with version 2.0 VCD discs if PBC is turned on. -
Page 19: Using Disc Menu/Title
Using Disc Menu/Title Menu To Select the Disc Menu You can use the menus for the audio language, subtitle language, profile, etc. DVD menu contents differ from disc to disc. Press the Enter button. Use the Up/Down ( ) or Press the Menu button during playback. -
Page 20: Program Playback
Program Playback Use this function with video and music CDs to play the tracks in a particular order. Program To Program Tracks in a particualr order Press the Program button. Press the Enter button then Press the Enter button, then use the Number buttons to use the Number buttons to select the desired title. - Page 21 To Change the Program Press the Up/Down ( Press the Enter button to Press the Clear button and button to select the track select the title or chapter to be then press the Number number to be changed. changed. buttons. ¥...
-
Page 22: Selecting The Audio Language/Subtitle Language
Selecting the Audio Language/Subtitle Language Audio Selecting the Audio Language MO/ST Press the Audio button. ¥ Depending on the number of languages recorded on a DVD disc, a different audio language (KOREAN, ENGLISH, JAPANESE, etc.) is selected each time the button is pressed. V I D E O ¥... -
Page 23: Various Dvd Functions
Various DVD Functions TV System To enlarge an image Zoom Press the Zoom button. ¥ Only 2X zoom ¥ Images can be enlarged 2x and 4x. operation is ¥ During DVD playback, press the possible during ZOOM button to zoom in VCD playback. -
Page 24: System Setup
System Setup You can use the DVD player's Setup function to select the TV screen ratio, rating limit, or digital output mode. Setup To Set up the System From the stop mode, press Press the Left/Right ( Press the Up/Down ( the Setup button. - Page 25 TV SCREEN(TV SCREEN RATIO) Select when you want to watch a 16:9 screen ratio DVD movie on a TV with a 4:3 ratio screen. You can see the full 16:9 picture, but black bars will appear at the 4:3LB top and bottom of the screen. LANGUAGES SYSTEM 4:3PS...
-
Page 26: Setting Up The Language Features
Setting up the Language Features Using the DVD player's Setup function, you can customize the Menu Language, Subtitle Language, and Disc Menu Language. Setup To set up the language feature Press the Up/Down ( / ) button to select Press the Setup button from the stop mode. the desired item. -
Page 27: Controlling A Tv With The Remote
Volume Number(0~9)button MO/ST Display Return Go To TV/VIDEO DVD/CD/TUNER Down Tuning Code Brand Code Brand Enter SAMSUNG 1 SHARP 3 SHARP 2 ZENITH Volume SONY LG 3 DSP Mode Effect Mute Sleep MAGNAVOX DAEWOO 8 AH59-00132A Sound Edit SPK Mode... -
Page 28: Speaker Setup
Speaker Setup Sound Edit To set up Speaker Balance Press the Sound Edit button. Use the Left/Right ( ) button to make adjustment. ¥ Each time the button is pressed the selection switches as shown below. Example: 5.1CH Sound Setup PRO LOGIC D I G I T A L OFF, range of -6~0... - Page 29 Test Tone Speaker Setting Methods Press the TEST TONE button. ¥ Depending on the number of languages recorded on a DVD disc, a different audio language (KOREAN, ENGLISH, JAPANESE, etc.) is selected each time the button is pressed. Test Tone To End the Language Features Setup ¥...
- Page 30 Speaker Setup SPK Mode Setting up Speaker Mode and Delay Time Press the SPK Mode button. ¥ Each time the button is pressed, a different mode selection is displayed on the front panel display as shown below. DIGITAL F SP SMALL Front speaker: Small You can select tither C-SP SMALL or DIGITAL...
- Page 31 To set the delay time (A)=Df-Dc Ideal Center Speaker Position When 5.1 Channel Surround Sound is played, ß Distance of (A) Value(ms) you can enjoy the best sound if the distance between you and each speaker is the same. You can set Delay Time in the Center/Rear Speaker to customize the sound to the acoustics of your room.
-
Page 32: Listening To The Radio
Listening to the Radio You can listen to the chosen band (FM or AM broadcast stations) by using either the automatic tuning or manual tuning operation. Remote Press the Tuner(Band) Select a broadcast station. Control button. Unit ¥ The selection toggles back When the button is pressed, a preset Auto Station 1... -
Page 33: Presetting Stations
Presetting stations A total of 30 broadcast stations (FM and AM combined) can be preset. Example: Presetting FM 89.1 in the memory Use the Select the MANUAL by Press the Tuner(Band) button button to tune into 89.1 pressing the Stop ( ) button and select the FM band. -
Page 34: Dsp/Sleep Functions
DSP/Sleep Function DSP Mode To Select a DSP Press the DSP Mode button. What is a DSP? ¥ The DSP mode toggles in the following order each time the DSP button is pressed: DSP synthetically recreates the sound HALL THEATER PAVILION field to achieve a more realistic, DANCE CLUB... -
Page 35: Using The Microphone
Using the Microphone (OPTION) You can have fun singing along by using a microphone (not supplied) input while VCD, CD, or radio music is playing in background. MICROPHONE Connect the microphone to the VOLUME control MICROPHONE jack on the main Turning the control unit. -
Page 36: Troubleshooting
Troubleshooting Problem Check ¥ Is the disc installed with the label side facing up? The disc tray does not ¥ Is the power cord plugged securely into the power outlet? open. ¥ Turn off the power to the unit by pressing the Power ( ) button and turn it back on. - Page 37 Problem Check ¥ Is the TV power turned on? ¥ Are the video cables properly connected? ¥ The disc revolves but no ¥ Is it the player in PAUSE mode? picture appears. ¥ Is your TV’s video format (NSTC/PAL) set correctly? Press the NTSC/PAL button once again to change the current selection.
-
Page 38: Cautions On Hadling And Stroing Discs
Cautions on Handling and Storing Discs Small scratches on the disc may reduce sound and picture quality or cause breaks in playback. Be especially careful not to scratch discs when handling them. Handling and Storing Discs When you get fingerprints or dirt on the disc, clean it with a mild detergent diluted in water and wipe with a soft cloth. -
Page 39: Disc Type And Protection
Disc Type and Protection Usable Discs Recording Disc Types Disc Size Max. Playing Time Marks Types Approx. 240 min. (Single-sided) 12cm Approx. 480 min. (Double-sided) Audio + Video V I D E O Approx. 160 min. (Single-sided) Approx. 160 min. (Double-sided) 12cm 74 min. -
Page 40: Specification
Specification HT-DL100 Power Supply 120V, 60Hz Power Consumption 120W Weight 6.5Kg Dimensions W 370mm x D 300mm x H 80mm Operating Temperature Range +5°C~+35°C Operating Humidity Range 10%~75% Receiving Frequency 87.5~108MHz Usable Sensitivity 10dB S/N Ratio 60dB Distortion 0.5% Channel Separation... - Page 41 5.1ch speaker system Speaker system Front/Center/Rear speaker Subwoofer speaker Impedance 6Ω x 5 3Ω Frequency range 150Hz~18KHz 45Hz~250Hz Output sound pressure level 87dB/W/M 86dB/W/M Rated input Maximum input 140W Front/Rear 103mm x 150mm x 120mm Dimensions 250mm x 403mm x 335mm Center 197mmx 103mmx 120mm Front/Rear...
-
Page 42: Reference
Reference Note on Terminology Recorded onto some DVD discs are scenes which have been simultaneously shot from a number ANGLE of different angles (the same scene is shot from the front, from the left , from the right , etc.). With such discs, the Angle button can be used to change the angle of view for specific scenes. - Page 43 AH68-00988B...
Need help?
Do you have a question about the HT-DL100 and is the answer not in the manual?
Questions and answers