Table of Contents
Advertisement
Quick Links
Advertisement
Table of Contents

Related Manuals for CONVEY-ALL 1214-GN


Summary of Contents for CONVEY-ALL 1214-GN
- Page 1 OPERATOR’S MANUAL TRANSFER CONVEYOR 1214-GN • 1615 • 1616-RC • 2218 • 2218-RC...
- Page 2 SIGN-OFF FORM Meridian Manufacturing Inc. follows the general Safety Standards specified by the American Society of Agricultural Engineers (ASAE), and the Occupational Safety and Health Administration (OSHA). Anyone who will be operating and/or maintaining the tube conveyor must read and clearly understand ALL Safety, Operating and Maintenance Information presented in this manual.
- Page 3 The Dealer must fill out this form, and be signed by both the Dealer and Buyer at the time of delivery. Scan or photograph the completed form (must be legible), and email it to: register@convey-all.com A copy of this form may also be mailed to the above address.
- Page 4 This page intentionally left blank...
-
Page 5: Table Of Contents
Operator’s Manual: Transfer Conveyor TABLE OF CONTENTS DESCRIPTION PAGE Section 1: INTRODUCTION ..... . . 1-1 1.1 Operator Orientation ..... . . 1-1 1.2 Serial Number Location . - Page 6 Operator’s Manual: Transfer Conveyor TABLE OF CONTENTS DESCRIPTION PAGE 3.8 Operating Hints ......3-13 3.9 Transportation .
-
Page 7: Section 1: Introduction
Operator’s Manual: Transfer Conveyor Section 1: INTRODUCTION Congratulations on your choice of a Convey-All™ Transfer Conveyor. It is designed to efficiently move grain, pulse crops or granular material between a truck, trailer, storage facility and another conveyor. Convey-All™ is a member of the Meridian Manufacturing Inc. family. The equipment we design and manufacture meet the exacting standards of the agricultural industry. - Page 8 Operator’s Manual: Transfer Conveyor This page intentionally left blank 01.2015...
-
Page 9: Section 2: Safety
Operator’s Manual: Transfer Conveyor Section 2: SAFETY The Safety Alert Symbol means: ATTENTION! BECOME ALERT! 3 Big Reasons why safety The Safety Alert Symbol YOUR SAFETY IS INVOLVED! is important to you: identifies important safety • Accidents Disable and Kill messages on the conveyor •... -
Page 10: Safety Orientation
2.1 SAFETY ORIENTATION 2.2 GENERAL SAFETY YOU are responsible for the SAFE operation • Read and understand the Operator’s and maintenance of your Convey-All™ Transfer Manual and all safety decals before Conveyor. Be sure that everyone who will operating, maintaining, adjusting or operate, maintain or work around it, is familiar unplugging the conveyor. -
Page 11: Equipment Safety Guidelines
Operator’s Manual: Transfer Conveyor 2.3 EQUIPMENT SAFETY GUIDELINES 2.4 SAFETY DECALS • Safety of the operator and bystanders is • Keep safety decals clean/legible at all times. one of the main concerns in designing and developing this conveyor. However, every year •... -
Page 12: Safety Decal Location
Operator’s Manual: Transfer Conveyor 2.5 SAFETY DECAL LOCATION The following illustrations show the general location of decals on this conveyor. The position of decals may vary depending on the machine’s options. Decals are not shown at actual size. 3630000010 3617000005 Fig 2 - 1615 Conveyor 3630000004 REMEMBER - If safety decals have been damaged, removed, become illegible, or parts were replaced... -
Page 13: Work Preparation
Operator’s Manual: Transfer Conveyor 2.6 WORK PREPARATION • Clear working area of stones, branches or • Never operate the conveyor and its engine until hidden obstacles that might be hooked or you have read this manual, and understand snagged, causing injury or damage. the information. -
Page 14: Maintenance Safety
Operator’s Manual: Transfer Conveyor 2.8 MAINTENANCE SAFETY 2.9 TIRE SAFETY • Review Section 4: Service and Maintenance, • Failure to follow procedure when before maintaining or operating the conveyor. mounting a tire on a wheel or rim can produce an explosion and may •... -
Page 15: Engine Safety
Operator’s Manual: Transfer Conveyor 2.11 ENGINE SAFETY • Do not tamper with governor springs, governor • Read and understand the operating links or other parts which may increase the manual provided with the engine. governed engine speed. • Use proper tools to service engine. •... -
Page 16: Operating Safety
Operator’s Manual: Transfer Conveyor 2.12 OPERATING SAFETY 2.13 HYDRAULIC SAFETY • Anyone who will be operating this • Always place hydraulic controls in neutral. conveyor, or working around it, must Then relieve pressure in hydraulic system read this manual. They must know before maintaining or working on machine. -
Page 17: Electrical Safety
• Turn machine OFF, shut down and lock out • Do not drink and drive. power supply (safety lock-out devices are available through your Convey-All dealer parts • Be a safe and courteous driver. Always yield department) and wait for all moving parts to... - Page 18 Operator’s Manual: Transfer Conveyor This page intentionally left blank 2-10 Revised 02.2019...
-
Page 19: Section 3: Operation
The Convey-All™ Transfer conveyor is designed to efficiently move grain, pulse crops, or granular material from under a truck, railcar or storage facility to another conveyor. Power is provided by a gas engine, electric or hydraulic motor. -
Page 20: Machine Components
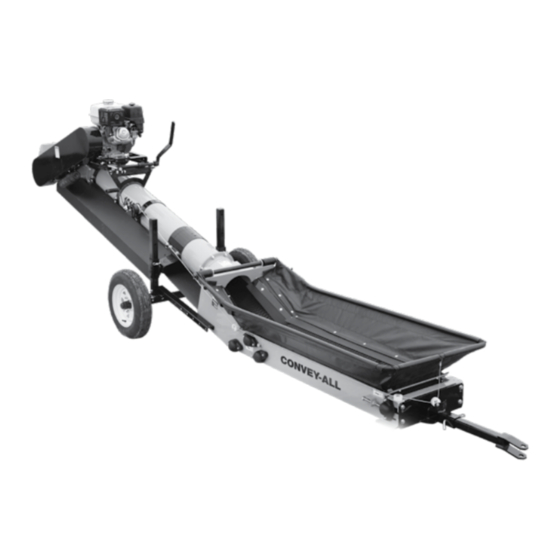
Operator’s Manual: Transfer Conveyor 3.1 MACHINE COMPONENTS The main components, and their general location The Transfer Conveyor is portable and low are listed below: enough to fit under trucks or low storage facilities. The “RC” models have an extra low a. -
Page 21: Components And Controls
Operator’s Manual: Transfer Conveyor 3.2 COMPONENTS AND CONTROLS Before starting to work, all operators should familiarize themselves with the location and function of the components and controls on your specific unit. Options and location may vary depending on model. Gas Engine: Read the engine manufacturer’s manual for more detailed instructions. - Page 22 A variety of switches can be used. Install an ON/ OFF switch next to the motor for the convenience of the operator. Minimum Power Requirements: Fig 8 - Hydraulic motor, hoses not attached MODEL ELECTRIC HP 1214-GN 1615 7.5hp 1616-RC 7.5hp 2218 10hp...
- Page 23 Operator’s Manual: Transfer Conveyor Chevron Belt with Alligator® Lacing: Convey-All™ conveyors use a 2 ply, 220 weight, chevron belt with Alligator® Lacing. MOVING BELT HAZARD Never climb into hopper onto the belt. The belt may inadvertently be turned on. Fig 9 - Chevron belt with Alligator® lacing...
- Page 24 Operator’s Manual: Transfer Conveyor Goose Neck (GN) Hopper (Optional): This hopper contains hold-down wheels inside the transition housing between the hopper and tube. UNEXPECTED MOVEMENT Do not release Hopper Winch handle when ratchet lever is in unlocked position, Fig 13 - Goose neck hopper with load on winch.
-
Page 25: Machine Break-In
Operator’s Manual: Transfer Conveyor 3.3 MACHINE BREAK-IN 3.4 PRE-OPERATION CHECKLIST There is no operational restrictions on the Efficient and safe operation of the conveyor conveyor when used for the first time. requires that each operator knows the operating procedures. The conveyor belt alignment is set at the factory, to track correctly without carrying a load. -
Page 26: Attaching To Tow Vehicle
Operator’s Manual: Transfer Conveyor 3.5 ATTACHING TO TOW VEHICLE The Transfer Conveyor may be attached to a truck or tractor whenever it is moved. It is road worthy and may be transported by a truck over long distances. 1. Make sure that bystanders, especially small children, are clear of the working area. -
Page 27: Conveyor Placement
Operator’s Manual: Transfer Conveyor 3.6 CONVEYOR PLACEMENT Follow this procedure when placing the Transfer Conveyor into working position: 1. Clear the area of bystanders, especially small children, before starting. 2. Be sure there is enough clearance from other equipment to move the machine into position. -
Page 28: Operating On Site
Operator’s Manual: Transfer Conveyor 3.7 OPERATING ON SITE 3.7.1 Starting Conveyor: Gas Engine Units: 1. Move engine assembly to its loosest drive belt tension. 2. Turn ignition switch on. 3. Move throttle to its 1/4 position for starting. Fig 23 - Gas engine 4. -
Page 29: Stopping Conveyor
Operator’s Manual: Transfer Conveyor 3.7.2 Stopping Conveyor: 3.7.4 Restarting after Emergency Stop: When the conveyor is shut down inadvertently Gas Engine Units: or in an emergency, the conveyor belt will still be 1. Run until conveyor belt is empty. covered with product. 2. -
Page 30: Unplugging
Operator’s Manual: Transfer Conveyor 3.7.5 Unplugging: In unusual moisture, crop or material conditions, the machine can plug. When unplugging, follow this procedure: 1. Place all controls in neutral or off, stop engine or motors and disable power source. 2. Remove the material from the discharge and the intake area. -
Page 31: Operating Hints
Operator’s Manual: Transfer Conveyor 3.8 OPERATING HINTS • Keep the hopper full for maximum capacity. • Belt Tension: Most efficient results will be obtained when There may be a rapid decrease in belt tension flow of incoming product is directed at the top during the first few hours of operation until the of the hopper (closer to the tube). -
Page 32: Transportation
Operator’s Manual: Transfer Conveyor 3.9 TRANSPORTATION Convey-All™ Transfer Conveyors are designed 9. Keep to the right and yield the right-of-way to be easily and conveniently moved from place to allow faster traffic to pass. Drive on the to place. road shoulder, if permitted by law. -
Page 33: Storage
Operator’s Manual: Transfer Conveyor 3.10 STORAGE After the season’s use, the conveyor should be 6. Touch up all paint nicks and scratches to thoroughly inspected and prepared for storage. prevent rusting. Repair replace worn/damaged 7. For gas engine with electric start: components to prevent unnecessary down time - Remove the battery, be sure it is fully next season. - Page 34 Operator’s Manual: Transfer Conveyor This page intentionally left blank 3-16 01.2015...
-
Page 35: Section 4: Service And Maintenance
Operator’s Manual: Transfer Conveyor Section 4: SERVICE AND MAINTENANCE • Review the Operator’s Manual and all safety • Before applying pressure to a hydraulic items before maintaining the conveyor. system, make sure all components are tight, hoses and couplings are in good condition. •... -
Page 36: Greasing
Operator’s Manual: Transfer Conveyor 4.1.1 Greasing: GREASING HAZARD Too much grease causes excessive overheating. Under-greasing accelerates equipment wear. No grease should be seen around bearings. If there is, too much grease was applied 13000006014 and the seal has ruptured! Fig 34 - Lubricate decal IMPORTANT: Grease bearings only one pump per month under normal usage conditions. -
Page 37: Servicing Intervals
Operator’s Manual: Transfer Conveyor 4.2 SERVICING INTERVALS Use the Service Record provided on page 4-13, to keep a record of all scheduled maintenance. The conveyor belt alignment is preset to run true under a condition of no load. It is important to check alignment and make adjustments, if required, during the initial few minutes of loaded operation. -
Page 38: Every 50 Hours Or Weekly
Operator’s Manual: Transfer Conveyor 4.2.2 Every 50 Hours or Weekly: 7. Check the conveyor belt tension. Watch tension more often while breaking-in the conveyor, because the belt may stretch. Refer to Section 4.3.1 Note: A properly tensioned belt will not slip when in operation. -
Page 39: Every 100 Hours Or Monthly
Operator’s Manual: Transfer Conveyor 4.2.3 Every 100 Hours or Monthly: Note: Recommended greasing is one small stroke every month. Be careful not to over grease as this may push the seal out. 12. Grease hopper roller bearings. 13. Grease transition roller bearings, if equipped. Fig 42 - Bearing grease zerks - 6 locations. -
Page 40: Every 200 Hours Or Annually
Operator’s Manual: Transfer Conveyor 4.2.4 Every 200 hours or Annually: Gas Engine Units: 20. Refer to the engine manual for specific service and maintenance schedules. Fig 46 - Gas engine Fig 47 - Air filter 21. Repack wheel bearings. 22. Check tire air pressure. 23. -
Page 41: Maintenance Procedures
Operator’s Manual: Transfer Conveyor 4.3 MAINTENANCE PROCEDURES By following a careful service and maintenance program for your machine, you will enjoy many years of trouble-free service. Note: Refer to the engine manual for complete details on your particular model. Fig 50 - Roller bearing mounts and anchor bolts ROTATING PART HAZARD lock-out power, Turn off engine/motor,... -
Page 42: Conveyor Belt Alignment
Operator’s Manual: Transfer Conveyor 4.3.2 Conveyor Belt Alignment: Belt Alignment at Tail and Transition Rollers: 1. Rotate the conveyor belt slowly, and check the position of the belt on the tail roller. BELT DAMAGE HAZARD Alignment of the belt must be checked at Note: the hopper, transition and discharge. -
Page 43: Conveyor Belt Replacement
Operator’s Manual: Transfer Conveyor 4.3.3 Conveyor Belt Replacement: 1. Rotate the conveyor belt until the Alligator® lacing is positioned under the tube and is accessible. 2. Move the tail roller bearings to their loosest position. 3. Pull all the slack to the seam area. 4. -
Page 44: Drive Belt Tension
Operator’s Manual: Transfer Conveyor 4.3.4 Drive Belt Tension: To adjust drive belt tension, follow this procedure: ROTATING PART HAZARD Turn off engine or motor, remove power supply and wait for all belts to stop rotating. First, Tension “Countershaft to Drive” Belt: Fig 56 - Countershaft to drive roller V-belt 1. -
Page 45: Check Pulley Alignment
Operator’s Manual: Transfer Conveyor 4.3.5 Check Pulley Alignment: Belt Deflection (Force Pounds) Uncogged Hy-T® Cogged 1. Use a straight edge across both drive and Smallest Belts and Torque Flex® Cross Sheave driven pulleys to check alignment. Uncogged Hy-T® and Machined Edge Section Diameter Range... - Page 46 Operator’s Manual: Transfer Conveyor This page intentionally left blank 4-12 01.2015...
-
Page 47: Service Record
Operator’s Manual: Transfer Conveyor 4.4 SERVICE RECORD See Section 4.2 for service intervals. This schedule is only a general guide under good conditions. Under extreme, or unusual circumstances adjust service timing accordingly. For more detailed schedule pertaining to the specific engine/motor model, consult its manual. Copy this page to continue record. -
Page 48: Ordering Parts
Operator’s Manual: Transfer Conveyor 4.5 ORDERING PARTS Always give the Model Number and Serial Number when ordering parts. To get your parts promptly the following information will be required: • The part name and number • Your Name, Address, Town, Province/State, Country •... -
Page 49: Section 5: Troubleshooting
Operator’s Manual: Transfer Conveyor Section 5: TROUBLESHOOTING In this section is a list of common problems, causes and solutions which may be encountered. If you have a problem which is difficult to solve, even after having read through this section, please contact your authorized dealer, distributor or the Meridian Manufacturing Inc. - Page 50 Operator’s Manual: Transfer Conveyor Problem Possible Cause Possible Solution Conveyor belt doesn’t turn or is slipping - cont’d Check and adjust pressure set screw on valve. Hydraulic system - valve, pump or motor could be Test flow from pump. Check for oil leaks under malfunctioning motor.
-
Page 51: Section 6: Reference
DISCHARGE HOPPER TO OVERALL HOPPER TUBE BELT MODEL HEIGHT TO GROUND LENGTH LENGTH DIAMETER WIDTH GROUND 1214-GN 36” - 48” 61/2” 15’ 4” 4’ 9” 10” 12” 1615 38” - 48” 61/2” - 73/4” 17’ 4” 5’ 10” 10” 16”... -
Page 52: Bolt Torque
Operator’s Manual: Transfer Conveyor 6.2 BOLT TORQUE The tables shown below give correct torque values for various bolts and capscrews. Tighten all bolts to the torques specified in chart unless otherwise noted. Check tightness of bolts periodically, using bolt torque chart as a guide. Replace hardware with the same strength bolt. ENGLISH TORQUE SPECIFICATIONS METRIC TORQUE SPECIFICATIONS Bolt Torque*... - Page 53 Operator’s Manual: Transfer Conveyor This page intentionally left blank 01.2015...
- Page 54 LIMITED WARRANTY STATEMENT 1. Meridian Manufacturing Inc, hereafter referred to as Meridian®, warrants each new product (the "Goods") to be free from defects in material and workmanship under normal use and service for a period of one (1) year or ninety (90) days in the case of commercial use, from the shipment date from the Meridian dealer (FCA).
- Page 55 8. This warranty is subject to the following limitations, provisions and conditions: a. Meridian® shall have no liability hereunder for any claims, including field re-work. b. Meridian® shall not be liable for any incidental loss or damage, however caused, including, without limitation, normal wear and tear.
- Page 56 (800) 418-9461 | www.convey-all.com | conveyors@convey-all.com Part No: 650507992-REV4 ©2021 Meridian Manufacturing Inc. Registered Trademarks Used Under License. Printed in Canada (02/2021)
Need help?
Do you have a question about the 1214-GN and is the answer not in the manual?
Questions and answers