Table of Contents
Advertisement
Quick Links
Advertisement
Table of Contents

Subscribe to Our Youtube Channel
Related Manuals for CONVEY-ALL 1685-SP


Summary of Contents for CONVEY-ALL 1685-SP
- Page 1 SELF-PROPELLED CONVEYOR Models: 1685-SP, 1690-SP, 1695-SP OPERATOR’S MANUAL...
- Page 2 This warranty shall expire one (1) year after the date of delivery of the new machinery. If these conditions are fulfilled, Convey-All™ shall at its own cost and at its own option either repair or replace any defective parts provided that the buyer shall be responsible for all expenses incurred as a result of repairs, labor, parts, transportation or any other work, unless Convey-All™...
- Page 3 The Dealer must fill out this form. It is to be signed by both the Dealer and Buyer at the time of delivery. Scan or photograph the completed form (be sure it is legible). Email it to: register@convey-all.com A copy of this form may also be mailed to Convey-All Industries Inc, at the above address. Buyer’s Name ________________________________ Dealer’s Name ________________________________...
- Page 4 This page intentionally left blank...
-
Page 5: Table Of Contents
Operator’s Manual: 1600-SP Series Conveyor TABLE OF CONTENTS DESCRIPTION PAGE Section 1: INTRODUCTION ......1-1 1.1 Operator Orientation. - Page 6 Operator’s Manual: 1600-SP Series Conveyor TABLE OF CONTENTS DESCRIPTION PAGE Section 4: SERVICE AND MAINTENANCE ....4-1 4.1 Fluids and Lubricants ......4-1 4.1.1 Greasing .
-
Page 7: Section 1: Introduction
Convey-All Industries Inc, if you need assistance, information, additional/replacement copies, or a digital copy of this document. Information provided herein is of a descriptive nature. Convey-All Industries Inc. reserves the right to modify the machinery design and specifications provided herein without any preliminary notice. - Page 8 Operator’s Manual: 1600-SP Series Conveyor This page intentionally left blank 08.2016...
-
Page 9: Section 2: Safety
Operator’s Manual: 1600-SP Series Conveyor Section 2: SAFETY The Safety Alert Symbol means: ATTENTION! BECOME ALERT! YOUR SAFETY IS INVOLVED! 3 Big Reasons why safety The Safety Alert Symbol identifies is important to you: important safety messages on • Accidents Disable and Kill the Self-Propelled Conveyor •... -
Page 10: Safety Orientation
2.2 GENERAL SAFETY YOU are responsible for the SAFE operation and • Read and understand the Operator’s maintenance of your Convey-All™ Self-Propelled Manual and all safety decals before Conveyor. Be sure that everyone who will operate, operating, maintaining, adjusting or maintain or work around it, is familiar with the safety, unplugging the conveyor. -
Page 11: Equipment Safety Guidelines
• In order to provide a better view, some Convey-All Industries Inc. images in this manual may show an assembly with a safety guards removed. Equipment should never be operated in 2.4.1 How to Install Safety Decals: this condition. -
Page 12: Work Preparation
Operator’s Manual: 1600-SP Series Conveyor 2.5 WORK PREPARATION • Never operate the conveyor until you have read • Clear the working area of stones, branches or this manual, and comprehend the information. hidden obstacles that might be hooked, snagged or tripped over, causing injury or damage. Also, read the engine operator’s manual. -
Page 13: Maintenance Safety
• Avoid contact with battery electrolyte. Wash off specifications. any spilled electrolyte immediately. Convey-All Industries Inc. will not be responsible • Wear safety glasses when working near for injuries or damages caused by the use of batteries. -
Page 14: Engine Safety
Operator’s Manual: 1600-SP Series Conveyor 2.11 ENGINE SAFETY • Read and understand the operating • Keep cylinder fins and governor parts free of grass manual provided with the engine. and other debris which can affect engine speed. • Use proper tools to service engine. •... -
Page 15: Operating Safety
Operator’s Manual: 1600-SP Series Conveyor 2.12 OPERATING SAFETY • Be sure that anyone who will be • Chock wheels of conveyor before starting. operating the conveyor, or working around the unit, reads the manual. They • Be sure that conveyor tube is empty before raising must know the operating, maintenance or lowering. -
Page 16: Workplace Hazard Area
Operator’s Manual: 1600-SP Series Conveyor 2.14 WORKPLACE HAZARD AREA OVERHEAD WIRES KEEP AWAY DO NOT RAISE CONVEYOR IN HIGH WIND KEEP OUT OF UNDER CONVEYOR AND SHADED HAZARD AREA UNDERCARRIAGE AREA HAZARD KEEP AWAY WHEEL CHOCKS WHEEL CHOCKS CONVEYOR DRIVE CONVEYOR INTAKE AREA HAZARD AREA HAZARD... -
Page 17: Transport Safety
Operator’s Manual: 1600-SP Series Conveyor 2.15 TRANSPORT SAFETY • The conveyor belt must be empty before raising or lowering it. • Always transport conveyor in collapsed position. • Check that all the lights, reflectors and other lighting requirements are installed and in good working condition. -
Page 18: Safety Decal Location
Operator’s Manual: 1600-SP Series Conveyor 2.17 SAFETY DECAL LOCATION The following illustrations show the general location of decals on this conveyor. The position of decals may vary depending on the machine’s options. Decals are not shown at actual size. Fig 4 - 1690-SP with optional swingout REMEMBER - If safety decals have been damaged, removed, become illegible, or parts were replaced without signage, new ones must be applied. -
Page 19: Section 3: Operation
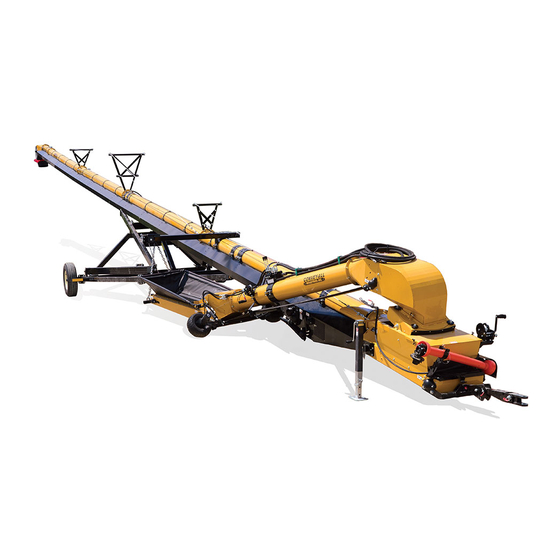
• Do not allow riders on the conveyor when transporting. The Convey-All™ Self-Propelled Conveyor is designed to efficiently move granular material between a truck and trailer and storage facility. Power is provided by a diesel engine. Be familiar with the conveyor and engine before starting. -
Page 20: Machine Components
Operator’s Manual: 1600-SP Series Conveyor 3.1 MACHINE COMPONENTS A diesel engine supplies power to the hydraulics The main components, and their general location are making this conveyor a self-contained, self-propelled listed below: unit. a. Conveyor Tube A hydraulic motor runs the conveyor belt. b. - Page 21 Operator’s Manual: 1600-SP Series Conveyor Fig 6 - Conveyor with optional swing-out 08.2016...
-
Page 22: Components And Controls
Operator’s Manual: 1600-SP Series Conveyor 3.2 COMPONENTS AND CONTROLS Before starting to work, all operators must familiarize themselves with the location and function of the components and controls of their specific unit. Options and locations may change without notice. Refer to the engine manufacturer’s manual for more detailed information. - Page 23 Operator’s Manual: 1600-SP Series Conveyor Hydraulic Oil Cooler: The cooler is standard feature to keep down the operational temperature of the oil. Hydraulic Controls: The hydraulic valve bank is beside the engine. There are two gauges on the valve bank, to monitor the two separate circuits.
- Page 24 Operator’s Manual: 1600-SP Series Conveyor NOTICE: Equipment Damage Likely Always disengage both drive wheels before towing. Hydraulic motors will be damage if driven at highway speeds. Drive Wheels: The hydraulically driven wheels have a lever to manually engage or disengage the drive mechanism. When disengaged, insert the retaining clip to secure.
- Page 25 Control the hopper frame at all times. Sudden release can cause serious injury. Fig 19 - Hopper clip Chevron Belt with Alligator® Lacing: Convey-All™ conveyors use a 2 ply, 220 weight, chevron belt with Alligator® Lacing. Fig 20 - Chevron belt with Alligator® lacing Discharge Spout:...
- Page 26 Operator’s Manual: 1600-SP Series Conveyor Electric Switches: On the side of the valve bank, is a junction box where the electrical switches are located. • Top switch works the lights. • Bottom, toggle switch controls the optional actuator at the discharge spout. Fig 23 - Electrical junction box Working Lights: Lights illuminate the hopper and discharge ends of...
-
Page 27: Swing-Out Remote Control (Optional)
Operator’s Manual: 1600-SP Series Conveyor Swing-Out Conveyor (Optional): A swing-out conveyor is available for convenient unloading. Refer to Section 3.3 Swing-Out Remote Control (Optional): Refer to Section 3.4 Fig 27 - Optional swing-out Document Holder: The document holder is located between the engine and the hydraulic valve table. - Page 28 Operator’s Manual: 1600-SP Series Conveyor 3.3 - 10 INCH SWING-OUT CONVEYOR (OPTIONAL) The swing-out conveyor is an extension of the main tube conveyor. It is available for tube conveyors models with a more substantial undercarriage. The discharge spout of the swing-out is attached to the main conveyor at the hopper.
- Page 29 Operator’s Manual: 1600-SP Series Conveyor Discharge Spout: The discharge spout is attached to the main conveyor above it’s hopper. The spout can tilt and rotate as needed with the movement of the swing-out. Use the removable cover, attached in front of the spout, to access the main belt.
- Page 30 Operator’s Manual: 1600-SP Series Conveyor Hydraulic Oil Flow Regulator: If equipped with a swing-out, a regulator is added to divide the hydraulic oil flow between main conveyor and swing-out. It has been preset by the factory to optimize the flow to both the movements and belt speed.
- Page 31 Operator’s Manual: 1600-SP Series Conveyor 3.4 SWING-OUT REMOTE CONTROL (OPTIONAL) For the swing-out’s movements, there is an optional remote control package. Manual Over-Ride Switch: The large, green button in front of the valve table is the over-ride switch. See Figure 41 Fig 43 - Remove control table on the swing-out To control the swing-out manually, press the over- ride switch (Note: there is now pressure shown in the...
- Page 32 Operator’s Manual: 1600-SP Series Conveyor Remote Control Handset: The handset is stored in the document holder, which is attached to the Engine Cradle. It has a power button, and two LEDs: • one to indicate when battery life is low. •...
-
Page 33: Machine Break-In
Operator’s Manual: 1600-SP Series Conveyor 3.5 MACHINE BREAK-IN 3.6 PRE-OPERATION CHECKLIST There is no operational restrictions on the conveyor Efficient and safe operation of the conveyor requires when used for the first time. that each operator knows the operating procedures. The conveyor belt’s alignment is set at the factory, to It is important for both the personal safety and track correctly without carrying a load. -
Page 34: Attaching To Tow Vehicle
Operator’s Manual: 1600-SP Series Conveyor 3.7 ATTACHING TO TOW VEHICLE The conveyor may be towed by a truck when transporting over long distances. Follow this procedure when attaching to or unhooking from a tow unit: WARNING: Electrocution Hazard Ensure enough clearance from overhead obstructions, power lines,... -
Page 35: Conveyor Placement
Operator’s Manual: 1600-SP Series Conveyor 3.8 CONVEYOR PLACEMENT Follow this procedure when placing the conveyor into its working position: 1. Clear the area of bystanders, especially small children, before starting. 2. Transport the conveyor to the working area. Refer to Section 3.11 3. - Page 36 Operator’s Manual: 1600-SP Series Conveyor 9. Use the hydraulics to raise the main conveyor tube to working height. 10. Advance until the conveyor is in position: - the discharge spout is above the storage bin. and/or - the hopper is in position for unloading. IMPORTANT: To prevent damage to the conveyor tube and belt,...
-
Page 37: Operating On Site
Operator’s Manual: 1600-SP Series Conveyor 3.9 OPERATING ON SITE When operating the conveyor, follow this procedure: 3.9.2 Stopping Conveyor: 1. Stop unloading. Wait for conveyor belt to empty. 1. Clear the area of bystanders, especially small children, before starting. 2. Stop the conveyor belt. 2. -
Page 38: Operating Hints
Operator’s Manual: 1600-SP Series Conveyor 3.10 OPERATING HINTS • Keep the hopper full for maximum capacity. Most • Belt Tension: efficient results will be obtained when flow of There may be a rapid decrease in belt tension incoming material is directed to the front (closer to during the first few hours of operation until the belt the tube) of the hopper. -
Page 39: Transportation
Operator’s Manual: 1600-SP Series Conveyor 3.11 TRANSPORTATION Convey-All™ Self-Propelled Conveyors are designed to be conveniently moved from place to place. When transporting the unit, follow this procedure: 1. Refer to Section 3.7: Attaching to Tow Vehicle. 2. Ensure the conveyor unit is ready for transport: - It is in its fully collapsed position. -
Page 40: Storage
Operator’s Manual: 1600-SP Series Conveyor 3.12 STORAGE After the season’s use, or when the conveyor will not 10. Remove ignition key, and store in a secure be used for an extended time, it should be inspected location. and prepared for storage. 11. -
Page 41: Section 4: Service And Maintenance
Operator’s Manual: 1600-SP Series Conveyor Section 4: SERVICE AND MAINTENANCE Servicing Safety • Review the Operator’s Manual and all safety • Keep hands, feet, hair and clothing away from all items before maintaining the machine. moving and/or rotating parts. • Follow good shop practices: •... -
Page 42: Greasing
Operator’s Manual: 1600-SP Series Conveyor Storing Lubricants: Your machine can operate at top efficiency only if clean lubricants are used. Use clean containers to handle all lubricants. Store them in an area protected from dust, moisture and other contaminants. 4.1.1 Greasing: Use the Service Record provided on page 4-15, to 3622000001 keep a record of all scheduled maintenance. -
Page 43: Servicing Intervals
Operator’s Manual: 1600-SP Series Conveyor 4.2 SERVICING INTERVALS The conveyor belt alignment is preset to run true under a condition of no load. It is important to check alignment and make adjustments, if required, during the initial few minutes of loaded operation. Check bearings for wear daily. - Page 44 Operator’s Manual: 1600-SP Series Conveyor 6. Grease drive box assembly bearings. Fig 66 - Drive box 7. Grease discharge roller bearings. Fig 67 - Discharge roller bearings 8. If equipped with a swing-out conveyor: - Grease it’s hopper roller bearings. - Transition roller bearings.
-
Page 45: Every 50 Hours Or Weekly
Operator’s Manual: 1600-SP Series Conveyor 4.2.2 Every 50 Hours or Weekly: 9. Check the conveyor belt tension. Watch the tension more often while breaking-in the conveyor, because the belt might stretch. Refer to Section 4.3.1 Note: A properly tensioned belt will not slip when in operation. -
Page 46: Every 200 Hours Or Annually
Operator’s Manual: 1600-SP Series Conveyor 4.2.3 Every 200 hours or Annually: 15. Refer to the engine manual for specific service and maintenance schedules. 16. Change hydraulic oil and filter. Fig 73 - Hydraulic oil filter 17. Grease steering wheel axle bushings and cylinder. - Page 47 Operator’s Manual: 1600-SP Series Conveyor Adjust eyebolts if required. 22. Repack wheel bearings. Fig 77 - Eyebolts and cable bridging 23. Thoroughly wash the unit to remove all product, Fig 78 - Wheels dirt, mud, debris and residue. - Wash on top and under the belt. - Clean inside the conveyor tube.
-
Page 48: Maintenance Procedures
Operator’s Manual: 1600-SP Series Conveyor 4.3 MAINTENANCE PROCEDURES By following a carful service and maintenance program for your machine, you will enjoy many years of trouble-free service.. Note: Refer to the engine manual for complete details on your particular model. WARNING: Rotating Belt Hazard Fig 80 - Tension Bolt Turn off engine, lock-out power and wait... -
Page 49: Swing-Out Conveyor Belt Tension
Operator’s Manual: 1600-SP Series Conveyor This conveyor has a Positive Pinch Drive. When loading on the belt gets heavier, the pinch roller tightens against the drive roller in proportion. This provides more torque. Tighten the tension bolts completely. When the conveyor belt is tensioned correctly, the arm at the end of the spring should sit vertical. -
Page 50: Main Conveyor Belt Alignment
Operator’s Manual: 1600-SP Series Conveyor 4.3.3 Main Conveyor Belt Alignment: NOTICE: Belt Damage Hazard Alignment of the belt must be checked at the hopper, drive box and discharge. Inspect weekly. Unaligned belt will cause damage and void warranty. NOTICE: Bearing Failure If a roller is replaced, ensure both ends are evenly aligned with the frame before running. - Page 51 Operator’s Manual: 1600-SP Series Conveyor Belt Alignment inside Drive Box: Aligning the belt, so it tracks down in the centre of the drive roller, is counter-intuitive! It is opposite from aligning the end rollers. This time you must loosen the loose side. This is because the first roller to have contact with the belt is the pinch roller, but the drive roller (second in line) is the only one which can be adjusted.
-
Page 52: Swing-Out Conveyor Belt Alignment
Operator’s Manual: 1600-SP Series Conveyor 4.3.4 Swing-Out Conveyor Belt Alignment: NOTICE: Belt Damage Hazard Alignment of the belt must be checked at the hopper, transition and discharge. Inspect weekly. Unaligned belt will cause damage and void warranty. NOTICE: Bearing Failure If a roller is replaced, ensure both ends are evenly aligned with the frame before running. -
Page 53: Conveyor Belt Replacement
Operator’s Manual: 1600-SP Series Conveyor 4.3.5 Conveyor Belt Replacement: 1. Rotate the conveyor belt until the Alligator® Lacing is positioned under the tube, inside the wind guard, and is accessible. 2. Loosen the tension bolts at the drive box to release pressure on the springs connected to the take-up roller. -
Page 54: Changing Hydraulic Oil And Filter
Operator’s Manual: 1600-SP Series Conveyor 4.3.6 Changing Hydraulic Oil and Filter: 1. Place all controls in neutral, stop engine and remove ignition key before maintaining. WARNING: Hot Liquid Engine and hydraulics must to cool before changing the oil. Hot oil can cause burns if it contacts exposed skin. -
Page 55: Service Record
Operator’s Manual: 1600-SP Series Conveyor 4.4 SERVICE RECORD See Section 4.2 for service intervals. This schedule is only a general guide under good conditions. Under extreme, or unusual circumstances adjust service timing accordingly. For more detailed schedule pertaining to the specific engine model, consult its manual. Copy this page to continue record. -
Page 56: Ordering Parts
Operator’s Manual: 1600-SP Series Conveyor 4.5 ORDERING PARTS Always give the Model Number and Serial Number when ordering parts. To get your parts promptly the following information will be required: • The part name and number • Your Name, Address, Town, Province/State, Country •... -
Page 57: Section 5: Troubleshooting
If problems are confronted which are difficult to solve, even after having read through this section, please contact your authorized dealer, distributor or the Convey-All Industries Inc. Before you call, please have this Operator’s Manual and the unit’s serial number ready. - Page 58 Operator’s Manual: 1600-SP Series Conveyor Conveyor belt doesn’t turn or is slipping, continued Check for sticks, stones, other objects jammed in belt Belt/roller is jammed drive area and remove Sweet spot is to turn the set screw all the way in, then Set screw (relief valve) on Detent on control valve on turn back 1-1/2 turns.
-
Page 59: Section 6: Sign-Off Form
Operator’s Manual: 1600-SP Series Conveyor Section 6: SIGN-OFF FORM Convey-All™ follows the general safety standards specified by the American Society of Agricultural Engineers (ASAE), and the Occupational Safety and Health Administration (OSHA). Anyone who will be operating and/or maintaining this conveyor must read and clearly understand all Safety, Operating and Maintenance information presented in this manual. - Page 60 Operator’s Manual: 1600-SP Series Conveyor This page intentionally left blank 08.2016...
-
Page 61: Section 7: Reference
Operator’s Manual: 1600-SP Series Conveyor Section 7: REFERENCE For information not included here, or for a digital copy of this manual, please call your dealer or Convey-All Industries Inc. directly for assistance (1-800-418-9461). 7.1 SPECIFICATIONS Type of Tube Belt Transport... -
Page 62: Working Measurements
7.2 WORKING MEASUREMENTS 15° 20° 25° 30° Model Height Length Height Length Height Length Height Length 1685-SP 21’ 2” 84’ 2” 28’ 7” 82’ 3” 35’ 10” 79’ 8” 42’ 9” 76’ 6” 1690-SP 22’ 6” 89’ 30’ 4” 86’ 11”... -
Page 63: Bolt Torque
Operator’s Manual: 1600-SP Series Conveyor 7.3 BOLT TORQUE The tables shown below give correct torque values for various bolts and capscrews. Tighten all bolts to the torques specified in chart unless otherwise noted. Check tightness of bolts periodically, using bolt torque chart as a guide. Replace hardware with the same strength bolt. - Page 64 (800) 418-9461 | www.convey-all.com | conveyors@convey-all.com Third Revision © 2019 Convey-All Industries Inc. Registered Trademarks Used Under License. Printed in Canada (06/2019)
Need help?
Do you have a question about the 1685-SP and is the answer not in the manual?
Questions and answers