Table of Contents

Subscribe to Our Youtube Channel
Related Manuals for Gator GRV127KT


Summary of Contents for Gator GRV127KT
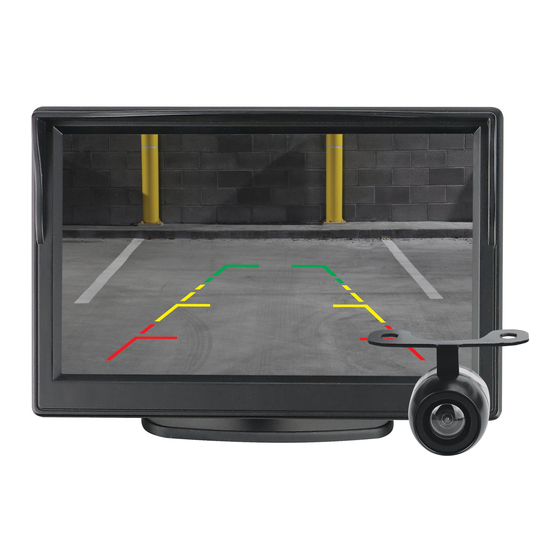
- Page 1 GRV127KT USER MANUAL For more information on the Gator range go to our website gatordriverassist.com Mirror monitor, Butterfly mount camera, 5.5M RCA extension cable, Adhesive mount, Suction mount, Mirror monitor harness, Camera harness.
-
Page 2: Introduction
Introduction Thank you for purchasing the Gator GRV127KT 5” Display dash mount reverse camera kit. Please ensure that you have read the product manual and instructions in full, prior to installation and use. Failure to do so may result in product failure/damage or incorrect operation and therefore impact the product performance. -
Page 3: Table Of Contents
Table of contents Introduction..............2 Product features & specifications..........2 Table of contents..............3 Installation diagram..............4 Installing the camera............5 Installation of the Monitor.............7 Testing the reverse camera function........7 Menu options and settings...........8 Troubleshooting guide............9 Safety information & warnings...........10 Technical assistance............11... -
Page 4: Installation Diagram
Camera The video signal is transferred from the camera to the GRV127KT monitor via an RCA cable that will need to be run through the boot, through the passenger compartment to the monitors wired loom run under the dash. From there the power and video signals are sent directly to the monitor. -
Page 5: Installing The Camera
Installing the camera In most instances, the camera is best mounted above the vehicles license plate as shown here. Hole for cable 1. Connect the RED wire of the Cameras Power Harness to the wire that supplies power to the reversing light globe (the wire that is energized only when the car is put into reverse). - Page 6 Installing the camera cont... module (sold separately) may need to be installed. However, just because the vehicle has a CAN BUS system does not necessarily mean that it will require such a module to work. In fact the opposite is true. Most vehicles do not require an additional module.
-
Page 7: Installation Of The Monitor
Installation of the Monitor 4. The monitor has two power wires to be connected. Connect the red wire (accessories +12V) to a wire that is energized when the vehicles accessories is turned on. Connect the black wire to a ground earth wire or to the body of the car using the steel of the cars body behind the kick trim as an earth. -
Page 8: Menu Options And Settings
Menu options and settings MENU 1. Press the MENU button for Menu access functions and confirm settings 2. Press the + or - button repeatedly to increase/decrease value - Brightness: Adjusts screen brightness - Contrast: Adjusts screen contrast - Saturation: Adjusts screen saturation - Language: Select menu language - Mode: Changes display mode between 4:3 &... -
Page 9: Troubleshooting Guide
Problem: The Monitor is frozen or not responding Solution: • Reset the unit by accessing reset function in the menu. Problem: Unresolved issues Solution: • Reset the unit by accessing reset function in the menu. • Contact Gator Technical Department. -
Page 10: Safety Information & Warnings
Safety information & warnings Do not use the Monitor in damp working conditions; the Monitor is not waterproof. Do not try opening the shell or trying to repair the Monitor by yourself. If the accessories for the Monitor have any problems, please take it to an authorised repair agent for repair. -
Page 11: Technical Assistance
Technical assistance If you need assistance setting up or using your Gator product now or in the future, call Gator Support. Australia TEL: 03 – 8587 8898 FAX: 03 – 8587 8866 Mon-Fri 9am – 5pm AEST Please retain this user guide for future reference.
Need help?
Do you have a question about the GRV127KT and is the answer not in the manual?
Questions and answers