Advertisement
Quick Links
INSTRUCTION MANUAL
M
ONTAGUE
Convection Ovens
These instructions should be read thoroughly before attempting installation.
Set up and installation should be performed by qualified installation personnel.
Keep area around appliances free and clear from combustibles.
T
Electric
MODELS:
EK-12A, 2EK-12A,
EK-15A, 2EK-15A
PLEASE RETAIN THIS MANUAL
FOR FUTURE REFERENCE.
M
C
HE
ONTAGUE
1830 STEARMAN AVENUE, P.O. BOX 4954
HAYWARD, CA 94540-4954
TEL: 510/785-8822 FAX: 510/785-3342
22
OMPANY
Advertisement

Related Manuals for MONTAGUE Vectaire EK-12A

Summary of Contents for MONTAGUE Vectaire EK-12A
- Page 1 INSTRUCTION MANUAL ONTAGUE Electric Convection Ovens MODELS: EK-12A, 2EK-12A, EK-15A, 2EK-15A These instructions should be read thoroughly before attempting installation. Set up and installation should be performed by qualified installation personnel. Keep area around appliances free and clear from combustibles. PLEASE RETAIN THIS MANUAL FOR FUTURE REFERENCE.
-
Page 2: Table Of Contents
CONTENTS INSTALLATION ... . . 1 MAINTENANCE ....19 OPERATION ....9 SERVICE . -
Page 3: Installation
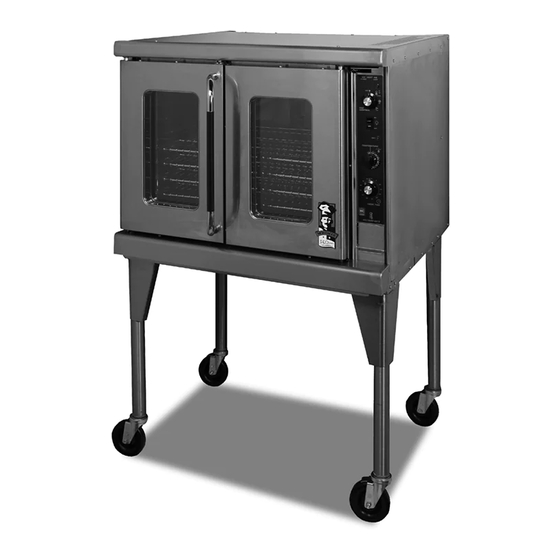
INSTALLATION The Vectaire electric convection ovens are manufactured for use on the electric supply indicated on the rating plate located on the front of the hinged panel. Units wired for three (3) phase service CAN NOT be changed to single phase or single phase units changed to three (3) phase. Units designated for 208 VAC will operate satisfactorily within the voltage range of 197 to 219 VAC. - Page 4 INSTALLATION ASSEMBLY Uncrate oven and base as near to final location as possible. Remove all packing material and accessories from oven interior. MODULAR STAND MODEL EK-12A, EK-15A: Turn modular stand frame upside down. Insert a leg or caster into each socket (4). Set modular stand in desired location of oven. Place oven section on stand and position oven so that locator tabs on stand engage oven bottom frame.
- Page 5 INSTALLATION LEVELING When the oven is in permanent position, level entire unit by placing a carpenters level on the oven rack and adjusting the foot on the bottom of each leg, so that the oven is level from front to back and side to side.
-
Page 6: Operation
OPERATION THIS APPLIANCE HAS BEEN CLASSIFIED AS COMMERCIAL COOKING EQUIPMENT AND MUST BE OPERATED BY PROFESSIONAL PERSONNEL. OPERATION INSTRUCTIONS - MODEL EK-12A, EK-15A, MODEL 2EK-12A, 2EK-15A Be sure power is "ON" at the main panel box. Open the hinged "Panel" at lower right front of oven. - Page 7 USING A CONVECTION OVEN The convection oven is a different type of oven which offers many features and advantages to the food service operation. The operation of the oven is not difficult to understand or control. The convection oven is the sealed type whereby the combustion products are separated from the air inside the oven.
- Page 8 COOKING HINTS Guide to Time and Temperature Product Temperatures Time Number of (Degrees F) Racks Used Bread, Bakery Bread (24-1lb. loaves) 30 min. Hamburger Rolls 15 min. Corn Bread (Northern) 25 min. Corn Bread (Southern) 15-20 min. Yeast Rolls 25 min. Baking Soda Biscuits 6 min.
-
Page 9: Cooking Hints
COOKING HINTS Suggestions · Avoid recipes that would not be satisfactory in a regular conventional oven. · Times and temperatures will vary slightly with maximum to minimum oven loads. · Stagger pans in ovens as much as possible to allow the free flow of air. ·... - Page 10 COOKING HINTS "HIT OR MISS" recipe mixing: Guess work in the matter of quality and quantity of ingredients frequently results in poor bakes. The following are some baking problems and their probable causes: Goods Pulled to Rear of Oven Oven not level. Pitched to rear causes dough to run to rear. ·...
- Page 11 COOKING HINTS Lack of Uniformity - Same Pan Uneven loading in pan. (See uneven bakes) · Faulty pans. · Lack of Spring Overproofing. · Incorrect temperature. · Cracked Cakes Too high temperature. · Too fast cooling. · Underdone Pie Bottoms (Advisable to bake on cookie sheet) Pastry too rich.
-
Page 13: Maintenance
MAINTENANCE CAUTION DISCONNECT POWER BEFORE CLEANING OR SERVICING. EACH OVEN SECTION HAS A SEPARATE ELECTRICAL SUPPLY CONNECTION. General Cleaning The complete oven should be given a periodic cleaning. Lint and grease suspended in the air tend to collect in air passages. Remove burner compartment access panel and clean any dirt and lint from all air passages and openings. - Page 14 MAINTENANCE STAINLESS STEEL: To remove normal dirt, grease, or product residue from stainless steel, use ordinary soap and water (with or without detergent) applied with a sponge or cloth. Dry thoroughly with a clean cloth. To remove grease and food splatter, or condensed vapors that have baked on the equipment, apply cleanser to a damp cloth or sponge and rub cleanser on the metal in the direction of the polished lines on the metal.
- Page 15 MAINTENANCE TO REMOVE HEAT TINT: Darkened areas sometimes appear on stainless steel surfaces where the area has been subjected to excessive heat. These darkened areas are caused by thickening of the protective surface of the stainless steel and are not harmful. Heat tint can normally be removed by the foregoing, but tint which does not respond to this procedure calls for a vigorous scouring in the direction of the polish lines, using SCOTCH-BRITE scouring pads or a STAINLESS scouring pad in combination with a powdered cleanser.
-
Page 16: Service
SERVICE WHEN SERVICE IS NEEDED, CONTACT A LOCAL SERVICE COMPANY, DEALER, OR FACTORY TO PERFORM MECHANICAL MAINTENANCE AND REPAIRS. THESE INSTRUCTIONS ARE INTENDED FOR USE BY COMPETENT SERVICE PERSONNEL. CAUTION: DISCONNECT POWER BEFORE DOING ANY SERVICE WORK. EACH OVEN SECTION HAS SEPARATE ELECTRICAL SUPPLY CONNECTION. - Page 17 SERVICE TO RECALIBRATE 1. Remove dial from dial shaft “B”. 2. Turn screw “A" clockwise to decrease and counterclockwise to increase the temperature. 3. 1/4 turn changes the temperature 35° 4. Replace dial on dial shaft. 5. After a calibration is made, set the dial at 350°...
- Page 18 SERVICE ADJUSTING DOOR SEAL It is important that the door seal be maintained across entire door but not too tight. 1. Loosen Bolts "D" 2. Doors will slide up or down. 3. Tighten up Bolts “D”. NOTE: If after doors are synchronized there is not enough adjustment in bolt holes “D”, it will be necessary to loosen Bearing “E”, move Gear Rack “F”...
- Page 19 SERVICE OVEN BURNER WILL NOT SHUT OFF OR OVEN GETS TOO HOT Electric Thermostat 1. Oven thermostat out of calibration. 2. Broken capillary tube. 3. Wire shorting across thermostat terminals. Oven Controls Overheating 1. Hole in top covered. 2. Range installed on control side conducting heat to control compartment, (insulate side of oven).
- Page 20 SERVICE Picture C MAIN CIRCUIT BREAKER SWITCH This switch is located behind the hinged timer panel. To replace the switch: (1) Turn off the main source of electrical power to the oven(s). (2) Remove the panels to the front and side of the circuit breaker switch by removing the phillips screws holding panels.
- Page 21 SERVICE TO REMOVE TIMER, (60-MINUTE MECHANICAL) This timer is located on the hinged panel at lower right hand of the front of the oven. Picture E Picture F TO REMOVE OR REPLACE: Open panel by pulling forward. Pull knob off of the timer stem. Remove the hex nut around the stem, this will loosen the timer bracket and buzzer.
- Page 22 In order to establish full compliance with Proposition 65, we attached a yellow warning label to each gas fired unit manufactured by the Montague Company. Carbon monoxide would not be present in concentrations that would pose a "significant risk" to the consumer when the...
- Page 23 Serial No. _________________________________________ Model No._________________________________________ Change No._______________________________________ Name & No. of Part Model No. Change No. Serial No. The Montague Company 1830 Stearman Avenue P.O. Box 4954 Hayward, CA 94540-4954 (REV. A) P/N 4519-5...
Need help?
Do you have a question about the Vectaire EK-12A and is the answer not in the manual?
Questions and answers