
Related Manuals for Hamilton/Buhl VividPro CAM17SV


Summary of Contents for Hamilton/Buhl VividPro CAM17SV
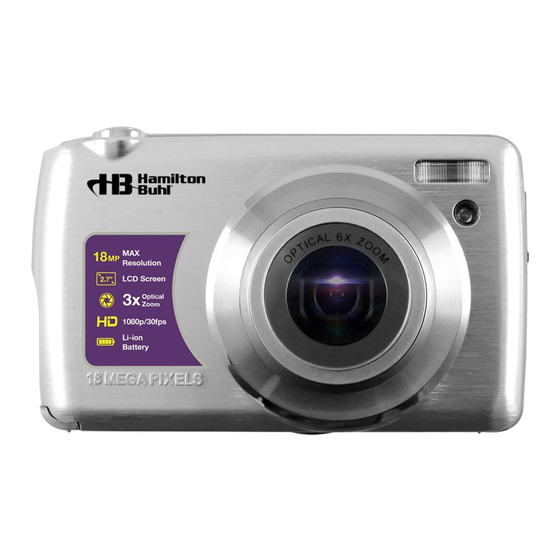
- Page 1 VividPro D i g i t a l C a m e r a Digital Camera /2.7” TFT-LCD Instruction Manual Model #: CAM17SV Never-Ending Learning Innovation...
-
Page 2: Table Of Contents
VividPro™ Digital Camera Table of Contents Introduction ................................. 3 Features and Specifications ............................3 Package Includes ................................ 4 Computer System Requirements ..........................5 A Quick Look at Your Camera ............................. 6 Installing Rechargeable Battery ..........................8 Installing SD Memory Card ............................9 Taking Photos ................................ -
Page 3: Introduction
VividPro™ Digital Camera INTRODUCTION As the new owner of the VividPro™ 48 Megapixel Digital Camera with Auto-Focus Digital Zoom Lens, you have everything you need to take high quality digital photos and videos. Your digital camera can also be used as a removable disk when a SD card up to 64GB is inserted into the camera. -
Page 4: Package Includes
VividPro™ Digital Camera PACKAGE INCLUDES • Digital Camera • SD Card • Instruction Manual • QRG (Quick Reference Guide) • Wrist Strap • Li-ion Rechargeable Battery • USB Wall Charger Port with USB Cable • Protective Pouch... -
Page 5: Computer System Requirements
VividPro™ Digital Camera COMPUTER SYSTEM REQUIREMENTS Windows XP: • Pentium III Processor or above with Windows XP • 128MB RAM with 150MB of free disk space • Available USB Interface • CD-ROM Drive (Optional) • 1024x768 Recommended screen resolution • 16-bit Color or higher display adapter Windows Vista/7: •... -
Page 6: A Quick Look At Your Camera
VividPro™ Digital Camera A QUICK LOOK AT YOUR CAMERA Flash LED Light Optical Lens Strap Holes... - Page 7 VividPro™ Digital Camera LED Light USB Port W/T (Zoom Out/In) Button Mode Button Speaker Up/Flash Button Button Menu/OK Button Right/Delete Button Down/Self-Timer Button Left/Scene Button Tripod Mount Microphone Power Button Shutter Button Battery Door...
-
Page 8: Installing Rechargeable Battery
VividPro™ Digital Camera INSTALLING RECHARGEABLE BATTERY The battery lock Insert with notch as shown 1. Slide the battery door open. 2. Before inserting a battery, the battery lock must be in a pushed-in position: Put a little pressure against the spring tab on the inside left corner of the compartment. -
Page 9: Installing Sd Memory Card
VividPro™ Digital Camera INSTALLING SD MEMORY CARD An external memory card is required for normal use. Your camera supports any compatible SD memory card (up to 64GB). 1. Locate the Memory Card slot at the base of the camera next to the battery compartment. 2. -
Page 10: Taking Photos
VividPro™ Digital Camera TAKING PHOTOS 1. Compose your photo using the LCD screen. 2. Press and hold the shutter button halfway down to activate the Auto-Focus. Wait for the camera to focus in on the desired object/person. A green frame appears when the object/person is in focus. 3. -
Page 11: Starting Your Digital Camera
VividPro™ Digital Camera STARTING YOUR DIGITAL CAMERA Power On: Press the power button on the top of the camera to turn the camera on. The LCD will light up and there will be a “beep” sound. Power Off: Press the power button again to turn off your camera. When there is insufficient battery power, a red icon will appear on the LCD screen. -
Page 12: Digital Zoom
VividPro™ Digital Camera DIGITAL ZOOM You can magnify your subject/object even more by using the 8x digital zoom. Press and hold the T button to zoom in and press W button to zoom out. SHORTCUT BUTTONS The camera has the 4 shortcut buttons on the Menu dial for quick access to the following settings: Scene (Left button), Self-Timer (Down button), Delete (Right button), and Flash (Up button). - Page 13 VividPro™ Digital Camera Shortcut to Scenes (Left Button): There are 9 different scene options that appear on the screen. Choose any of these modes to activate settings for different lighting/environmental conditions. 1. Press the Scene/Left button. 2. Press Up/Down to select from the 9 different scene options: Auto, Sport, Night, Portrait, Landscape, Backlight, Party, Beach, High Sensitivity.
-
Page 14: Camera Mode
VividPro™ Digital Camera CAMERA MODE The available Camera Mode menus are: Mode Set, Photo Resolution, Beauty Face, Anti-Shake, Face Detect, Smile Capture, Multi-Snapshot, Self-Timer, Date Stamp, Setup. Mode Set (Scene Selection): This camera supports that allows you to choose an ideal environment for your photo. 1. - Page 15 VividPro™ Digital Camera Beauty Face: This camera supports “Beauty Face” that allows you to take the best portrait shots. 1. Press the Menu button. 2. Press Right/Left button to select the Beauty Face icon. 3. Press Up/Down button to select On/Off. 4.
- Page 16 VividPro™ Digital Camera Smile Capture: 1. Press the Menu button. 2. Press Right/Left button to select the Smile Capture icon. 3. Press Up/Down button to select On/Off. 4. Press the Menu button to confirm. Note: Once you use “Self Timer”, the “Smile Capture” function will turn off automatically. Multi-Snapshot: Take up to 3 photos continuously, even if pressing the Shutter button only once.
-
Page 17: Setup Menu
VividPro™ Digital Camera Date Stamp: This option will display or not display the date and time on a photo. 1. Press the Menu button. 2. Press Right/Left button to select the Date Stamp menu. 3. Press Up/Down button to select: Off, Date only, Date & Time. Press the Menu button to confirm. 4. - Page 18 VividPro™ Digital Camera White Balance: This setting allows the camera to adjust the color of your photos according to the color of the light source. 1. Press Up/Down button to select White Balance in Setup menu. 2. Press Menu button to enter the submenu. 3.
- Page 19 VividPro™ Digital Camera Set Date: This allows you to set up the date and time format displayed on the photos. 1. Press Up/Down button to select Date & Time in Setup menu. 2. Press Menu button to enter the submenu. 3.
- Page 20 VividPro™ Digital Camera Light Frequency: For U.S. customers, use 60Hz. 1. Press Up/Down button to select Light Frequency in Setup menu. 2. Press Menu button to enter the submenu. 3. Press Up/Down button to select 60Hz/50Hz. 4. Press Menu button to confirm and return to Photo Mode. Sound: You can turn off the sound indicators (default is on).
-
Page 21: Video Mode
VividPro™ Digital Camera Default Settings: If camera settings are in disarray, you can reset to the camera’s default settings: 1. Press Up/Down button to select Default Setting in Setup menu. 2. Press Menu button to enter the submenu. 3. Press Up/Down button to select: Yes (resets to default) or No. 4. -
Page 22: Playback Mode
VividPro™ Digital Camera Video Mode Menu In the Video Mode Menu there are 3 options: Video Resolution, Date Stamp, Setup. Power on the camera and press the Mode button once to enter Video Mode. Video Resolution: Your camera supports 4 video resolutions: 1. -
Page 23: Editing
VividPro™ Digital Camera Thumbnail Display: 1. When the camera is in playback mode, press W and your thumbnail library will appear on the screen. 2. Press Up/Down/Left/Right button and select a photo or video thumbnail. 3. Press the Menu button to display the photo or video in full screen. Zoom In or Out of a Photo: 1. - Page 24 VividPro™ Digital Camera Protecting Photos and Videos: 1. Press the Menu button in Playback Mode. 2. Press Left/Right button and select the icon. 3. Press Up/Down button to select: Write-protect current file, Write-protect all files, Unlock current file, Unlock all files, Cancel.
-
Page 25: Downloading Photos And Videos To Your Pc
VividPro™ Digital Camera Playing AVI Video Files: 1. In Playback mode, press Left/Right button to select an AVI video file or press the W button to enter the thumbnail library, and select a video. From the thumbnail library, press the Menu button for the selected video to appear in full screen. -
Page 26: Specifications
VividPro™ Digital Camera SPECIFICATIONS Image Sensor 8MP CMOS Sensor Image Resolution (48MP) 8000x6000, (30MP) 6400x4800, (24MP) 5600x4200, (18MP) 4896x3672, (16MP) 4608x3456, (8MP) 3264x2448, (7MP) 3072x2304, (5MP) 2592x1944, (2MP) 1600x1200. Video Resolution 4K, 2.7K, 1080P, 720P File Formats JPEG (Still Image), AVI (Video) Speaker External Memory HCSD Class 6 or Higher Card (up to 64GB) - Page 27 VividPro™ Digital Camera Flash Auto Flash (flashes as needed), Manual Flash (flash always on), No Flash Self-timer Off, 2 seconds, 5 seconds, 10 seconds Interface USB 2.0 System Requirements Windows XP, Vista/7, Mac Battery Lithium-Ion...
- Page 28 Never-Ending Learning Innovation Product Registration Instructions Visit: www.HamiltonBuhl.com 1. Click on Customer Care 2. Click on Product Registration Form 3. Please fill out all fields marked with * to register your product Warranty Warranty begins the date item ships from our warehouse. All products have a one year warranty from original date of shipment, unless otherwise noted.
Need help?
Do you have a question about the VividPro CAM17SV and is the answer not in the manual?
Questions and answers