
Related Manuals for Hamilton/Buhl CAM17SV


Summary of Contents for Hamilton/Buhl CAM17SV
-
Page 1: Instruction Manual
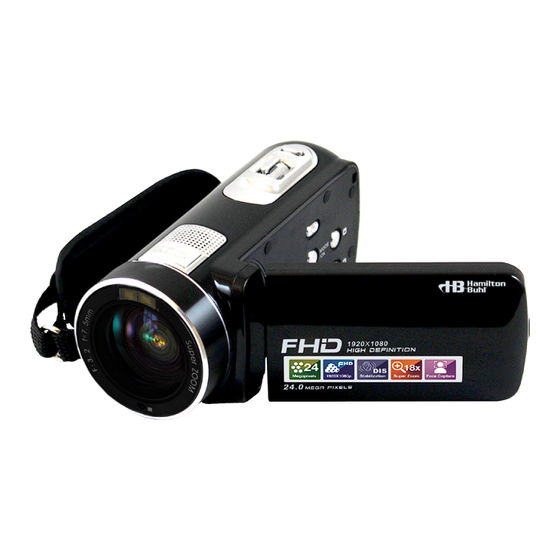
ActionPro FHD Digital Video Camera /2.7”TFT ActionPro FHD Digital Video Camera Instruction Manual Model #: CAM17SV Never-Ending Learning Innovation... -
Page 2: Table Of Contents
ActionPro™ Digital Video Camera 1. About . . . . . . . . . . . . . . . . . . . . . . . . . . . . . . . . . . . . . . . . 4 1a . - Page 3 ActionPro™ Digital Video Camera 5h . Playing Video . . . . . . . . . . . . . . . . . . . . . . . . . . . . . 14 5i .
-
Page 4: About
ActionPro™ Digital Video Camera 1. About Your Camcorder 1a . System Requirements • Pentium processor 2 .0 GHz or higher • Windows XP Operation System (or later version) • 2 GB memory, available 40 GB disk space • USB interface •... -
Page 5: 1C . Button Functions/Descriptions
ActionPro™ Digital Video Camera 1c . Button Functions/Descriptions Icon Button/Key Description Power /LED Light Power on /o ff or LED light charge / discharge Menu Access Menu Mode Mode/Enter Switch modes or select function in Menu settings: ... -
Page 6: Using Your Camcorder
ActionPro™ Digital Video Camera 2. Using Your Camcorder 2a . Inserting a Memory Card Insert a memory card to store videos and photos . Information stored on a card will not be lost if you physically lock the card . Insert the memory card according to the following steps: 1 . -
Page 7: 2B . Installing Battery
ActionPro™ Digital Video Camera 2b . Installing the Battery Install the rechargeable lithium battery in the battery slot . A battery can only be installed in one specific direction . Do not force or push down hard on the battery . It will install easily if inserted correctly . Make sure the pins are inserted first, facing up . -
Page 8: 2E . Changing Modes
ActionPro™ Digital Video Camera 2e . Changing Modes Press the ‘Mode’ button to change modes . Modes are: video recording, camera and playback mode . Each mode’s icon will appear in the top left corner of the screen, when selected . 2f . -
Page 9: Video Recording Mode
ActionPro™ Digital Video Camera 2h . Video Recording Mode Press the ‘Mode’ button to select video shooting mode . Options on the display are: 1 . Recording mode 6 . Memory card 11 . Video quality 2 . Video resolution ratio 7 . -
Page 10: 2J . Zoom Function
ActionPro™ Digital Video Camera 2j . Zoom Function Zoom in by tilting the ‘Zoom’ lever to the right . Zoom out by tilting the ‘Zoom’ button to the left . 2k . Using LED Light The camcorder has a built-in LED light . It can compensate for a dark environment and help reduce shadows . -
Page 11: 3B . Mode Settings
ActionPro™ Digital Video Camera 3b . Mode Settings The camcorder has multi-modes . Use Auto for general purpose filming . 1 . From the ‘Video Mode’, press ‘Menu’ then press the ‘Up/Down’ buttons to select the ‘Mode Set’ option . Press OK to enter the sub-menu . -
Page 12: 3F . Iso Settings
ActionPro™ Digital Video Camera 3f . Adjusting Photo Sensitivity (ISO) The recommended setting is ‘Auto .’ 1 . From ‘Video Mode’, press ‘Menu’, then press the Up/Down buttons to select the ‘ISO’ . Press OK to enter sub-menu . 2 . Press Up/Down buttons to select Auto, 100, 200, 400 or Cancel . 3 . -
Page 13: 5B . Deleting Photos/ Videos
ActionPro™ Digital Video Camera 3 . Since the .jpeg is quite large, you can move within the photo to examine parts of it by zooming in, then pushing ‘OK’ to activate up or down and left or right navigation . Press Up or Down buttons to go up or down within the photo and press the zoom buttons to go left or right . -
Page 14: 5E . Cropping Photos (Not Videos)
ActionPro™ Digital Video Camera 5e . Cropping Photos (Not for Videos) 1 . From ‘Display Mode’ while viewing a jpeg photo, press ‘Menu’ then press the Up/Down buttons to select ‘Crop Image’ option . Press OK to select the sub-menu . 2 . -
Page 15: 5I . Deleting Video Files
ActionPro™ Digital Video Camera 5i . Deleting Video Files 1 . From Display Mode, select the video file you wish to delete then press ‘Menu’ . 2 . Press the Up/Down buttons to select ‘Delete’ . Other operations work the same way as in camera mode . Go to ‘Menu’, then the sub-menu and select and confirm to delete . -
Page 16: 6A . Resolution Settings
ActionPro™ Digital Video Camera 6a . Resolution Settings You may set photo resolution as follows: 1 . From camera mode, Press the ‘Menu’ button, then select ‘Resolution’ (use Up/Down buttons to get to this option) . 2 . Press ‘OK’ to enter the sub-menu . 3 . -
Page 17: 6E . Face Detect Function
ActionPro™ Digital Video Camera 6e . Face Detect Function This function can detect the faces of people on the viewfinder . It’s similar to taking a portrait shot on an older SLR camcorder using film and a 125mm lens . 1 . -
Page 18: 6I . Adjusting Photo Sensitivity (Iso)
ActionPro™ Digital Video Camera 6i . Adjusting Photo Sensitivity (ISO) You can manually adjust photo sensitivity with this function, however we recommend you use ‘Auto’ mode . ASA 100 Daylight ASA 400 low light (old film settings available on camcorder) . 1 . -
Page 19: 6M . Saturation Settings
ActionPro™ Digital Video Camera 6m . Saturation Settings Use this feature to affect the vividness of the color . 1 . From camera mode, press ‘Menu’ then press the Up/Down but- tons to select ‘Saturation’ . 2 . Press ‘OK’ to enter sub-menu . 3 . -
Page 20: Menu Settings
ActionPro™ Digital Video Camera 7. Menu Settings (Setup) You can set the Time/Date, Language and other options from the ‘Setup Menu .’ 7a . Language Settings This unit supports English and a number of other languages . 1 . From camera mode, press ‘Menu’ then press the Up/Down buttons to select the ‘Setup’... -
Page 21: 7D . Beep Settings
ActionPro™ Digital Video Camera 7d . Beep Settings Turn on and off ‘Beep’ sounds made by pushing various keys . 1 . From camera mode, press ‘Menu’, then press Up/Down to ‘Setup .’ 2 . Press the Up/Down keys to select ‘Beep’ then press ‘OK’ . You can now select ‘On’... -
Page 22: 7H . Default Settings
ActionPro™ Digital Video Camera 7h . Default Setting If the user makes mistakes in settings and finds that the unit isn’t functioning, default settings can be restored to factory settings . It will not delete the data already saved on the memory card . Also, the language will not be changed . -
Page 23: Appendix
ActionPro™ Digital Video Camera 8. Appendix 8a . Technical Specifications Sensor 8MP CMOS Sensor, Max . 24 .0 Sensitivity Auto, ISO100, ISO200, ISO400 Storage media Support SD SHDC Card, 32GB Max . Lens Fixed Lens F/3 .2 f=7 .5mm Focus 1 .0m~∞... -
Page 24: 8B . Troubleshooting
ActionPro™ Digital Video Camera 8b . Troubleshooting Issue Possible Cause(s) Solution Unbootable Battery not installed Properly install battery properly . according to manual . Battery not charged . Charge battery . Sudden Power-saving function Reset power save function . shutdown setting .
Need help?
Do you have a question about the CAM17SV and is the answer not in the manual?
Questions and answers