
Subscribe to Our Youtube Channel
Related Manuals for Hamilton/Buhl ActionPro HDV17BK


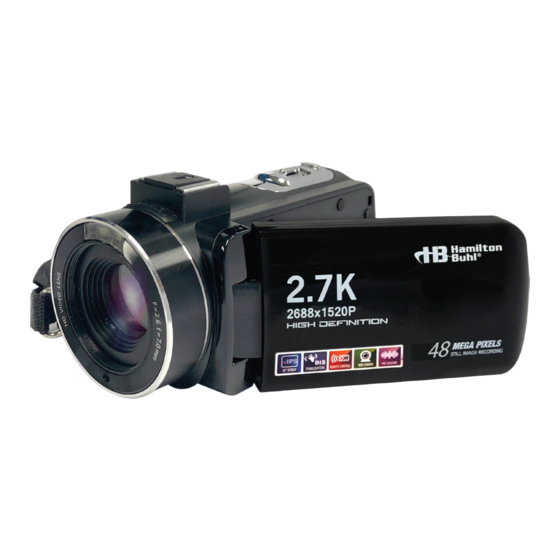
Summary of Contents for Hamilton/Buhl ActionPro HDV17BK
- Page 1 ActionPro 2.7K Digital Video Camera /3.0”TFT ActionPro FHD Digital Video Camera Instruction Manual Model #: HDV17BK...
-
Page 2: Table Of Contents
Table of Contents About ........................System Requirements ..................Camcorder Description Diagrams ..............Button Functions/Descriptions................. Using Your Camcorder ..................Inserting Memory Card ................... Installing the Battery ..................Charging the Battery ..................Turning On/Off Camcorder ................Changing Modes .................... Connecting to a Computer................Connecting to a Television ................ - Page 3 Exposure Settings..................4g. White Balance Settings................. 4h. Quality Settings (Photo) ................Sharpness Settings ..................Effects Settings .................... 4k. ISO (Photo Sensitivity Settings) ..............Anti-Shake Settings ..................4m. Face Detect Settings..................4n. Smile Capture Settings ................4o. Date Stamp Settings ..................Playback Mode and Settings ................
-
Page 4: About
1. About 1a. System Requirements ● Intel Pentium processor 2.0 GH or higher ® ● Windows XP Operation System or later ● 2GB Memory, more than 40 GB disk space ● USB interface ● Display card cache memory 1 GB or higher ●... -
Page 5: 1C. Button Functions/Descriptions
1c. Button Functions/Descriptions Icon Button Name Function Description Power/ LED Light Power on/off or LED light on/off Menu Accesses Menu Mode Switches modes/select function in Menu Camera Mode Mode/Enter Video Recording Mode Playback Mode In playback mode, Cursor will move up to select desired photo Page Up or video file In playback mode, Cursor will move down to select desired... -
Page 6: Installing The Battery
1. Open the battery door (on the bottom) by pulling the lever – the door should pop open. 2. Metal contact part should go in first facing up, away from the battery. Insert and push the card in until it clicks into place. Close the door, making sure it is fully locked. -
Page 7: Charging The Battery
Attention! Please install the battery correctly or it may cause damage to the camera or other damage. Do not use non-standard charger. The power adapter for the camera is AC 100V-240V/50-60Hz. 1 . Open the battery cover in the direction as shown 2 . -
Page 8: Connecting To A Computer
2f. Connecting to a Computer In order to view videos and photos on your computer, connect the standard USB charging cable to your computer’s USB terminal. The computer will recognize the camcorder as a removable drive; you will find your video and photo files in the subfolders. Connect the camcorder Mini-USB to a Standard-USB on a computer 2g. -
Page 9: Video Recording Mode
Video Recording Mode Press the ‘Mode’ button to select video shooting mode. Options are: 1 Recording Mode 6 Memory Card 11 ISO 12 Exposure 2 Video Resolution 7 Zoom 3 Scene Mode 8 Battery 13 White Balance 4 LED Light 9 Effects 14 Menu 5 Recording Time... -
Page 10: Zoom Function
2k. Zoom Function Zoom in by tilting the ‘Zoom’ lever to the right. Zoom out by tilting the ‘Zoom’ button to the left. Using the LED Light The camcorder has a built-in LED light. It can compensate for a dark environment and help reduce shadows. -
Page 11: Beauty Face Settings
3c. Beauty Face Settings This function adjusts skin tones and may make a person’s skin appear more natural, adjusting skin lightness and complexion. 1. From ‘Video Mode’, press ‘Menu’. Then, press the ‘Up/Down’ buttons to select the ‘Beauty Face’ option. Press 'OK' to enter the sub-menu. 2. -
Page 12: Shooting Photos And Settings
1. From ‘Camera Mode’, press ‘Menu’. Then, press the ‘Up/Down’ buttons to select ‘ ISO’. 2. Press 'OK' to enter sub-menu. 3. Press ‘Up/Down’ buttons to select: Auto, 100, 200, 400 or Cancel from the menu. Press 'OK' to save and return to the video mode. Note: Refer to the Setup Menu on page 17 for Basic Setup Settings. -
Page 13: Beauty Face Settings
4c. Beauty Face Settings This function helps enhance the lo'OK' of skin. 1. From Camera Mode, press the ‘Menu’ button. Then, press ‘Up/Down’ buttons to select ‘Beauty Face’. Press 'OK' to enter the sub-menu. 2. Press the ‘Up/Down’ buttons to turn On/Off or Cancel. Press 'OK' to save and return to the Camera Mode. -
Page 14: Sharpness Settings
1. From Camera Mode, press the ‘Menu’ button. Then, press ‘Up/Down’ buttons to select ‘Photo Quality’. Press 'OK' to enter sub-menu. 2. Press the ‘Up/Down’ buttons to select: Super Fine, Fine, Normal or Cancel. Press 'OK' to save and return to Camera Mode. 4i. -
Page 15: 4N. Smile Capture Settings
2. Press the ‘Up/Down’ buttons to select On, Off or Cancel. Press ‘OK’ to save and return to Camera Mode. 4n. Smile Capture Settings This function will shoot photos automatically when it detects a smile. 1. From Camera Mode, press the ‘Menu’ button, then press ‘Up/Down’ buttons to select ‘Smile Capture’. -
Page 16: 5C. Protecting Photos
5c. Protecting Photos This function protects photos, so they are not accidentally deleted while on the SD card. 1. From ‘Playback Mode’, select a photo, then press ‘Menu’. Then, press the Up/Down buttons and select ‘Protect’. Press ‘OK’ to enter the sub-menu. 2. -
Page 17: 5H. Deleting Video Files
5h. Deleting Video Files This function deletes one video or all videos at once. 1. From ‘Playback Mode’, select a video, then press ‘Menu’. Then, press the Up/Down buttons and select ‘Delete’. Press ‘OK’ to enter the sub-menu. 2. Press Up/Down buttons to select ‘This Video’, ‘All’ or ‘Cancel’. 3. -
Page 18: 6D. Beep Settings
6d. Beep Settings This function will turn on and off beeping sounds made by pushing various keys. 1. From Video or Camera Mode, press ‘Menu’. Then, press the Up/Down buttons to select ‘Setup’. Press ‘OK’ to enter the sub-menu. 2. Press the Up/Down buttons to select ‘Beep’. 3. -
Page 19: Appendix
ActionPro™ Digital Video Camera 7. Appendix 7a. Technical Specifications Sensor COMS Sensor, Max. 30MP (software interpolation) Sensitivity Auto, ISO100, ISO200, ISO400 Storage Media Supports C10 (or higher) SD Card, Max. 128GB Lens Fixed Lens, F/2.6, f=7.0mm Focus Range Normal: 1m~Infinity File Format: JPEG Image Resolution 48M (8000x6000), 30M (6400x4800), 24M (5600x4200),... -
Page 20: 7B. Troubleshooting
7b. Troubleshooting Issue Possible Causes Solutions Battery not installed properly. Properly install battery according to the Unbootable Battery not charged. manual. Charge the battery. Reset power save function. Power-saving function setting. Suddenly shutdown Charge battery. Battery not charged. When battery indicator is red, Can’t store a photo Power was interrupted before immediately use a new battery or...
Need help?
Do you have a question about the ActionPro HDV17BK and is the answer not in the manual?
Questions and answers